Click here to go to Susan’s Design Development Page


Susan Hurlbutt, 1745-1775 Re-Enactor
Tale of 2 Times & Places
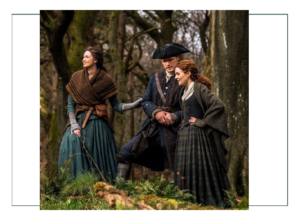
Susan is a REAL Celt! She knows her clan, her tartan, and her family’s history. She and her kilt-wearing husband attend events for family and to meet other fans of the popular “Outlander” show and books at gatherings. In both the real story and the “Outlander” historical fiction, characters start in Scotland in the 1740’s, and end up in Colonial America in the early 1770’s through the post Revolutionary War of 1783 and forward in time.
Time and travel is the key; a character and a real family that moves over a period of 30 to 40 years from Scotland and the strife of the Jacobite uprisings and changing powers to a newly forming United States from 13 original colonies and the conflict and change there. It’s a lot of fact-based action, and a lot of change and adaptation for real and fictional women like Susan, her ancestors, and her heroines.
Picking Depiction(s)
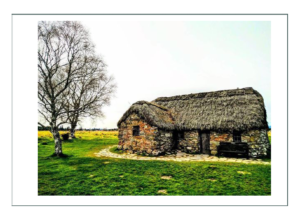

Living in a southern and very warm climate, Susan has come a long way from the misty hills of the highland of today, or yesteryear, and of folklore.
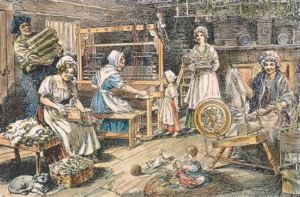
Divided between Colonial America of the mid 1770’s and the Scotland of the 1740’s, her decision on how to portray her character is split between the two: a rural farm wife living in the lovely woven wools and textiles worn by the working class in 1745 Scotland with all the knits and warm things, vs. a Colonial farmer in the south working in a completely different culture and environment amongst all the people who were there in the 1770’s pre-Revolutionary War.
We believe, just as a real woman would, she can have BOTH in one depiction. All she has to do is start young in the Highlands, and travel to Colonial America 30 years later – wearing the same undergarments.
A Way to Have it All
We somewhat jest about the undergarments, but to be realistic in building costume ensembles for women who will not be wearing these daily, we can provide BOTH depictions as long as they are built on the same foundations: the same character, personality, family unit, values, taste, occupation, and other aspects of her personal life such as body measurements, special needs and preferences.
The best way to do that is to examine her character and to find the common elements she would take with her for 30 years – such as we would wear our hair the same or keep our old favorite bra. We need to find what is the SAME for 1745 and 1775, and use that as a basis. In other words, build a basic framework for the person that will take her from Scotland of the ’40’s to America of the ’70’s.
It is much like deciding if you could take one suitcase of all your possessions. What would that be? Once we answer that, it will be easy to build upon it with flexible garments and accessories that she can have it ALL – both the times and the places desired.

Personality & Traits That Carry Through Life
(or at least the 30 years in question)
Susan has made the decision that the character she depicts is as close to her own life and heritage as possible; to be as true and honest as it can be. Her current occupation is a nurse, and she wishes to remain one. She writes:
I am a healer of course. Married to a farmer in Scotland . We have 3 children. The years are 1740- 1790. We are simple folk, but we come from wealthy families. Occasionally we travel abroad.
I might also have to be a time traveler as well because I like and admire many different styles.
(In the Design Development section we will show examples of her specific preferences in fashion and design).
From conversations between Suzi and Susan, we also note in summary:
- Basing character on “Outlander”, Claire (a time traveler and healer. We will discuss specifics in the “Historical Context Section” next).
- A healer skilled in modern medicine for her “time travel” component as well as ancient remedies; specifically herbals and botanicals (which she is currently experimenting with in real time).
- Using knowledge of her real ancestors and those of her husband to stay as close to family ties as possible (to fit in at Gatherings).
- Cover both eras and the time and distance between two very different cultures of Scotland and the American Colonies (means knowing her history!)
- Fit in accurately to the class and social status of time and place, with correct fashion for such.
- Have the correct silhouette and correct garments so that people who look at her intuitively see it as “correct”, and so that she FEELS the character to aid in her own joy of re-enactment.
- To look good in mixing with others in excellent costumes and knowledge of the eras and fashion; to have good working knowledge of why she is wearing what she is and why she is doing what she is (we will educate her in general on Colonial societies; she knows more than we do about Scotland as we build for American women; not European, but we will attempt to add some new knowledge that is fashion specific in the “Historical” and “Fashion History” sections to follow.
Let’s get started! On to the “Historical Context Page” to continue research and project development, or skip below and cheat to see the Finished Project as it is completed. At the end of this page will be photos of Susan in her completed ensemble.
Click here to go to Susan’s Historical Context page (next)
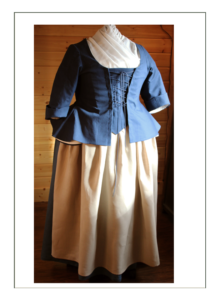
Or continue below to see the Final Design, Finished garments, and Photos of Susan!

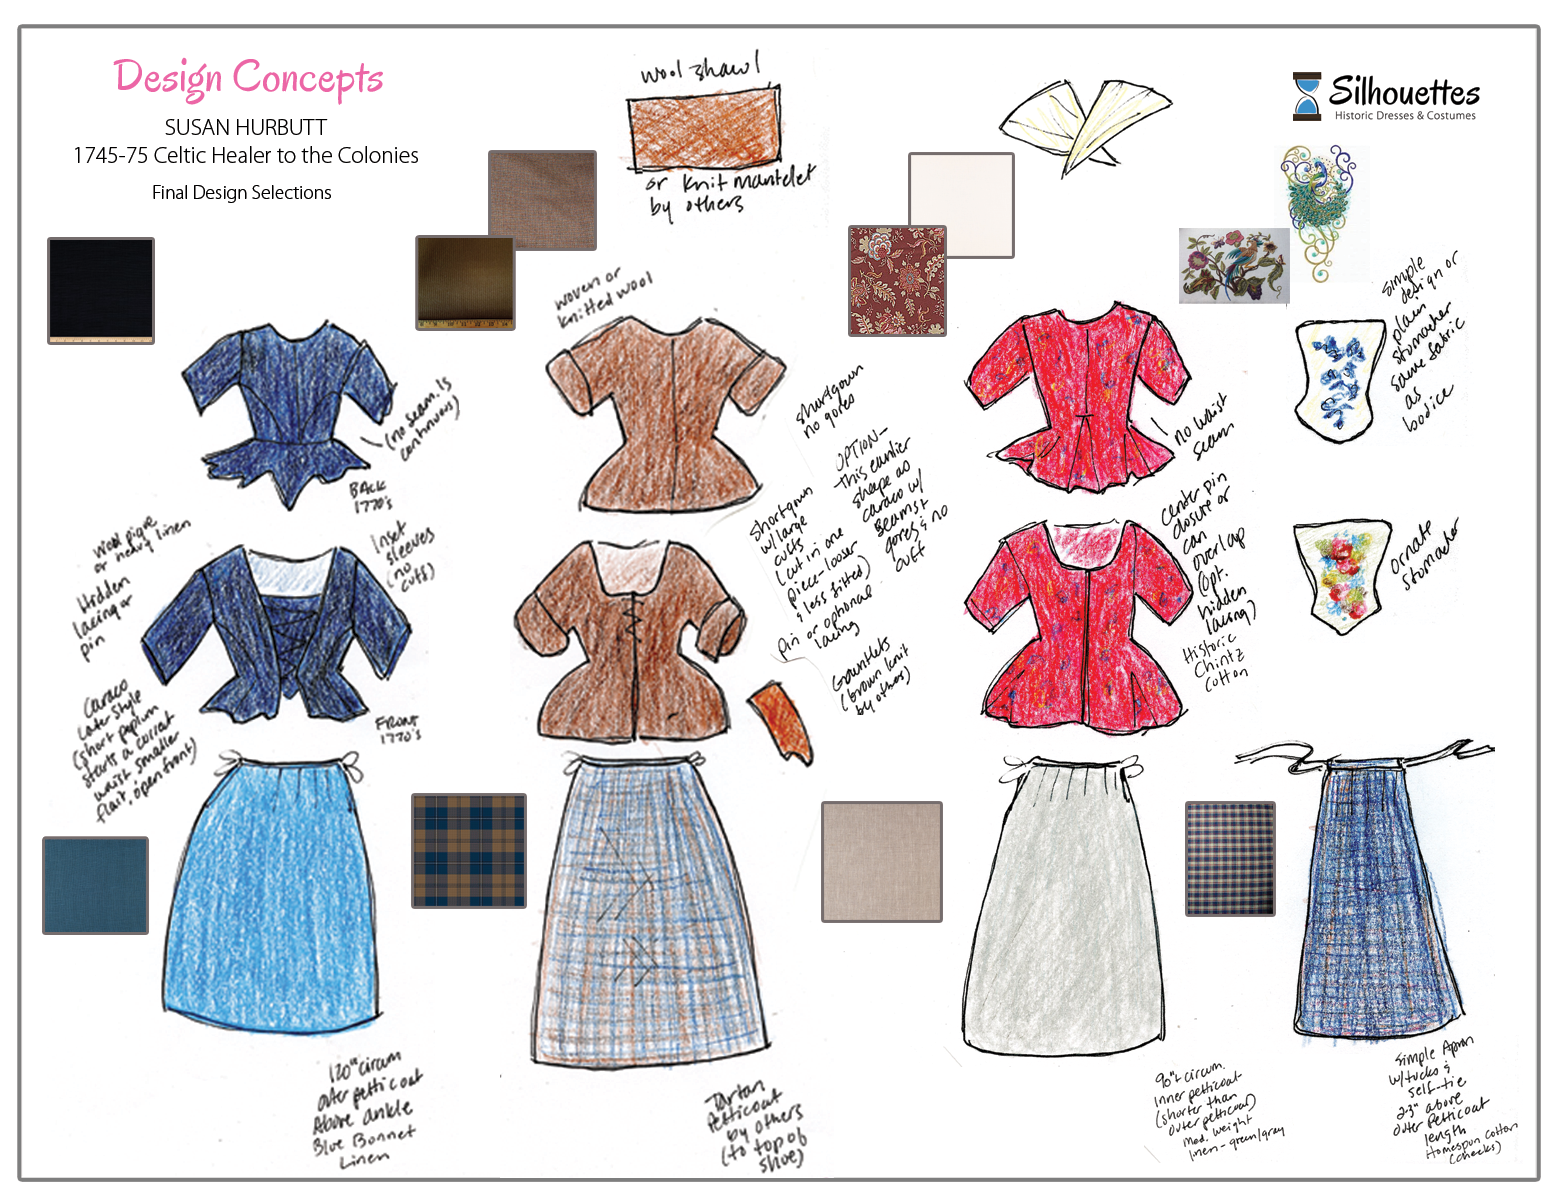
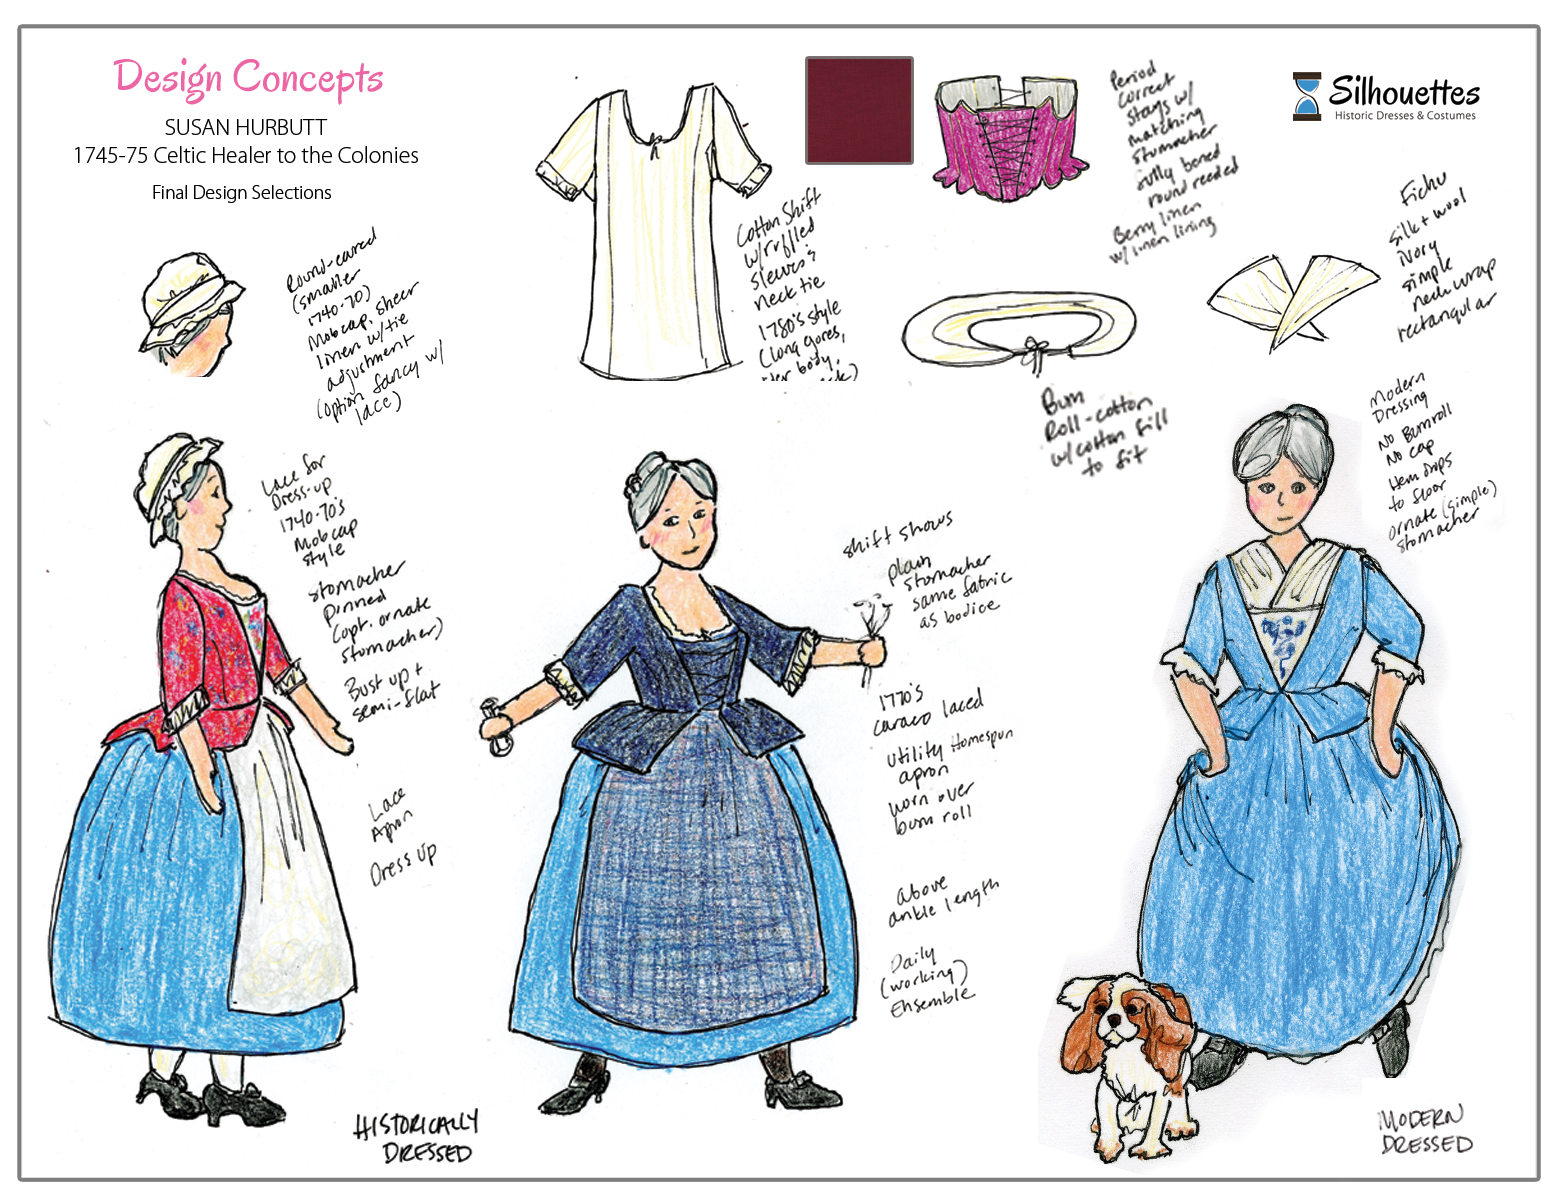
Project 1
Basics to Mix and Match
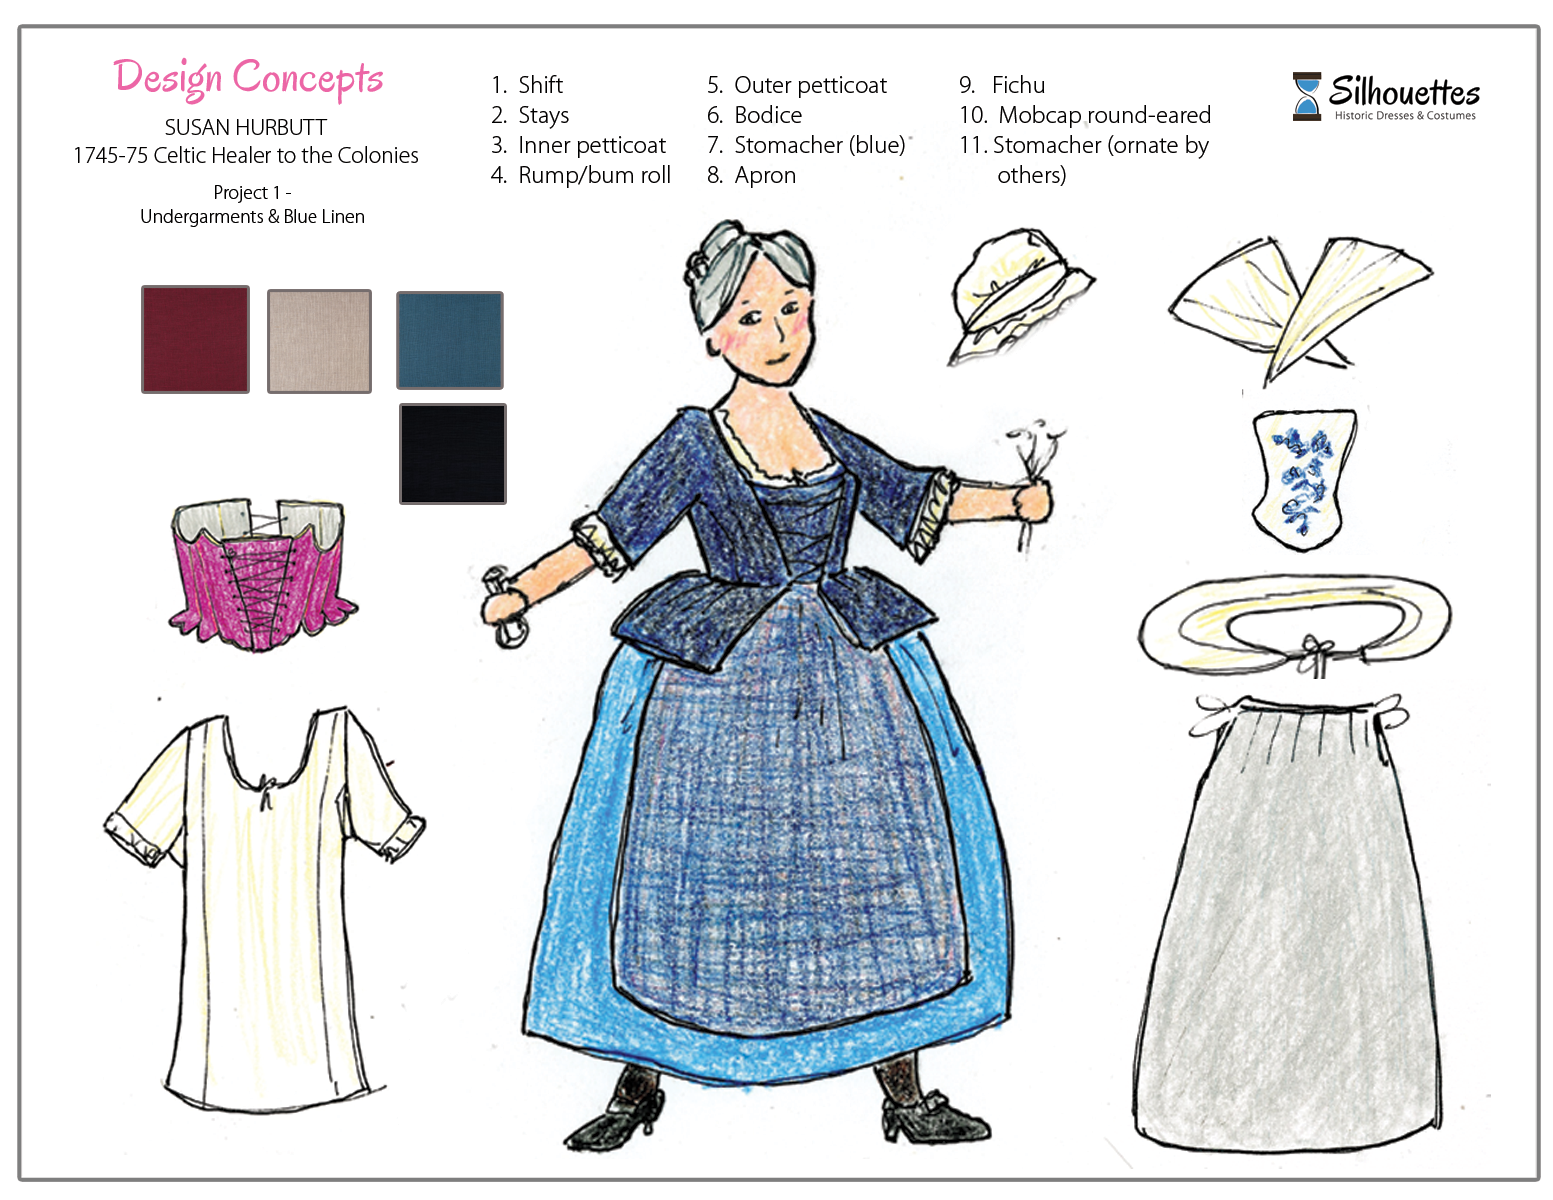

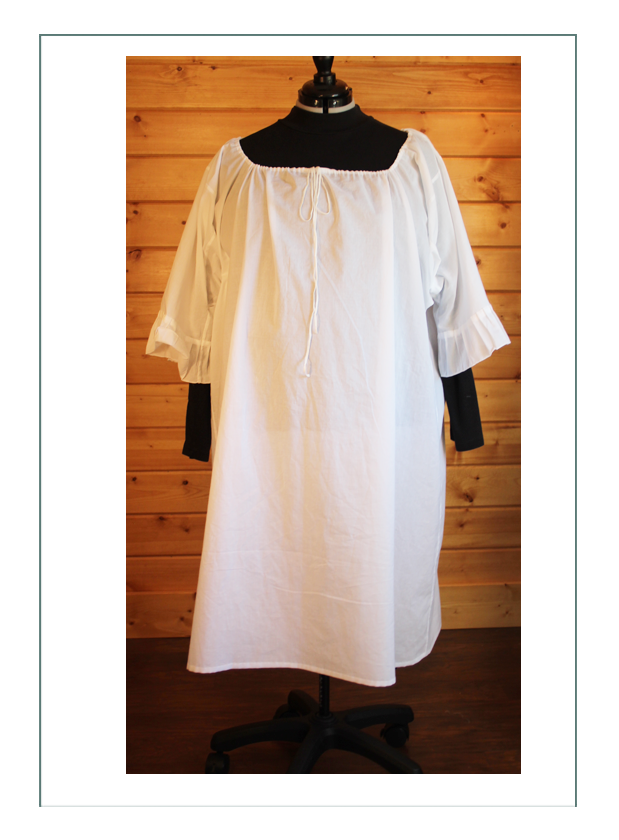
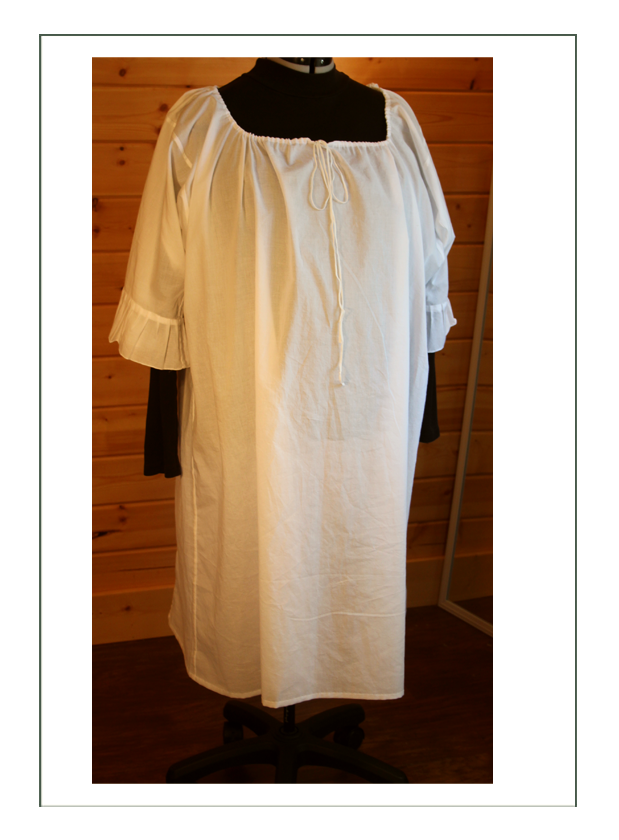
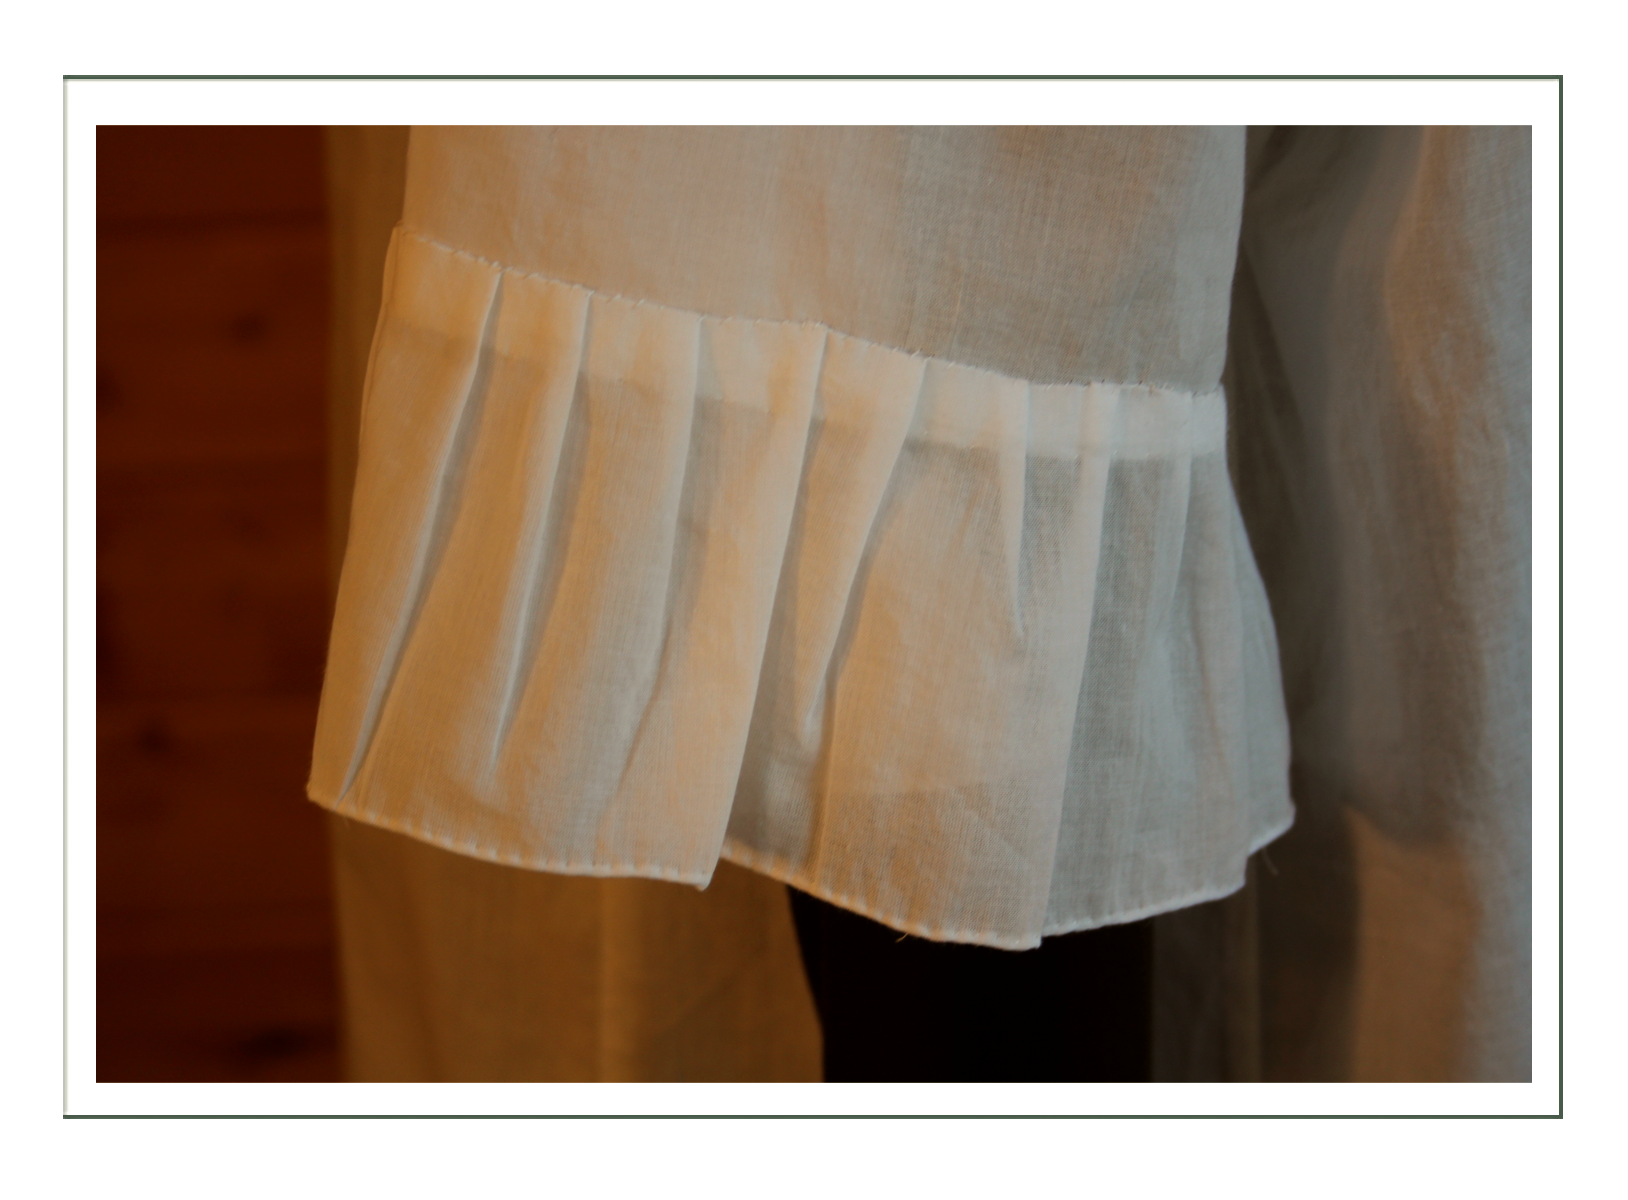
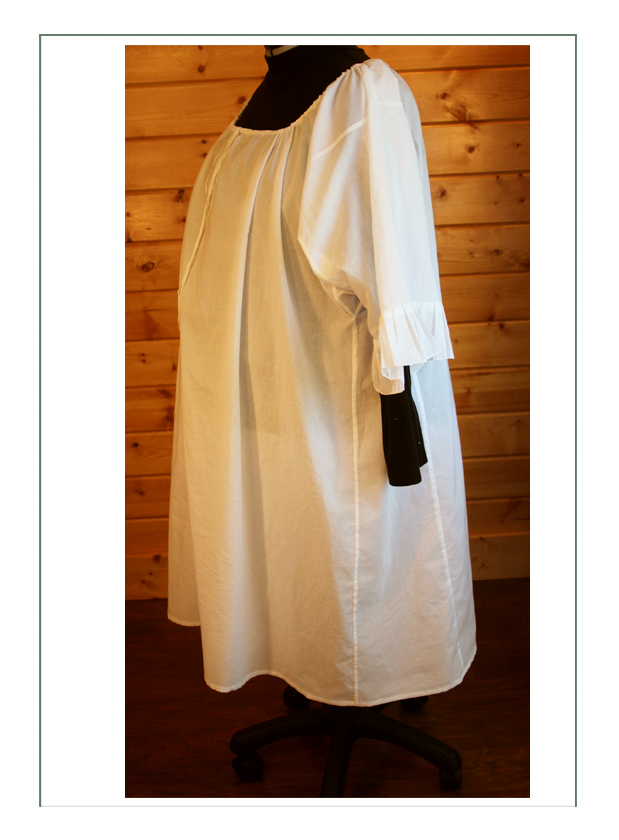
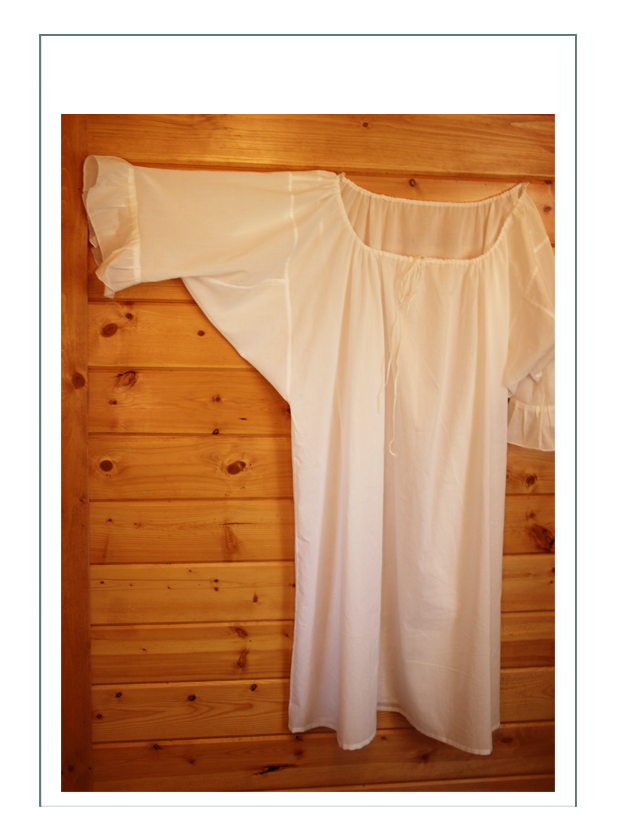
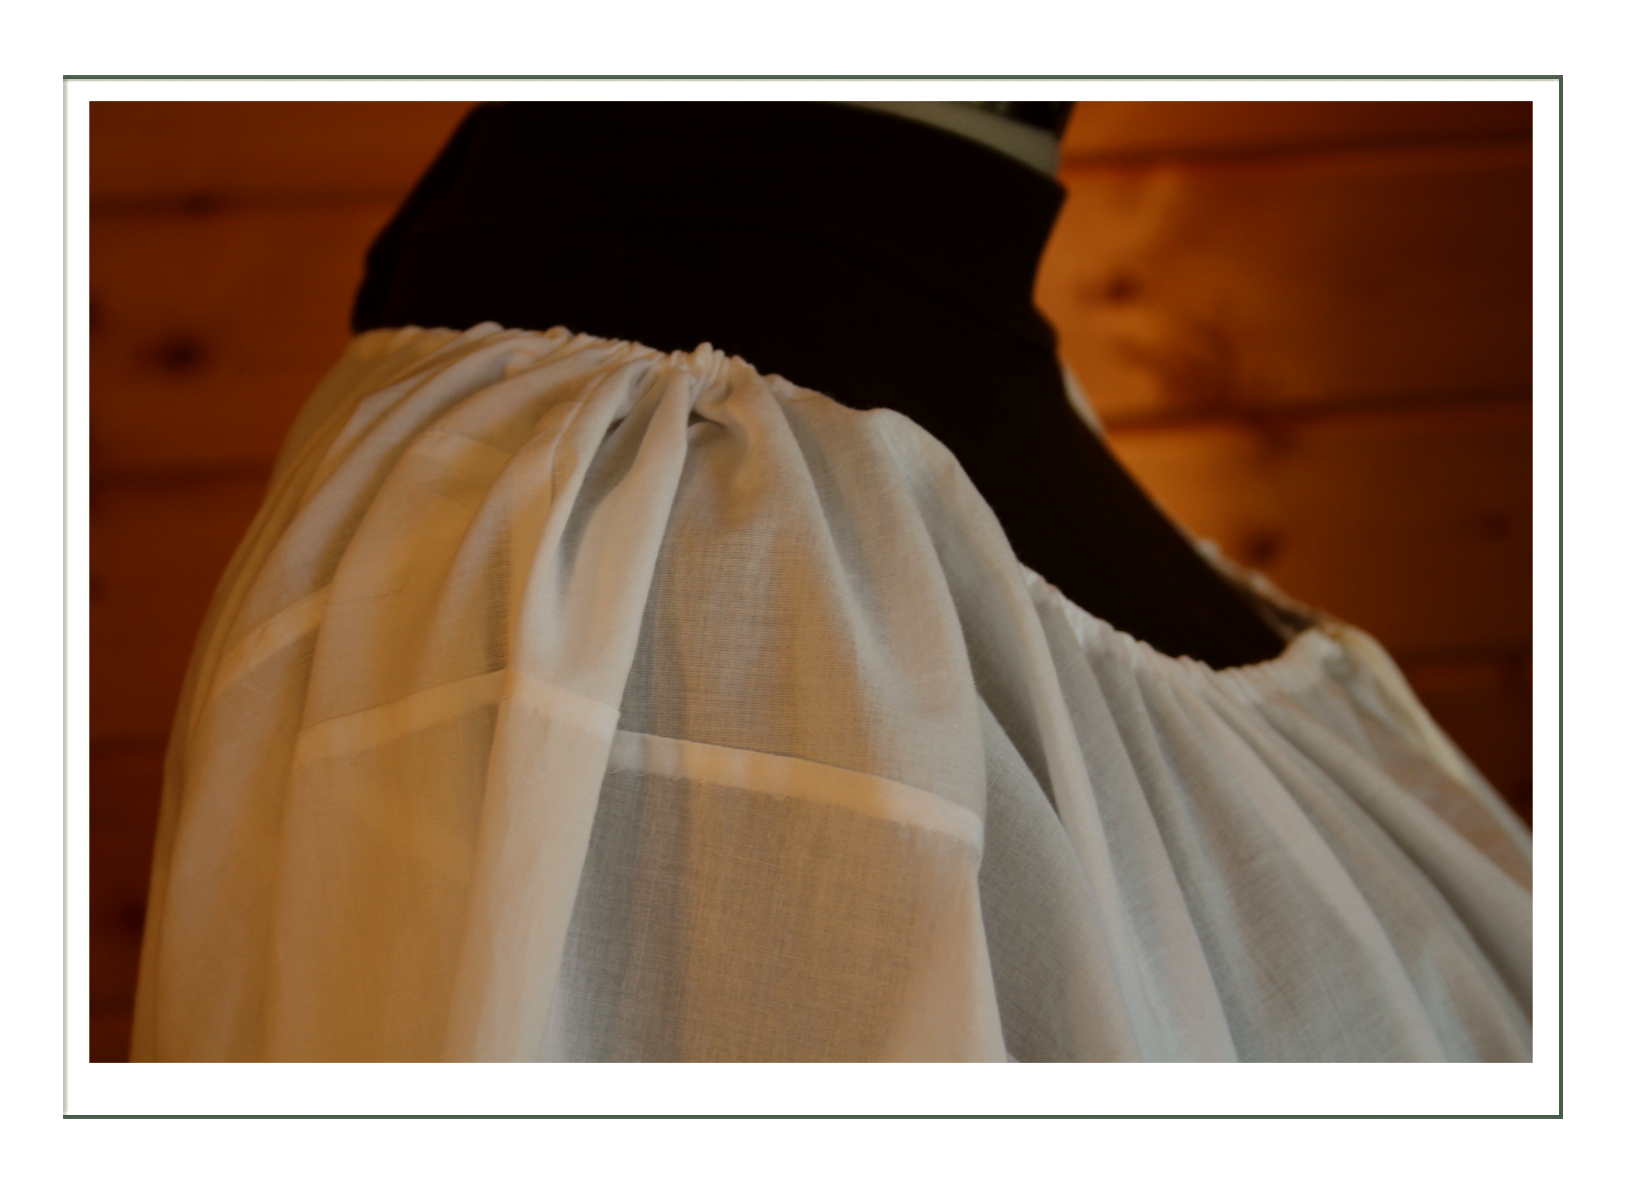
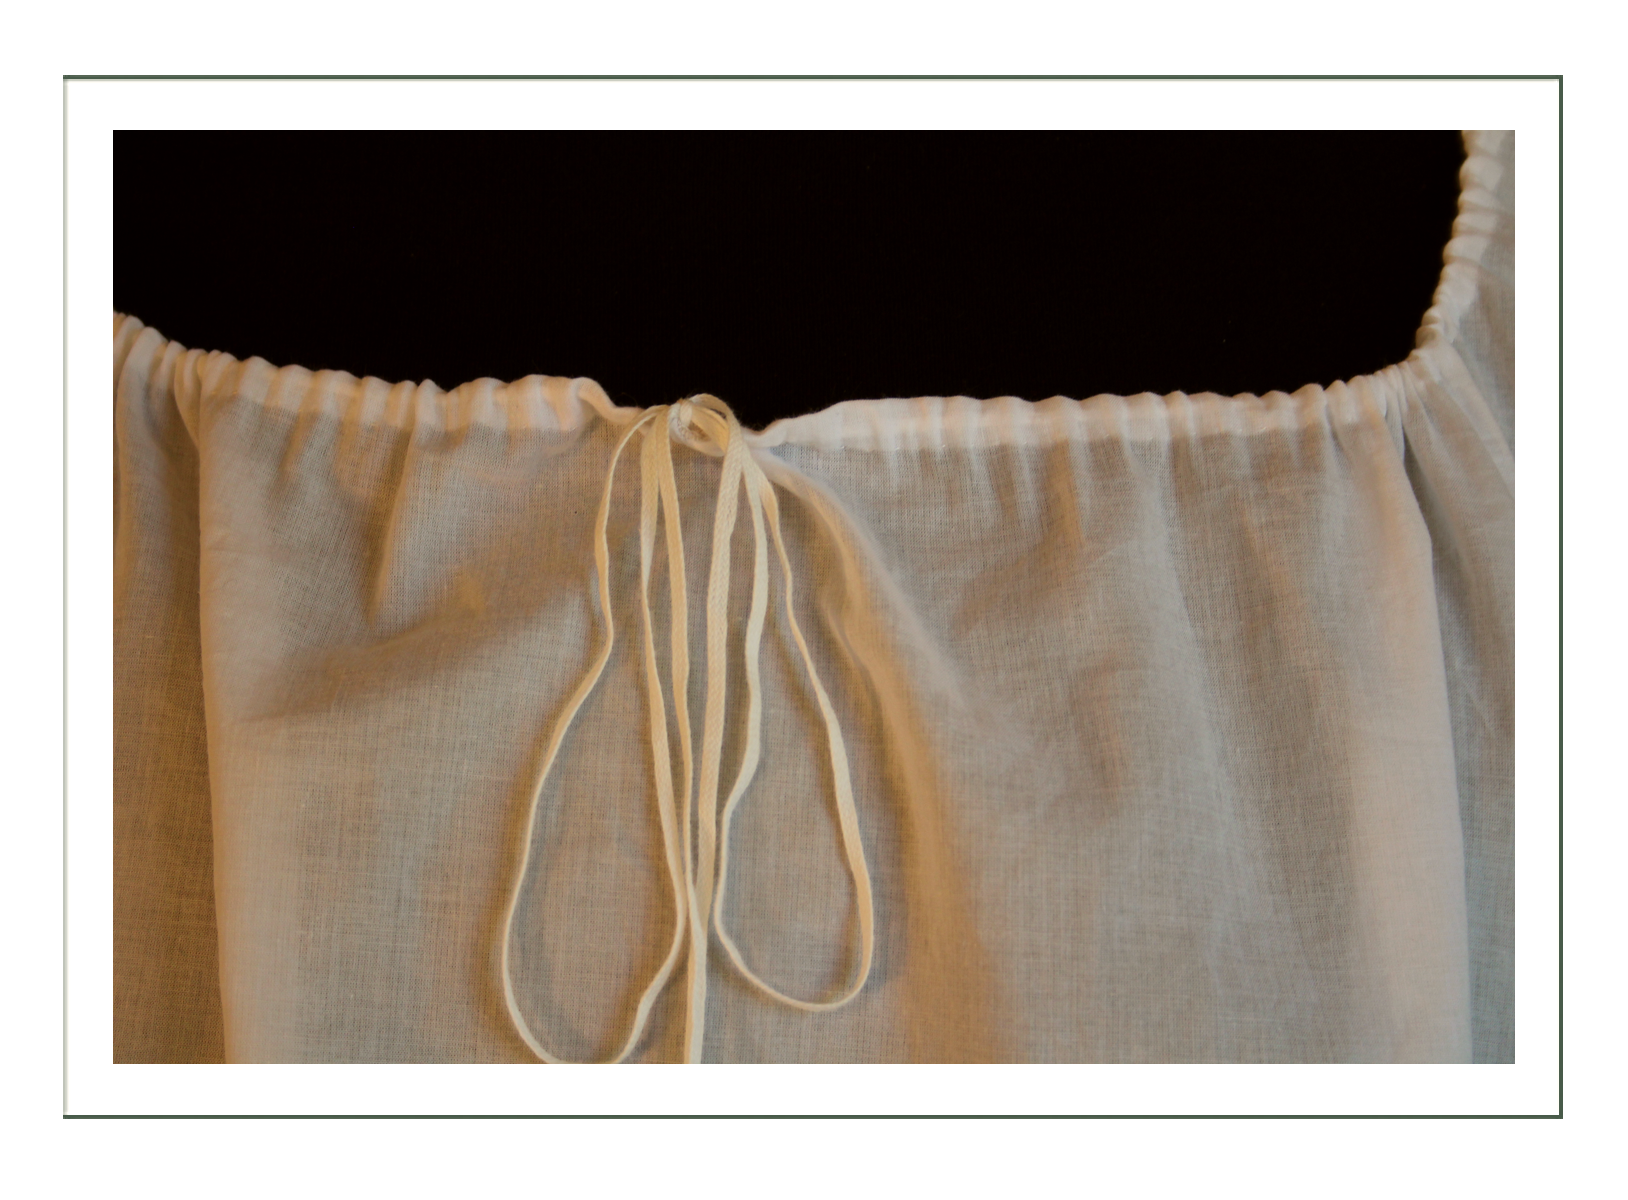
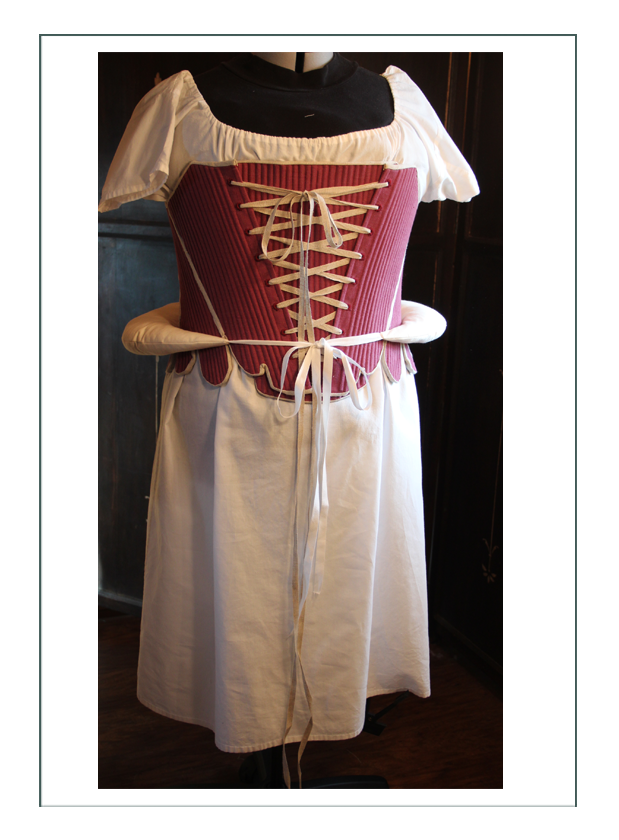
Shift
This is cotton to keep the cost down. It includes ruffles at sleeves and adjustable neckline with intent that they will show outside the sleeves and neckline. (Shown in photos is a different one). It has the later, straight gores and a wider bodice, shoulder area, and underarm gussets to accommodate the modern body, and to allow for more adjustability at the bodice neckline for wider year depictions. All seams are felled by hand, and the neckline is entirely made by hand with silk twist eyelets for the cotton lacing string.

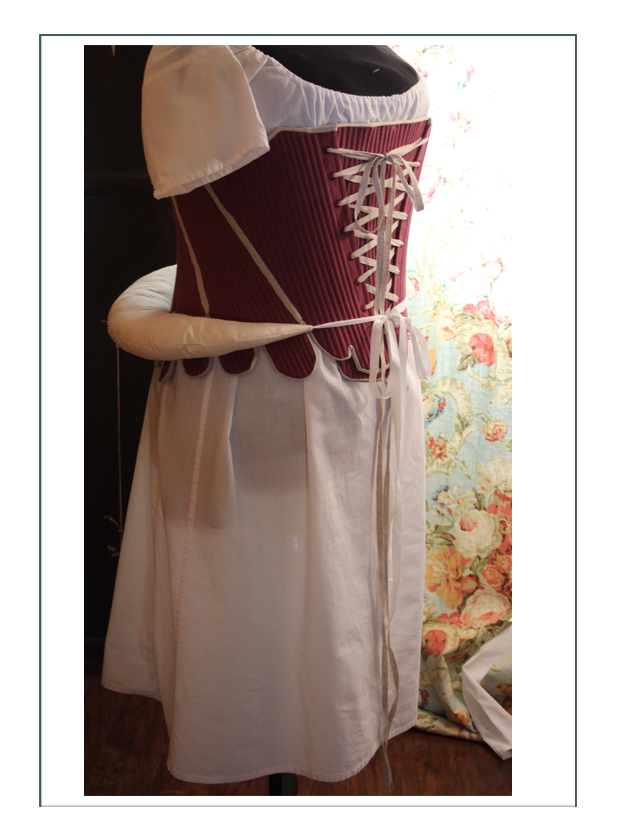
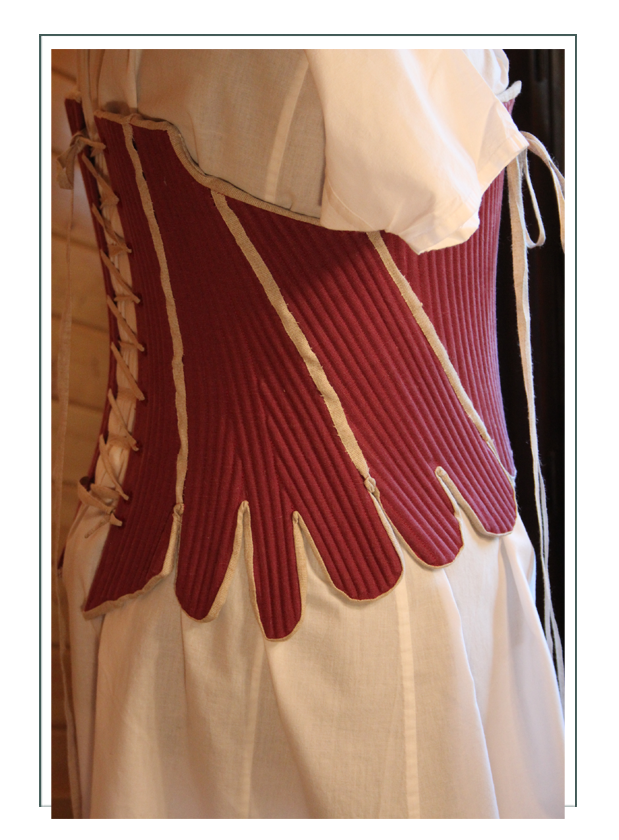
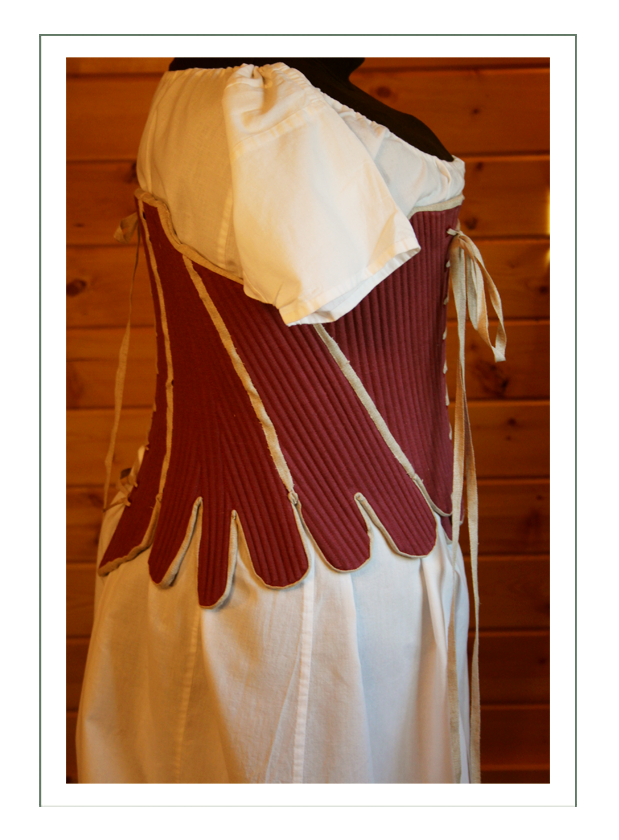
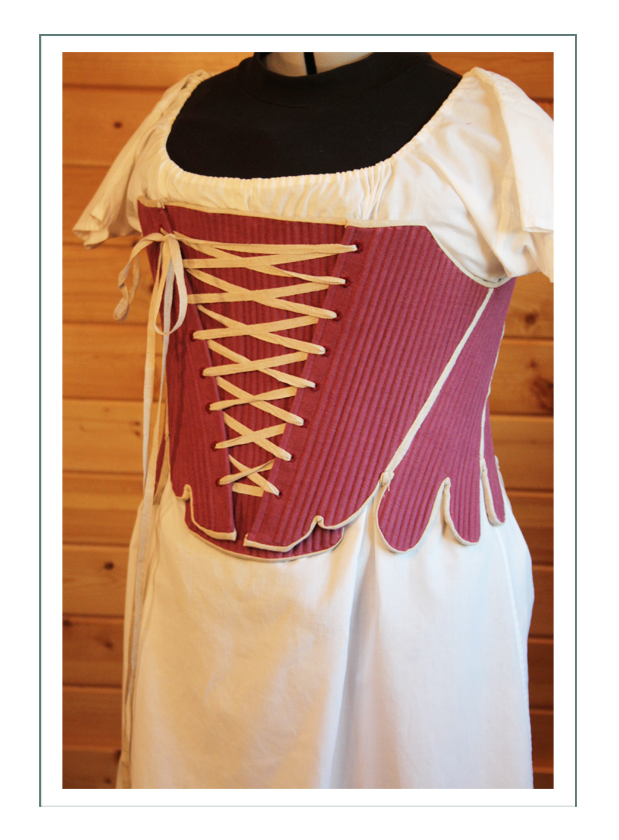
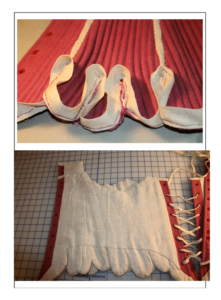
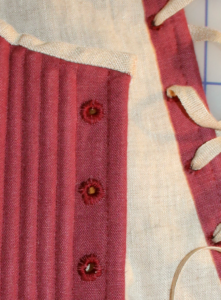
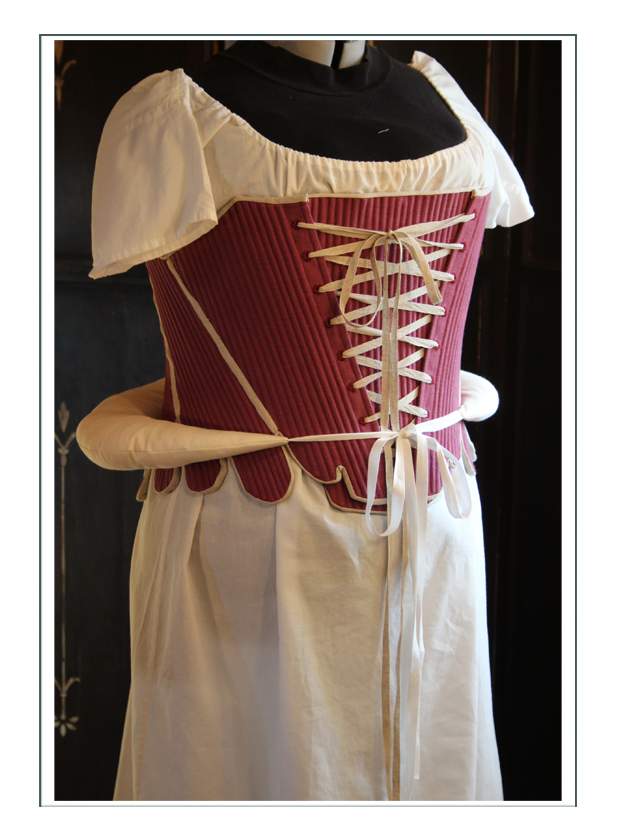
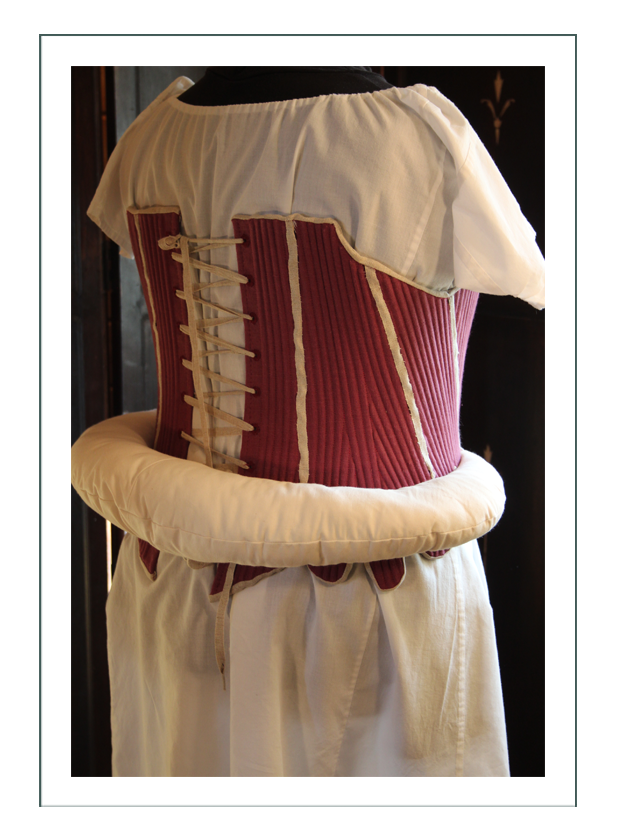
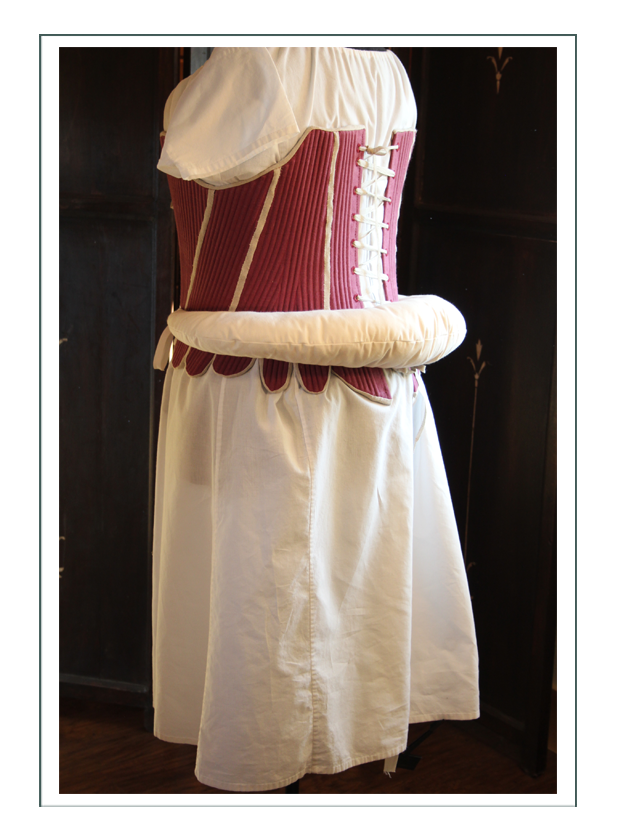
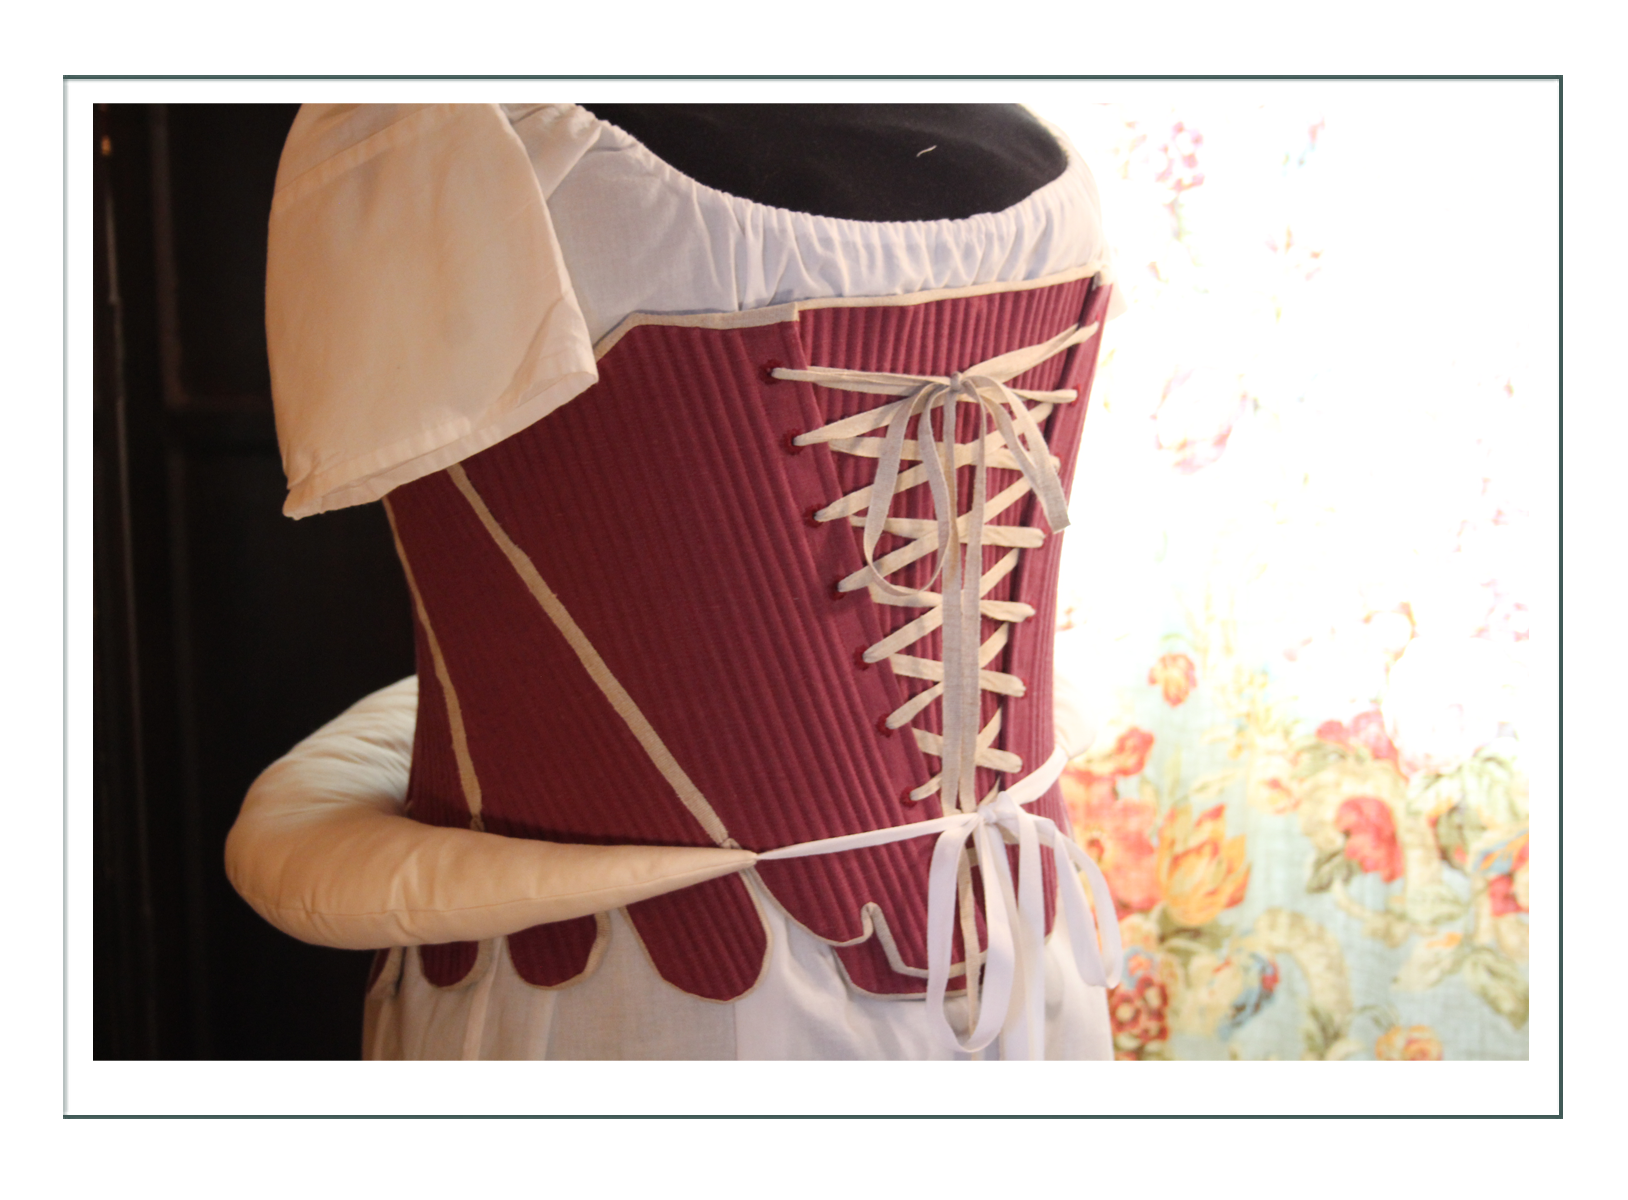
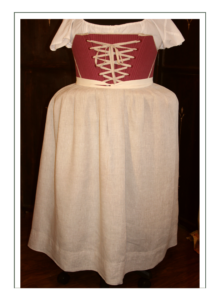
Stays with Stomacher & Pad
Fully round reeded, hand made using AUTHENTIC construction techniques for the 1740-70 6 piece taking 83 hours (each eyelet taking 20 minutes). The ONLY thing by machine are the boning channels. These are heavily reinforced through the stomacher with extra strong laces and lace eyelets.
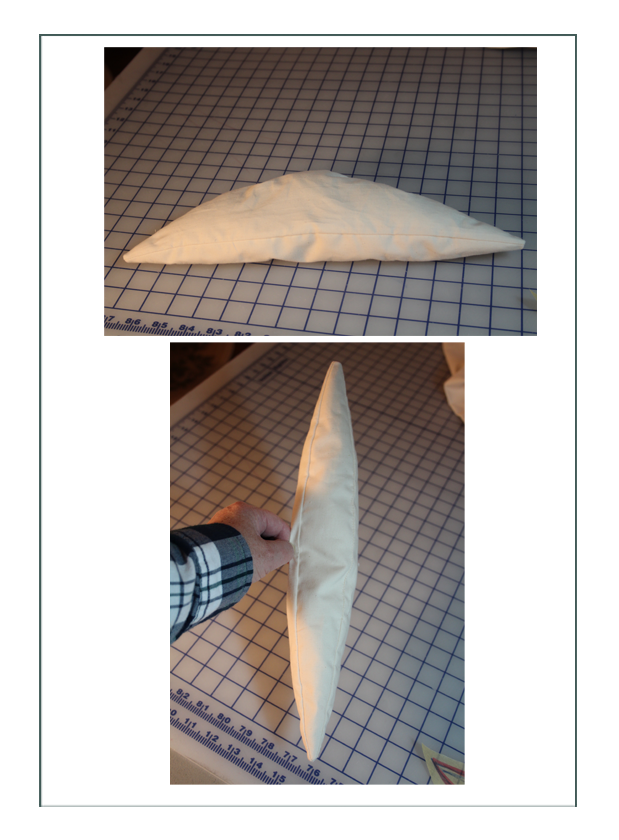
We have provided an additional custom underbreast pad to fill the gap between tummy and to bust and to lift the busts into the correct position. It looks like a “banana”, but has the ability to “squish” into whichever shape is needed. This protects the bamboo reeds from bending when Susan bends.
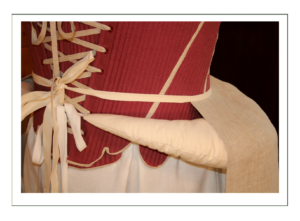
The reeds have been steamed into shape, but some additional shaping may be needed after a fitting. The stays and pad are designed to somewhat “smash” the breasts but to lift them (and separate a bit) to they are almost entirely in the “window”. Our dressmaking dummy can no way simulate the real body as it is pressed and lifted.
NOTE: With the remake, we duplicated the underbust pad and so there are two. The purpose is to fill the gap between tummy and under breasts so boning does not get broken in bending. The pads allow for a straight line from hip to breast on the modern body. They are a “fix” for modern bodies to bring them to historical shape.
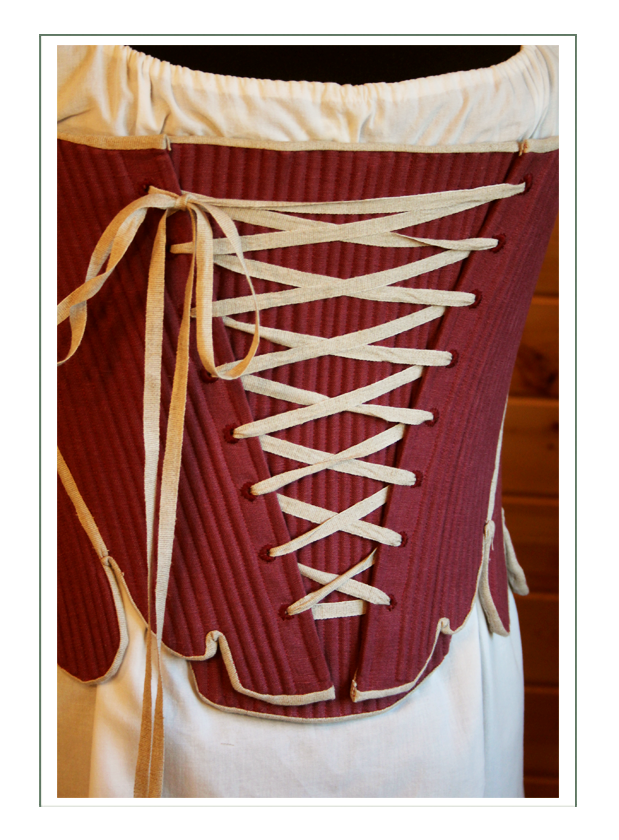
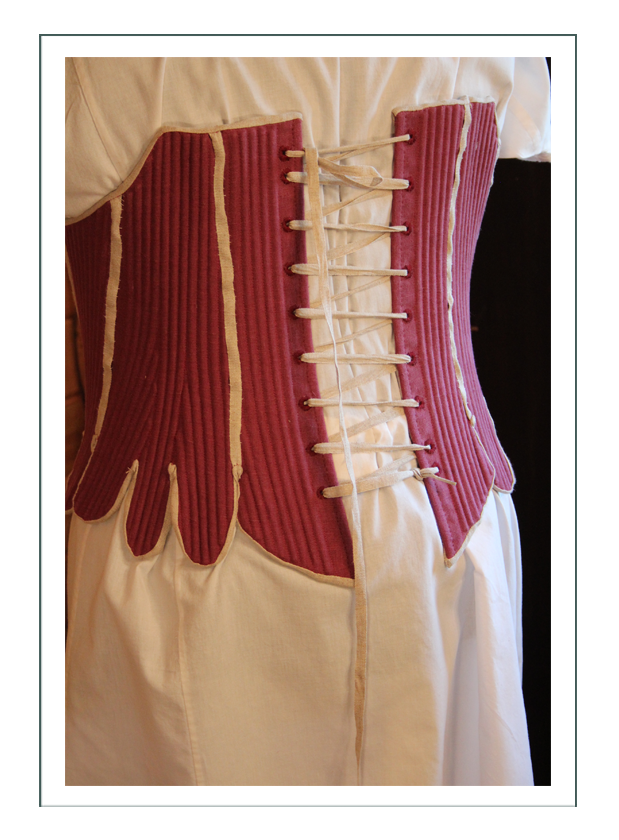

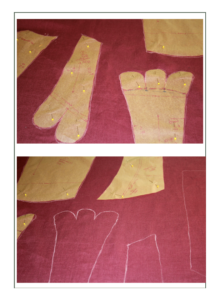
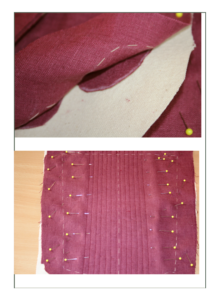
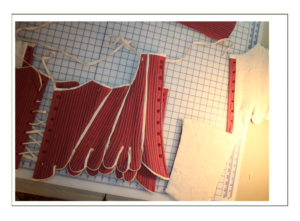
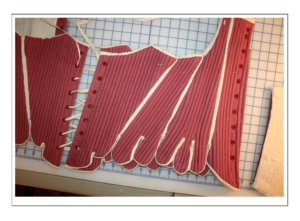
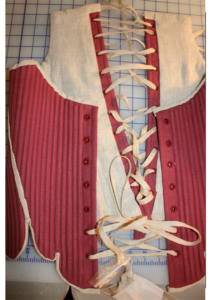
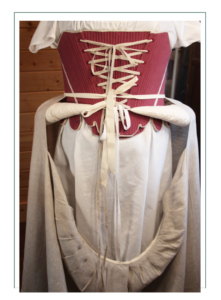
Stays #2
We remade the stays: 96 hours of hand work. Here are a few photos of the beginning of the process. There are many more steps than shown. We did not have a body to photograph them on, and were mostly concerned with the revisions made, so finished photos look a bit “rough”.


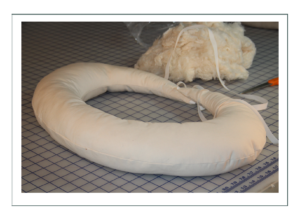
Rump/Bum Roll
There were many shapes and sizes available at this time, and especially through the 30 years of this depiction. Class and social status comes into play quite a bit in the decision how to build these. There are no patterns, few instructions, and fewer extant examples, so the modern seamstress is on her own to create whichever padding will yield the desired silhouette.
This character is a middle class farmer/healer, and the depiction goes through several fashion eras and on two continents. In reality, like women of the next century, she would probably toss her “bum roll” for daily use and bring it out with her best ensemble to go to church – except as we learned in our Celtic studies, women were very informal to the point of wearing their stays on the outside to church, so they may not have worn them at all!
We had to “punt” and decide, and the decision was based on:
- What will yield the correct period silhouette
- What will make Susan look good
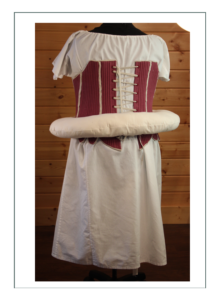
Therefore we chose a large, “tubular” type of roll instead of a pad, that would give sturdy “lift” and create the large hips and rear end desired of the fashionable woman. In other words, we’ve created a fashionable ensemble as one would dress up in.
First Attempt Bum Roll
The first one we made looked too much like the farthingale of the prior century, as it came around to the front and had a 6″ flat platform. We made the inner petticoat, and it was just fine – for court apparel. Through the time periods of depiction, women most certainly DID wear them like this and this big, but this character is lower class, harder working, and not wearing it for formal or Court wear. So we made another one.
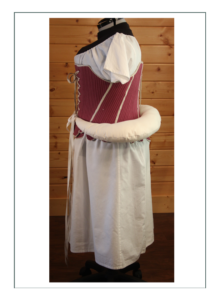
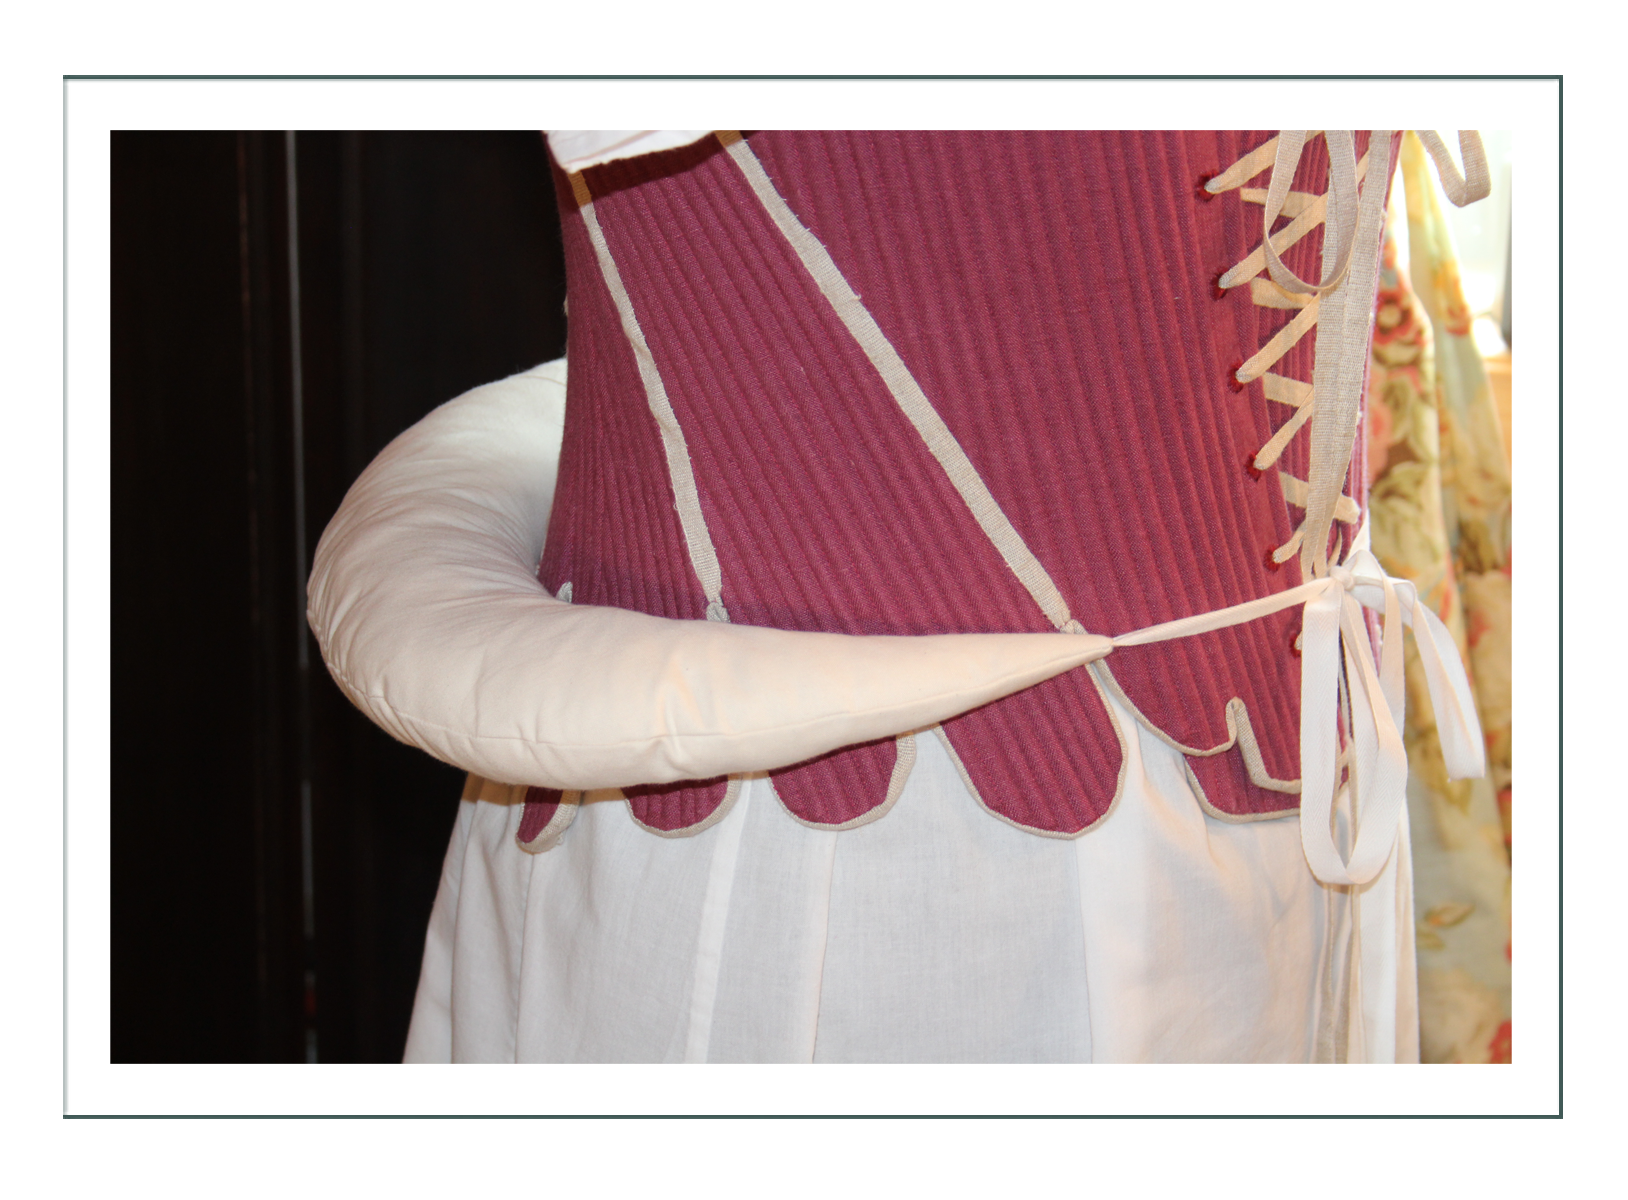
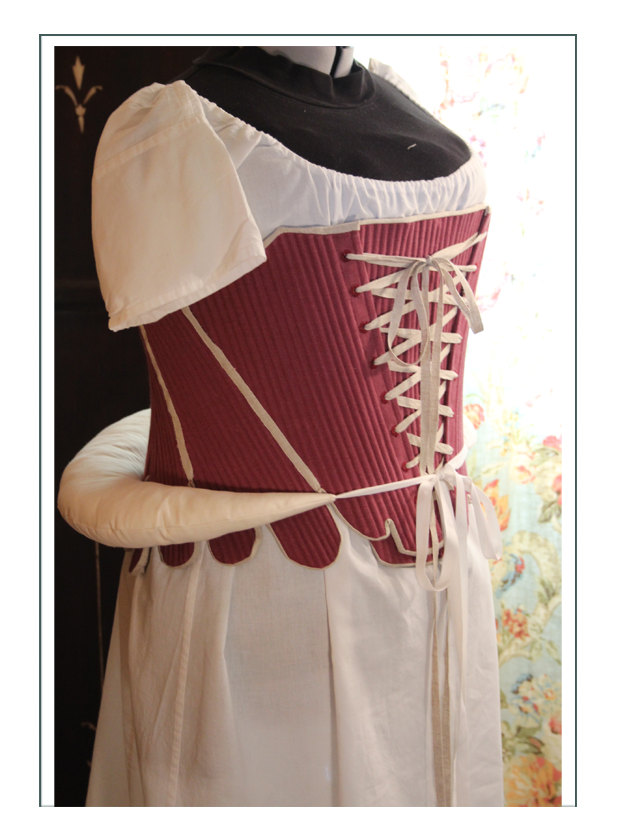
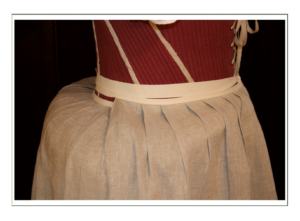
Final Attempt Bum Roll
This one is still large, rigid, and tubular, but it only has a 4″ ridge and does not go around the front, give the more “modern” silhouette of the 1760’s similar to the lower class version of the panier. This should enhance Susan’s figure and when the bodice is finished, should give her a small waist (especially with the bust lifted).
One must remember at this time stays and undergarments did not shape the body nor even attempt to hold it in (except to lift and smash the breasts somewhat). They were to TRICK the eye into seeing a cone shape. This rump is designed enhance that illusion.


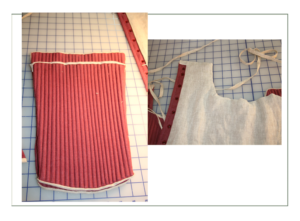
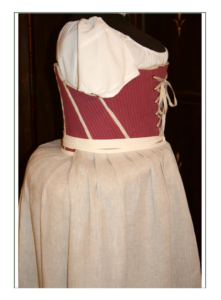
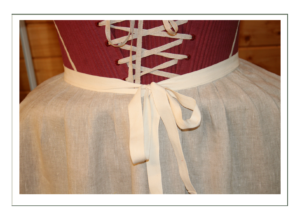
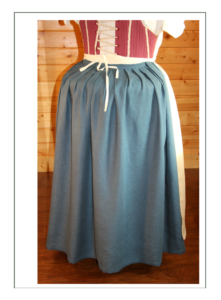
Inner Petticoat
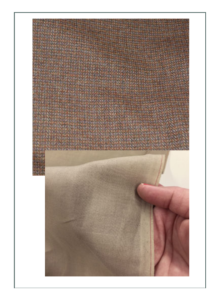
As mentioned, the first petticoat was completely made to fit the large rump made at first. It has to be tossed, but the photos are good for showing how to dress, so we will show it here. You can see how the fabric is a nice natural linen that will look “real”, not too clean and modern looking under either her blue or tartan outer petticoats. This type of linen can be washed, and it is especially effective in looking realistic and historic when washed and not ironed, as the fabric will crinkle quite naturally as linen does.
How to put a petticoat on:
2nd Attempt Inner Petticoat
The 2nd inner petticoat will be made with casings and tapes with side closures. All petticoats for Susan need to be side closing as she wants to use her authentic pockets. Pockets are hung around the waist inside and under the rump, so she needs to be able to reach through the layers of all petticoats, through the slit, and into the pocket slit. The rump helps quite a bit with this by holding the petticoats away from the body to give room to get a hand in there. (One doesn’t want the skirts laying on top of the pockets, or nothing could be stored in them without creating visual “lumps”)
The Final inner petticoat looks the same as the first outwardly. It is just a different size and length.
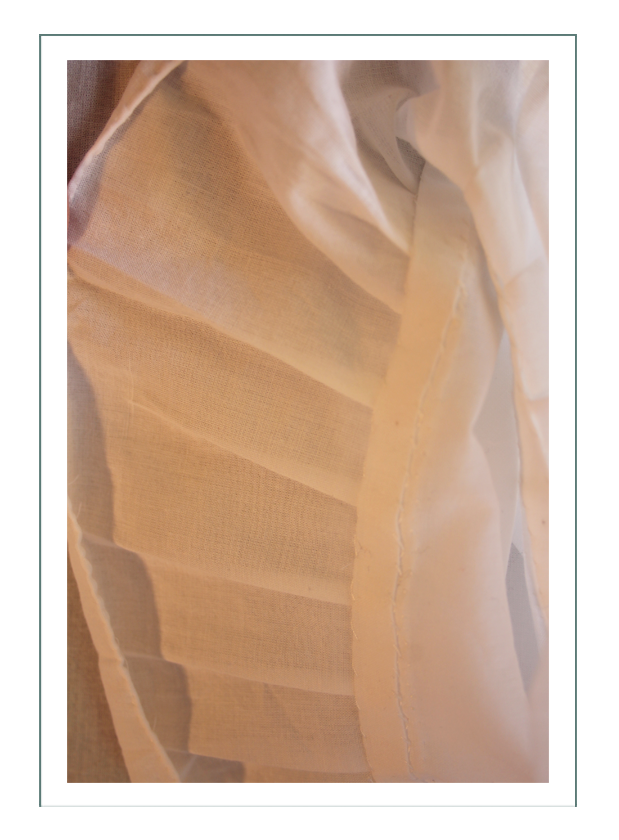
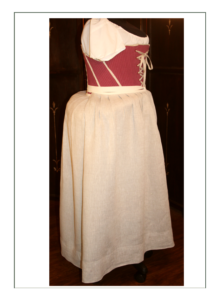
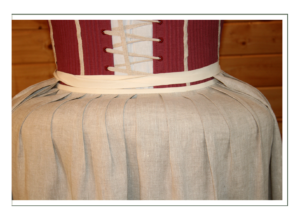
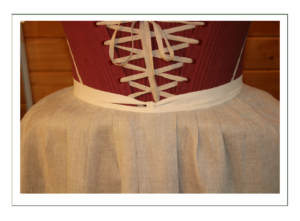
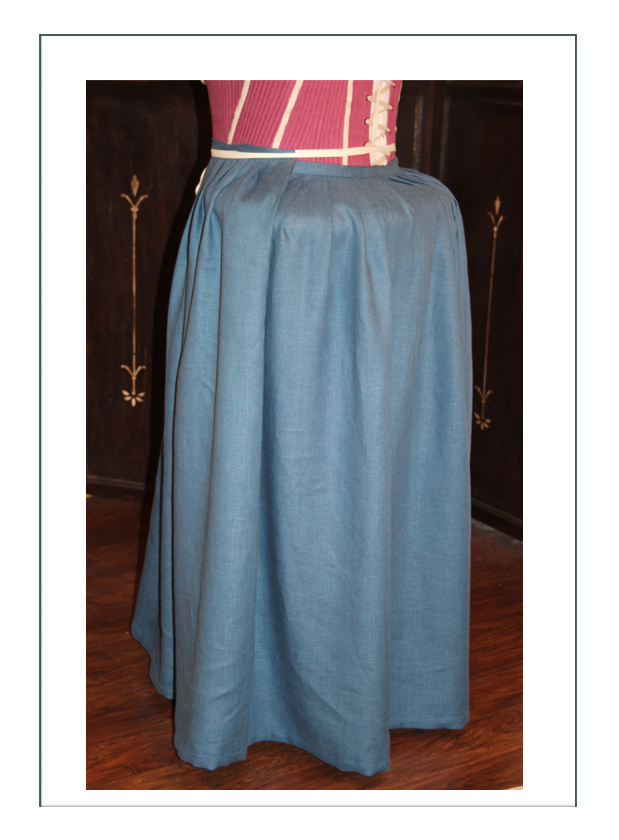
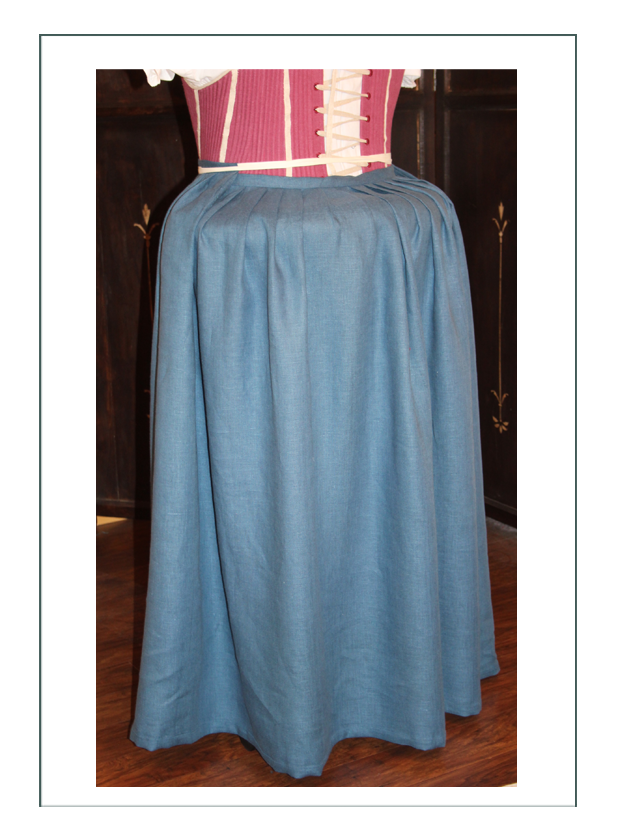
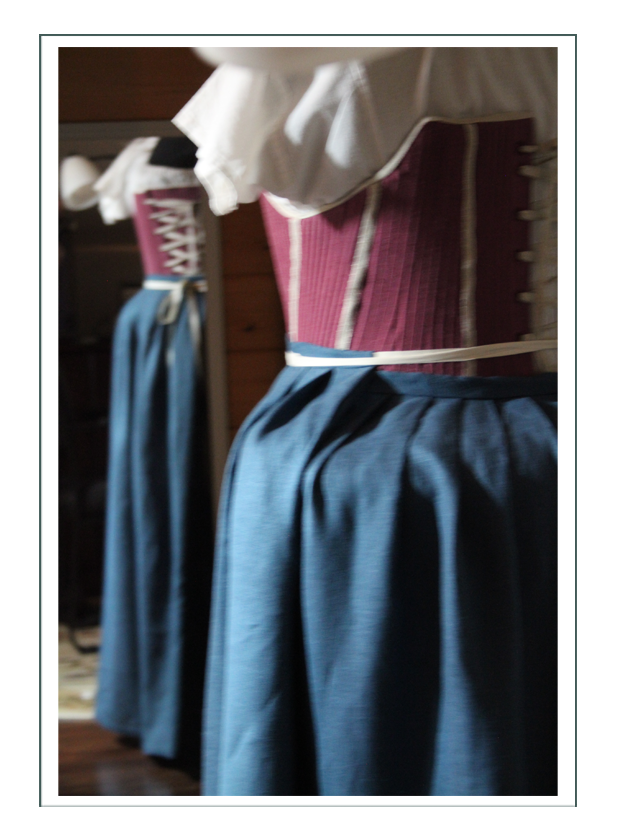
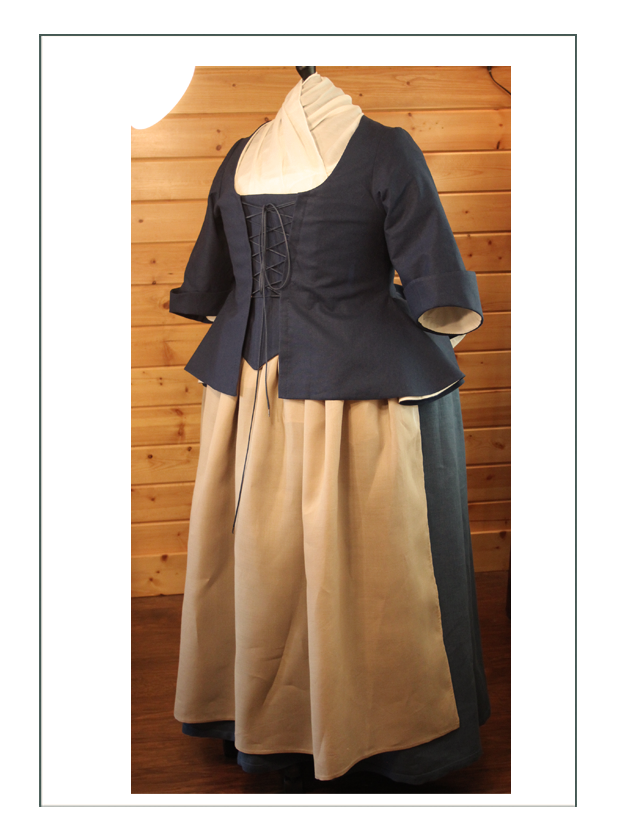
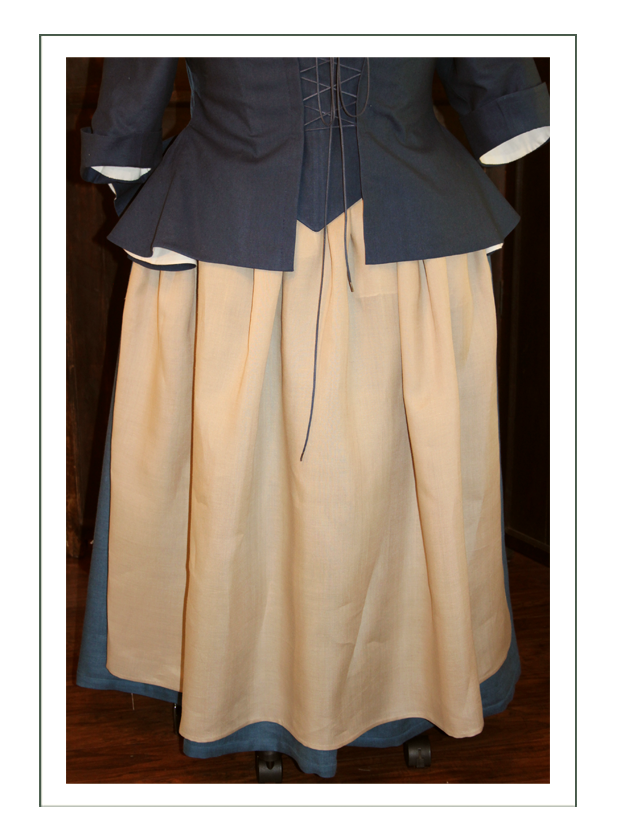
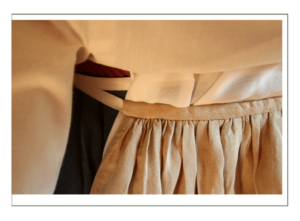
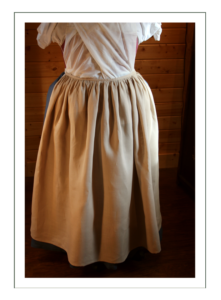
Outer Petticoat
Got The Outer Petticoat on the 1st Try
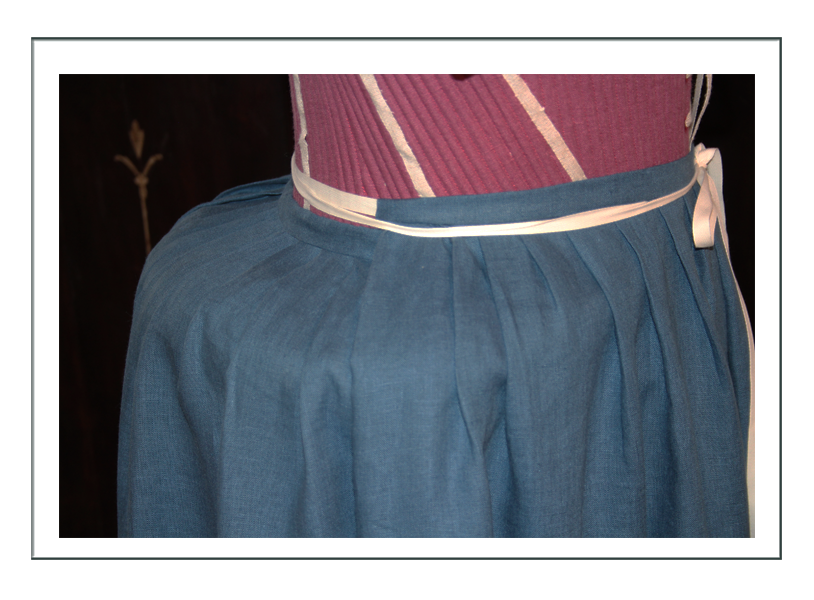
After trial and error with the inner petticoat and bum roll, the outer petticoat was a matter of manipulating the pleats on top to adjust for the differing widths at the waist. This was done using the historically correct method of leveling the hem at the bottom and THEN adjusting the upper pleating; much harder than making a curved hem.
The reason for this is the bottom of the skirt must remain parallel to the floor no matter what length and as it goes over a 4″ shelf on the sides and 3″ in the back plus the round parts. Like in history, the seamstress must drape it; this on the dummy.
Ideally the outer petticoat will be just below the ankles. Also authentic is the hem binding which can show, tuck to the inside, or work as a hem tape instead. It’s easy to adjust it to 1″ longer or many inches shorter; just like they would have worked and reworked it in the 18th century. If needed at fitting, it will be an easy adjustment.
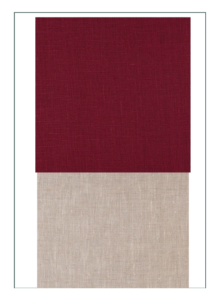
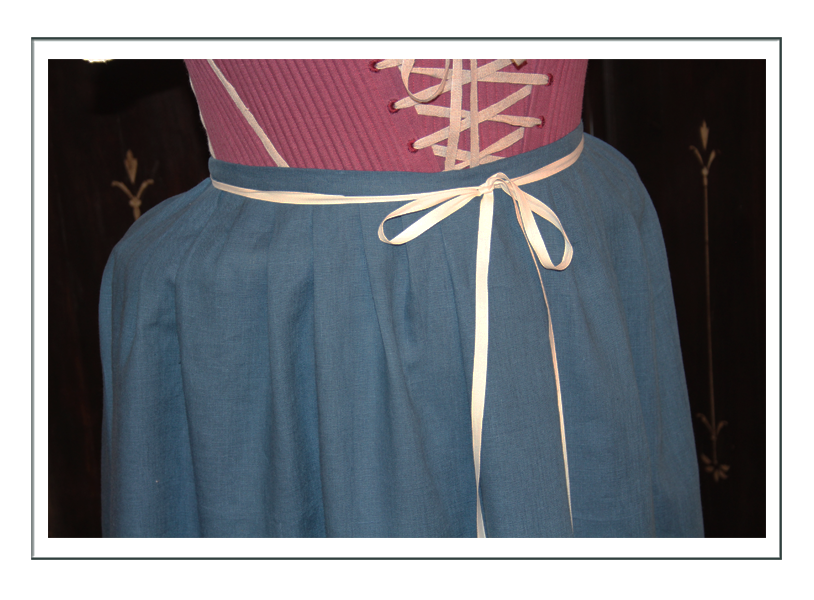
Important though is that the inner petticoat needs to be 1-3″ shorter than the outer, and must be made of a lesser circumference. Our outer petticoat blue bonnet linen is 60″ wide and the inner is only 55″, so we have made both from 2 panels – exactly as they did historically. This allows the selvedge edges to be finished (otherwise historically they didn’t finish their edges except on shifts which have felled seams).
The finished circumference of the outer petticoat is 118″; the inner is 108″. Typical to the era is 90-120″.
This will look much better with the bodice which balances out the silhouette. The contrasting tapes and bindings are quite historically correct as they just used whatever they had at hand. Even the bottom hem binding would be of anything they could find; especially lower class and not necessarily even close to matching like ours does of self-fabric.
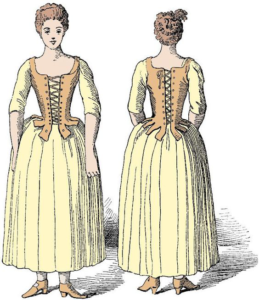
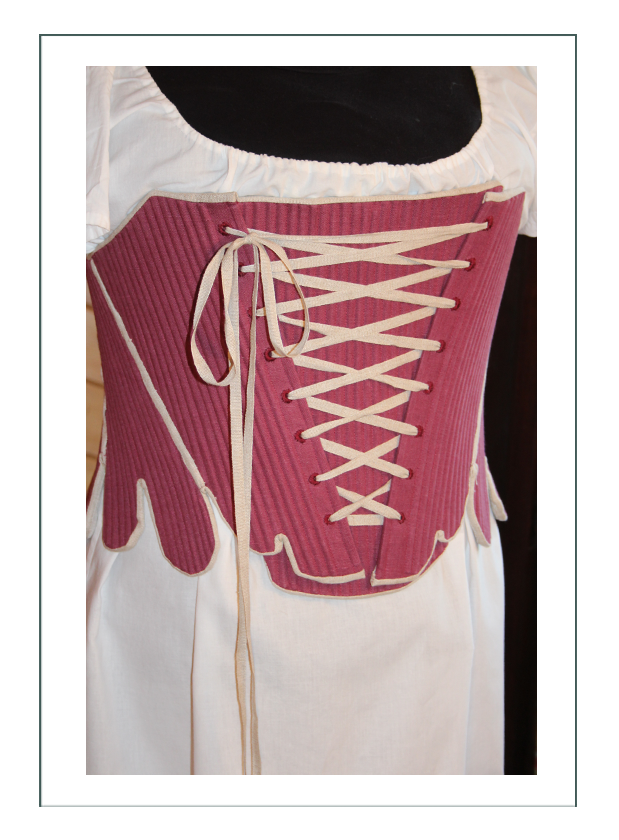
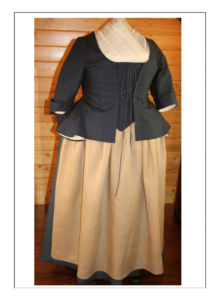
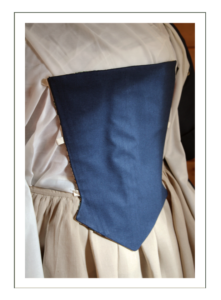
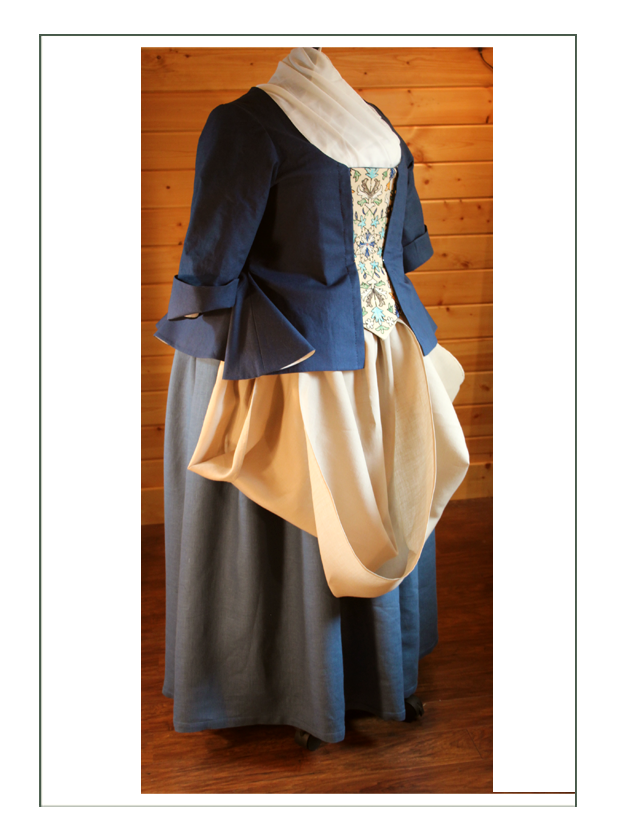
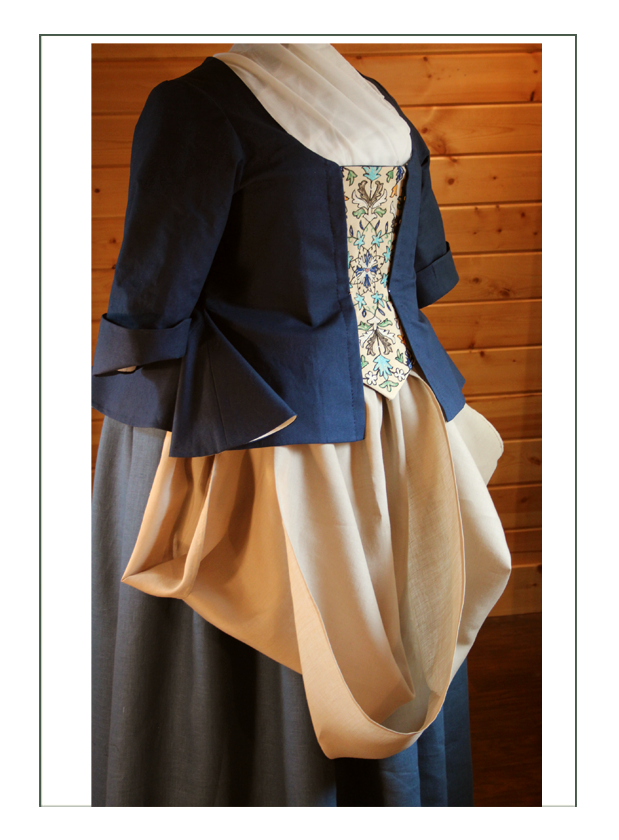
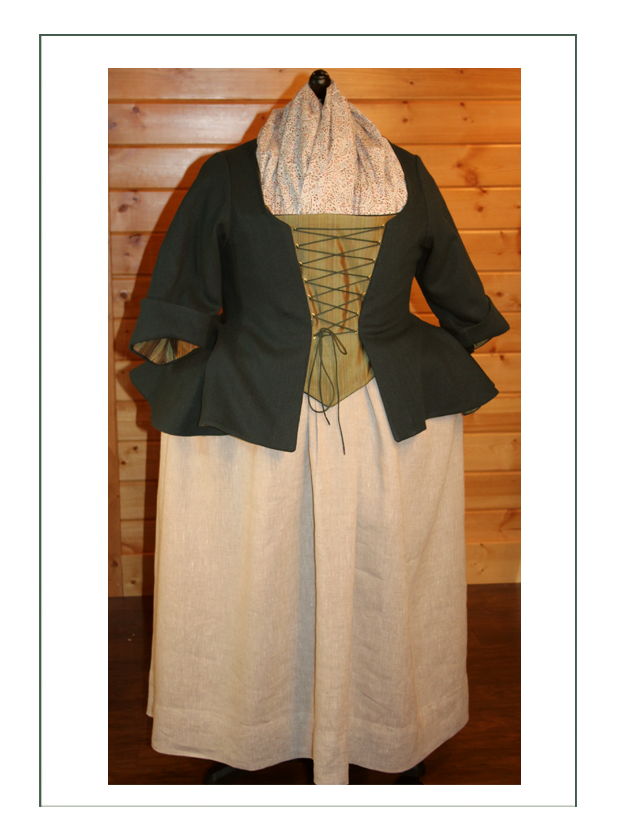
Bodice MockUp
Since there are only basic instructions for the many types of these worn, we are following our sketch for design which was based on the many examples Susan provided in her preferences: the 1770’s style with laced front and stomacher. That way Susan’s embroidered stomacher she has already can be pinned in if the lacing is left off, so she can switch. This means serious modification of any patterns available since they all have a wide opening in front (such as our sketch). We have to bring it in to 6″.
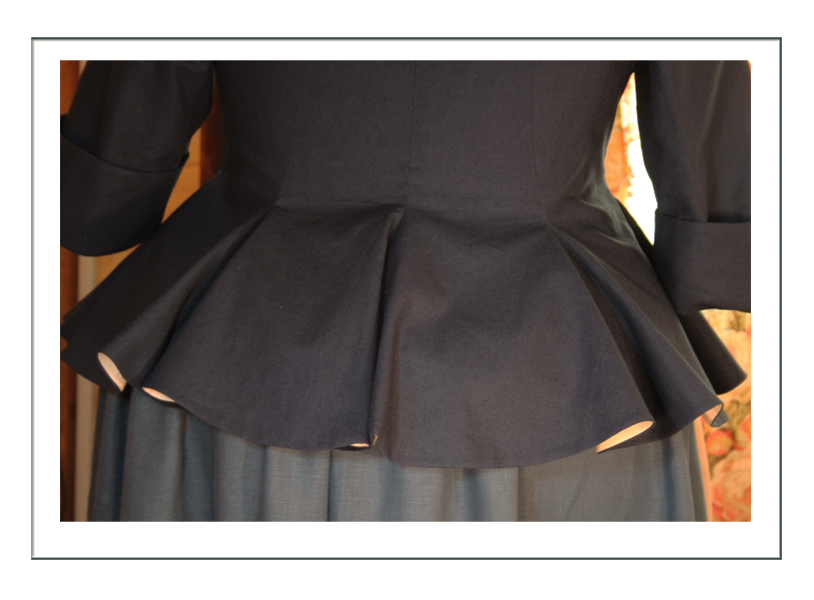
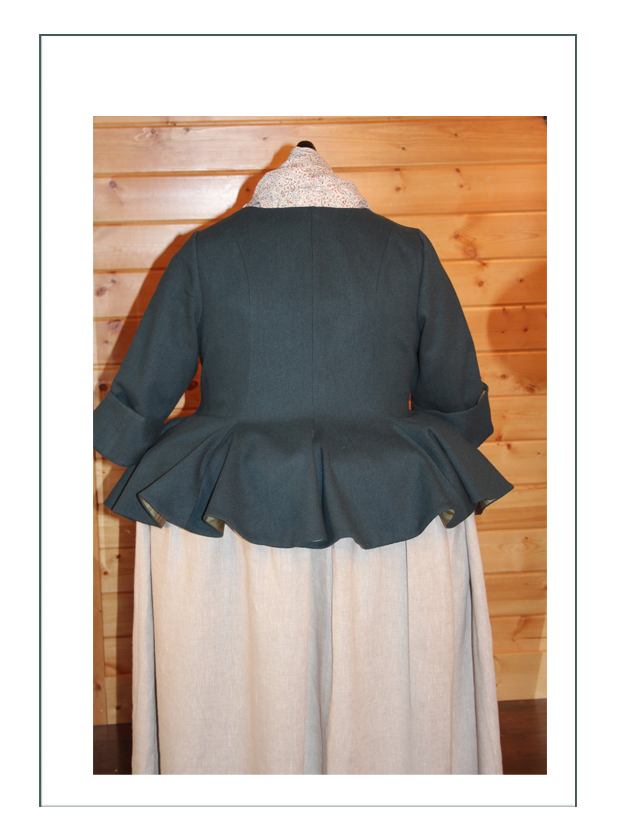
This mock up is made from cotton/linen 50/50 blend which is lovely to work with; as lovely as the period correct chintz we had considered. It will be lined with cotton from stock; anything that looks nice (indigo and tan). It will have the longer hip coverage over the rump, and the “at waist” pleat in center back. Bodices to be built later will have the shortgown no inset sleeve construction like a loose robe, and the longer over the hips type with gores and a pleat high in back.
If successful fit, Susan will have the option to buy this at a discount.
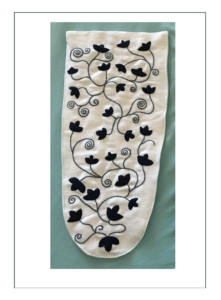
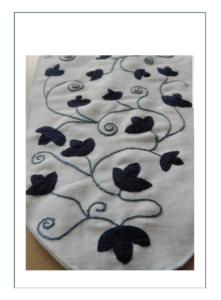
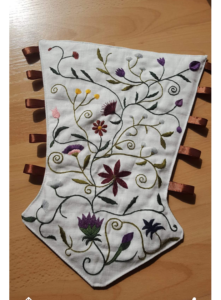
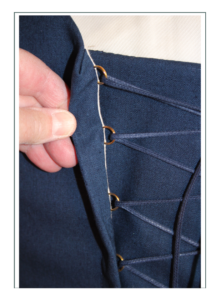
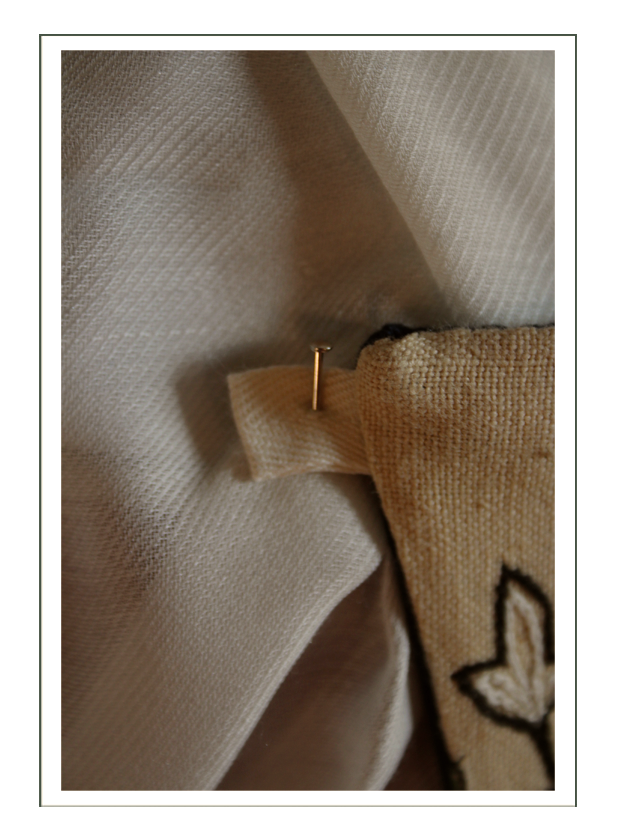
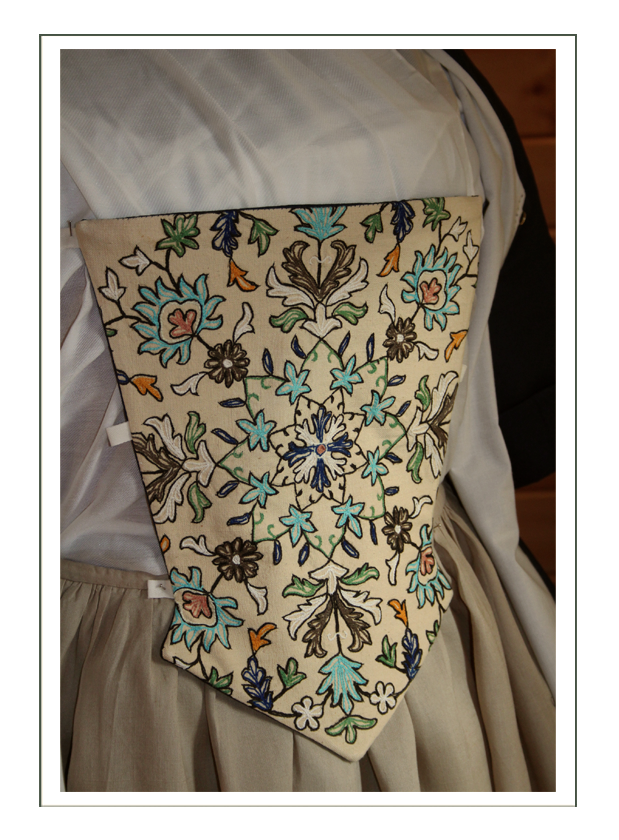
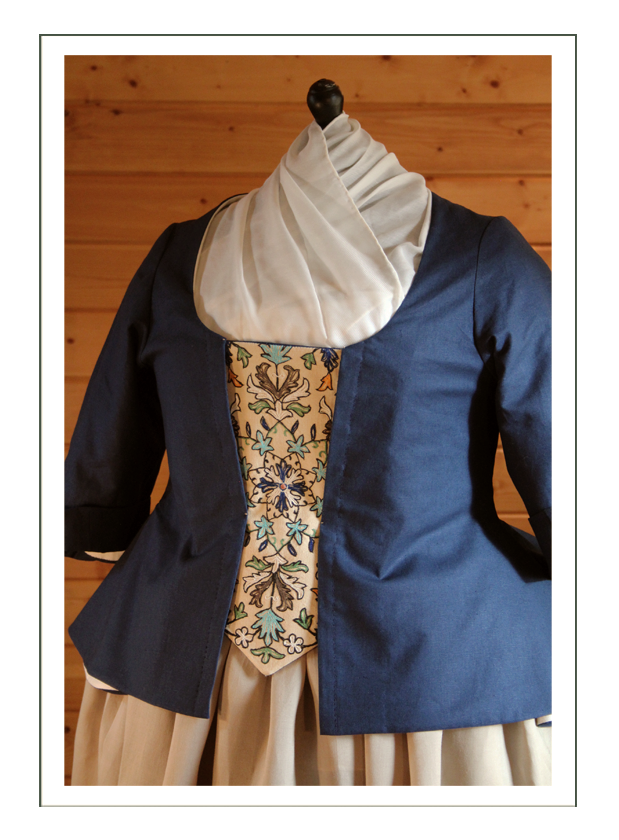
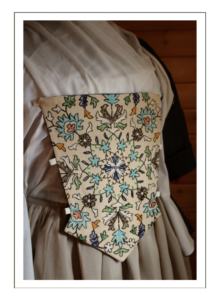
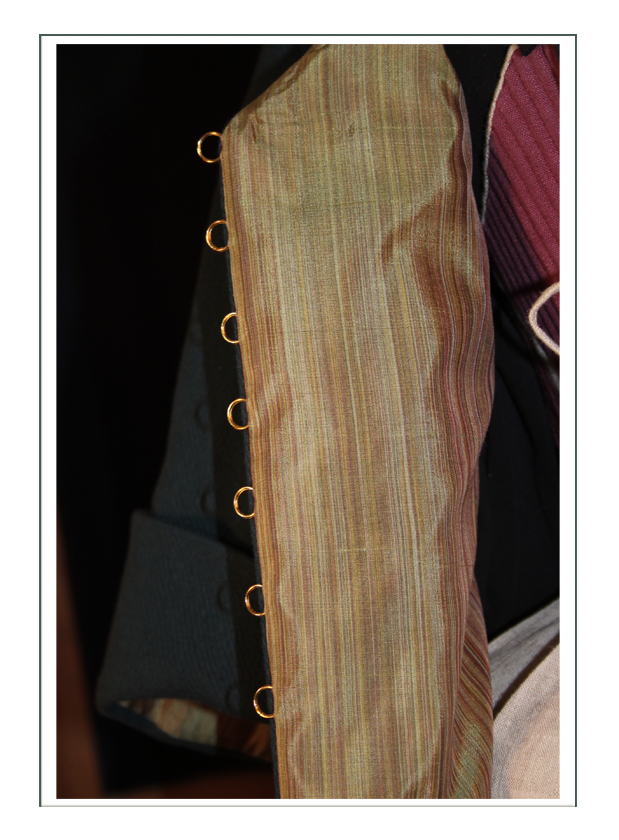
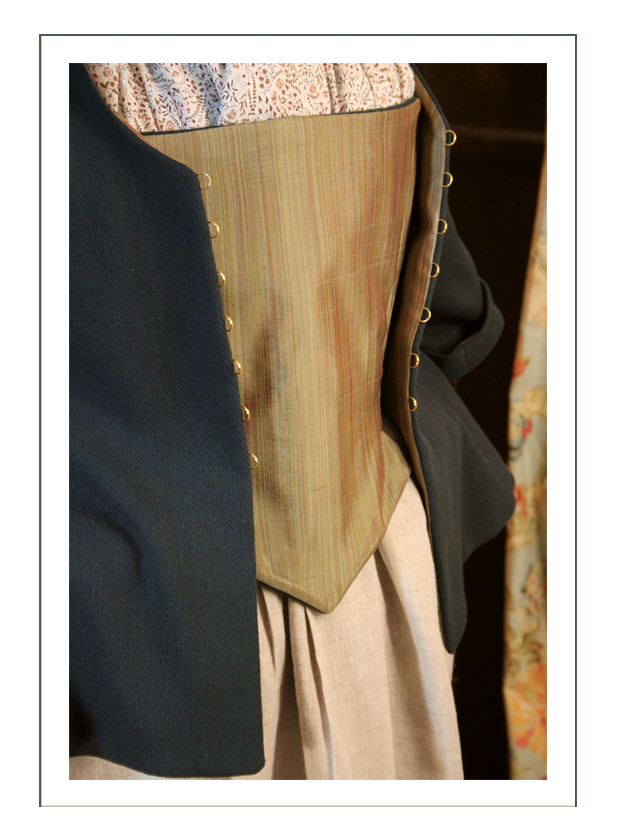
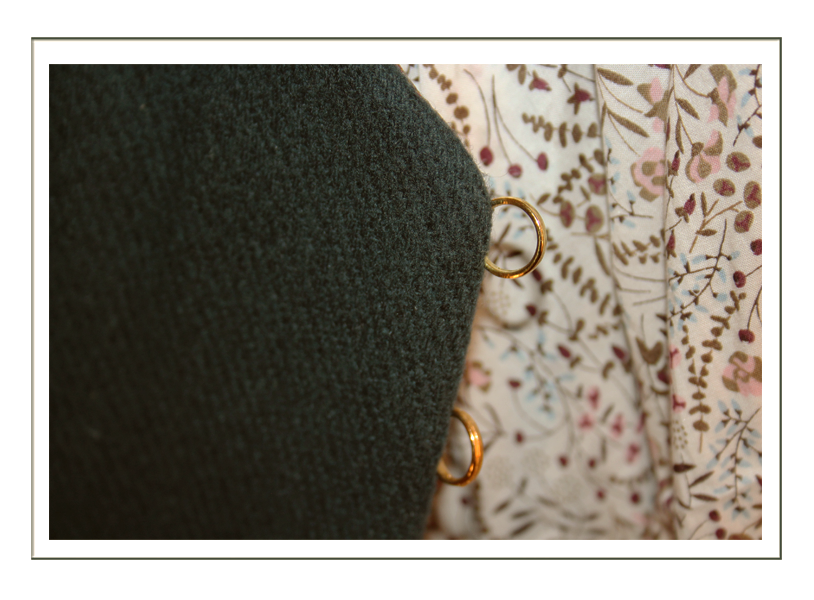
The bodice mock up turned out beautifully, and will be worn with its own reversible stomacher, or with those above. The stomacher is reversible; one side is hand crewel work (wool on linen), and the other matches the bodice. The very special inserted brass lacing rings are to be used with lacing – OR – pinned into the stays (to not disturb the stomacher designs).
This ensemble as it is, is already very flexible, but keep reading, as the wool bodice with more flexibility in use is coming yet!
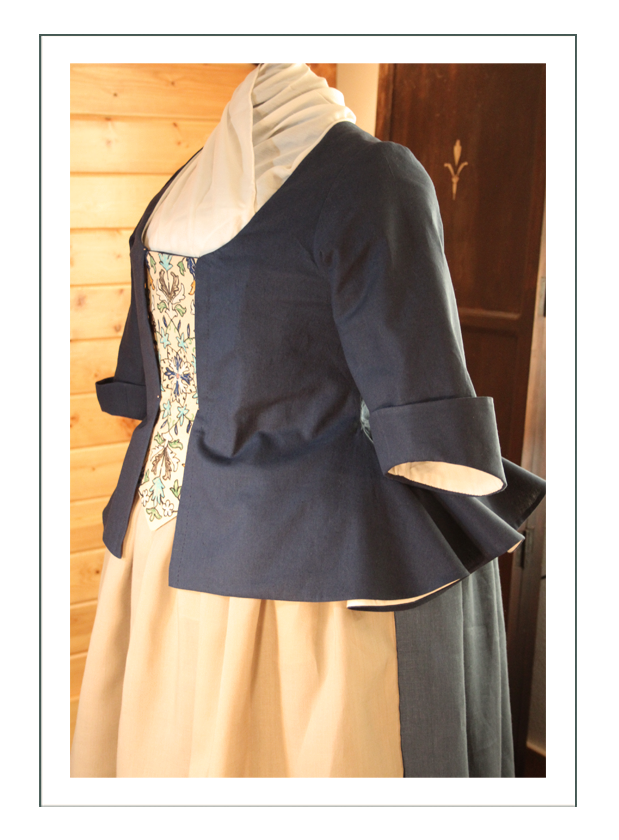
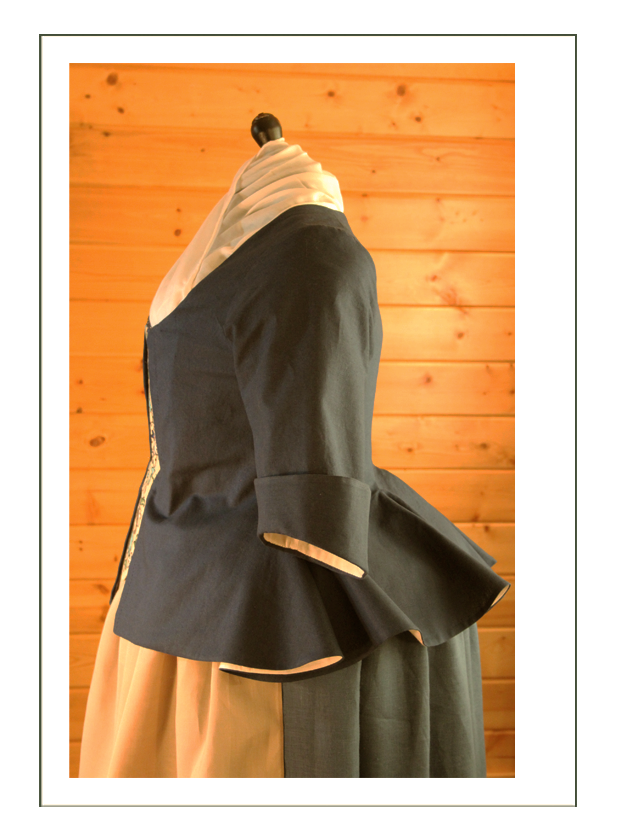
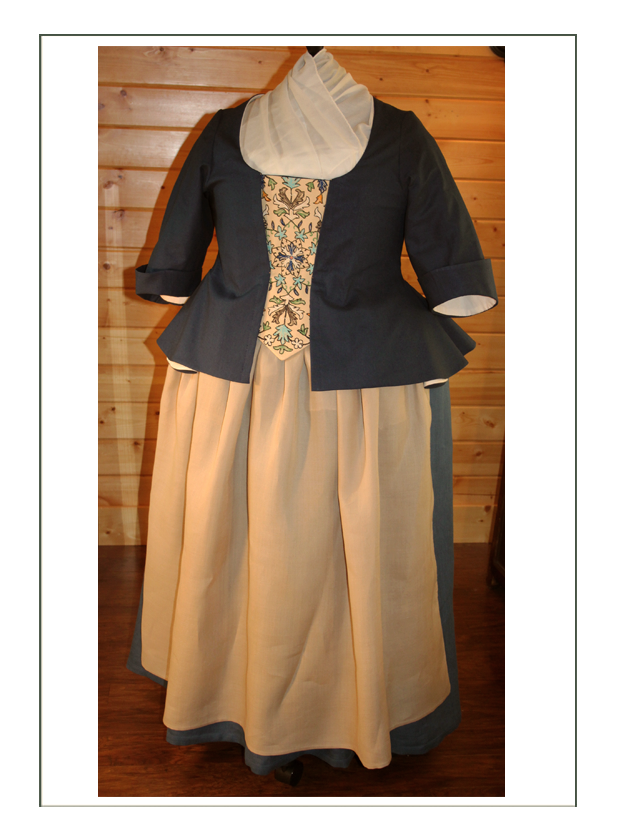
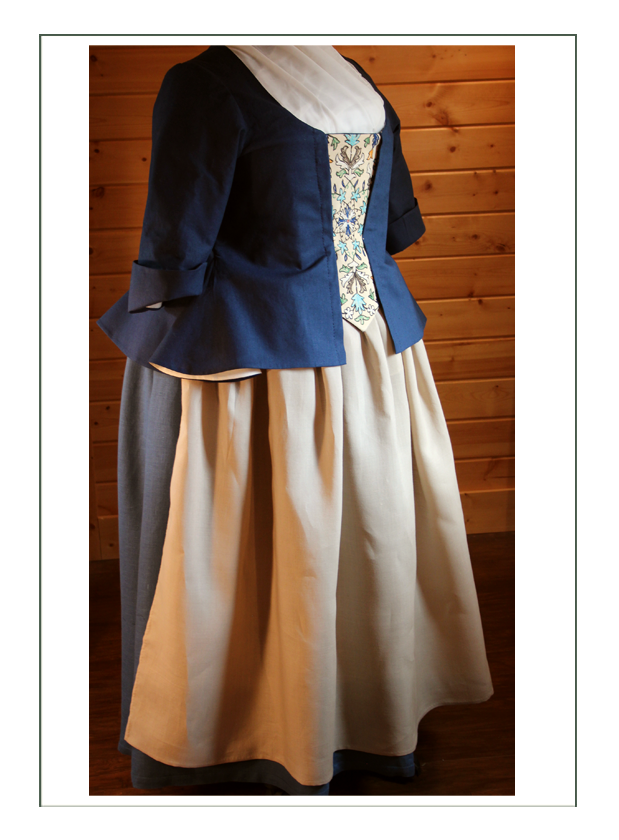
Cotton/Linen Bodice w/Self Fabric Stomacher

Cotton/Linen Bodice w/Crewel Stomacher
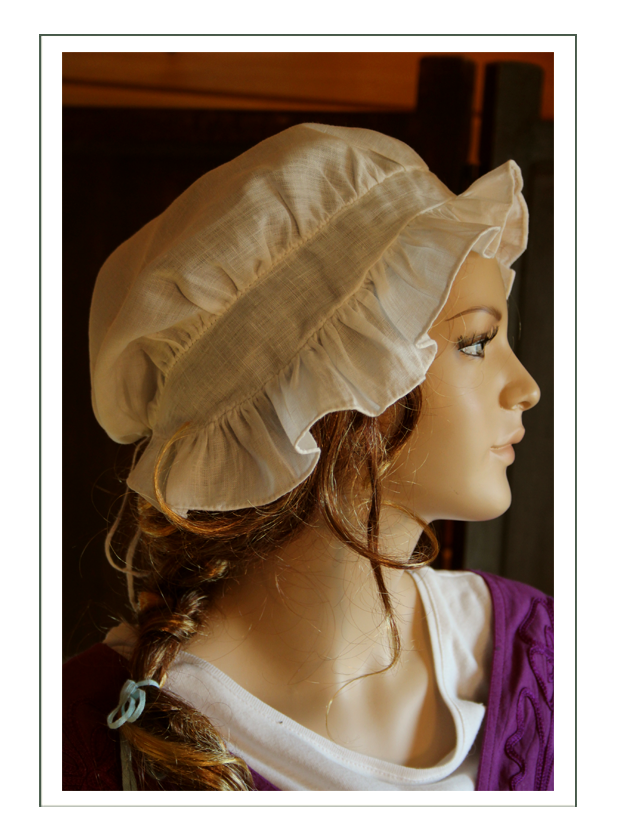
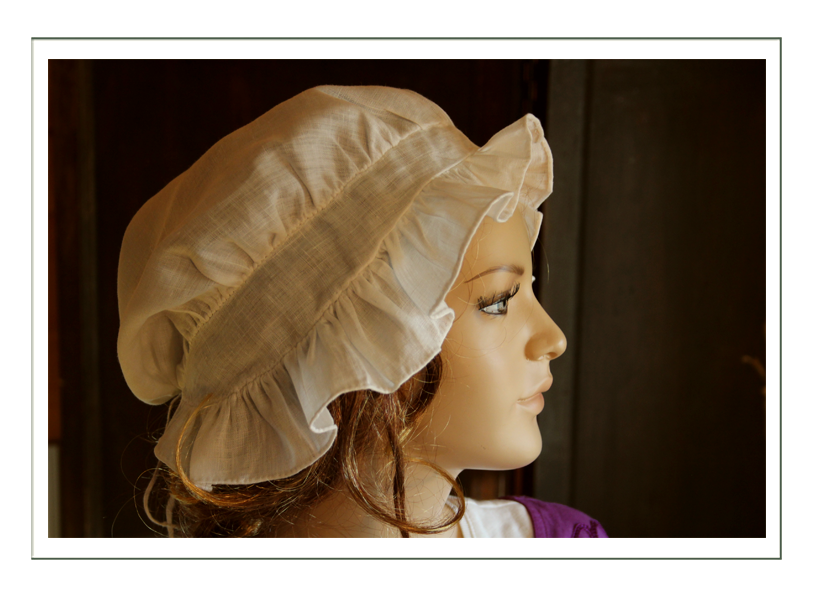
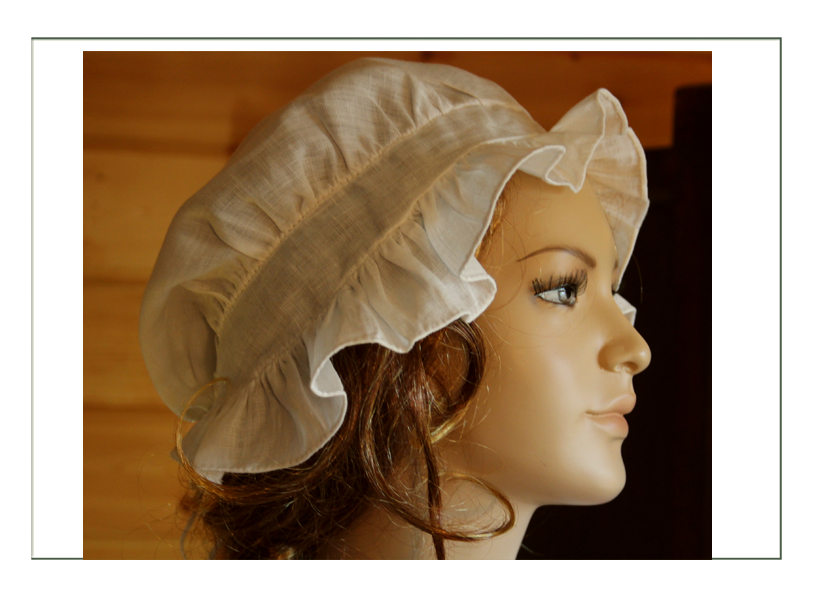
Mobcap
This is the very period correct (1740-1775) Round-eared smaller cap of the middle of the century design of sheer ivory linen and made entirely by hand, having a string adjustment back as historically correct. Susan will be able to wear it any way desired – high on the head like a teacup for the upper class, or full over all the hair as a working woman would wear it to keep her hair out of the way.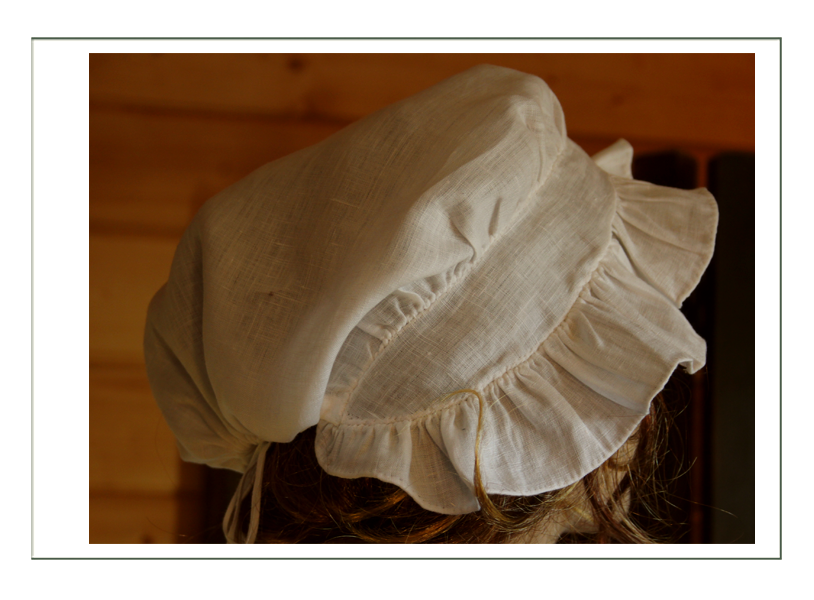
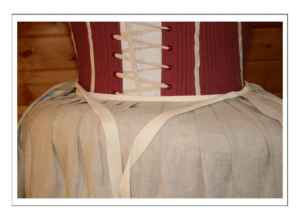
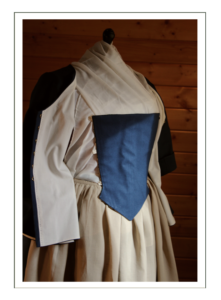
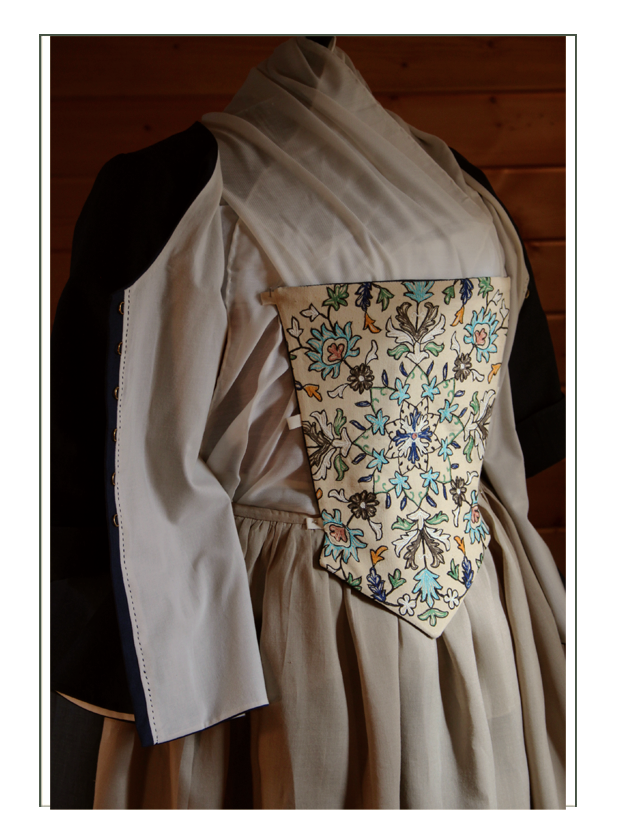
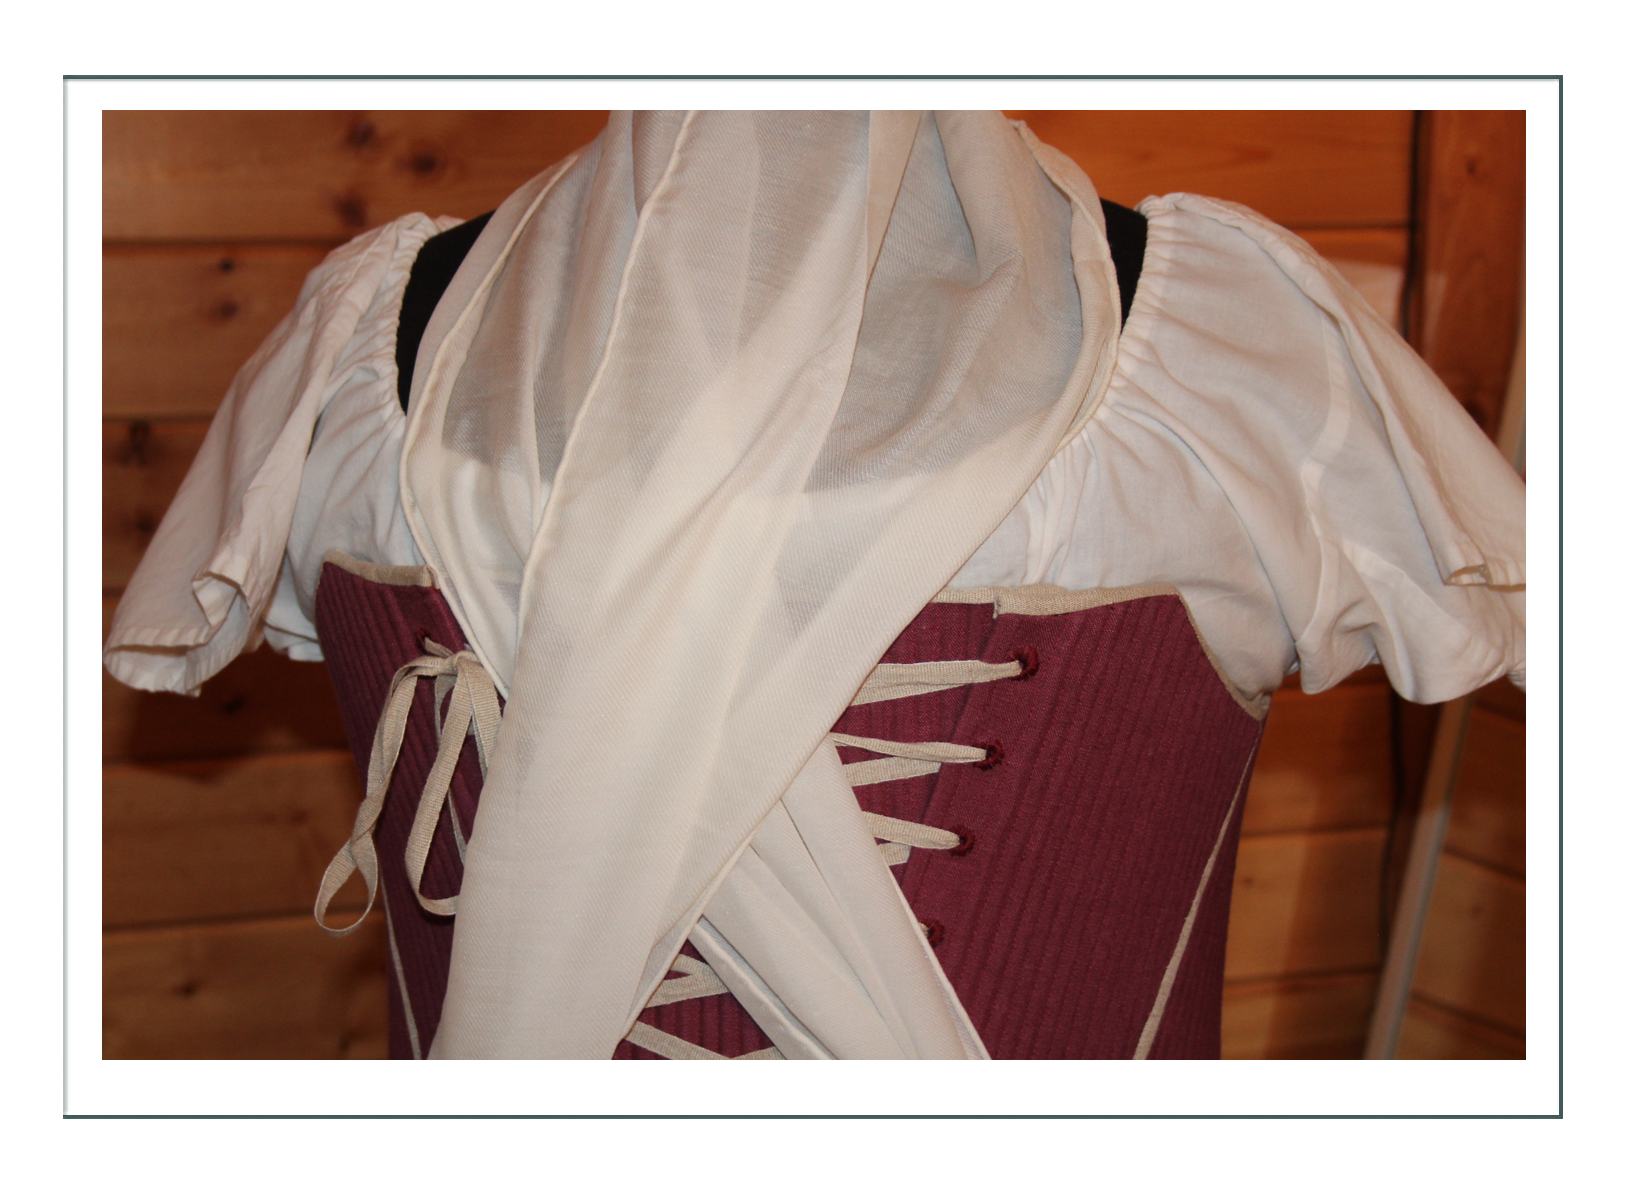
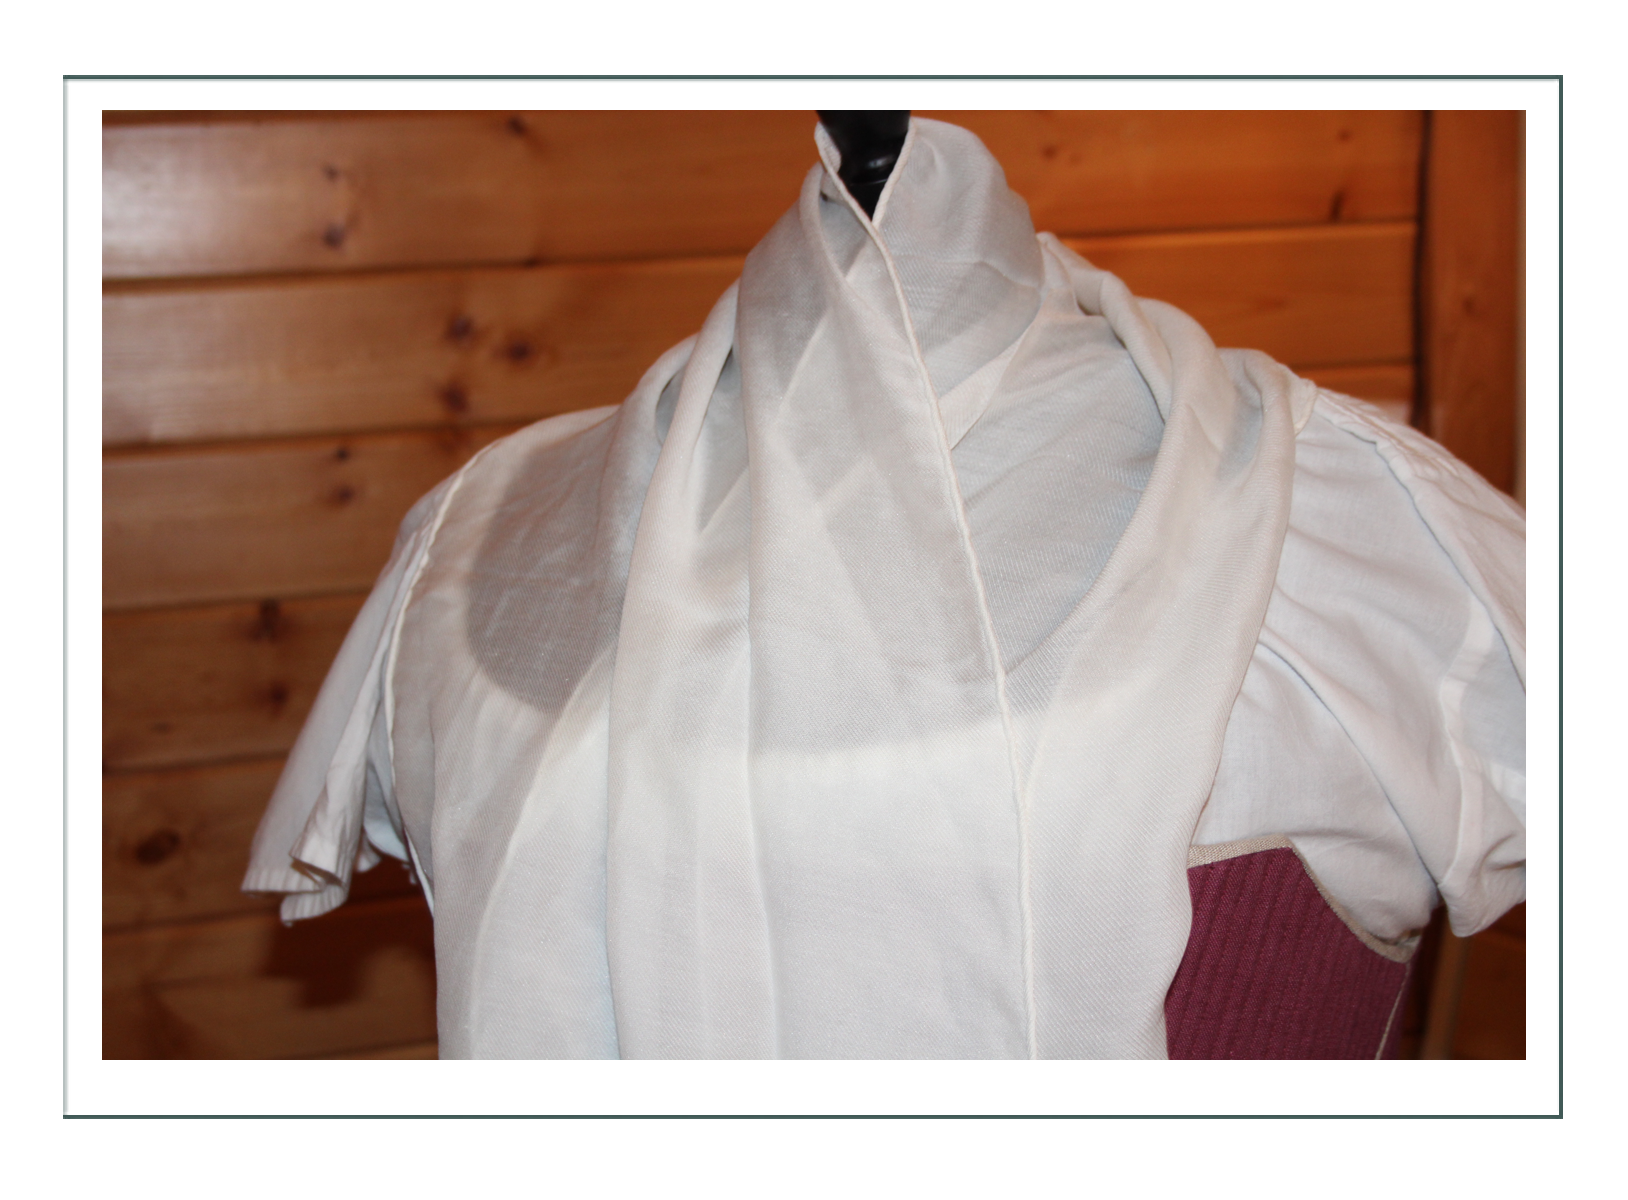
Fichu
Of 60%silk/40% wool this is very sheer and drapey; designed to tuck into her bodice for modesty. She might want to add one of a thicker linen for work later. This has hand tiny rolled hems and is a long rectangle that can tuck into the stays under the bodice or crossover and tuck (as shown).
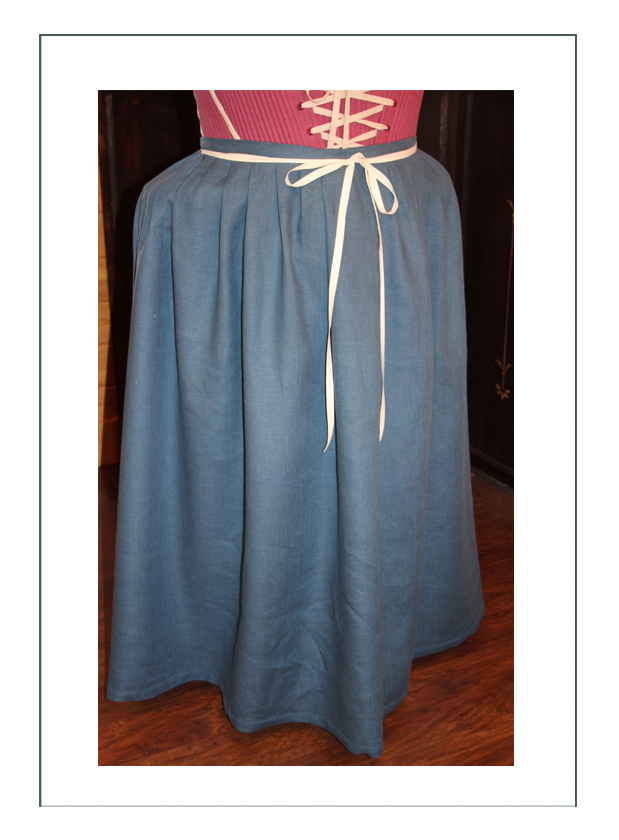
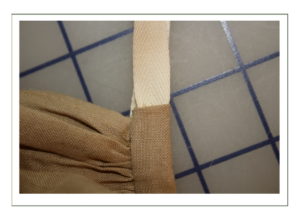
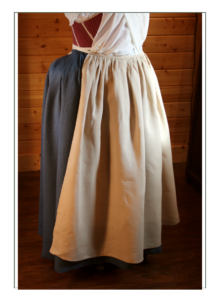
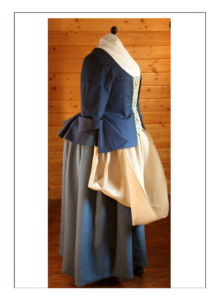
Apron
The apron was made of khaki colored lightweight (handkerchief) linen, hand stroked (pleated by laying flat the folded pieces), and has a line twill tape to wrap around the body once or twice. It is shown here with the mockup linen/cotton bodice and crewel stomacher, although it will match the wool bodice and tartan too.
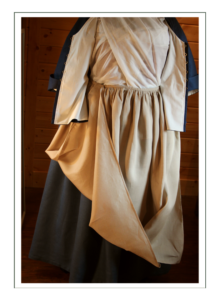
After long deliberation and samples, the homespun, which is great with the all blue ensemble, just won’t work for both tartan and blue ensemble. We will be making a very basic linen one out of either khaki or ivory color. This will be the last thing made with this Project 1
Project 2
Additional Garments to Coordinate with Basics
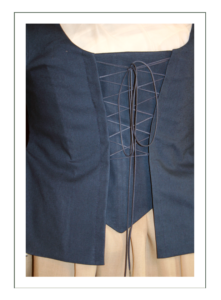
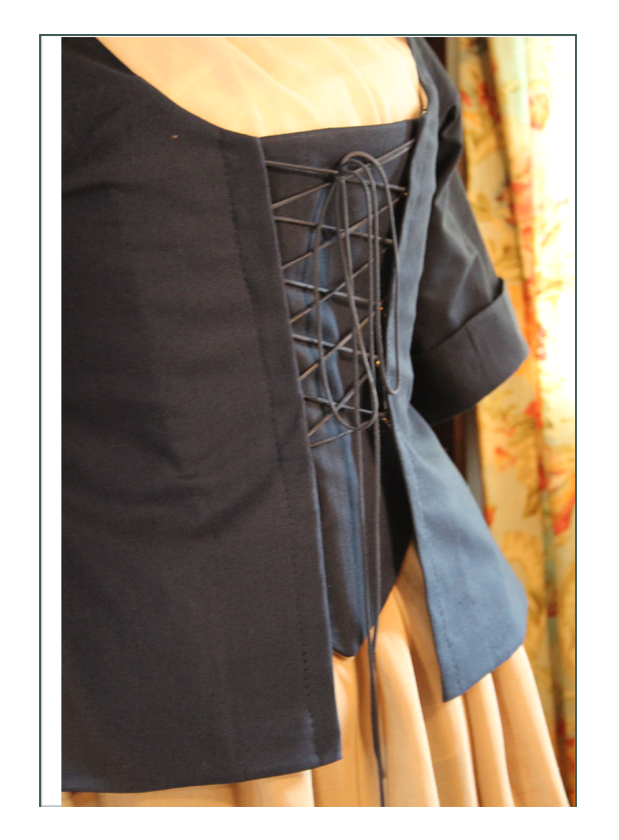
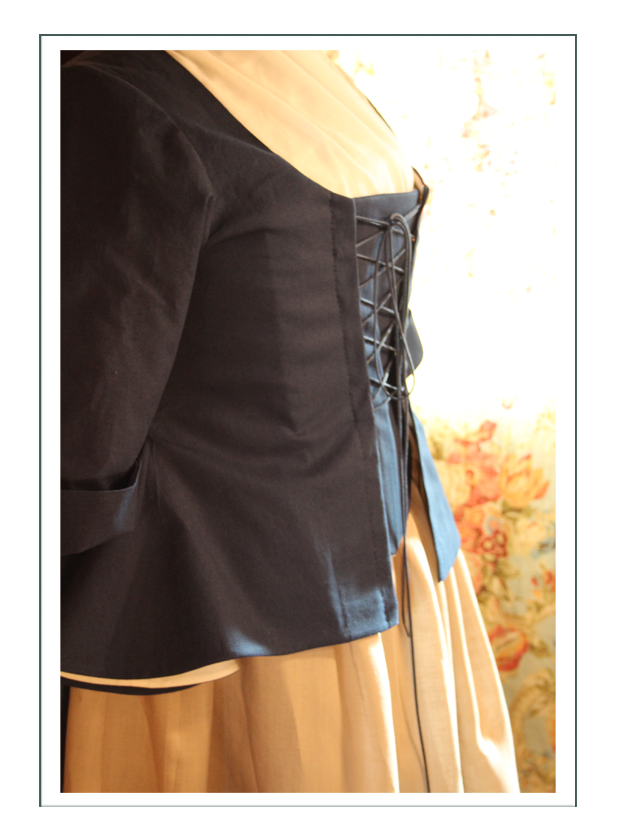
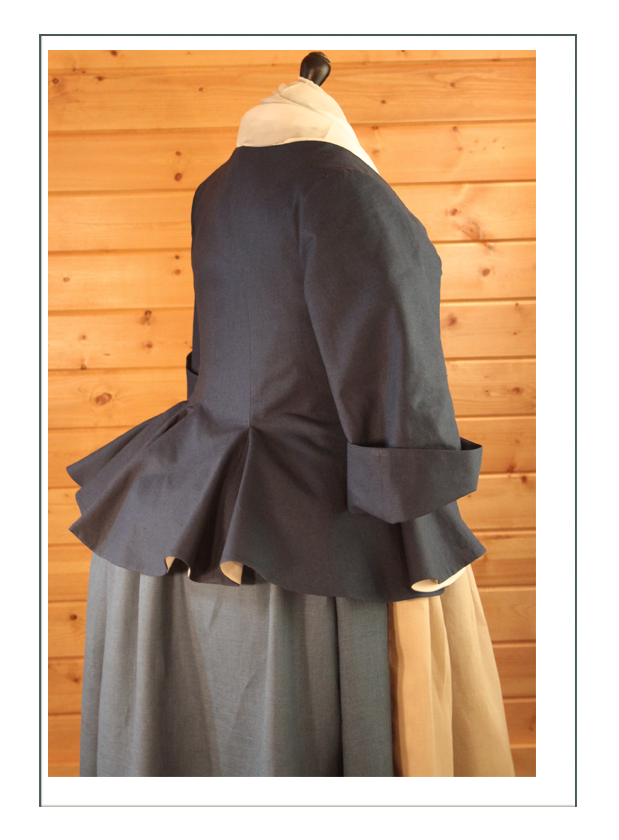
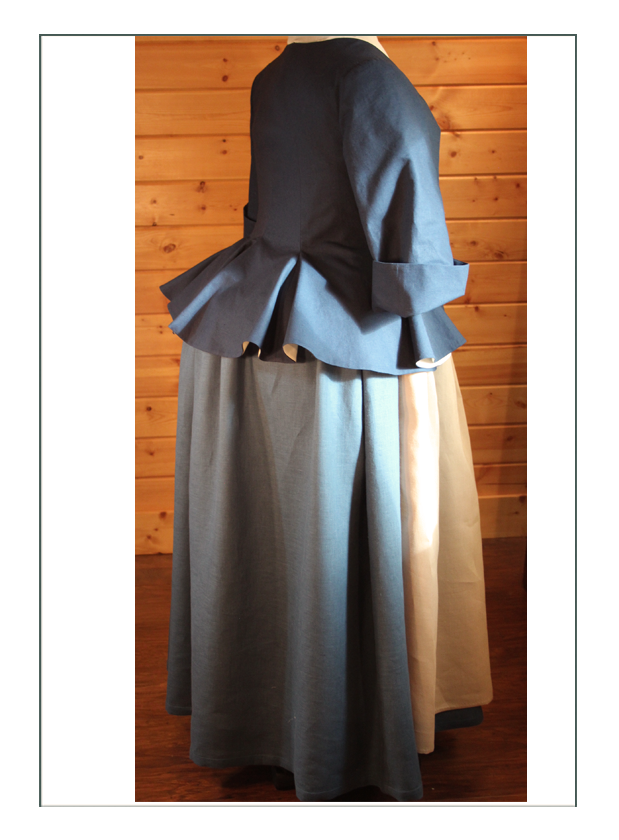
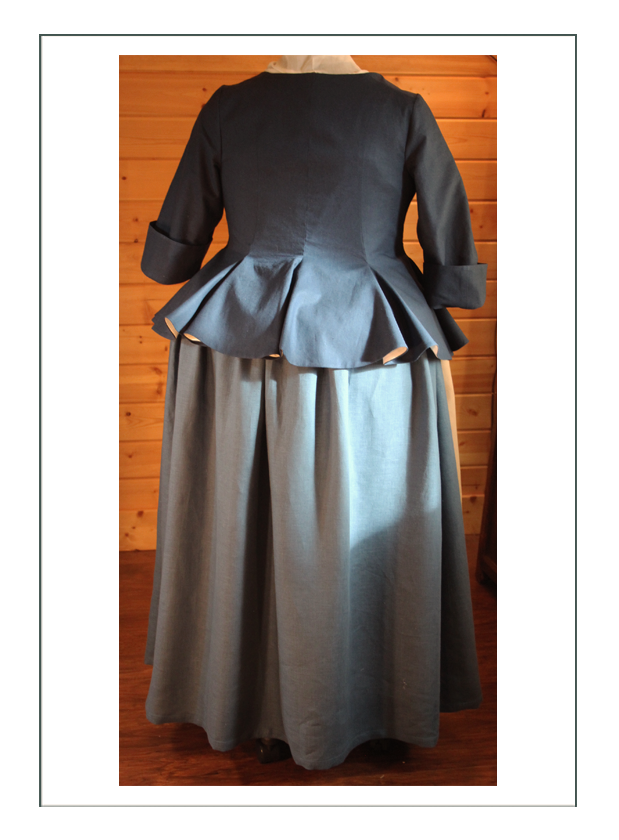
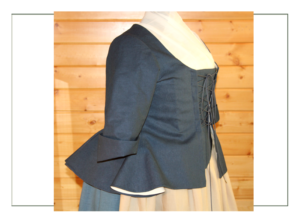
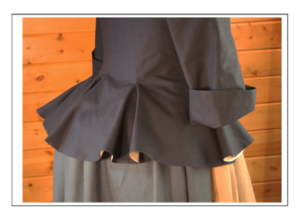
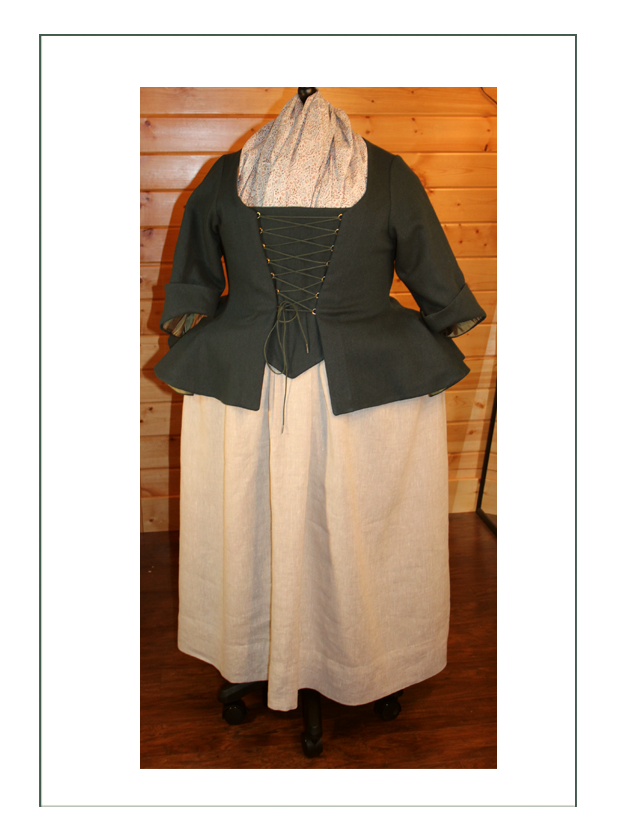
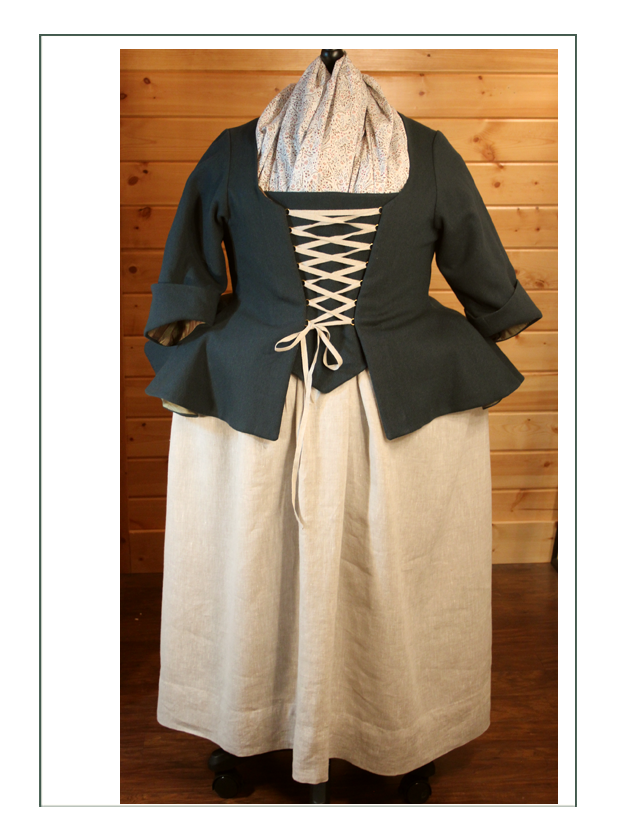
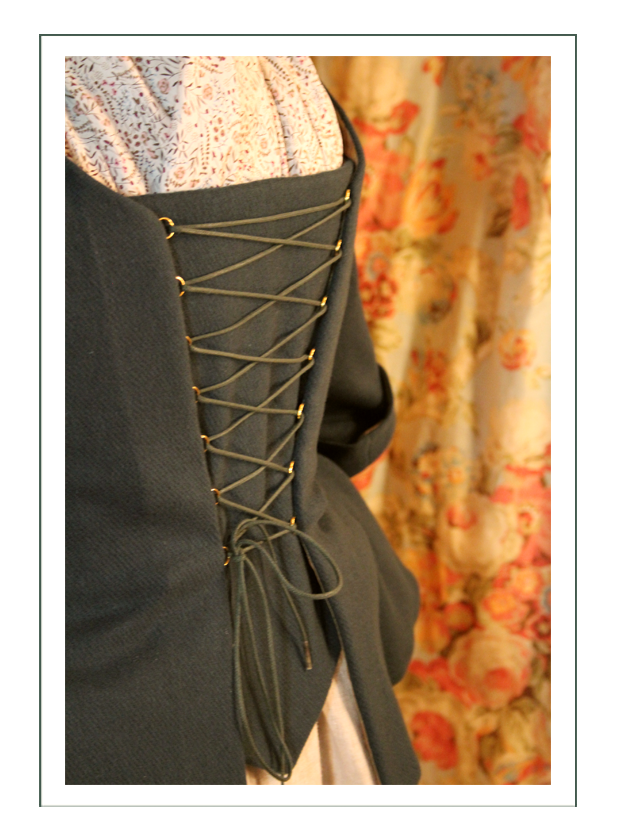
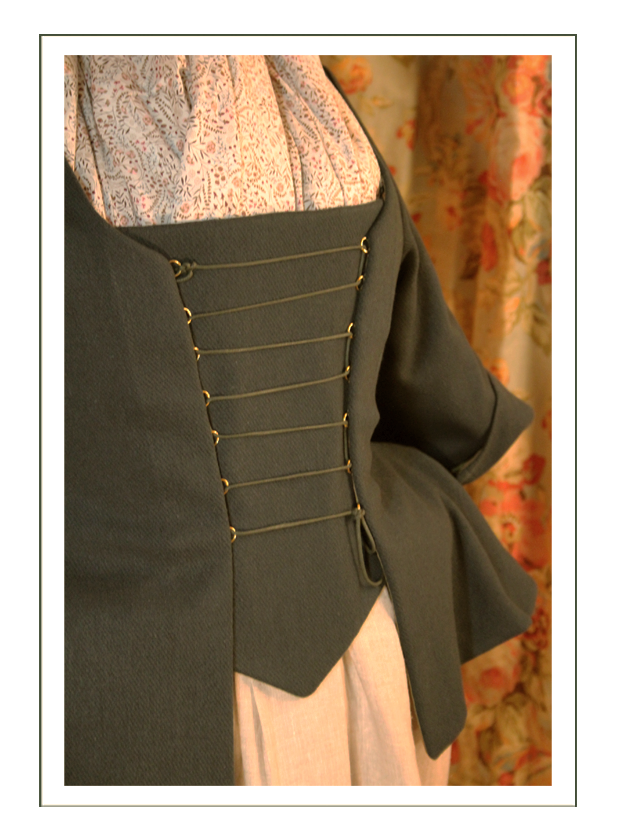
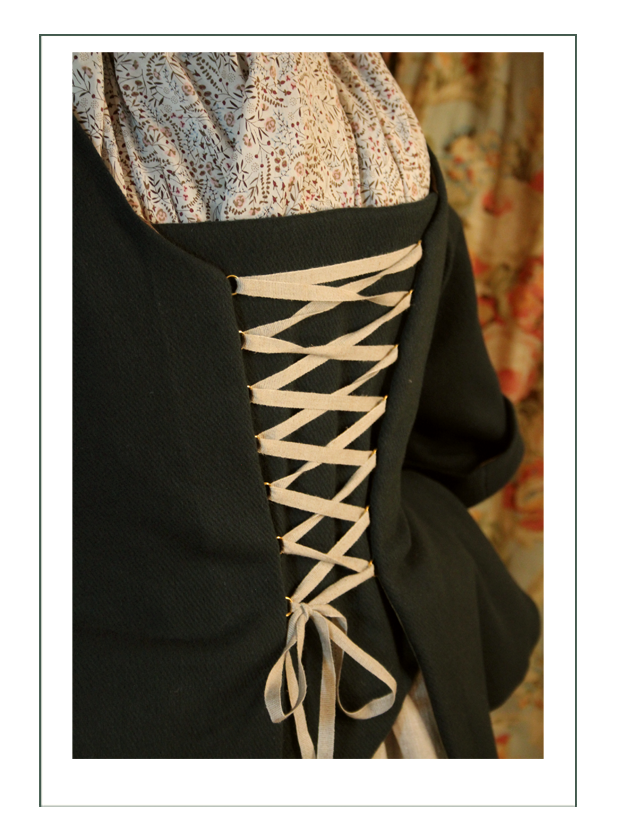
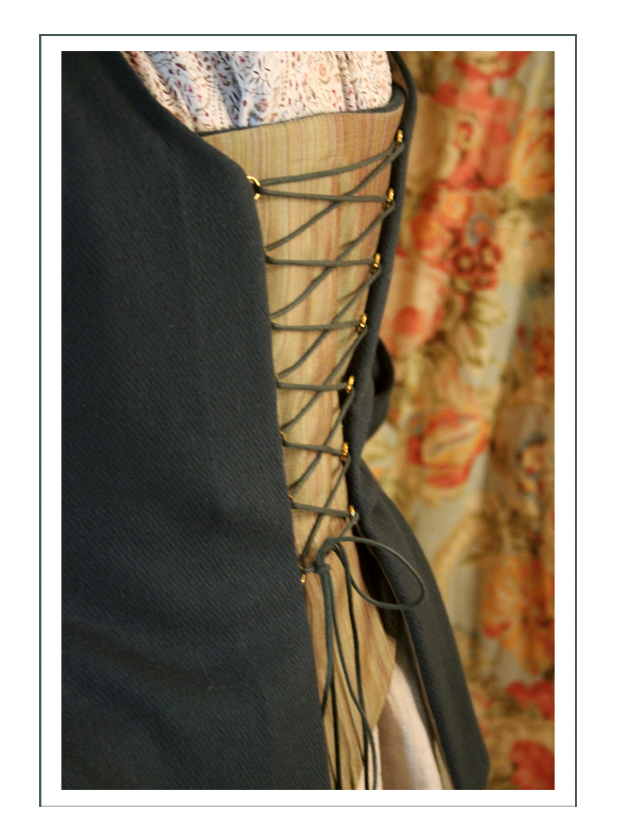
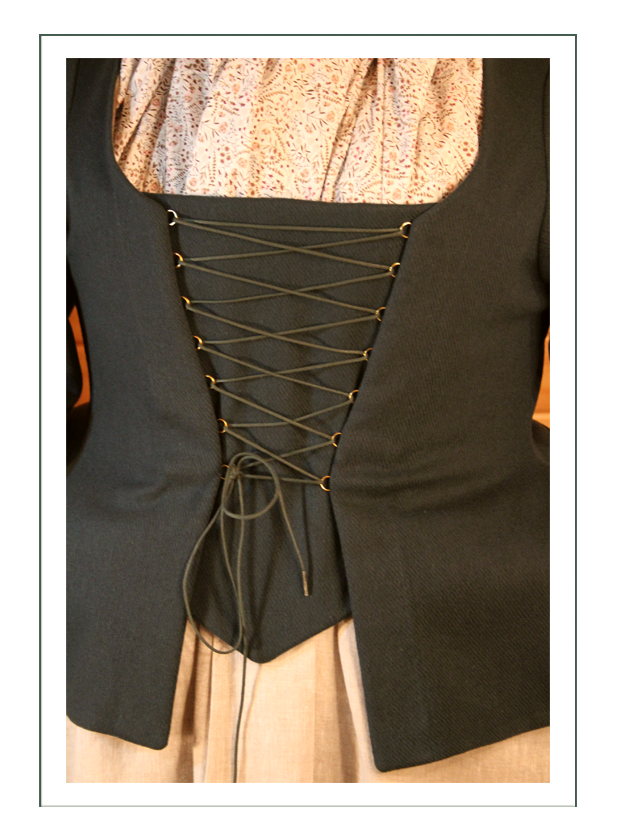
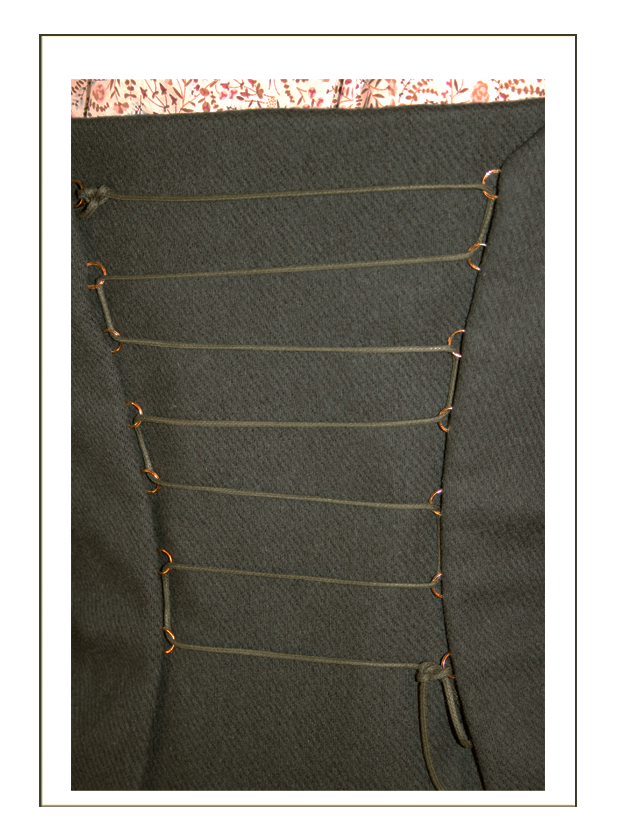
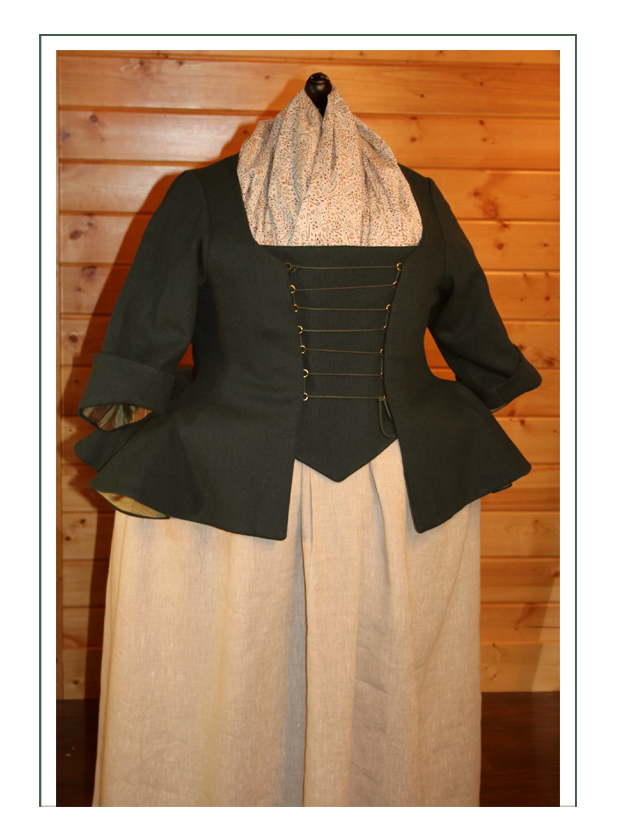
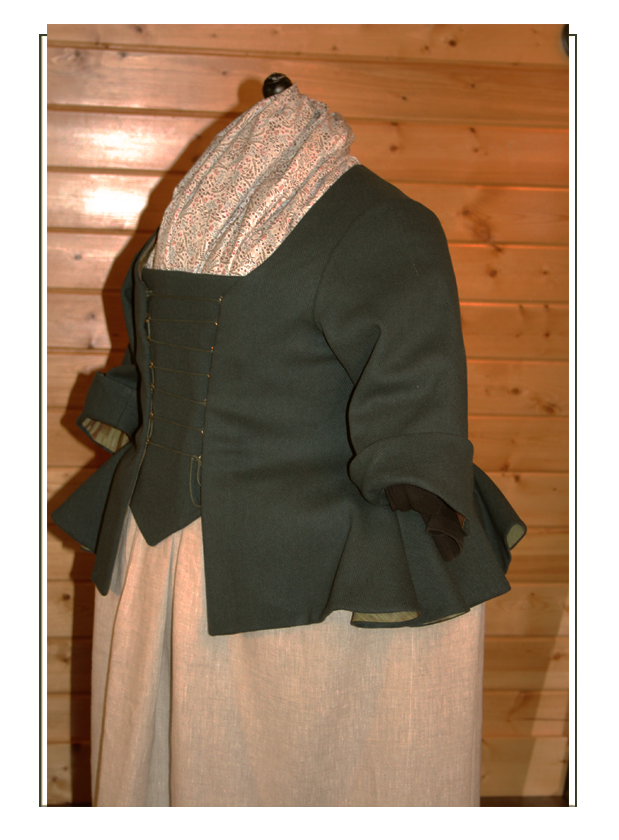
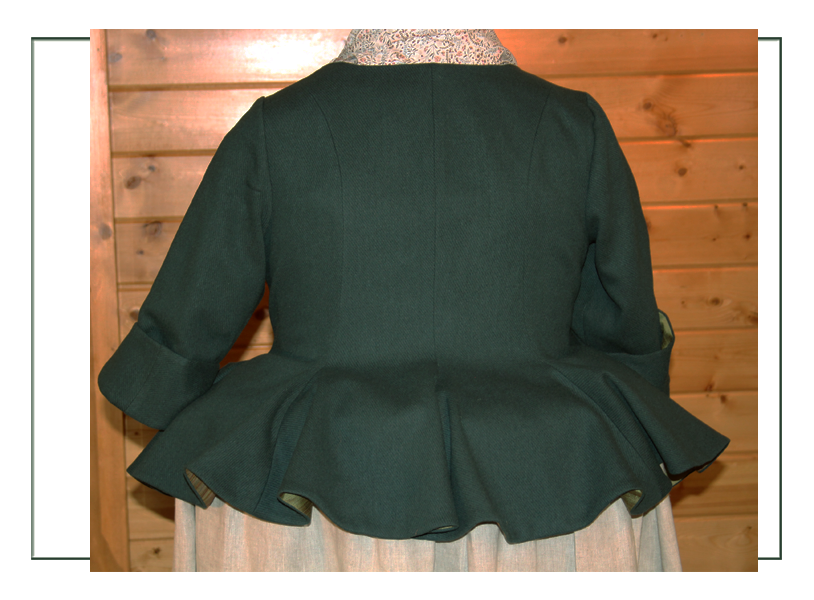
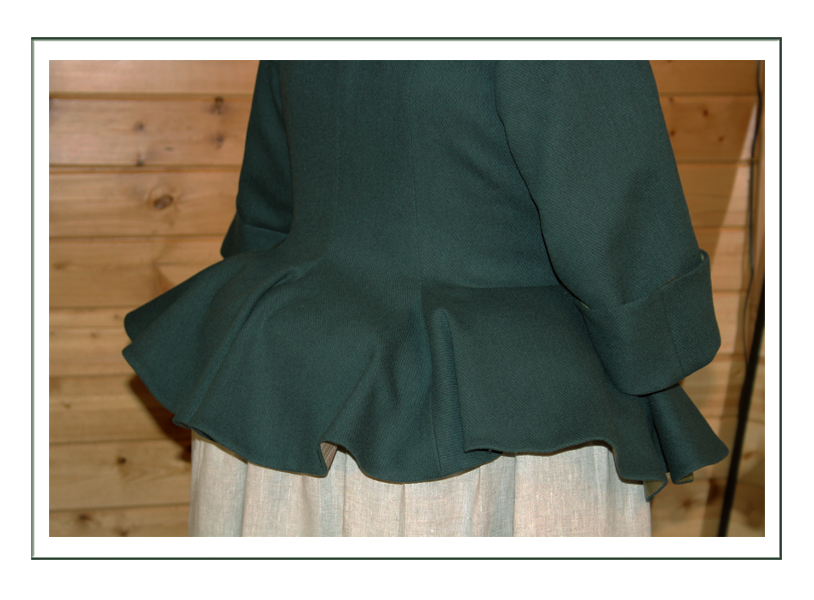
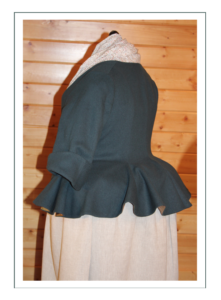
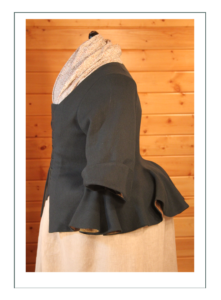
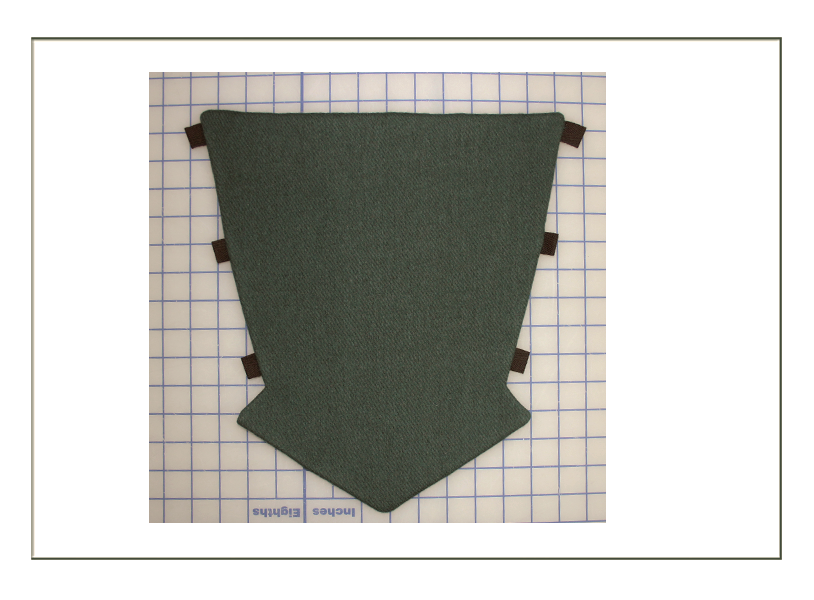
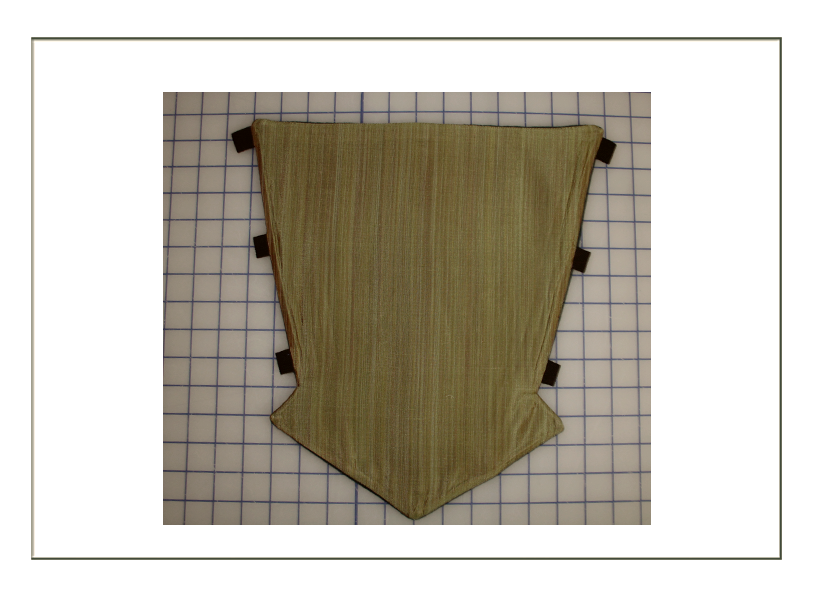
Wool Bodice
to match Tartan AND Blue Bonnet Petticoats
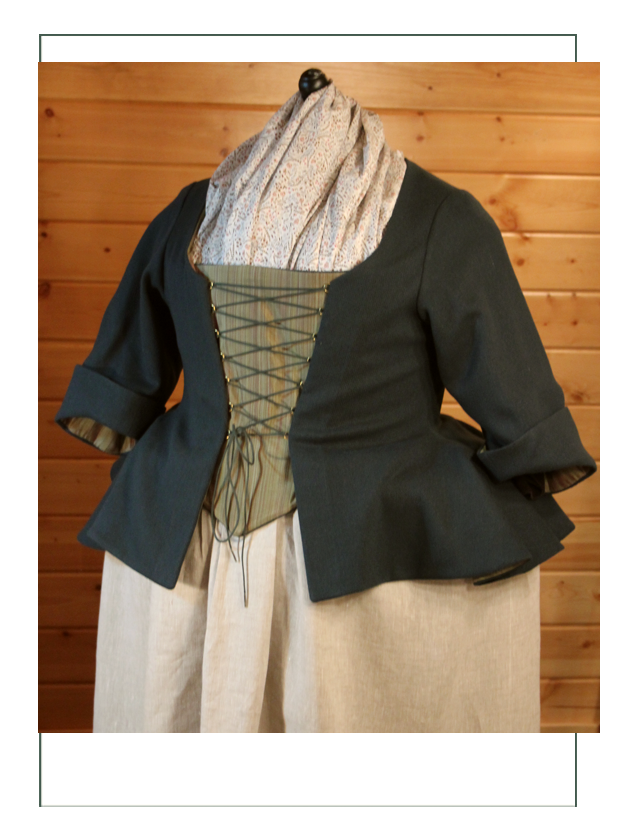
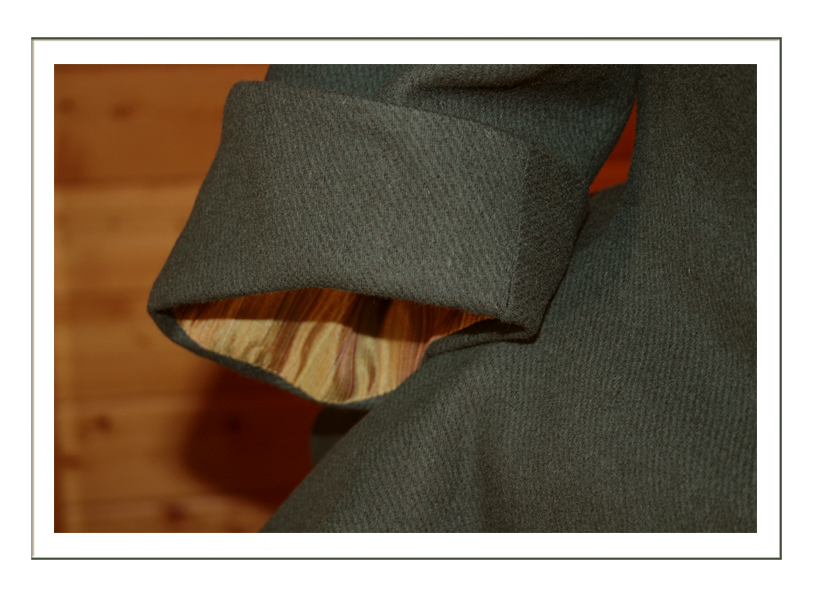
We had shipped the completed mock-up, 2 petticoats, stays, shift, apron, cap, stockings, and bum roll to Susan already, so we used our own for the photographs. These are shown on smaller stays and larger rump, so the fit is not as exact as it will be when she puts them on over her own. This is to be worn with the tartan. The lining is 100% silk taffeta, and the outer wool 100% melton which has a nap and a felted side and textured side.
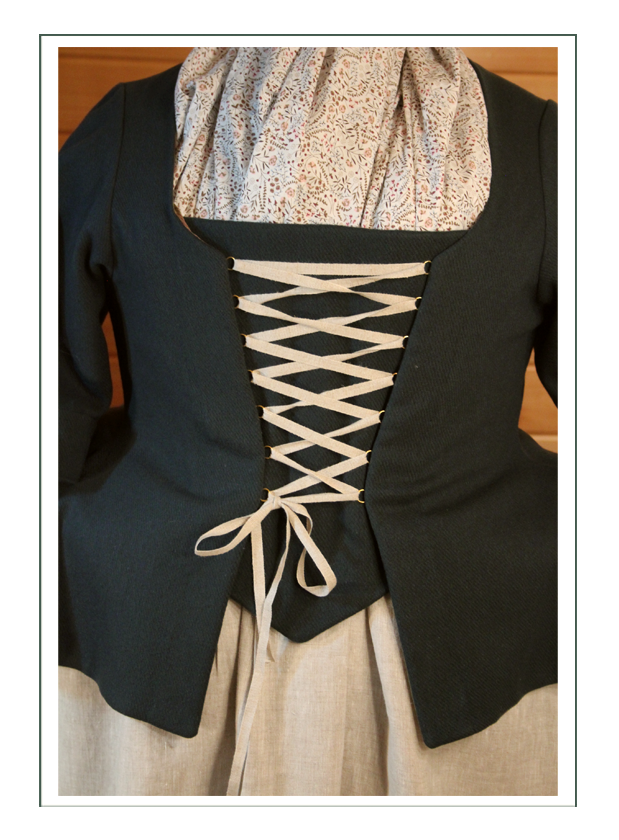
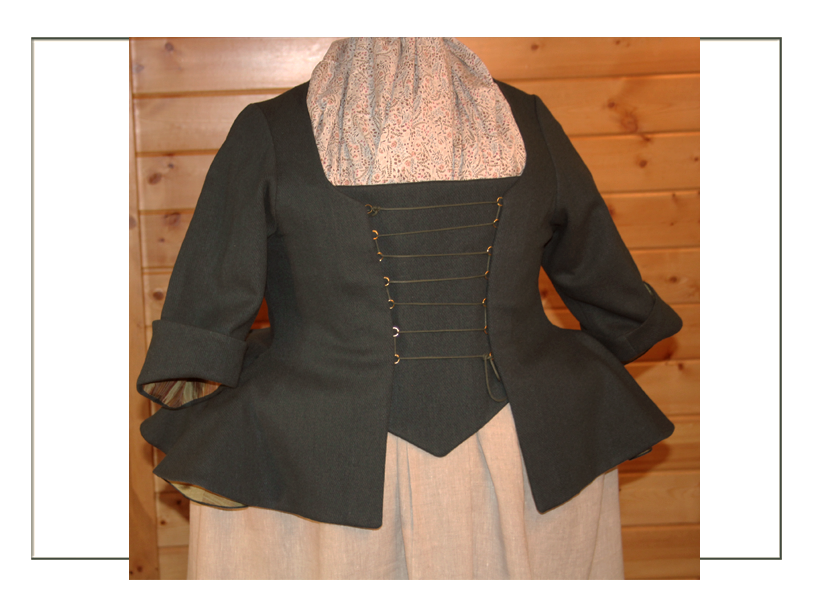
She has the option to use a linen lacing string or blue/green cord for lacing. It can be laced top to bottom or bottom to top, or in a spiral – or – to be absolutely historically correct, with the straight lacing shown here first. We personally liked the blue/green cord in a cross-lacing pattern best since the lacing rings are even across from each other and not designed for spiral.
Requested by Susan revisions in design between mockup and finished wool bodice were:
- Wider gap between lacing
- Reversable stomacher
- Otherwise same


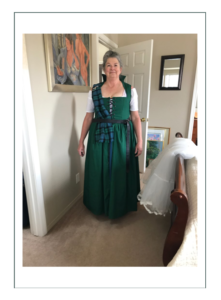
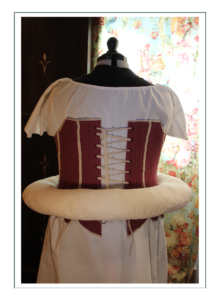
They fit! Susan is soooo cute in her mobcap, and she wears it around the house daily. She can put on her stays without any assistance, and very quickly, and likes to sleep in her shift – just like – Claire!
We had a minor snafu in the remake of the stays – they were about 1 1/2″ too high in the upper back. We had tried to make them high enough to not jab into the shoulder blades but they were just a smidge too much. It wouldn’t have mattered, except in the soft wool bodice, their sticking out just a bit (could be steamed) make the back of the bodice rise up too high.
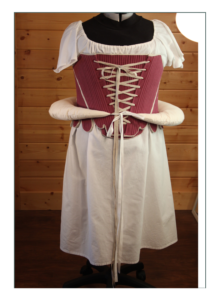
In a final fitting we played with oh so many mix and matches for the ensemble. Now she’s all dressed up and needs someplace to go. We suggested to her son in the Dakotas where they have Celtic games. When these photos come from her, you will see her tartan (made by others), and how really nicely that odd green taffeta lining on the wool bodice matches the tan/blue tartan! It’s the magic of squinting from a distance: the same thing that makes purple out of a pink and blue narrow striped fabric, and a railroad conductor’s denim blue and white look like pastel blue as the train goes by.
Let’s see Susan! (hubby’s knees in his kilt optional)…
Click here to go to Susan’s Design Development Page
Click here to go to the top of this Page