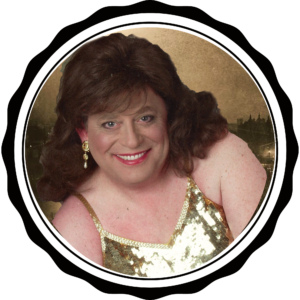
 1887 London Seaside, Melissa Morton

Experienced & Infamous
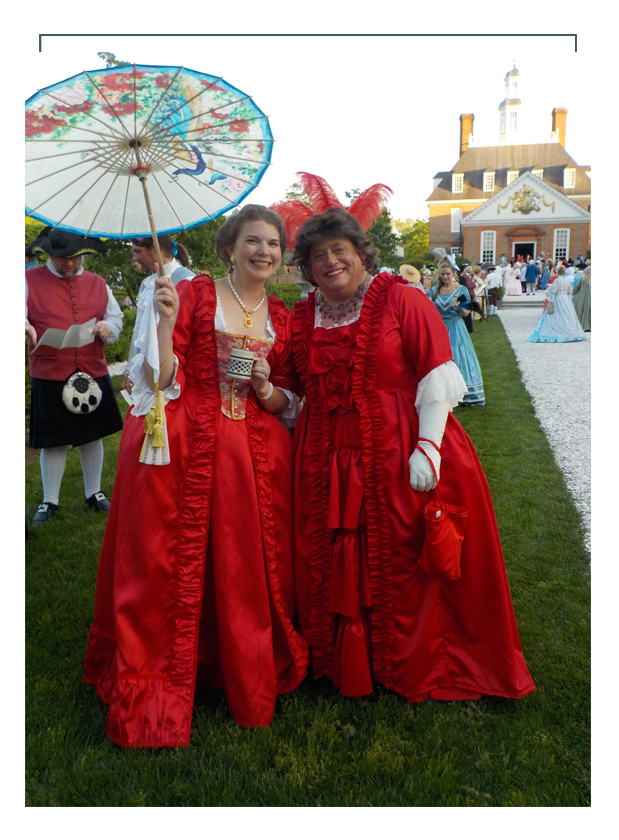
Melissa is a renowned researcher, educator, reenactor and interpreter of many venues, eras, and locations. She has participated just for fun in 1860’s balls, conferences, and gatherings, and has a special interest and passion in the study and interpretation of Sherlock Holmes and other literary figures. Her whimsical and accurate costumes worn at events similar to the 221bCon (refers to Holme’s address in London, see the section on Sherlock Holmes at the end of Melissa’s Historical Context Page), and others, have received rave reviews for originality and accuracy.
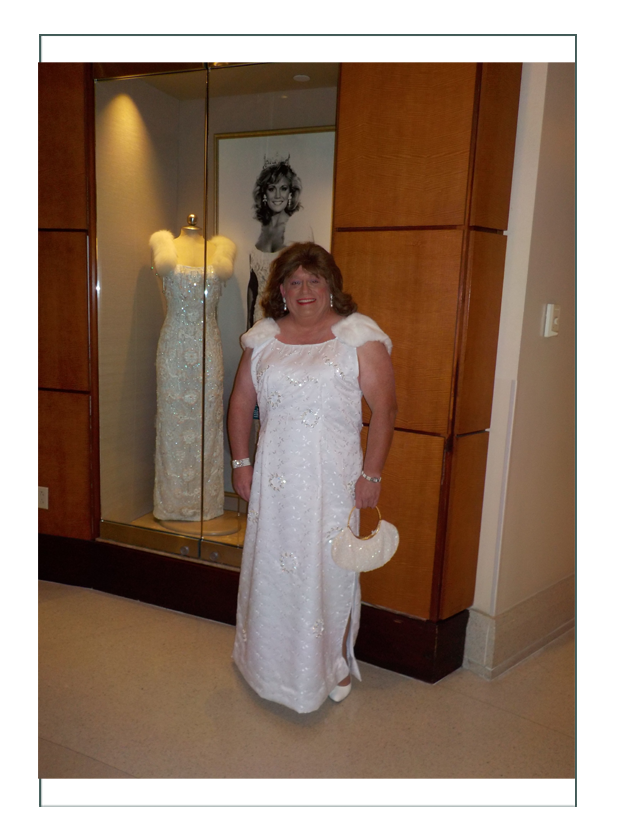
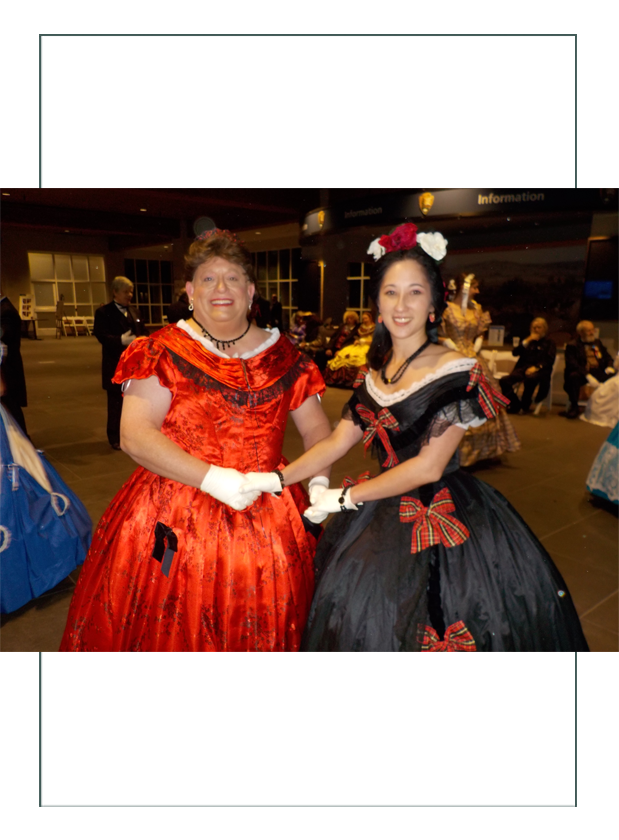
Having a passion and being a big supporter off the Miss America pageants through the years, Melissa has attended every one possible, and one year wore her reproduction of one of the gowns worn by Miss America to the live pageant! At another event, she teamed up with the “Couture Courtesan”, Samantha Bullat, who is a seamstress for the Jamestown-Yorktown Foundation to wear a “color reversal” of each other in Civil War interpretations. At yet another event, she met with a friend wearing matching 18th century robe a l’anglaise ensembles.
Melissa is known for her custom and unique reticules (handbags, see brief history of reticules on the bottom of Melissa’s Fashion Page). Every handbag or pocket project, she says, must have something very special and very specific to the scheme, place, time, and era. We are honored to be asked to build an 1880’s ensemble for Melissa’s upcoming events, including a special reticule.
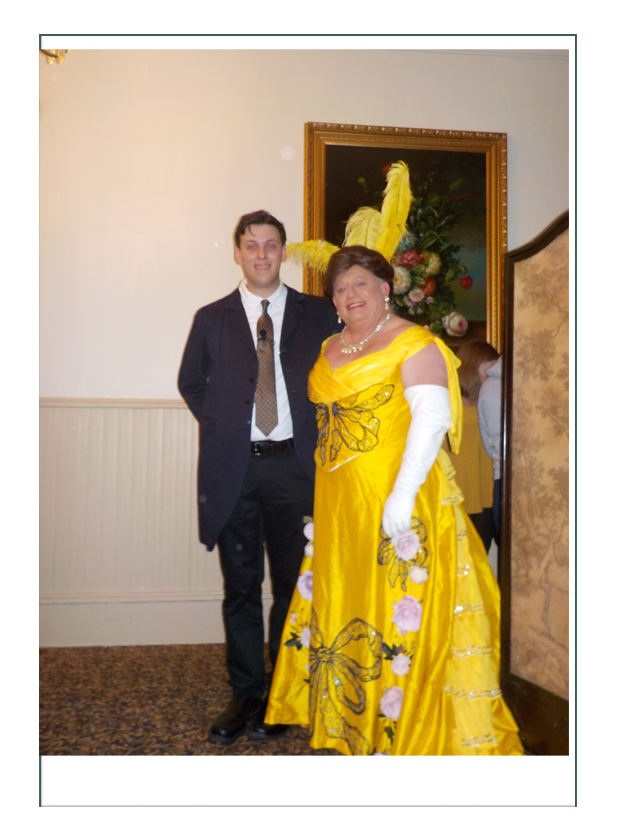
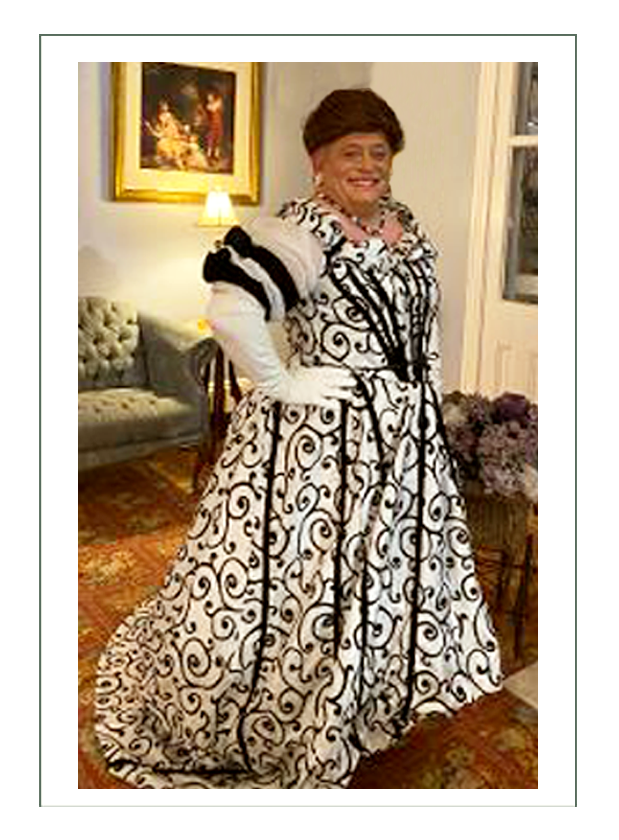
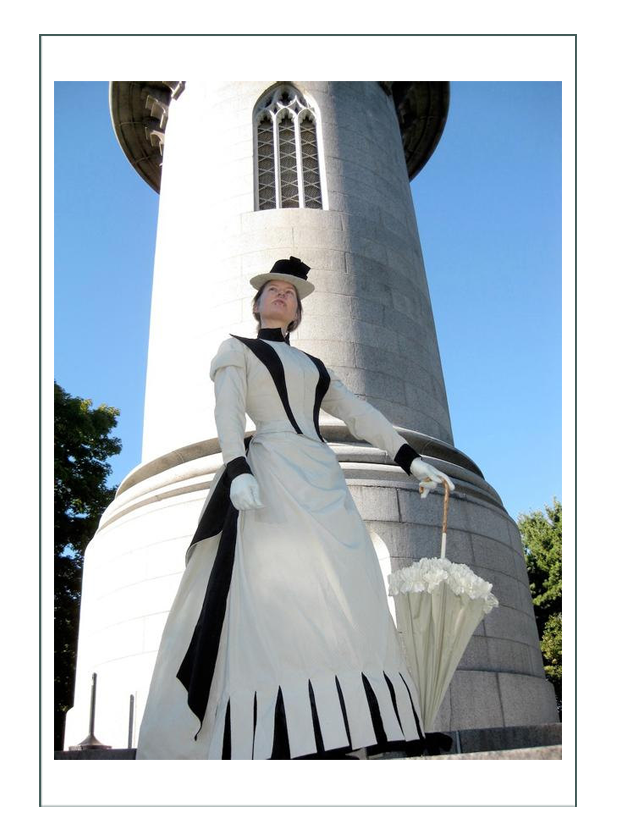
Just in! Melissa in her reproduction House of Worth gown (below):
“Reverse” & Original Characters
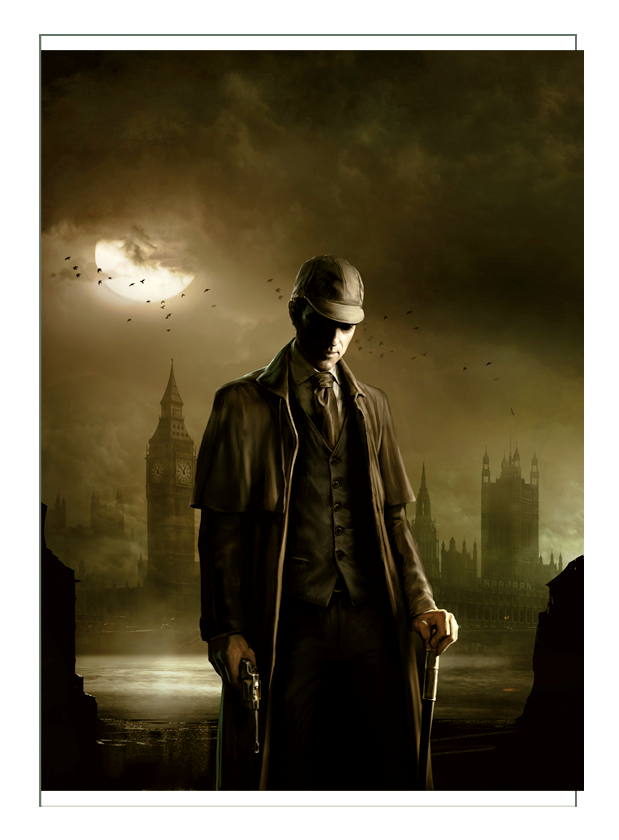
While Melissa is very well respected and appears to be very beloved by her fellow re-enactors for fun and historic events and at historic sites, what she is most known for is her historical research and presentation of historic topics. She has a passion for learning about real and fictional characters, particularly in historical literature. She focuses on those with unique personalities, traits, characteristics, and gender identities either stated or implied. In this, like a favorite character, Sherlock Holmes, she is really an historical “investigator”, or investigative reporter, and like us, she searches for the “spaces in between”, or the real lives and meanings of real people that you can’t get in books or documents.
Melissa writes of this research into characters and depiction of such,
“When I venture out into the world of historical reenacting, I do not portray a particular person, whether a character from one of the Sherlock Holmes stories, or a real person from the Civil War era. However, I do sometimes say at Civil War reenactments that I am sort of portraying the “reverse” version of one of the persons I research.”
It appears that her depictions kind of show the “inside out” of a person. When you look up the terms “reverse character”, you find a definition of “reverse text” which basically says you write something inverted so when you hold it up to a mirror, it appears to be written correctly. “Reverse” in that sense, and applying to character depiction, would mean portraying the mirror image as the outwardly, and relying on the observor to interpret the rest. How very Holmesian!

There are also Anime (Japanese famous artistic “cartoon” and animation) shows called “reverse Anime” which is a new subgenre telling stories of gentle and peaceful women in a tough world. It seems to be the concept of “mirroring” a character; somewhat like turning the inside to the outside in a depiction, or looking for the motivations and real person inside that defies his or her outward appearances.
Since Melissa teaches this, we will not pursue it further, but to build this ensemble, it is good to understand that the purpose for this project is to represent the inner person who exists within an era. For that reason, the historical context, and particularly the gender roles at the time are of more importance to this project than in some of our other projects.
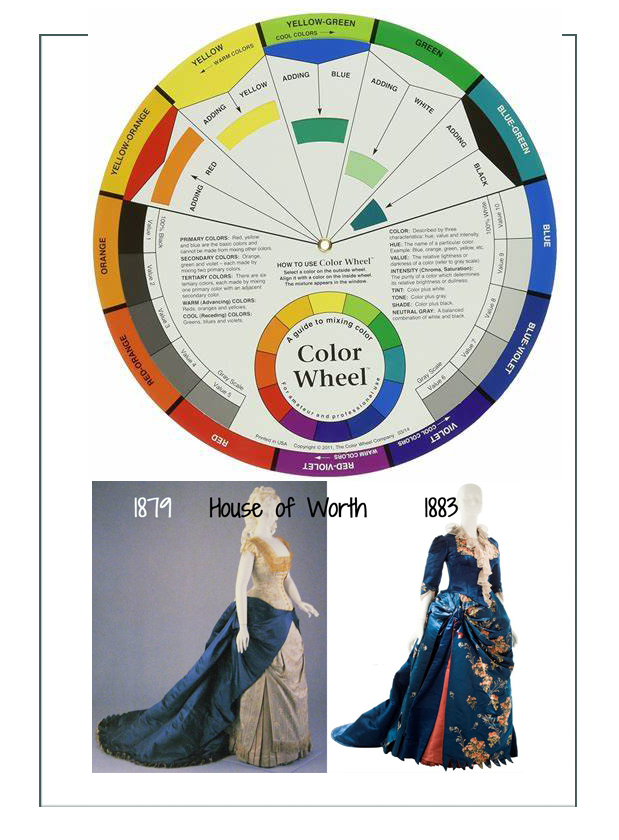
Extremes like black and white – opposite and most extreme contrasts in color – might exemplify the concept, with contrasting colors like purple and orange also being effective. What is very interesting about that, is that the styles of the late Victorian era used complementary colors and shades of colors, and this is to be a Late Victorian ensemble.
Once again it brings us to the conclusion:

(men, and their lives).

Magnum Opus
This ensemble will be worn by Melissa while giving presentations on historical and literary characters of the late 19th century and specifically Holmes and other “reverse” characters. Melissa may also wear it to special activites and organizations such as te First Event Conference in Boston when it reopens, 221bCon, and others if possible. The best thing about having a new and historically accurate ensemble with multiple layers and undergarments that suit other depictions, is that now you can look for events and reasons to wear it!
The request began as, “can you build exactly this?” “this”, being an ensemble designed and built by Professor Bats of DeviantArt. Research began, which you can see on Melissa’s Fashion History and Design Development pages, first to understand the Professor’s purposes and construction (if there was one) of the costume in order to propose it, and then to figure out the date of depiction (if there was one of those too).
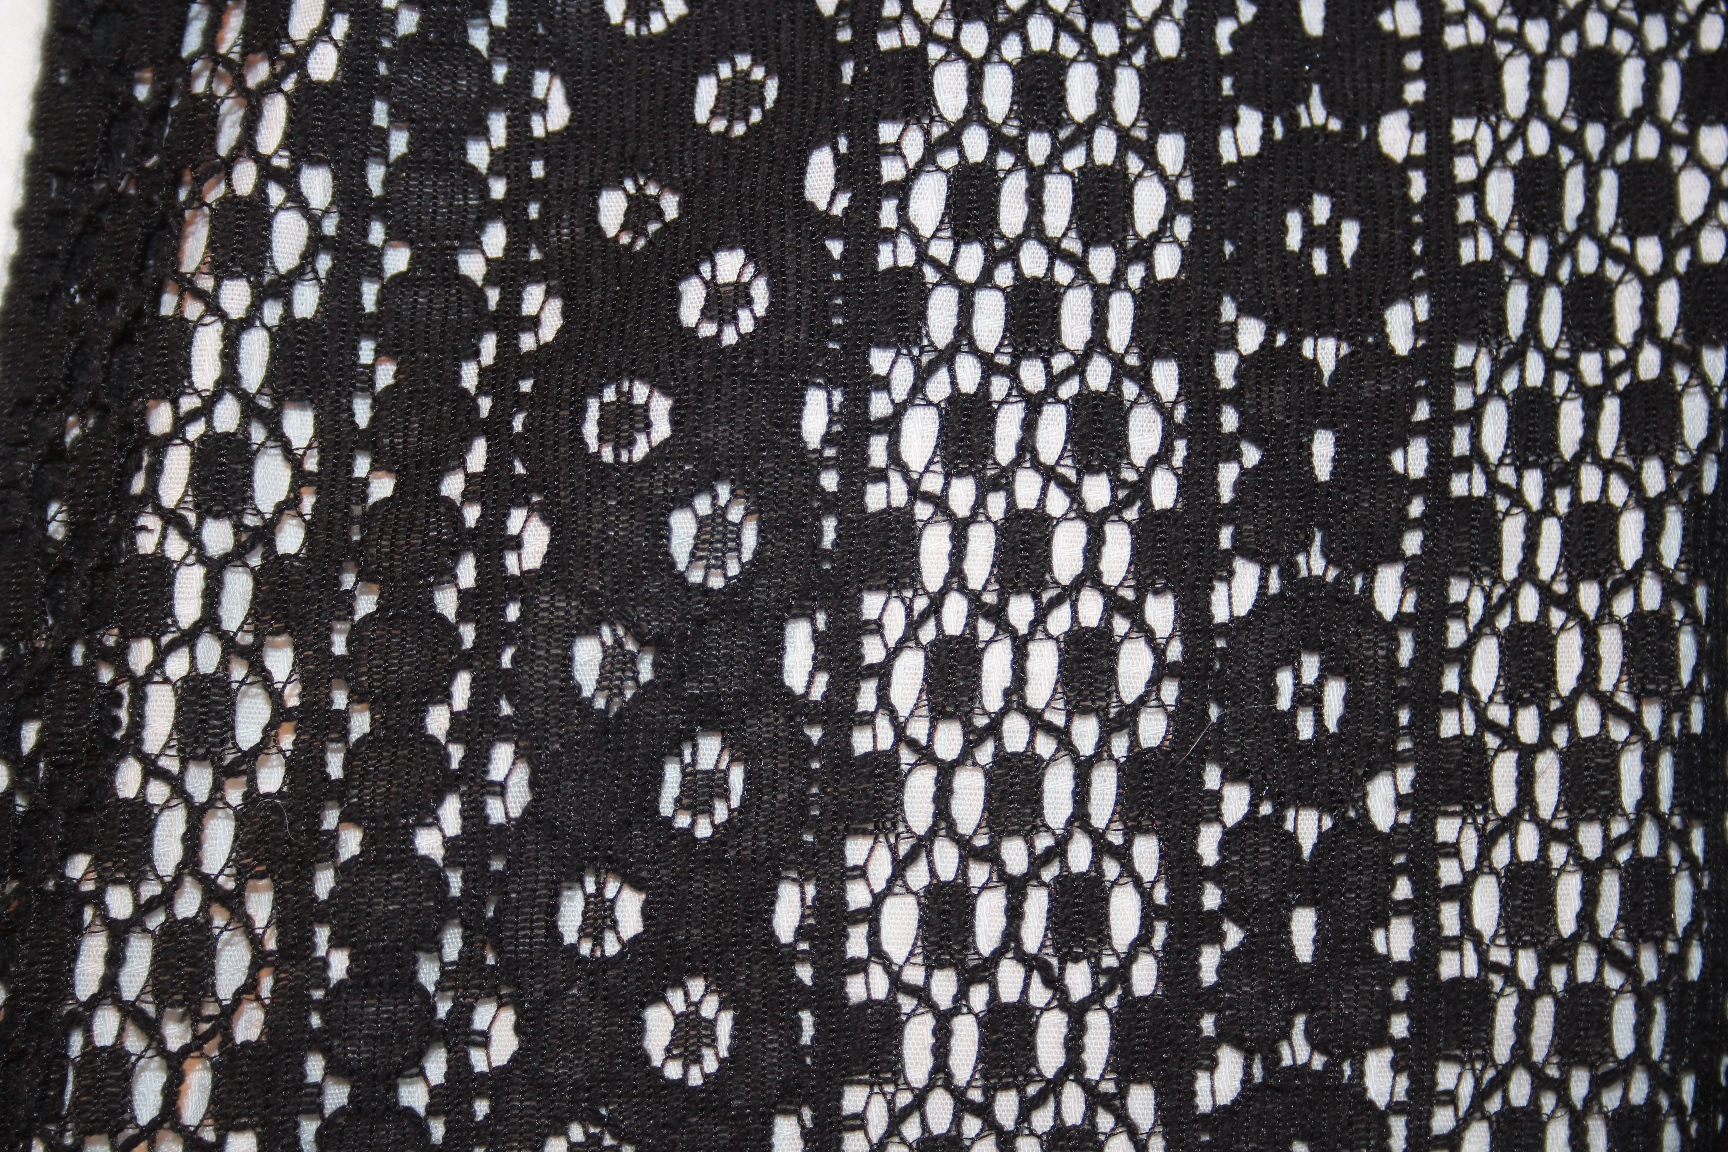
In reality, this “Lady in White” ensemble is mint green with black trim (remember the blue or gold dress dilemma on social media a few years ago?). It is a dobby cotton with moire trim. The ruffle is knife pleated under a crenulated hem, and the bonnet is handmade from buckram. Easy to say just “go with it”; a bit harder to replicate, as tthe Good Professor redesigned the whole thing to suit her purposes.
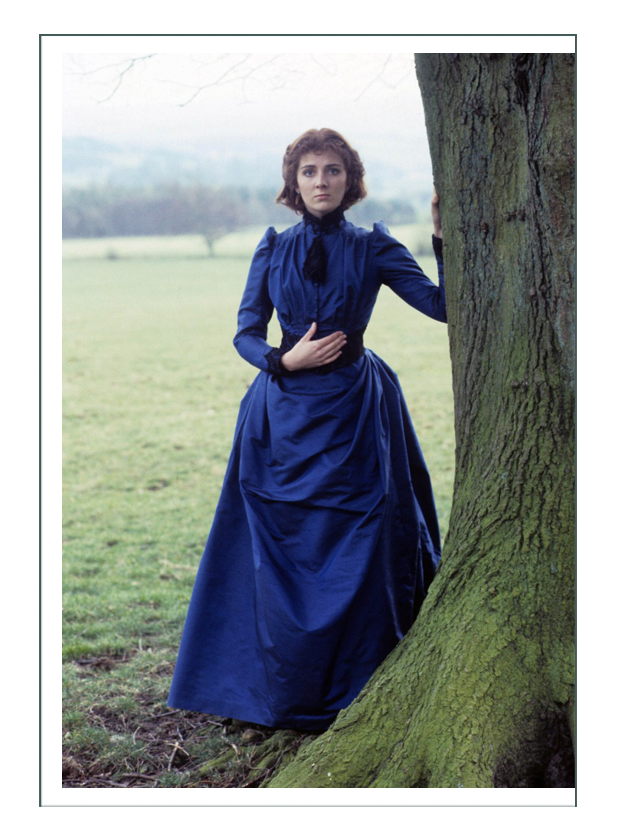
A second inspiration was the “Lady in Electric Blue” based on a Holmes character (below). We will jump to the solutions now, but do look at the extensive research and many decisions and revisions which led to the final design, or the “Magnum Opus” we are building together as Melissa will provide some parts of it, and Silhouettes the rest.
Click here to go to Melissa’s Historical Context Page (next!)
Click here to go to Melissa’s Fashion History Page
Click here to go to Melissa’s Design Development Page
Click here to go to the Top of this Page
Continue below to see the Finished Project with Photos

After research and analysis, the ideal date of depiction is 1887, and the location the London (or American) seaside. As we learned in the Historical Context data about the Sherlock Holmes story settings, most took place from 1885-1910, and a notable story, “The Sign of the Four” features a young woman looking for her missing father, a seas captain, among the docks and ships outside of London.
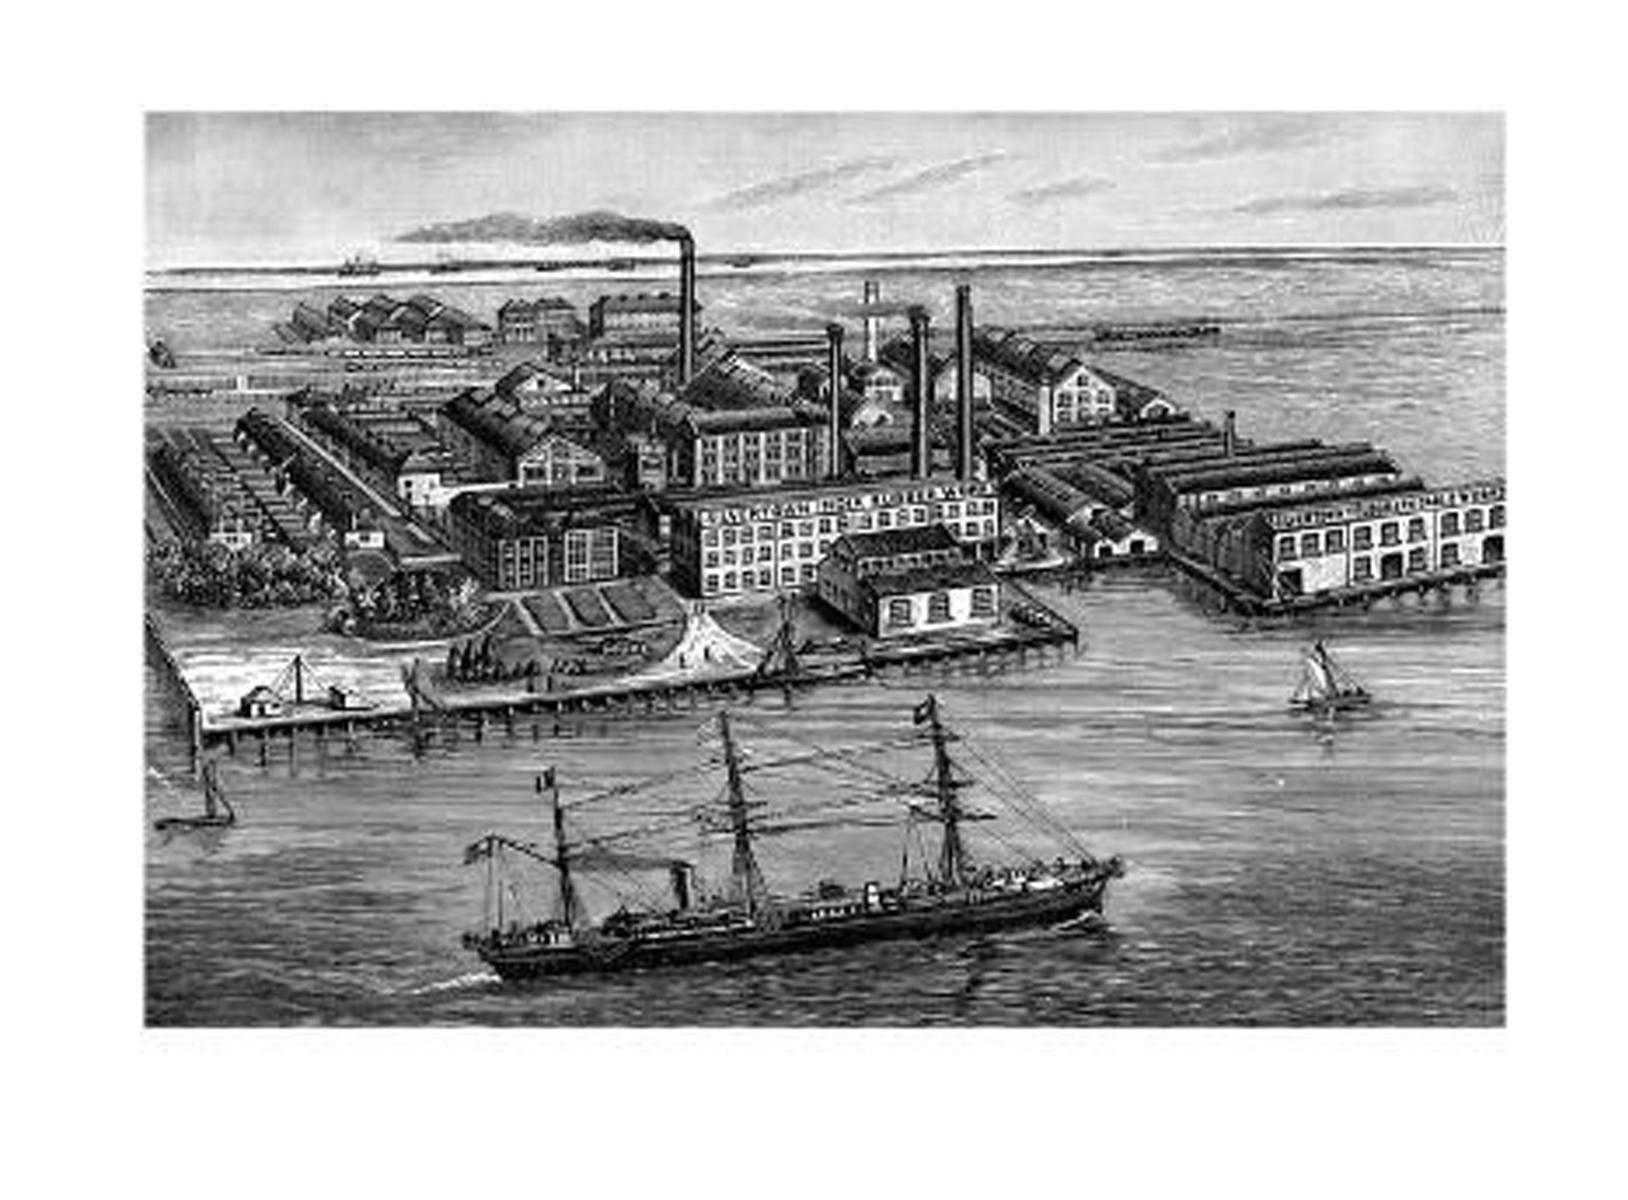
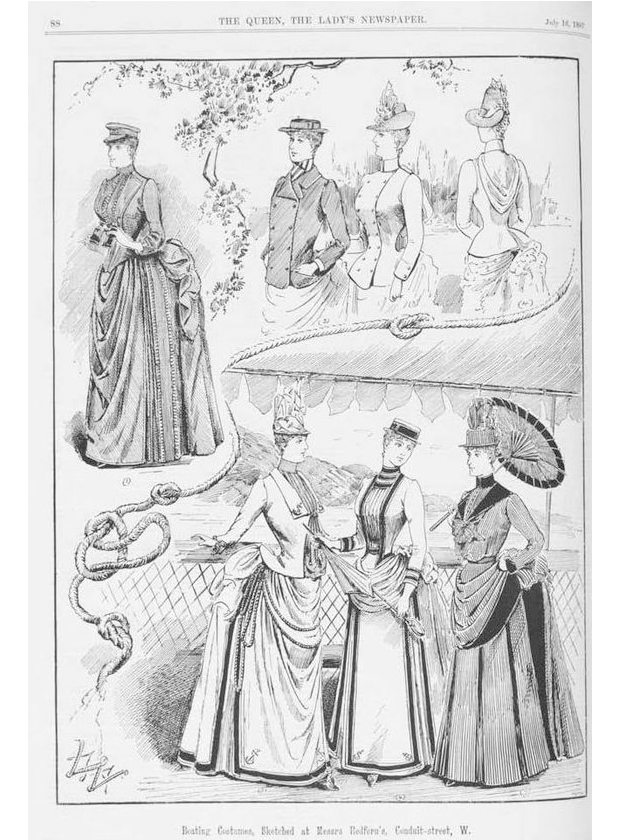
Our fashion history research found that the white with black design with large collar was specific to sportswear and yachting in particular for exactly the summer of 1887 according to “The Queen” fashion newspaper, “Godey’s Lady’s Fashion Book” (magazine), and other extant and fashion sources of the day. The design of the skirts, type of bustle, accessories, and every detail of the “Lady in White” project is specific to August of that year.
While Professor Bats and her patterns indicate the year 1889, we know the bustle was in style only until about the beginning of 1888, and then only rarely (as there is no exact line fashion crossed, some women would still be wearing them, and others embracing the new tapering gored skirts that were emerging at the end of the Victorian era), so 1887 which was the very peak of the large bustle era would be perfect.
The Holmes story, “Four in Hand” was set in the summer of 1888 – how perfect! The 1887 fashions did carry into 1888.
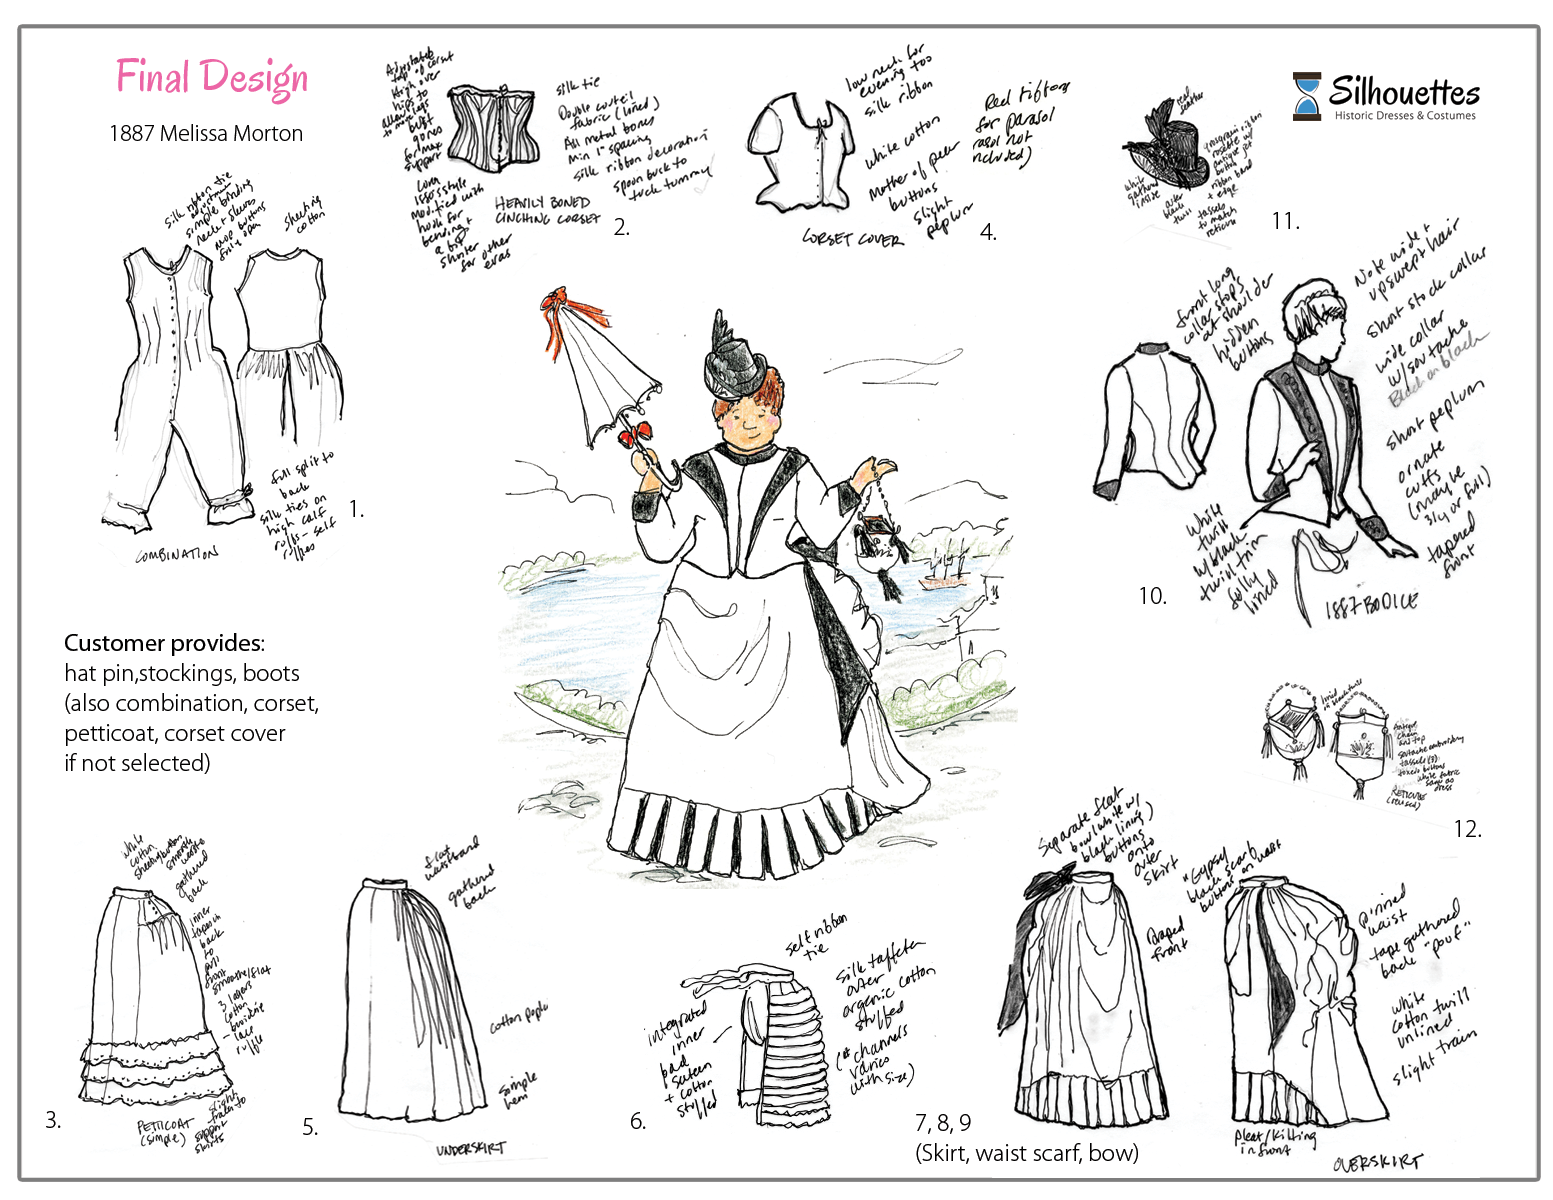
Design Sketches
There are many versions of design as it was developed on Melissa’s Design Development Page, but this is the final. It combines all the garments needed to complete the look, regardless of whether Melissa or Silhouettes is providing them. All are available for Melissa if she should wish to purchase, as they have all been made, but some of these she will replace with her own and we will not have photos of them.
There were in the late 1880’s many ways to achieve this same silhouette through layering different types of undergarments and bustles. It was a transitional time away from the flat fronted and poufed back of the skirt with a separate bodice into the more evenly full gored skirt and one piece “dress” or “suit” that was coming into style. These were subjective decisions made for cost, ease in dressing, and to permit use of the undergarments for other future depictions.
In order of dressing/layering (1887 specific and correct).
Silhouettes will provide the items with *:
- Combination (100% cotton, huge split for easy use in the restroom, it is a very washable layer to absorb sweat and reduce chafing)
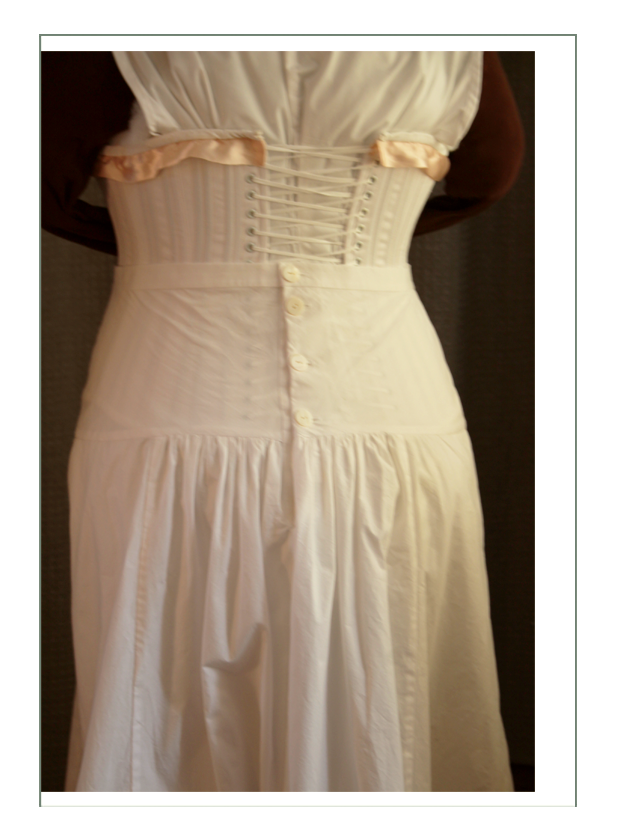
- Corset (shown is a heavily metal boned for maximum comfort where bones are no more than 1″ apart and are grouped in 3’s for strong cinching. Late Victorian corsets were very long and had a spoon busk which tucked in the tummy to keep the front of the skirt flat)
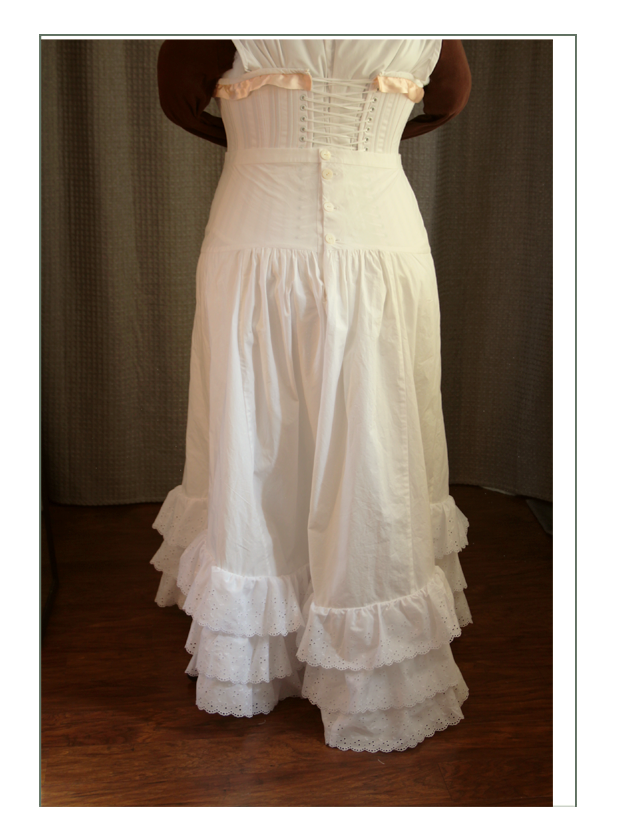
- Petticoat (simple 100% cotton with broiderie lace ruffle; full back and slight train)*
- Corset Cover (another sweat layer which helps keep temperature moderated for comfort and is very washable. Also protects outer garments from damage by the metal of the corset)*
- Bustle (this a padded bustle that looks like a snail, it was commonly made of rough cotton stuffed with horsehair. Having no horses who are shedding nearby, and not knowing if Melissa has allergies, this is stuffed with lovely breathable cotton and is covered with silk satin to reduce the weight. It has an inside pad so the weight of the garments doesn’t smash it flat against the rear end. This would be simply called an “organic cotton” bustle)*
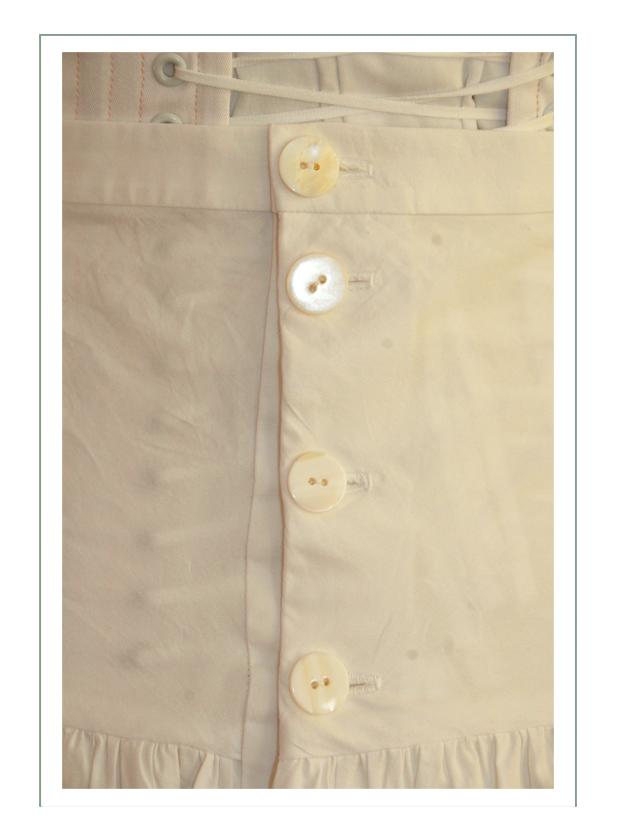
- Foundation/inner/under skirt (went by many names in history; would be attached inside the skirt in the next decade. This is simply a thin cotton skirt used to reduce sheerness of the white outer fabric and to provide a stiffener to maintain the shape. It has back gathers so it can go over the bustle while the petticoat goes under the bustle)*
- Outer skirt (simple pin on, it’s all in one with the pouf in the back and draping in front built in; a key feature of 1887-89 as draping in previous years was not part of the skirt, but were overlays and tunics piled on)*
- Bodice (simple button up front, with a peplum that fits over the skirt and many layers below. This is simply a variation that had been built since the 18th century. Designers of the 1880’s claimed they were being original)
- Gypsy Scarf (optional button on the sides. This has nothing to do with history; simply to replicate the “Lady in White”, to give more black contrast to an otherwise very all white skirt)*
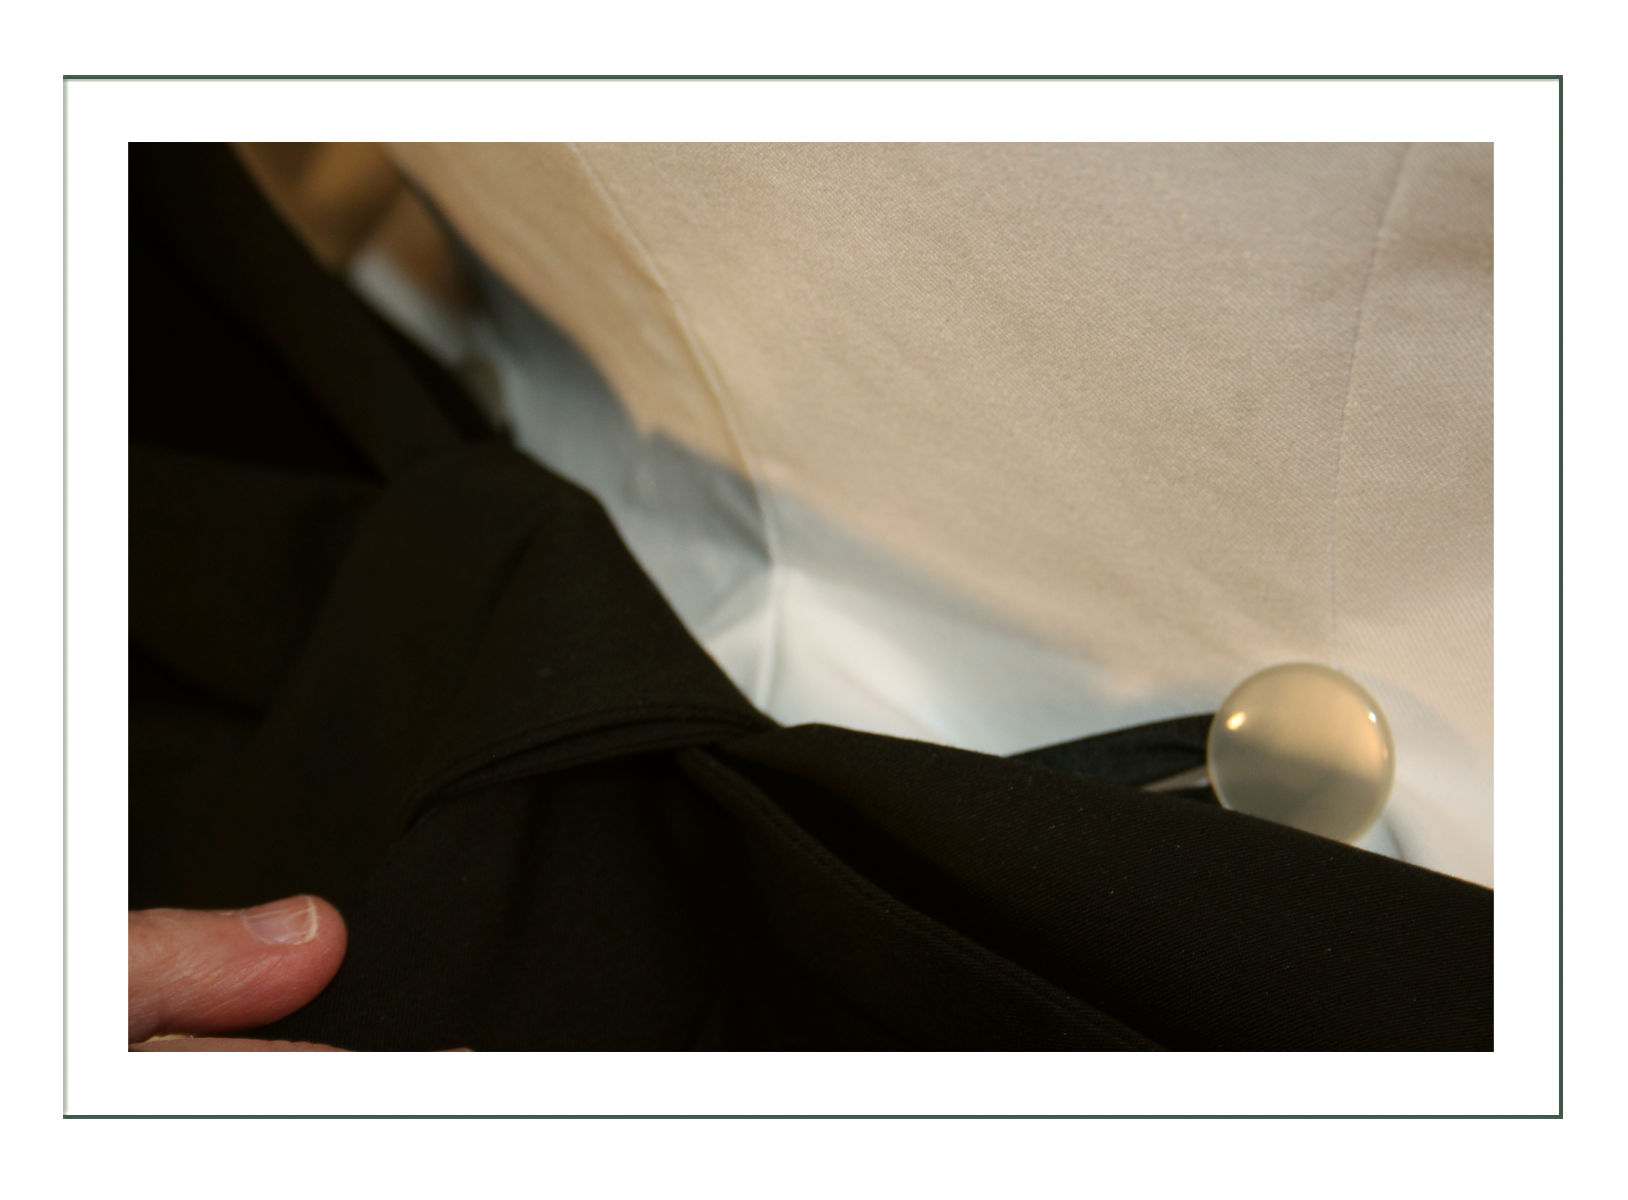
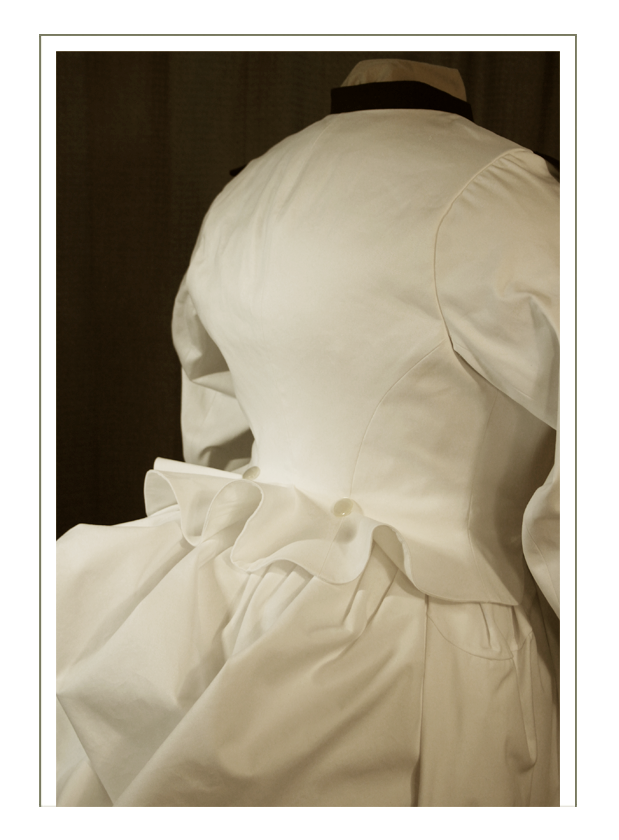
- Bow (buttons on using a loop onto the bodice back buttons over the peplum)*
- Bonnet (replication of the “Lady in White”, it features a REAL crow feather, antique button, and the “Dutch Stovepipe” style that was popular from 1883-1888)*
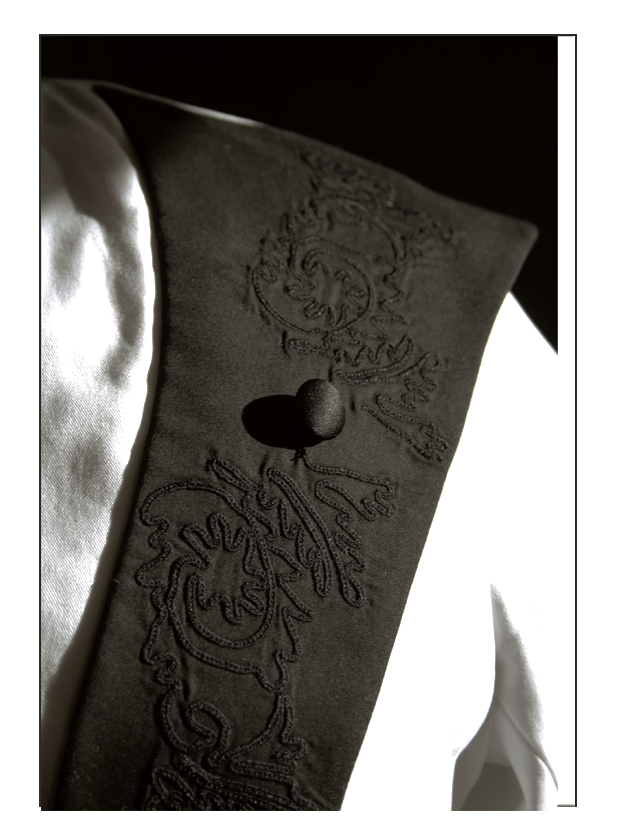
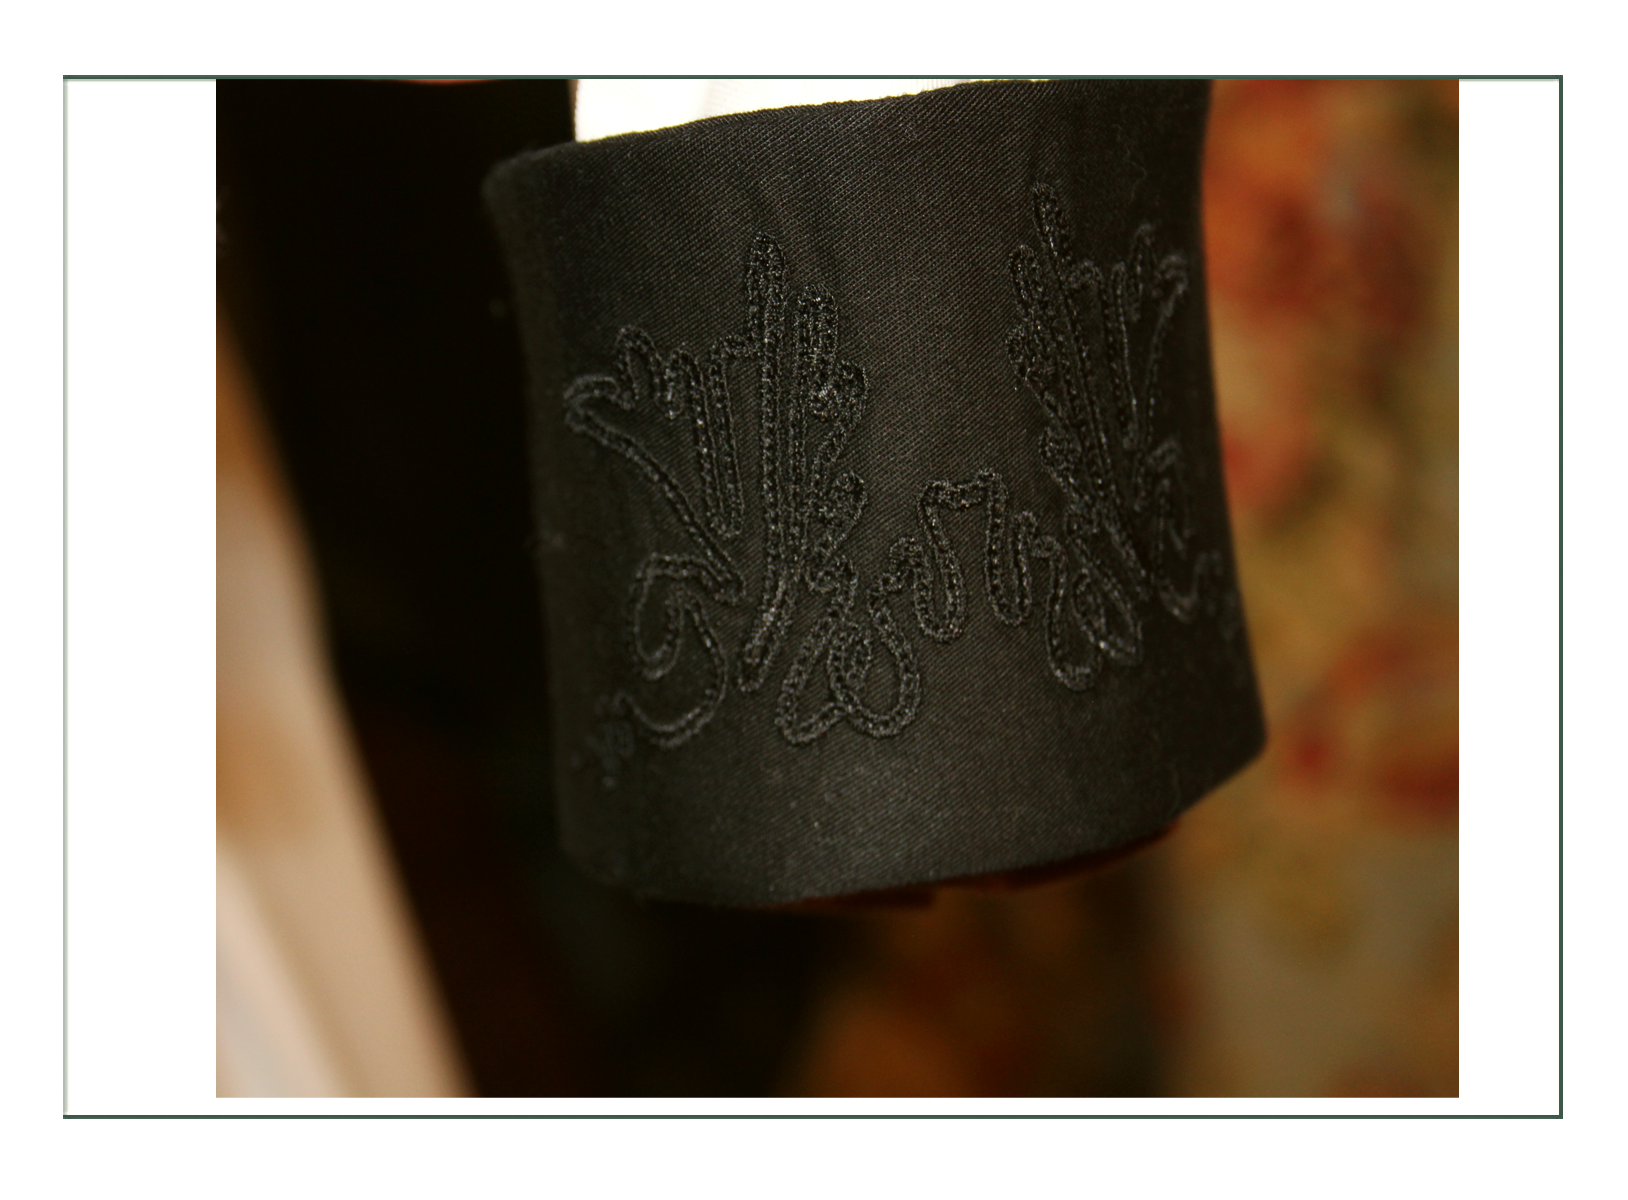
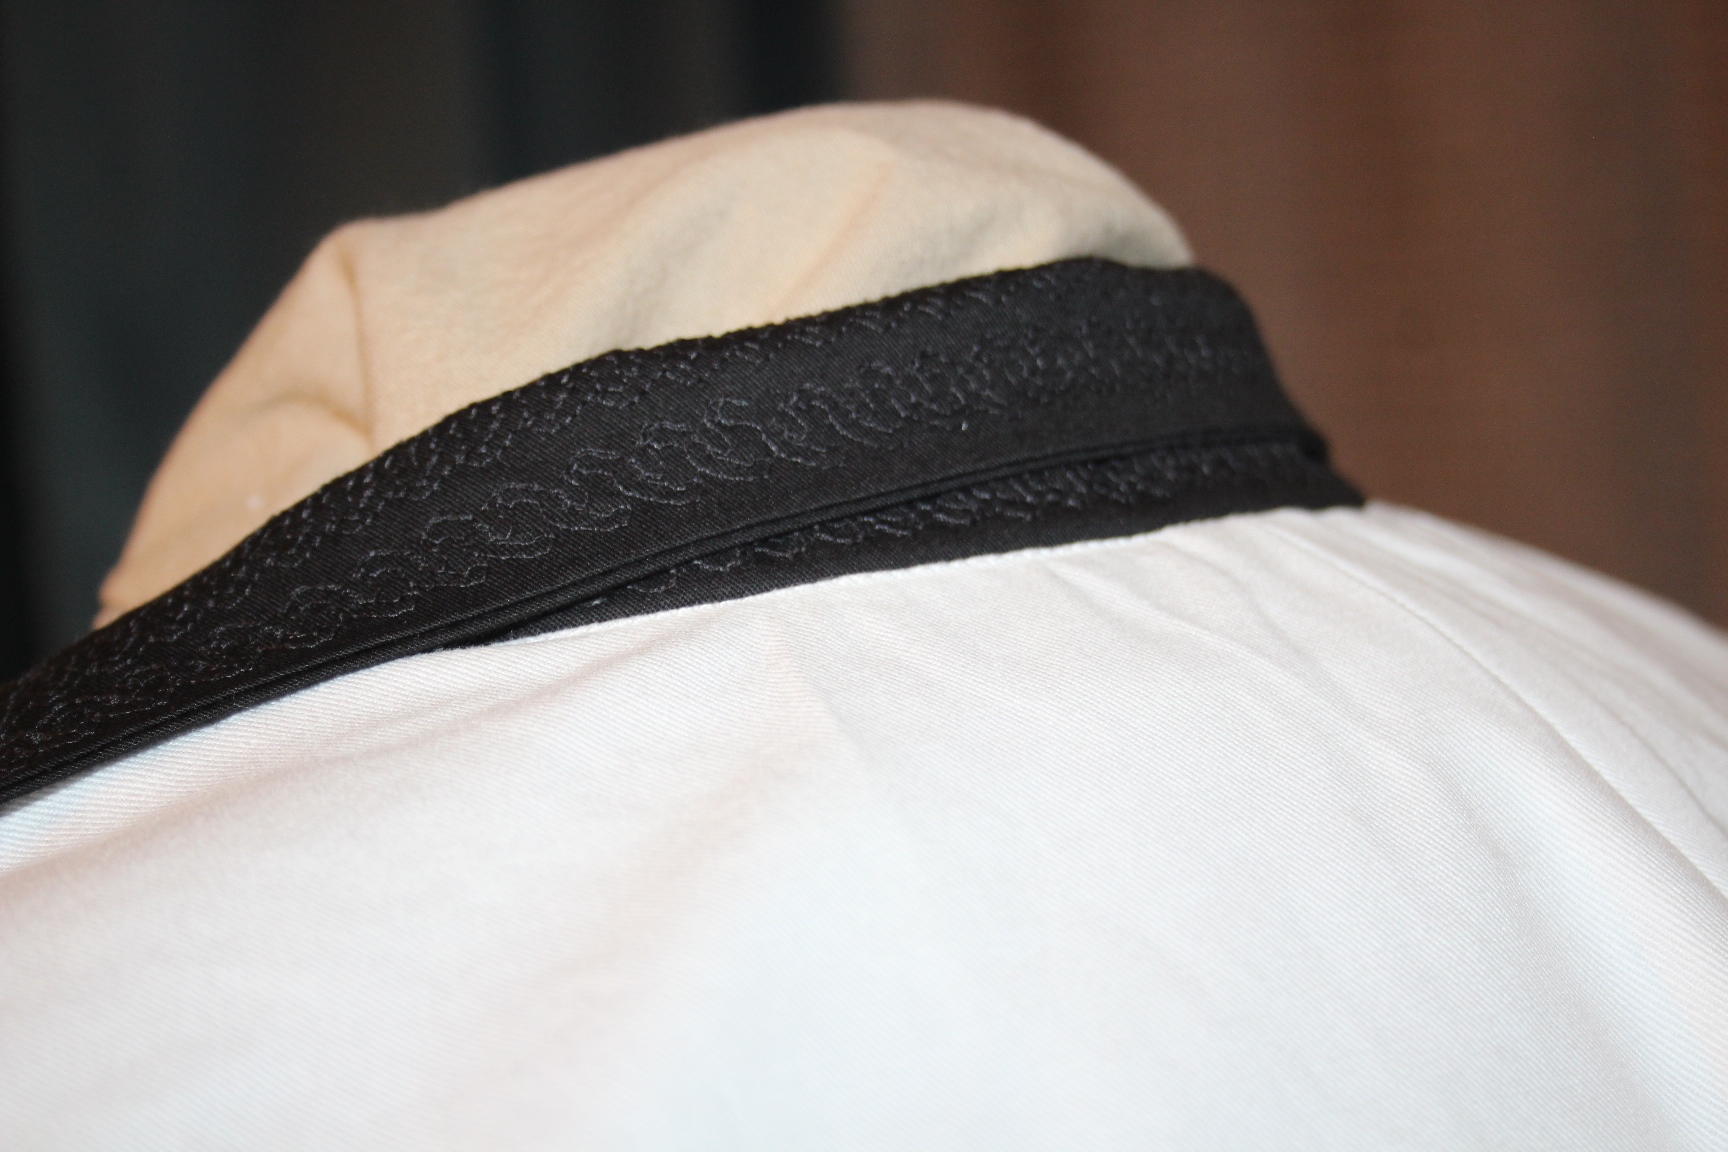
- Reticule (soutache embroidery, buttons, and tassels with a very special actually from the 1880’s clasp closure! We made two of these; one gathers on a cord, and the other with the clasp. This whimsical design of the braid is also on collar and cuffs of the bodice for visual depth and interest)*
- Bows (one of the fashion plates showed a black parasol with red ribbon on the tip and handle. We just loved it! Regardless of whether the parasol is black or white, this is just the finishing touch)*
- Accessories (by Melissa) parasol, GLOVES a must, stockings, boots (button up best), wig which is wide with updo, hat pin(s) to hold the tipped hat on the wig, and perhaps a red cameo type pin at the neck and earrings?

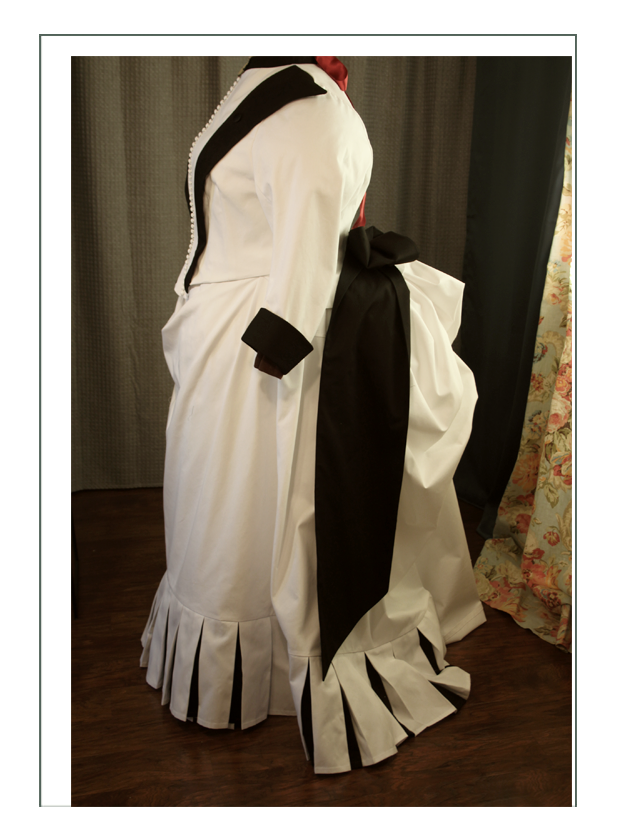
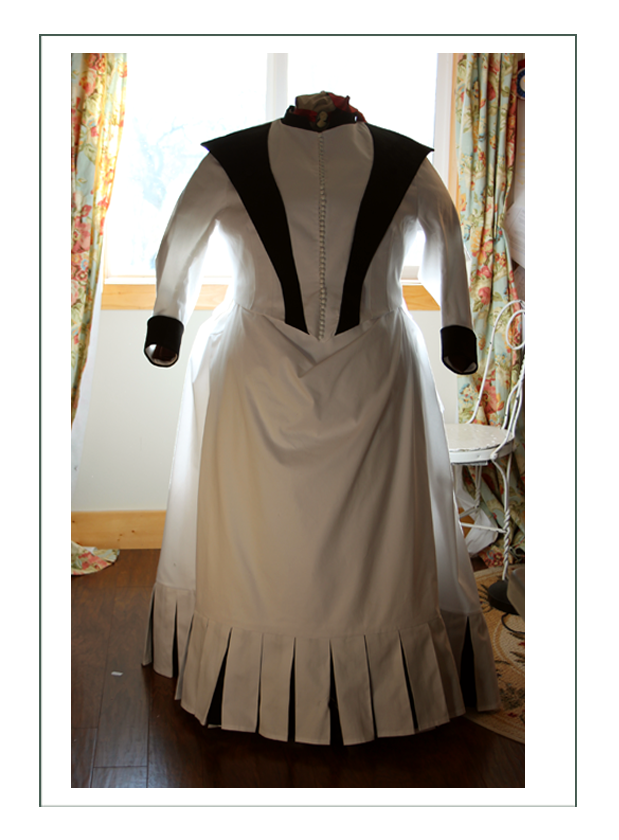
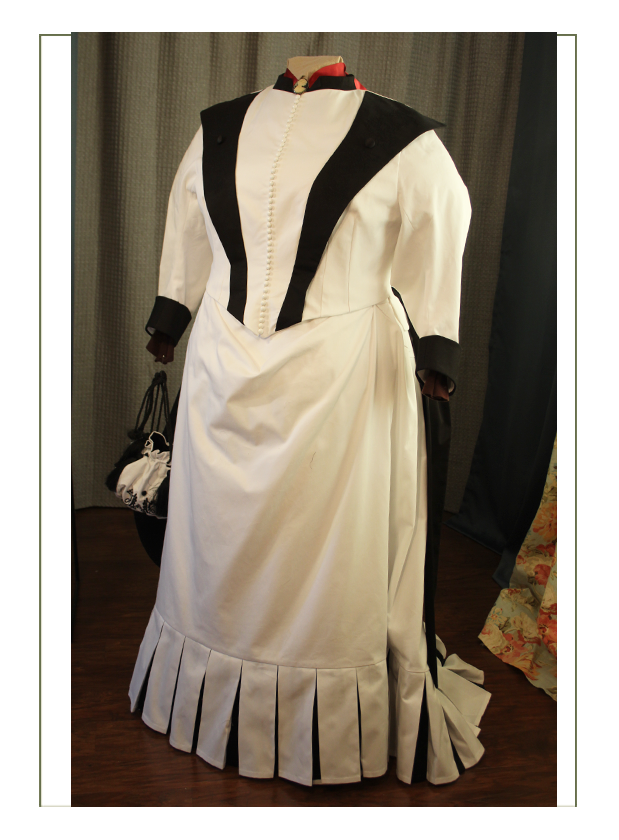
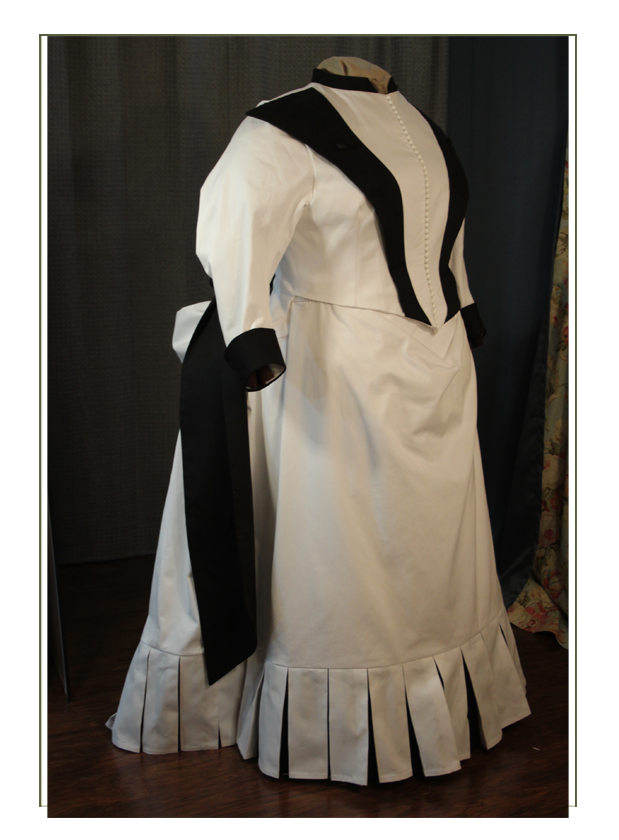
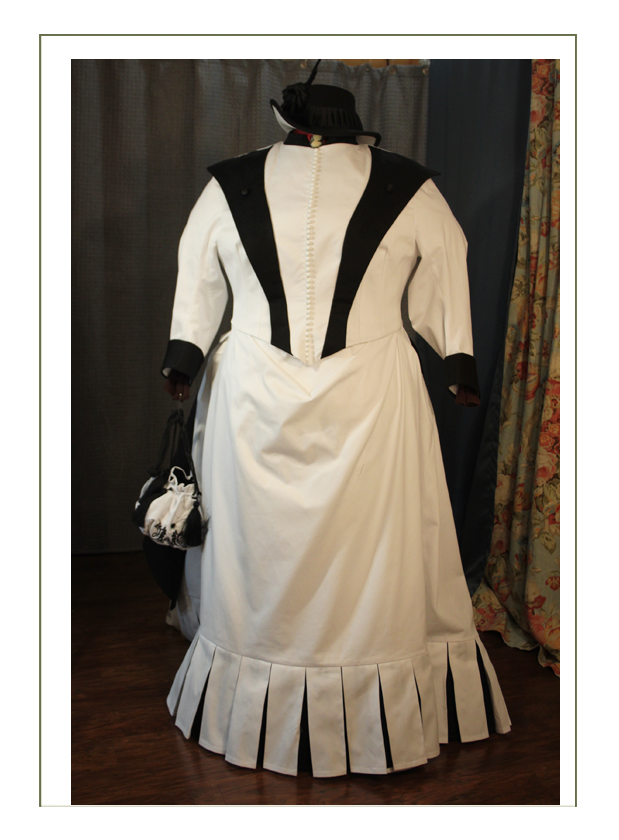
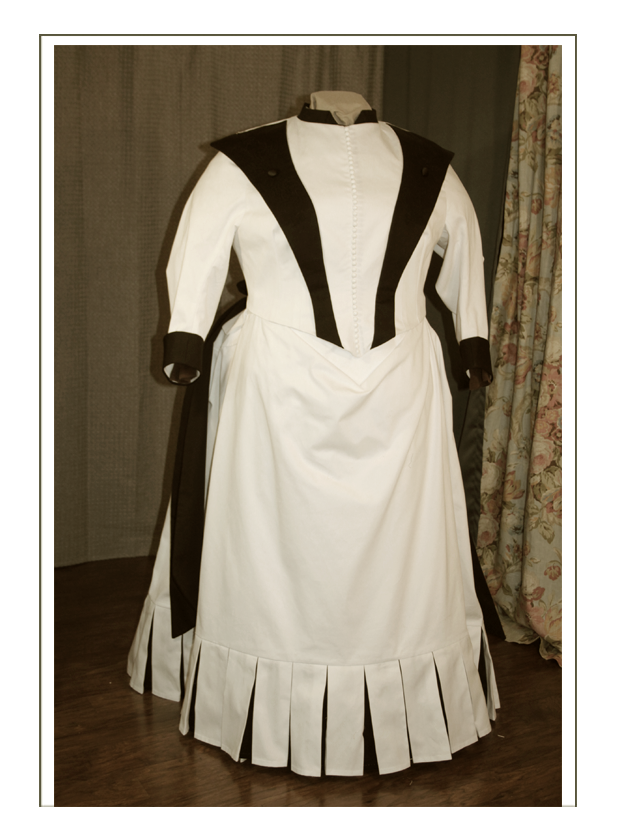
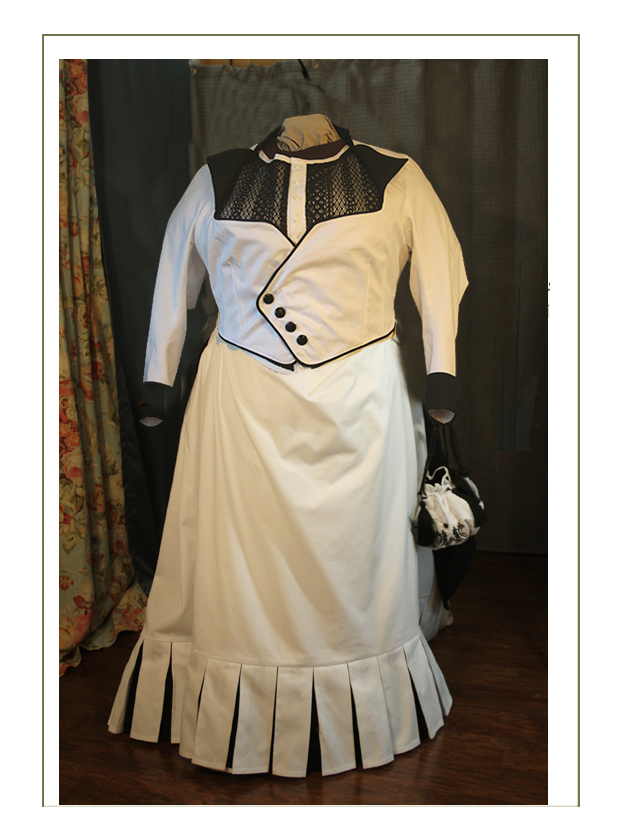
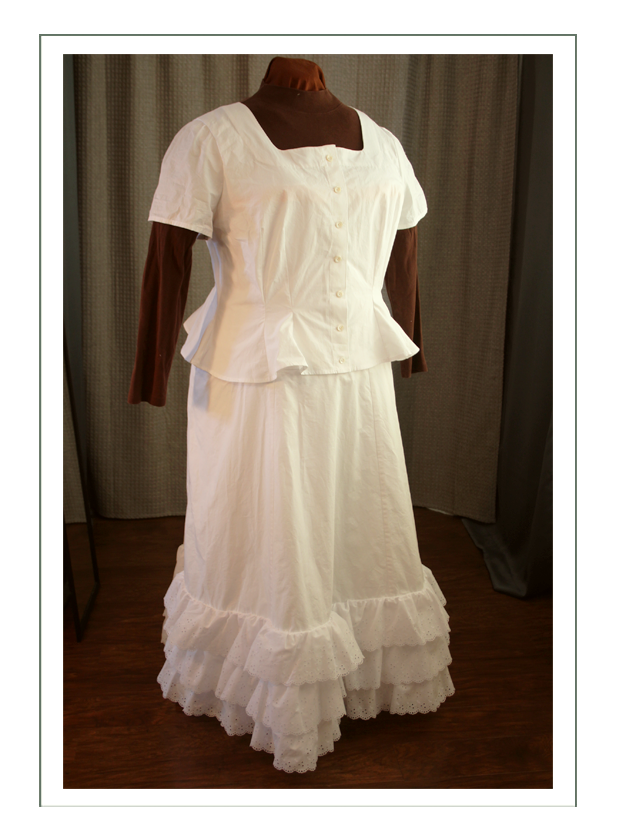
Completed With all on Mannequin


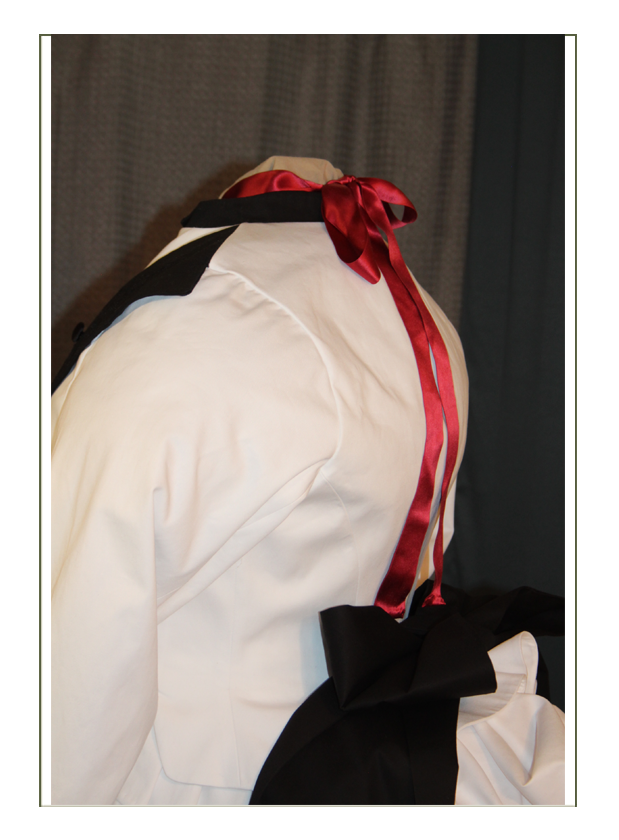
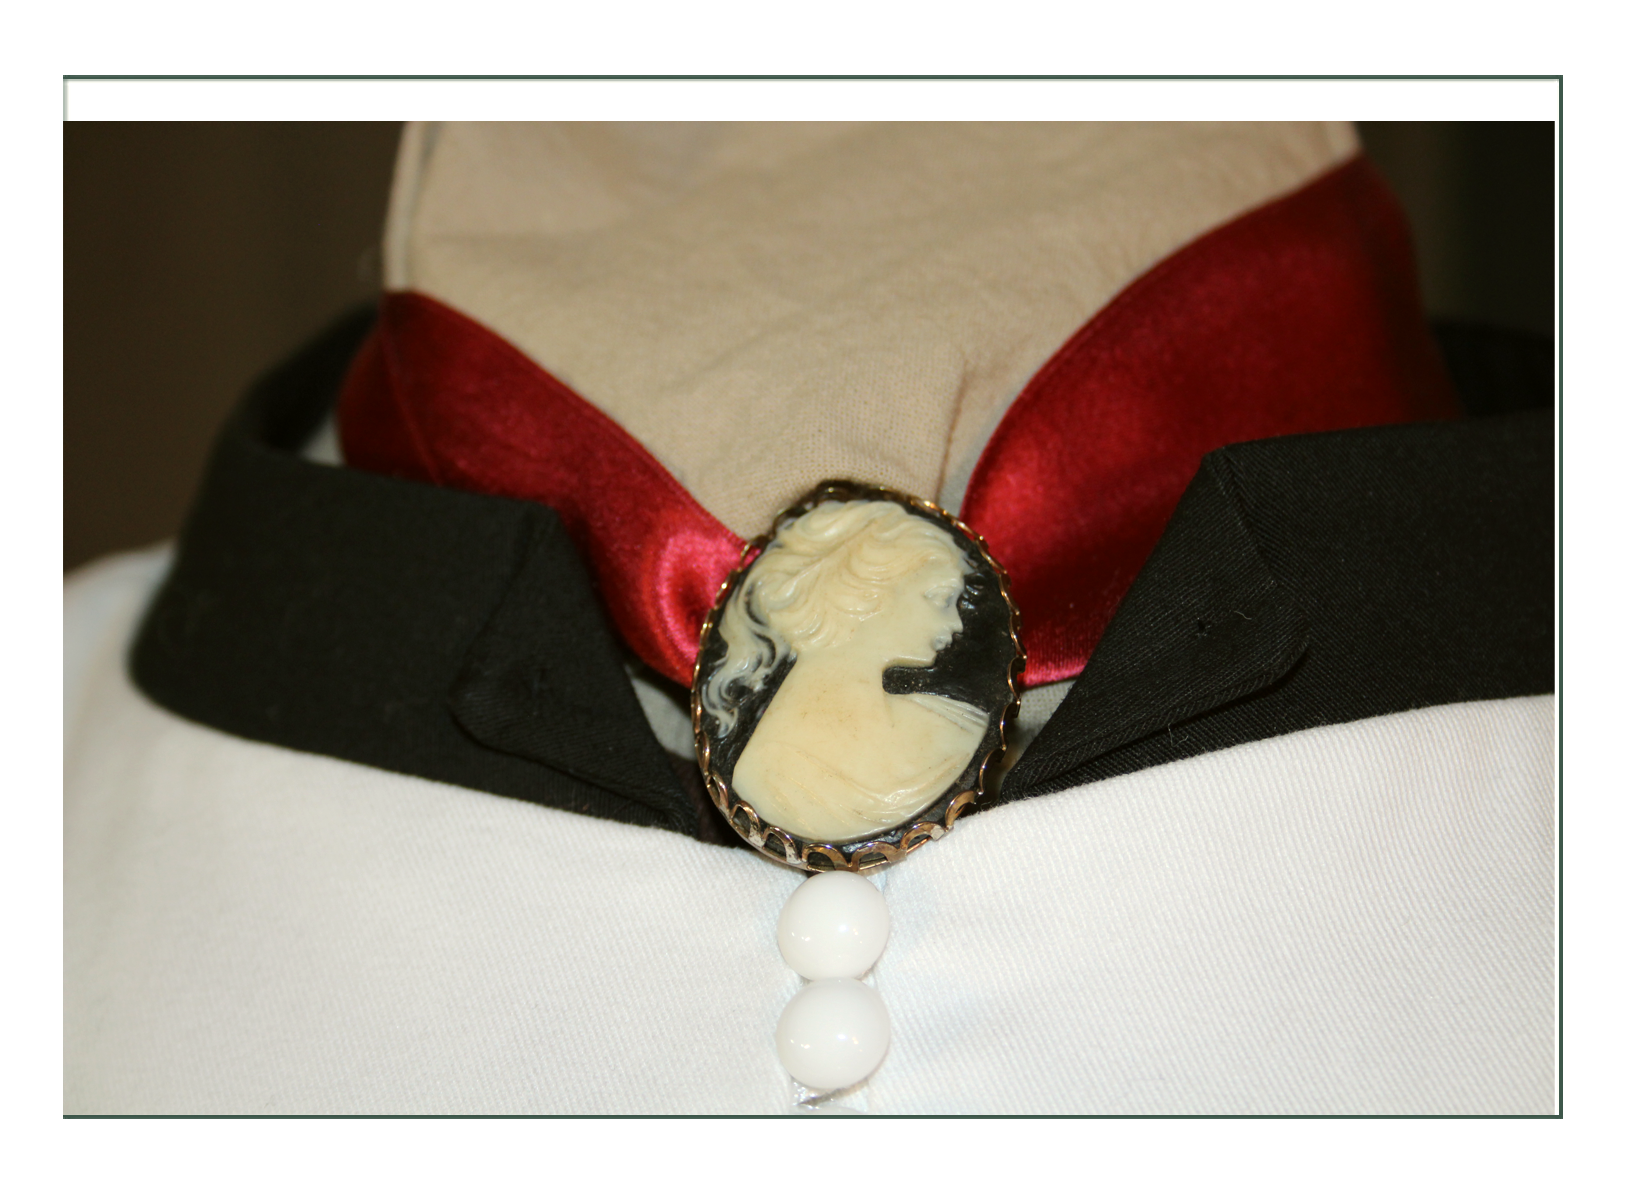
Cameo
This gives a bit of Dracula to the ensemble.. or maybe tipping the hat to the Marvelleuses of the early Regency period who were alluding to the guillotine. We had this in stock, and it was just fun. That’s a 100% silk satin ribbon that can be tucked in or worn down the back like.. well, after the guillotine. Gruesome, but it is so.. Holmesian..!
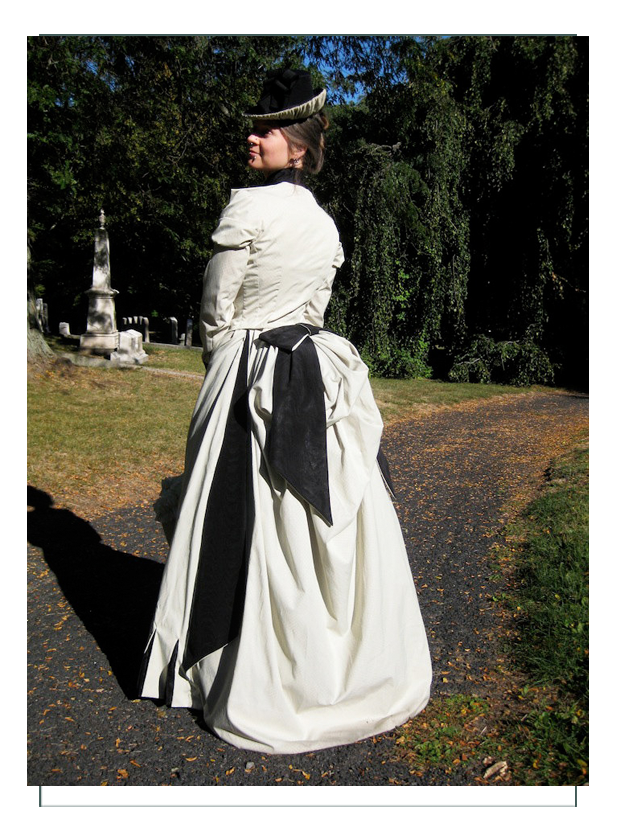
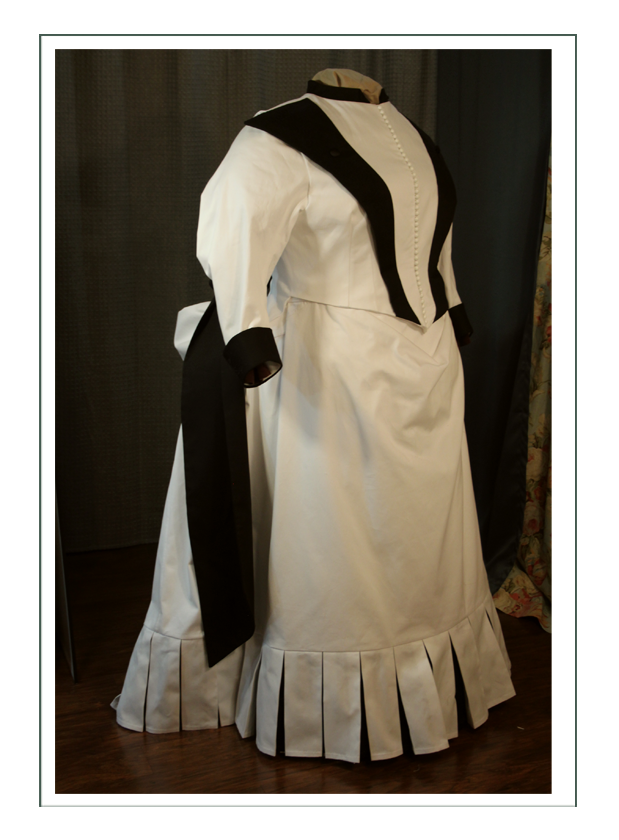
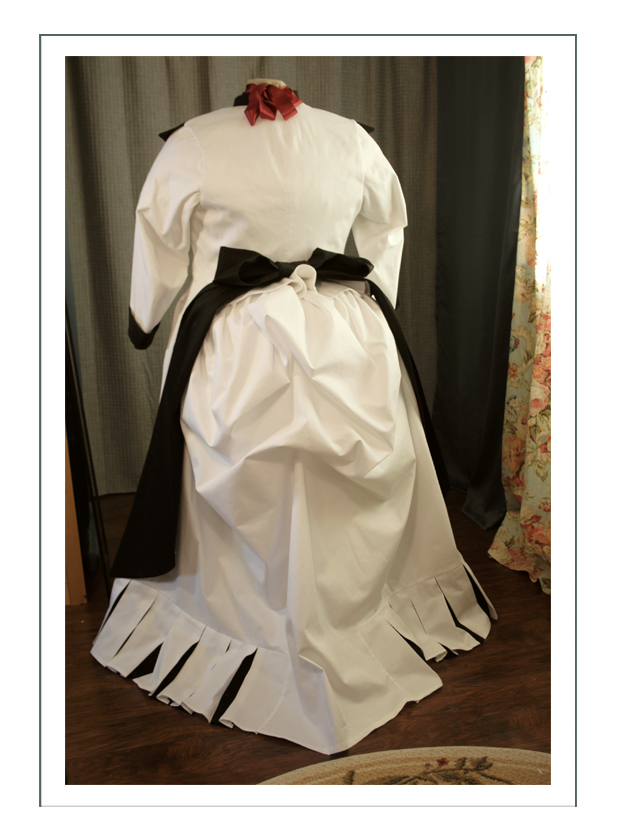
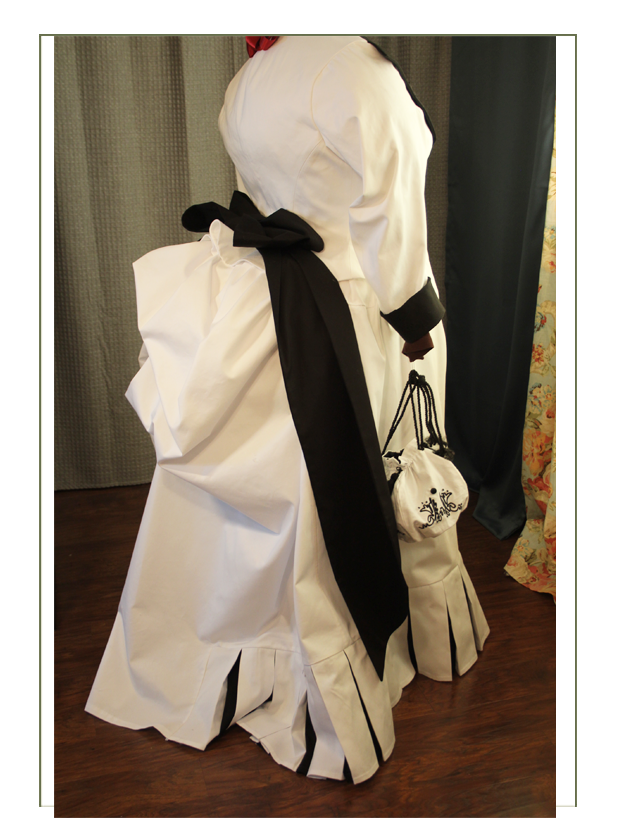
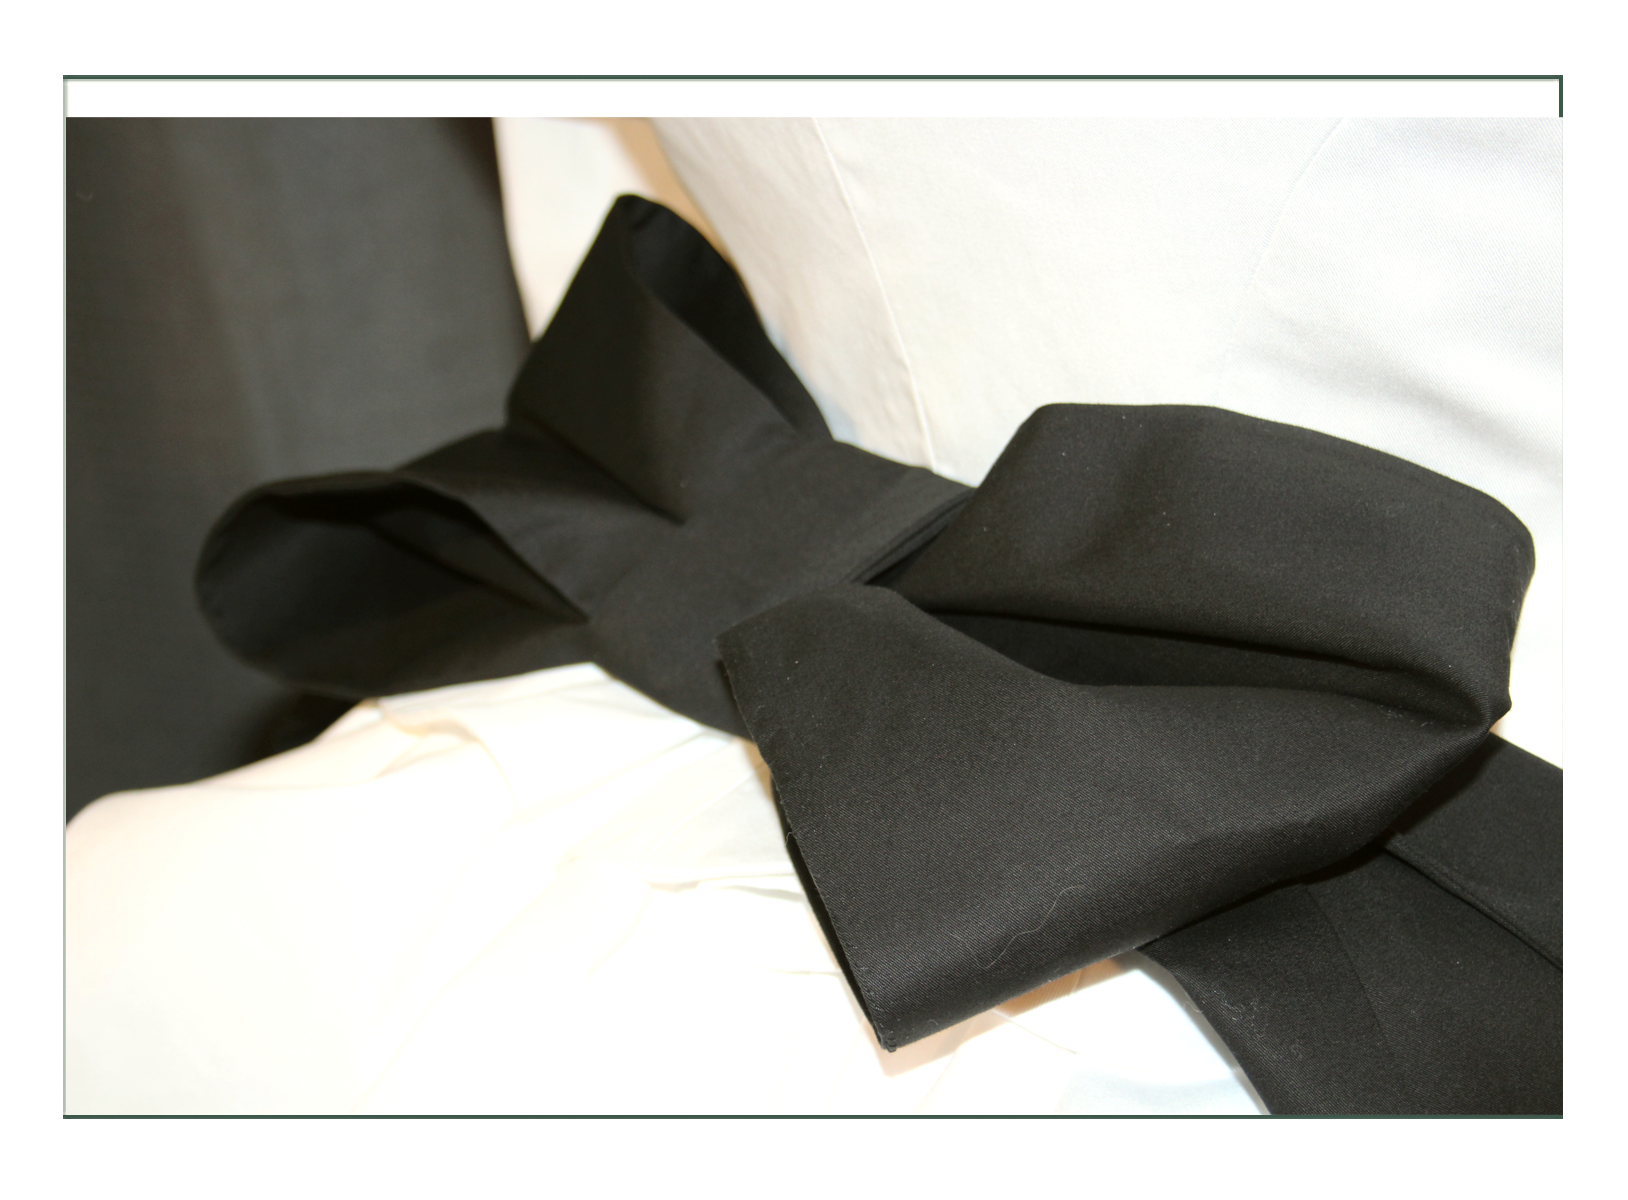
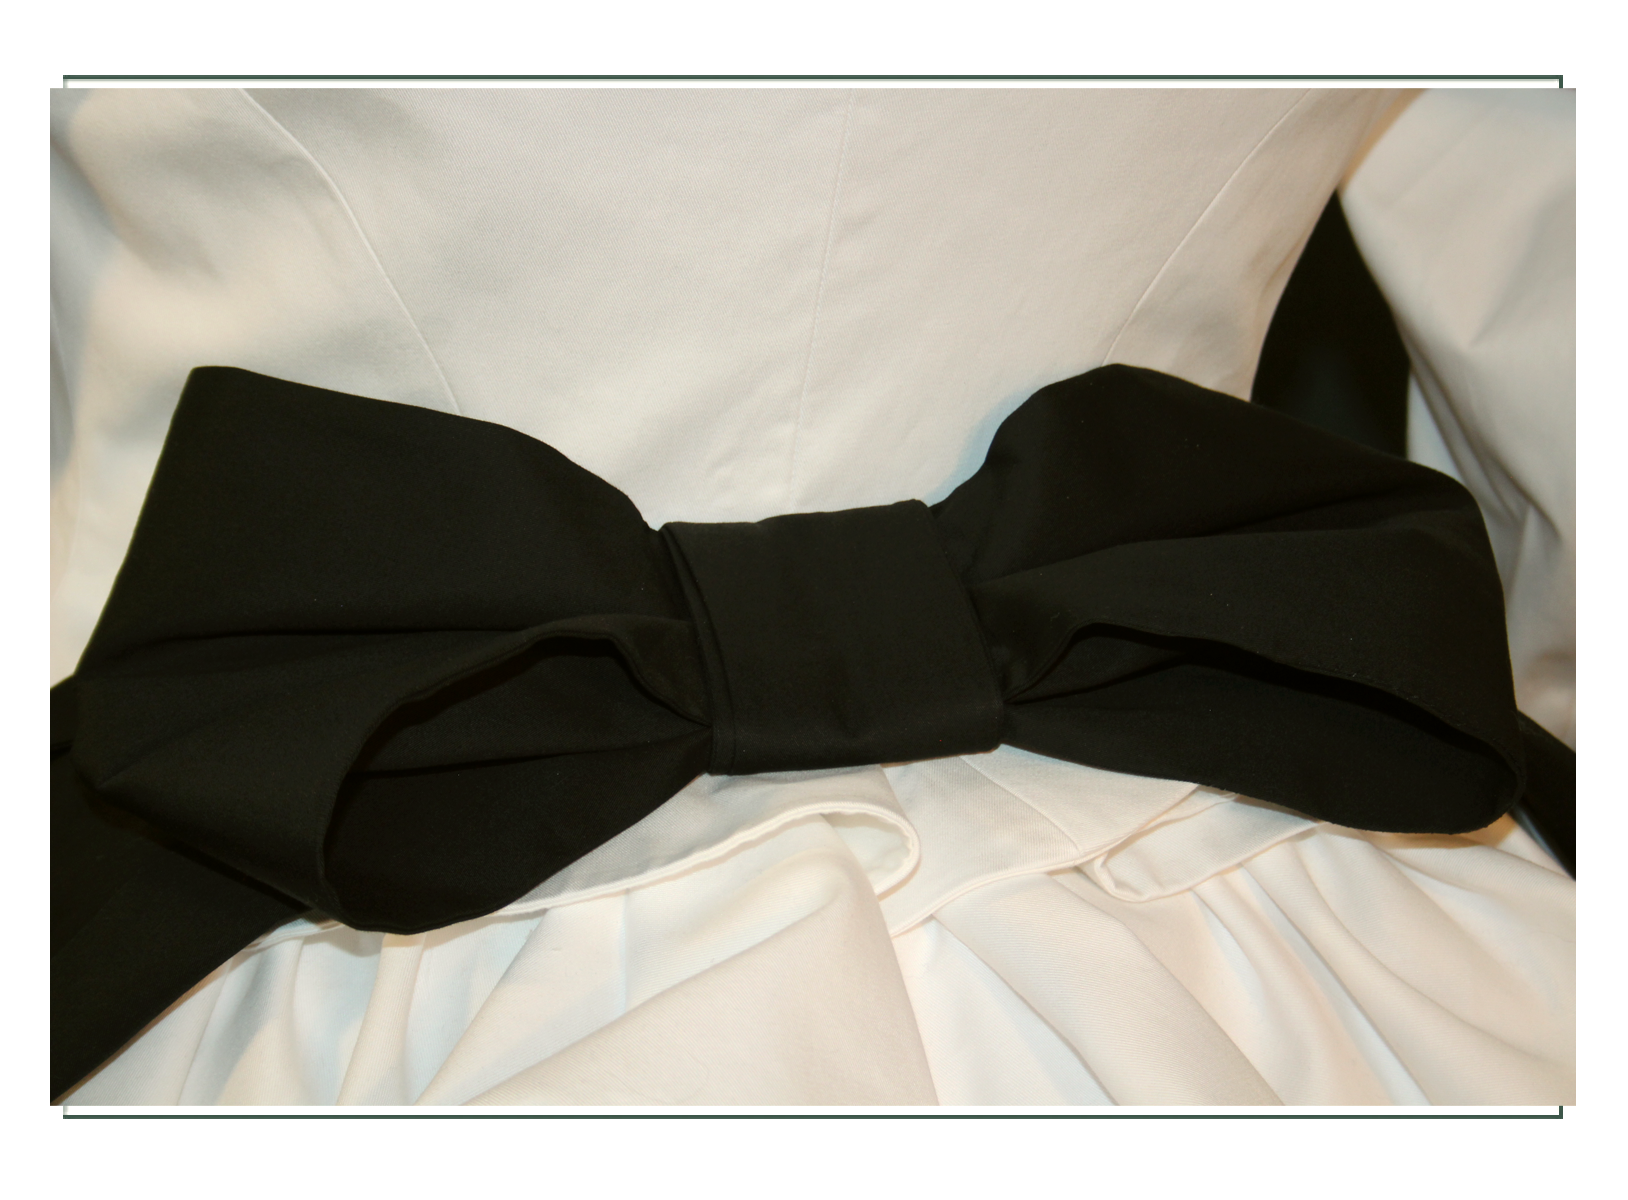
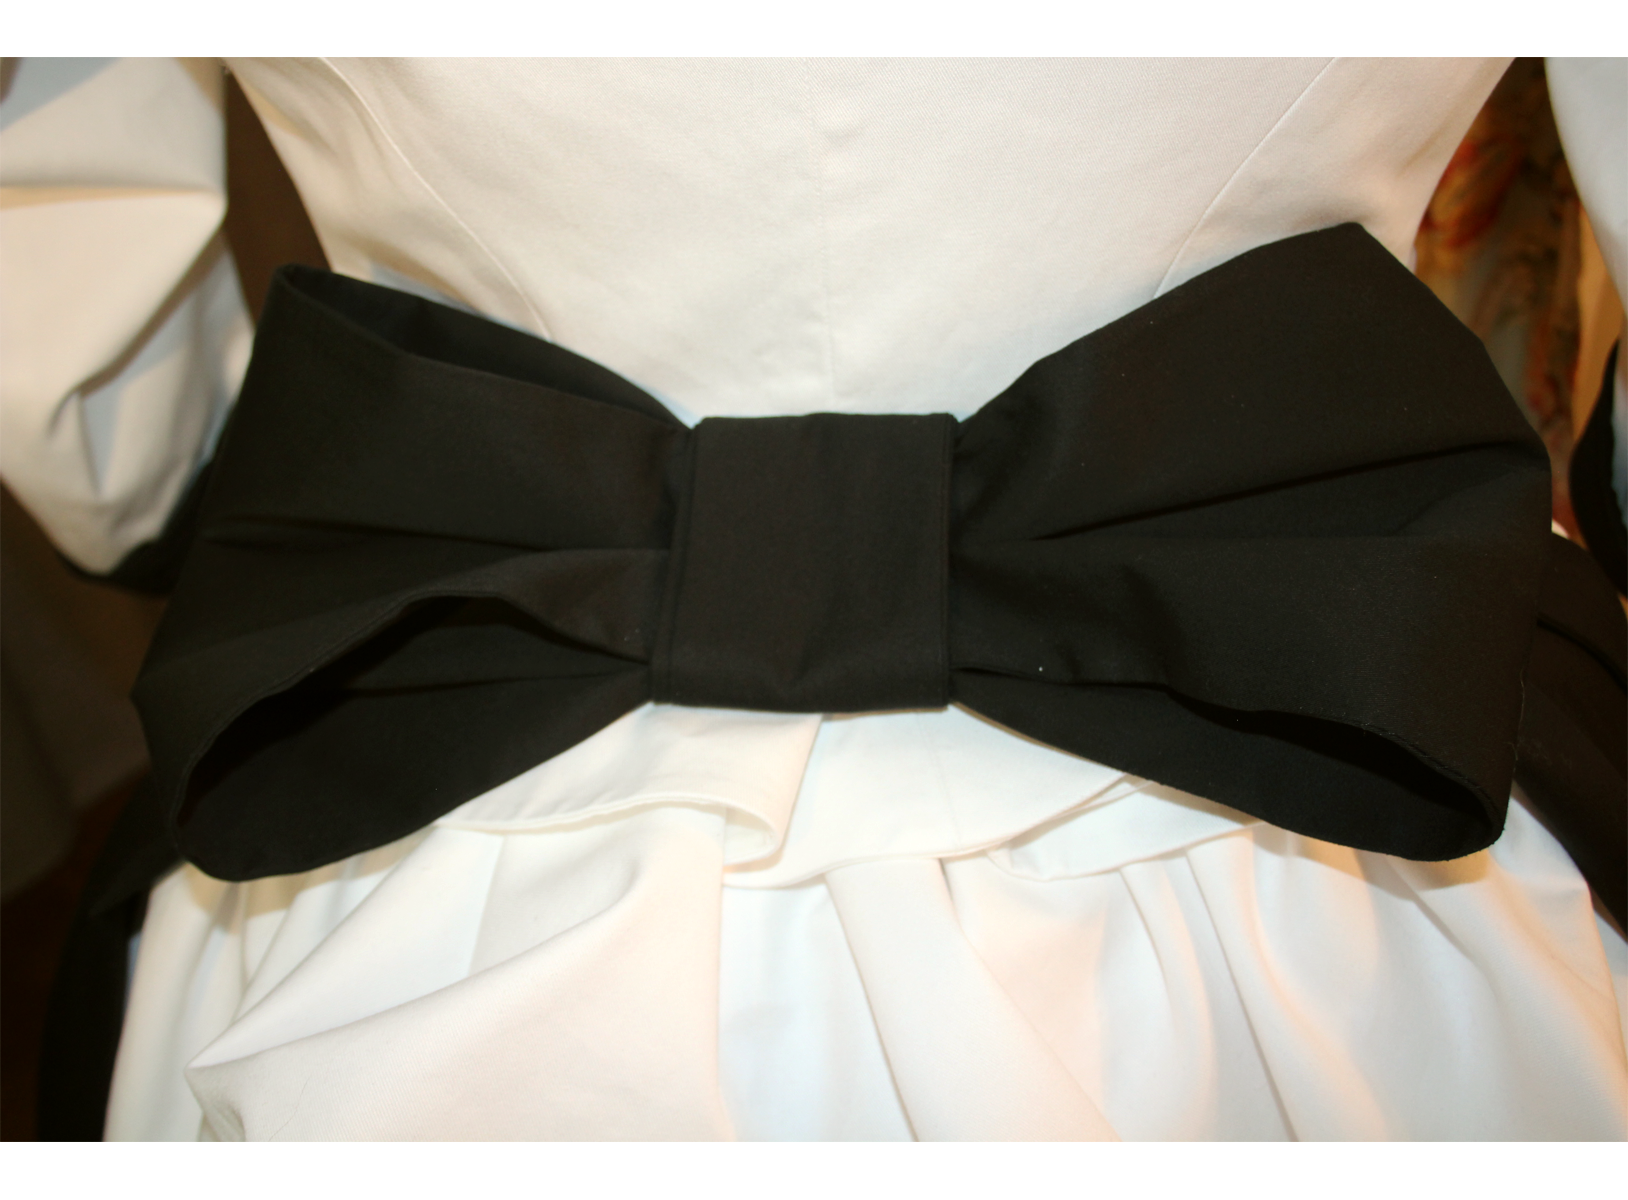
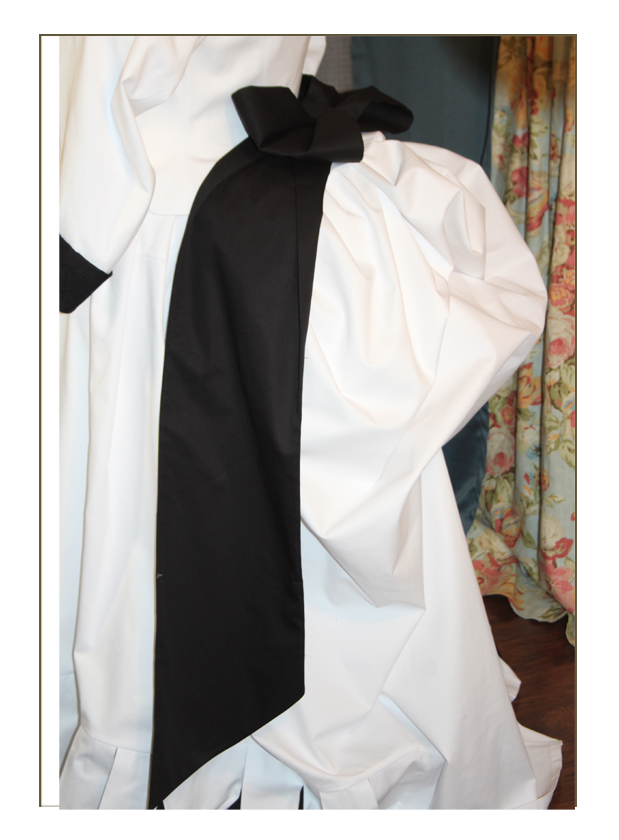
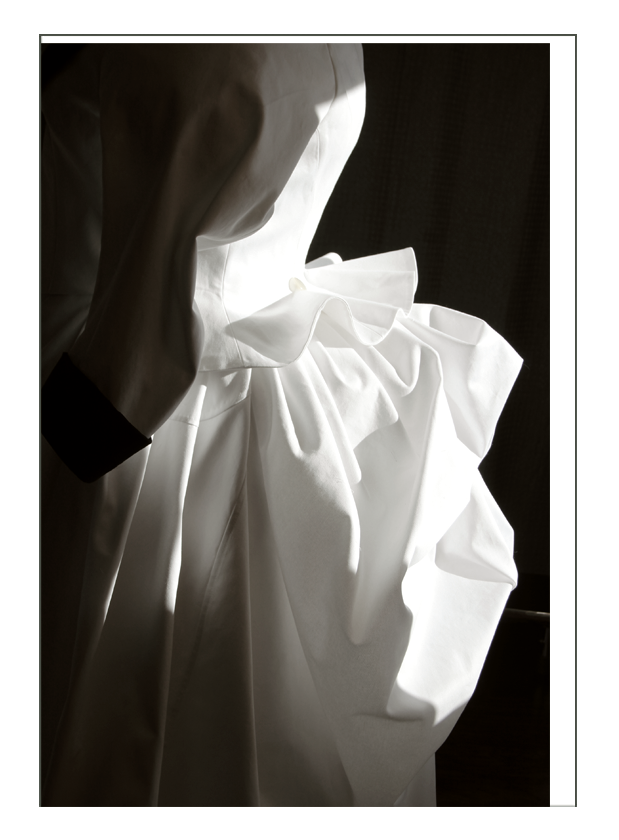
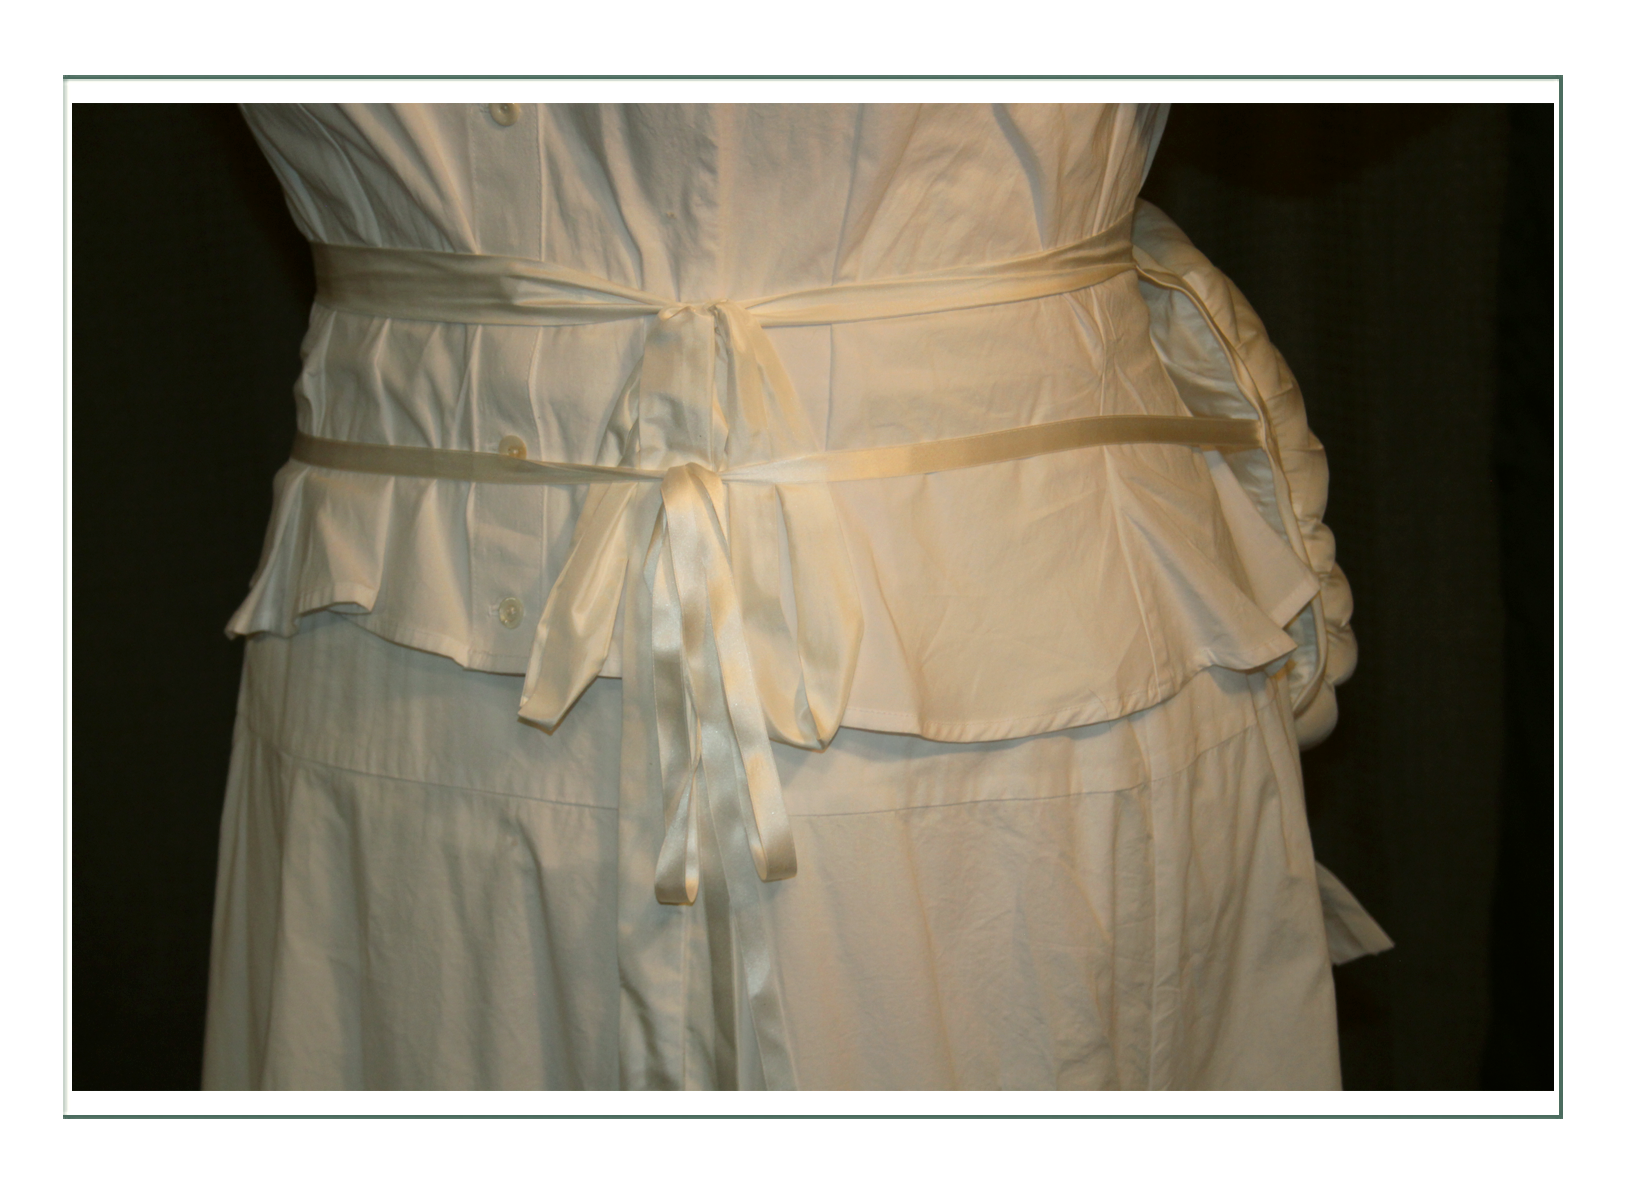
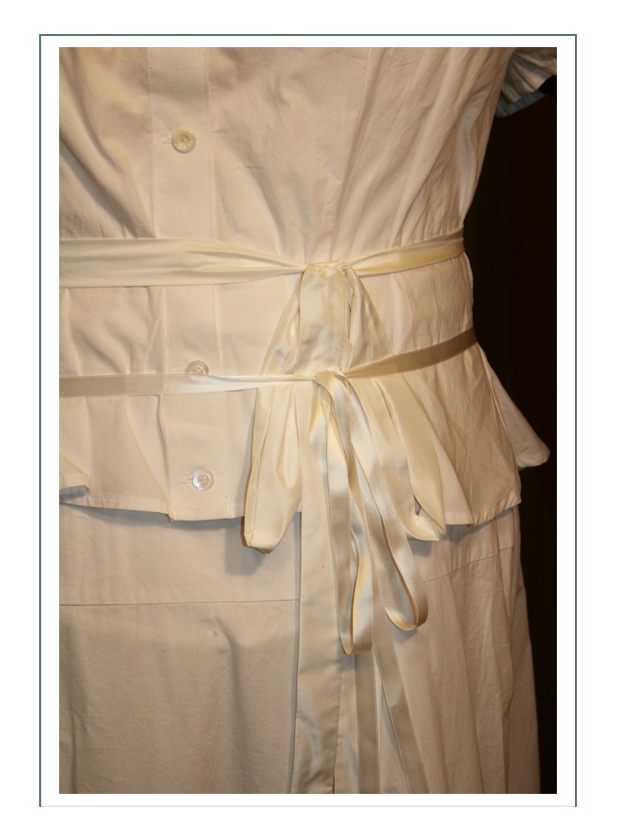
Sash Bow
We were going to build two more scarves that would hang down the sides like the “White Lady” appears to have, but after building this stiff and gorgeous BIG sash bow which has loops to go over the buttons of the peplum, the ensemble was already getting “busy”, and two more would have been too much! We traded Melissa the two sashes for a buttonhook for the bodice and the cameo on ribbon.
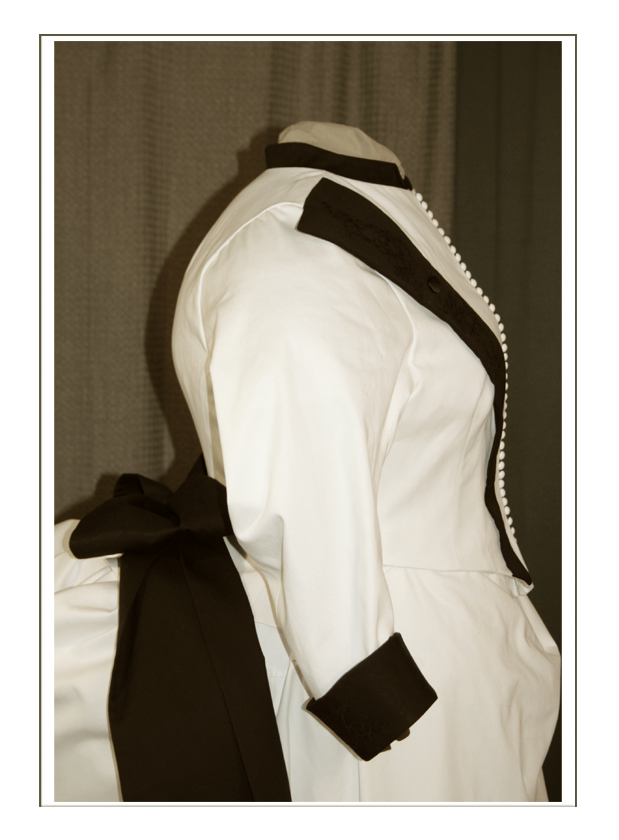
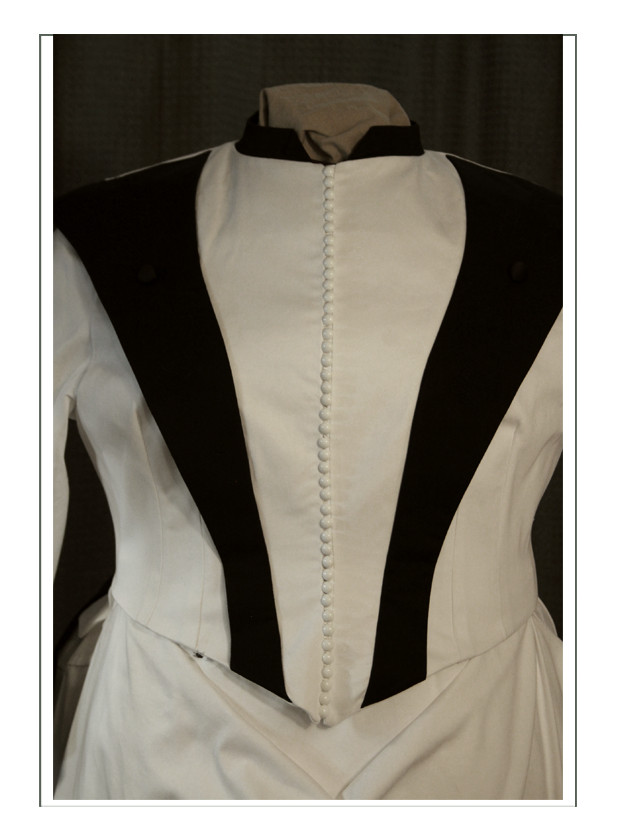
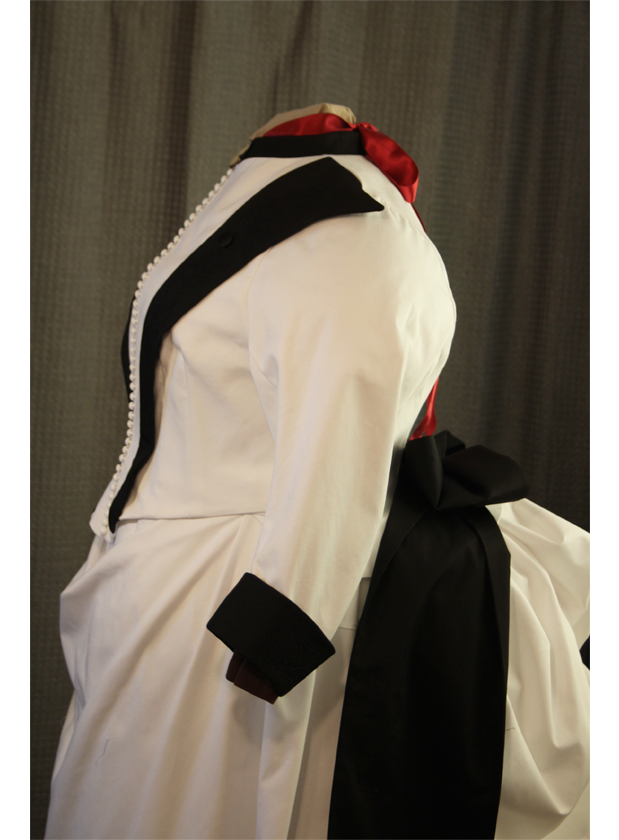
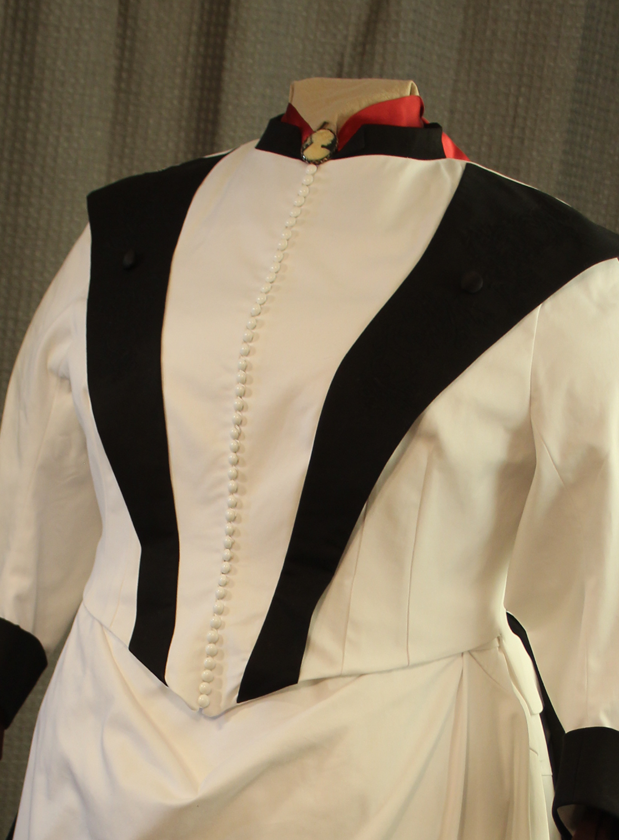
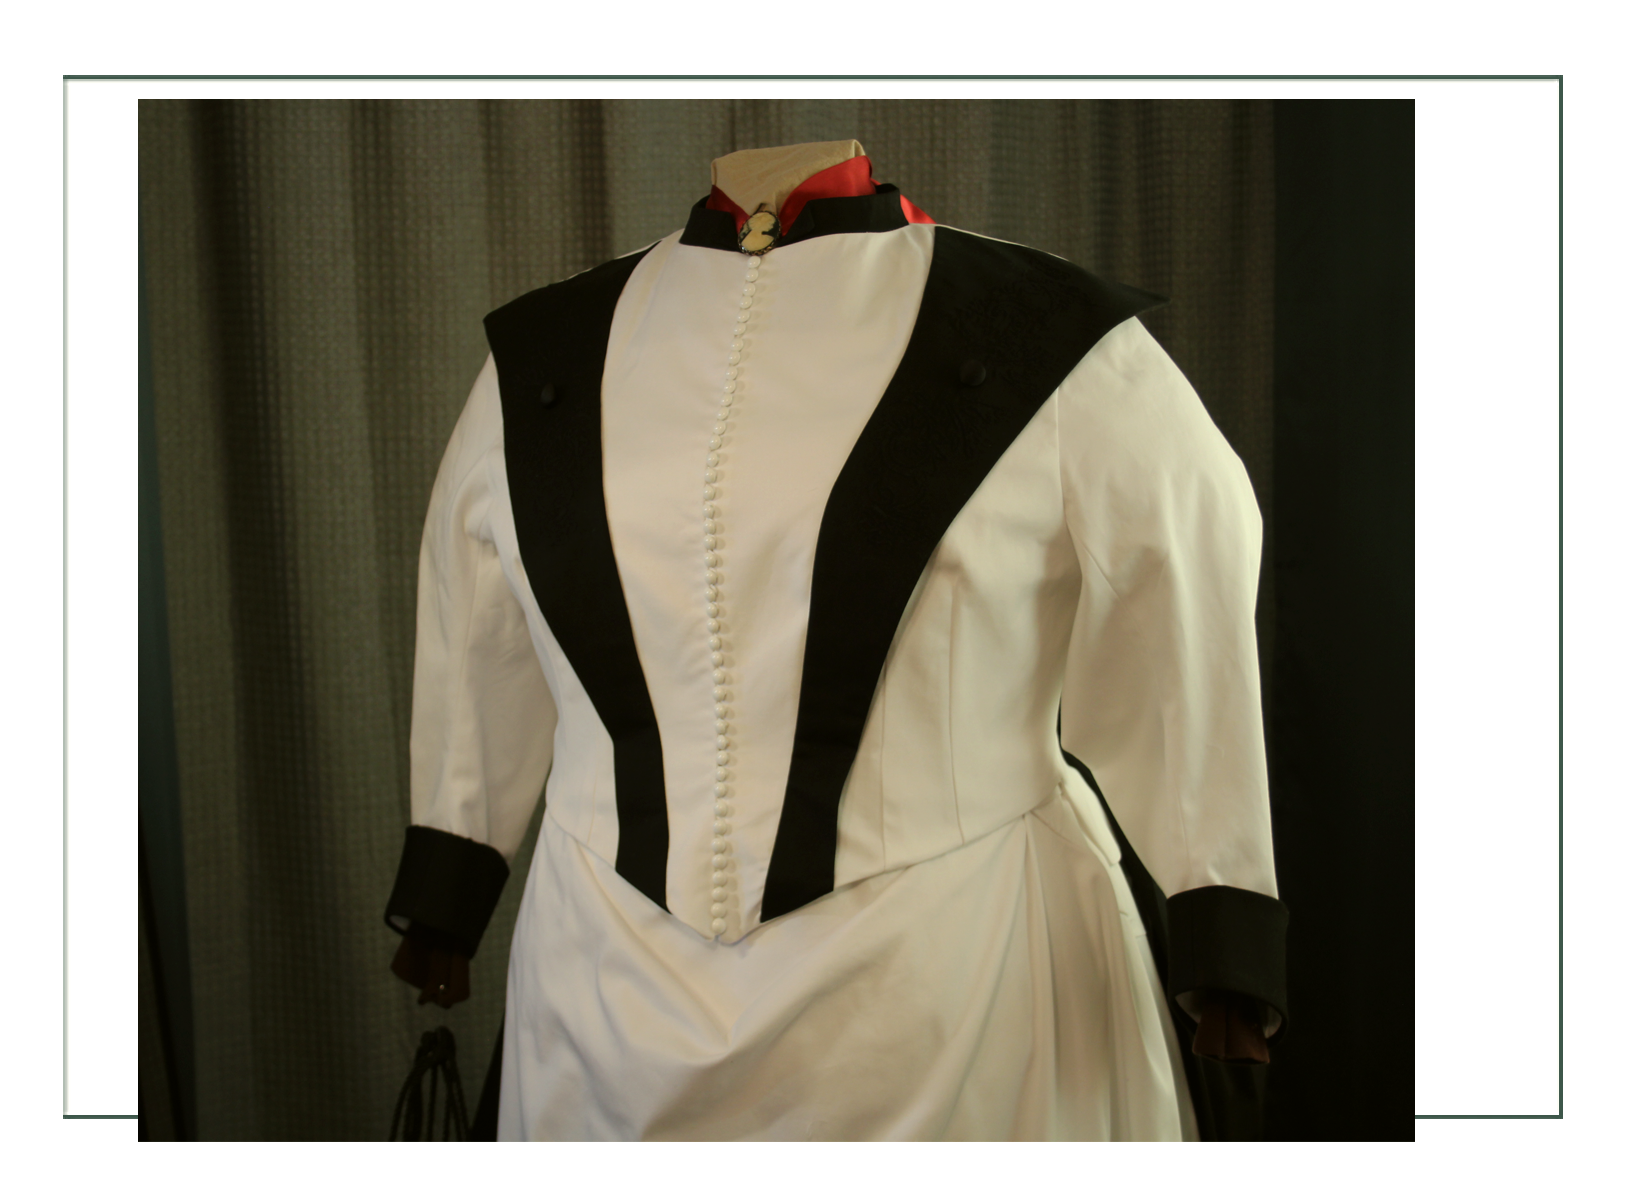
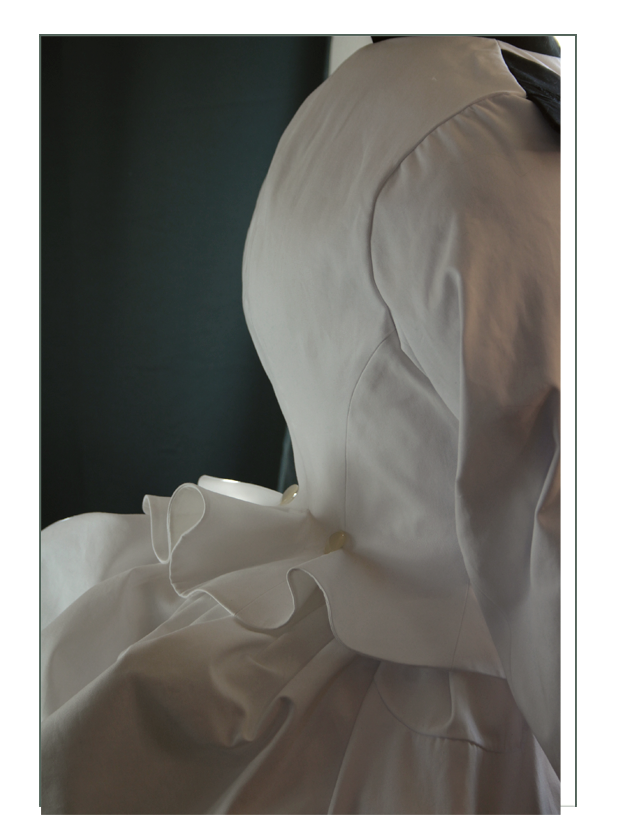
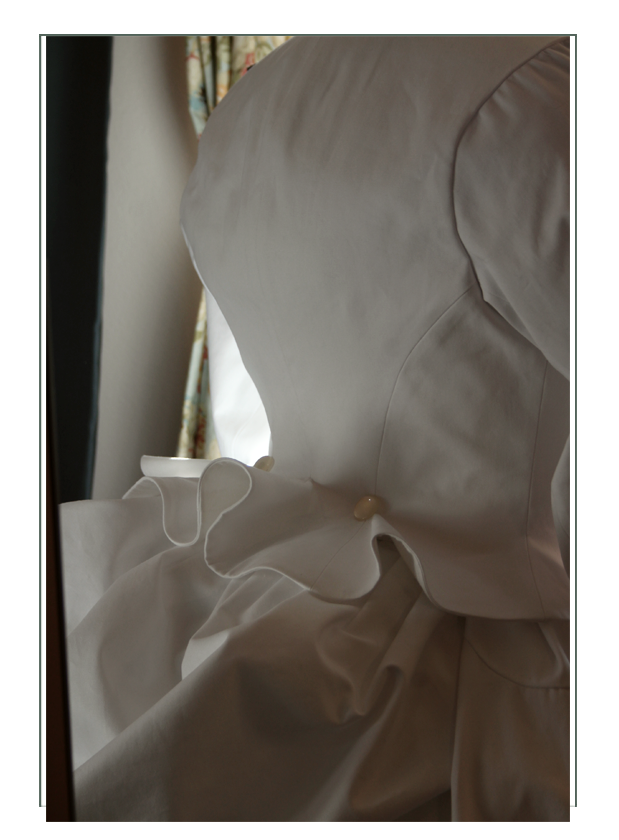
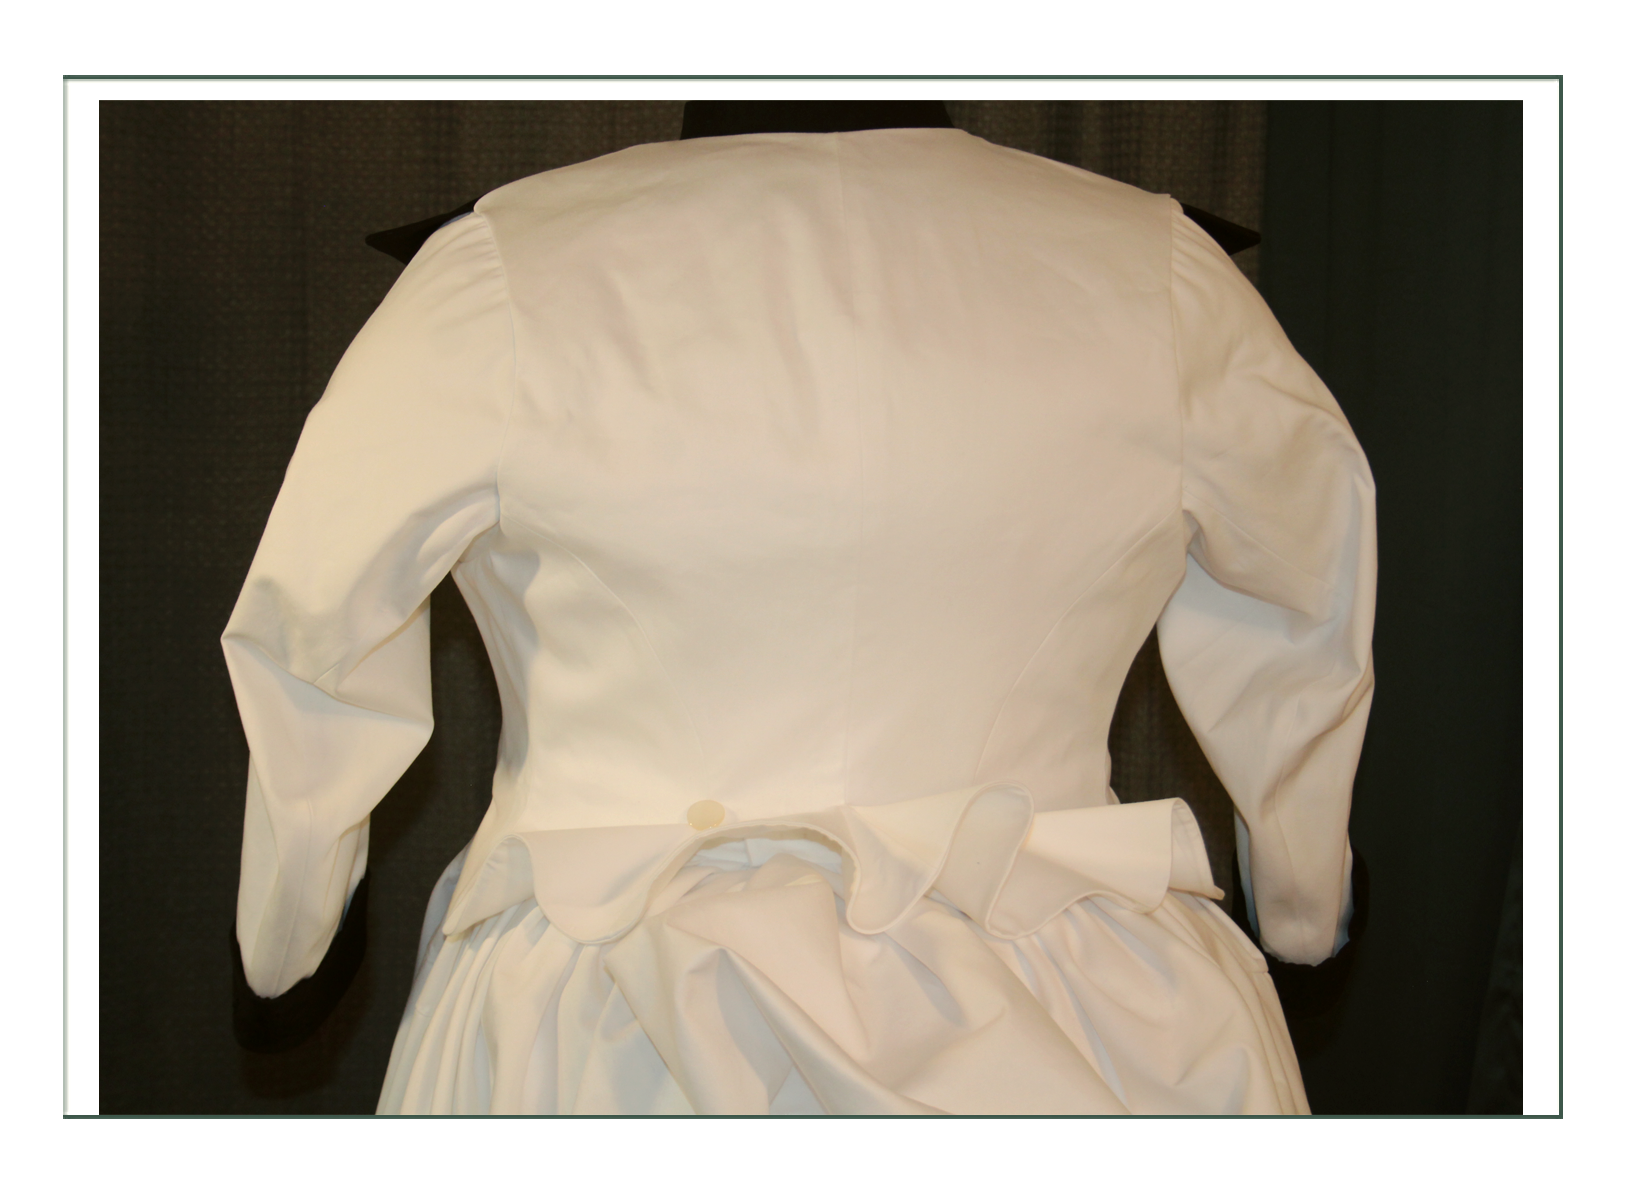
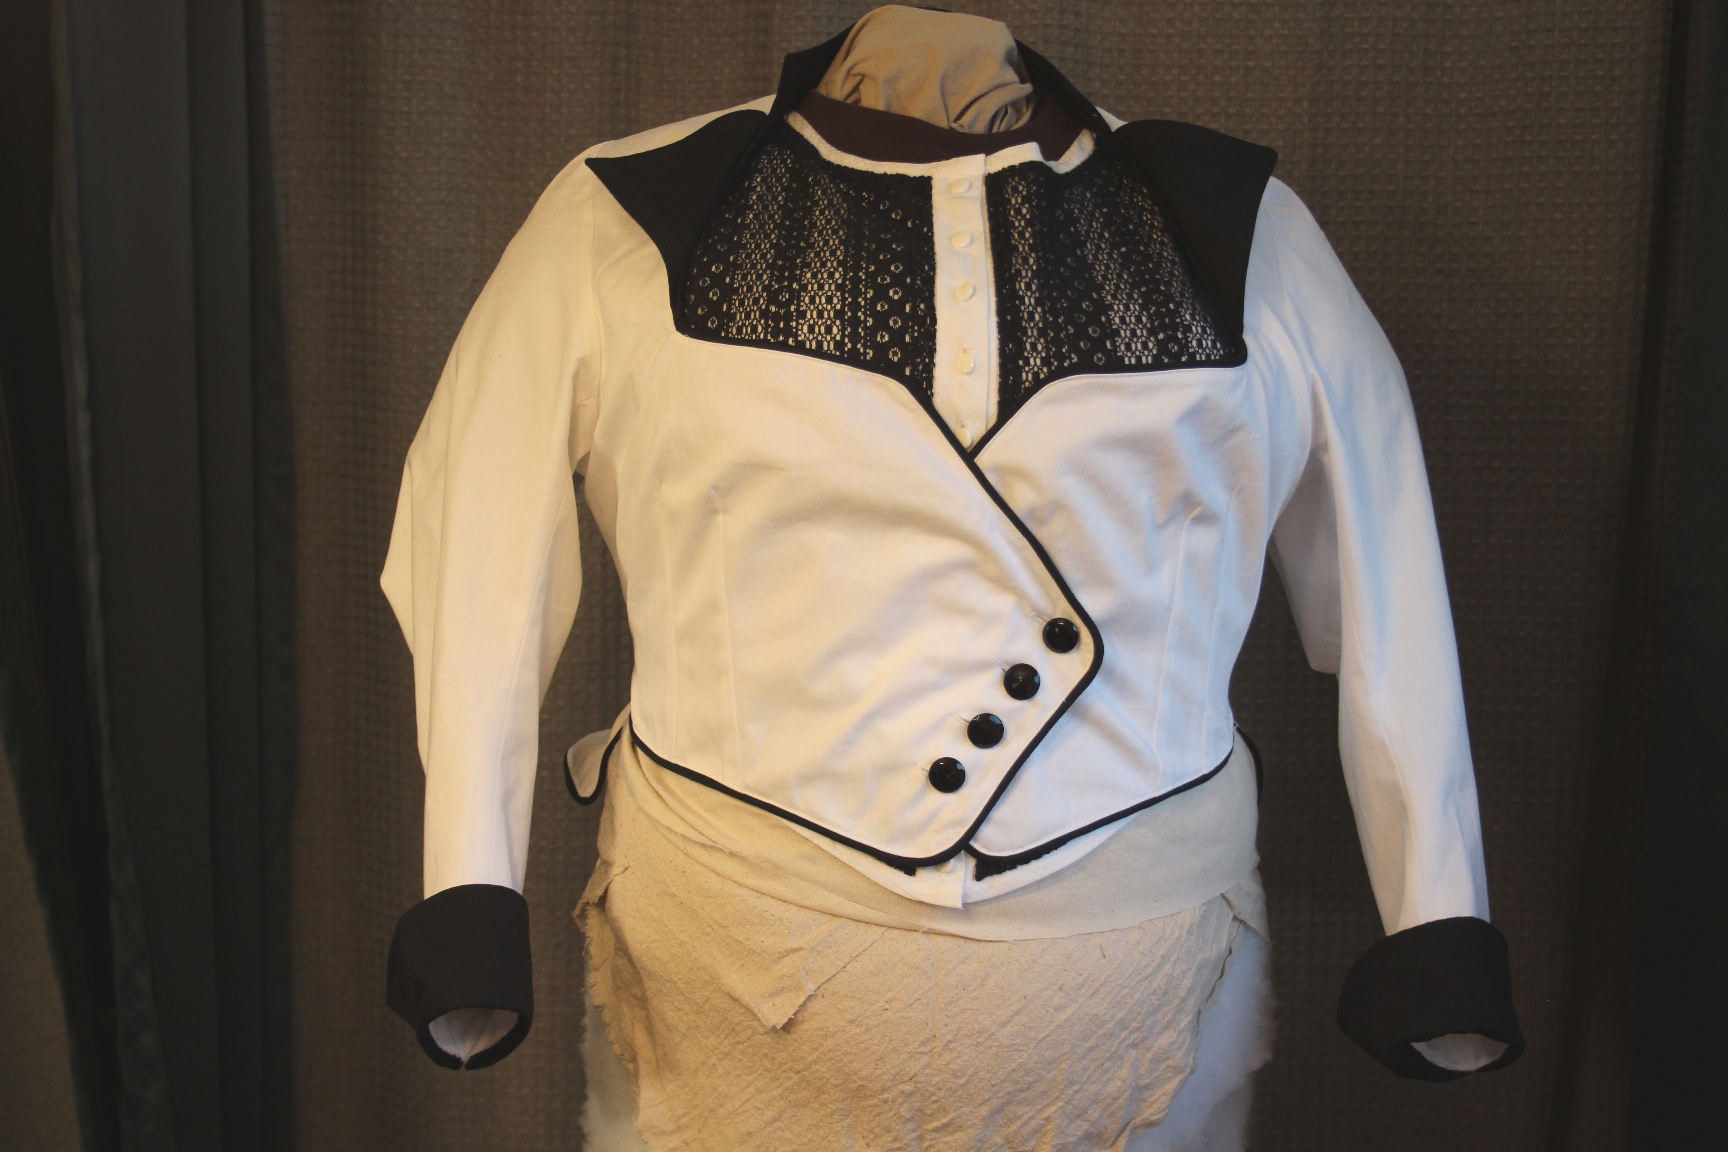
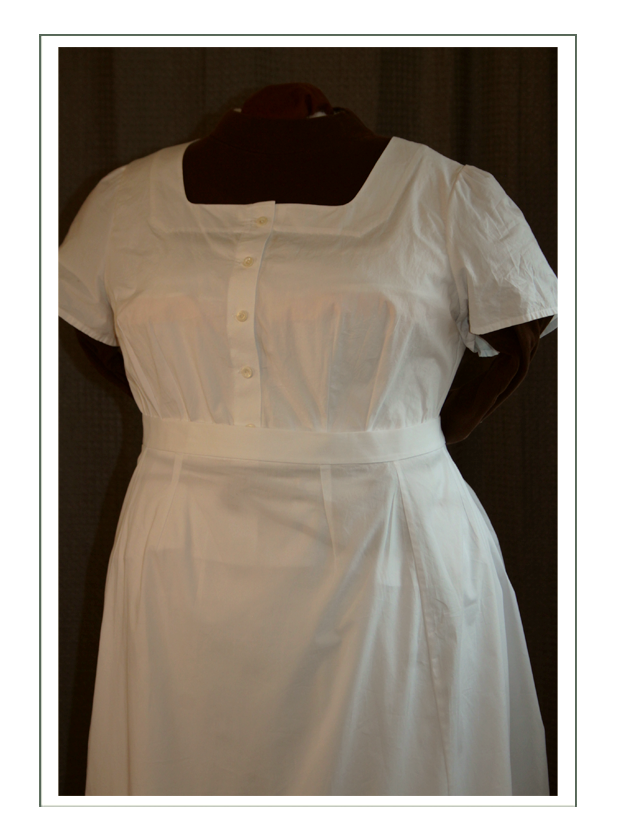
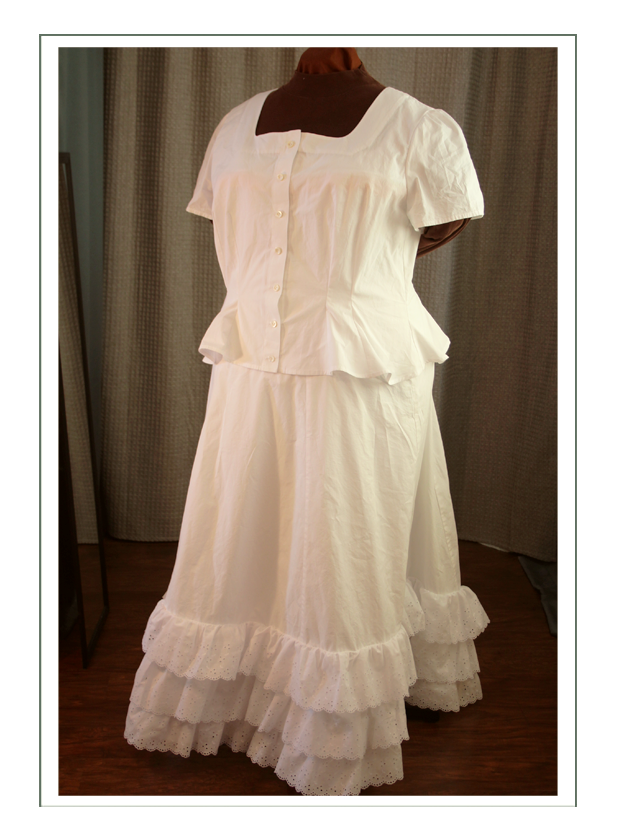
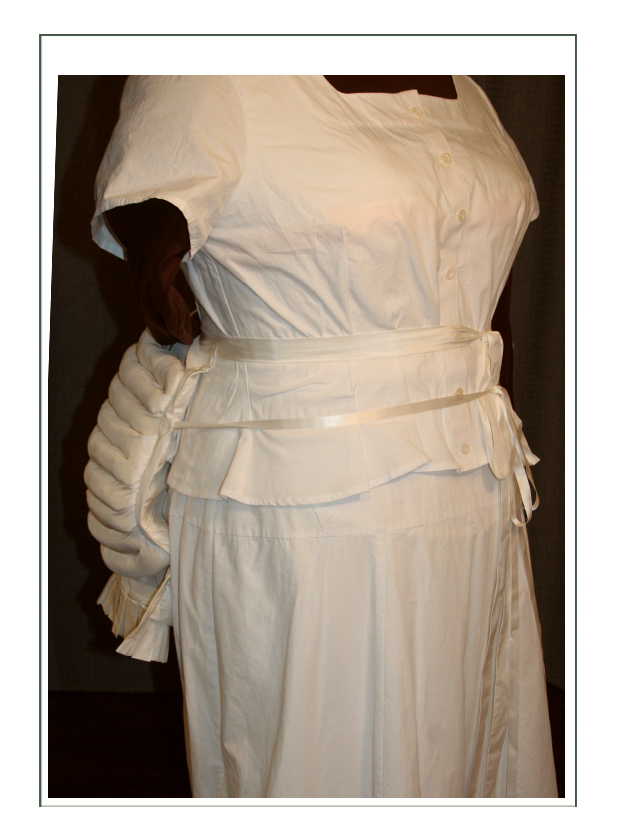
Bodice
This ended up being a bit different than the sketches, because we were torn on the construction method to use; whether to build revers from softer and lighter weight fabric with buttons and pleats, or to build EXACTLY as per the example. The latter won out because we found an historical pattern to use as a basis specific to 1887!
This is called an “Alexandra Bodice”, named after Alexandra of Russia who was the 3rd fashion trendsetter of the era (along with Victoria, Eugenie, and Lillie Langtry). Alexandra worked with the Worth Fashion House but also many other Parisian houses, so she had variety. She was very popular on America because she visited often and had family attending school there, although she lived in Russia.

Alexandra wore the very tightly cinched and fitted long corset and was known for her fashionable shape. This pattern emphasizes that long and tight shape.
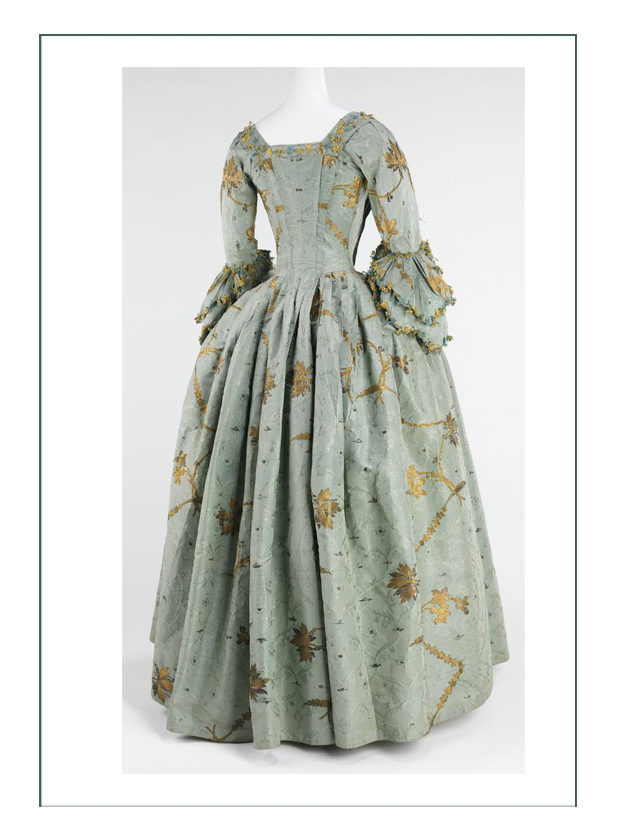
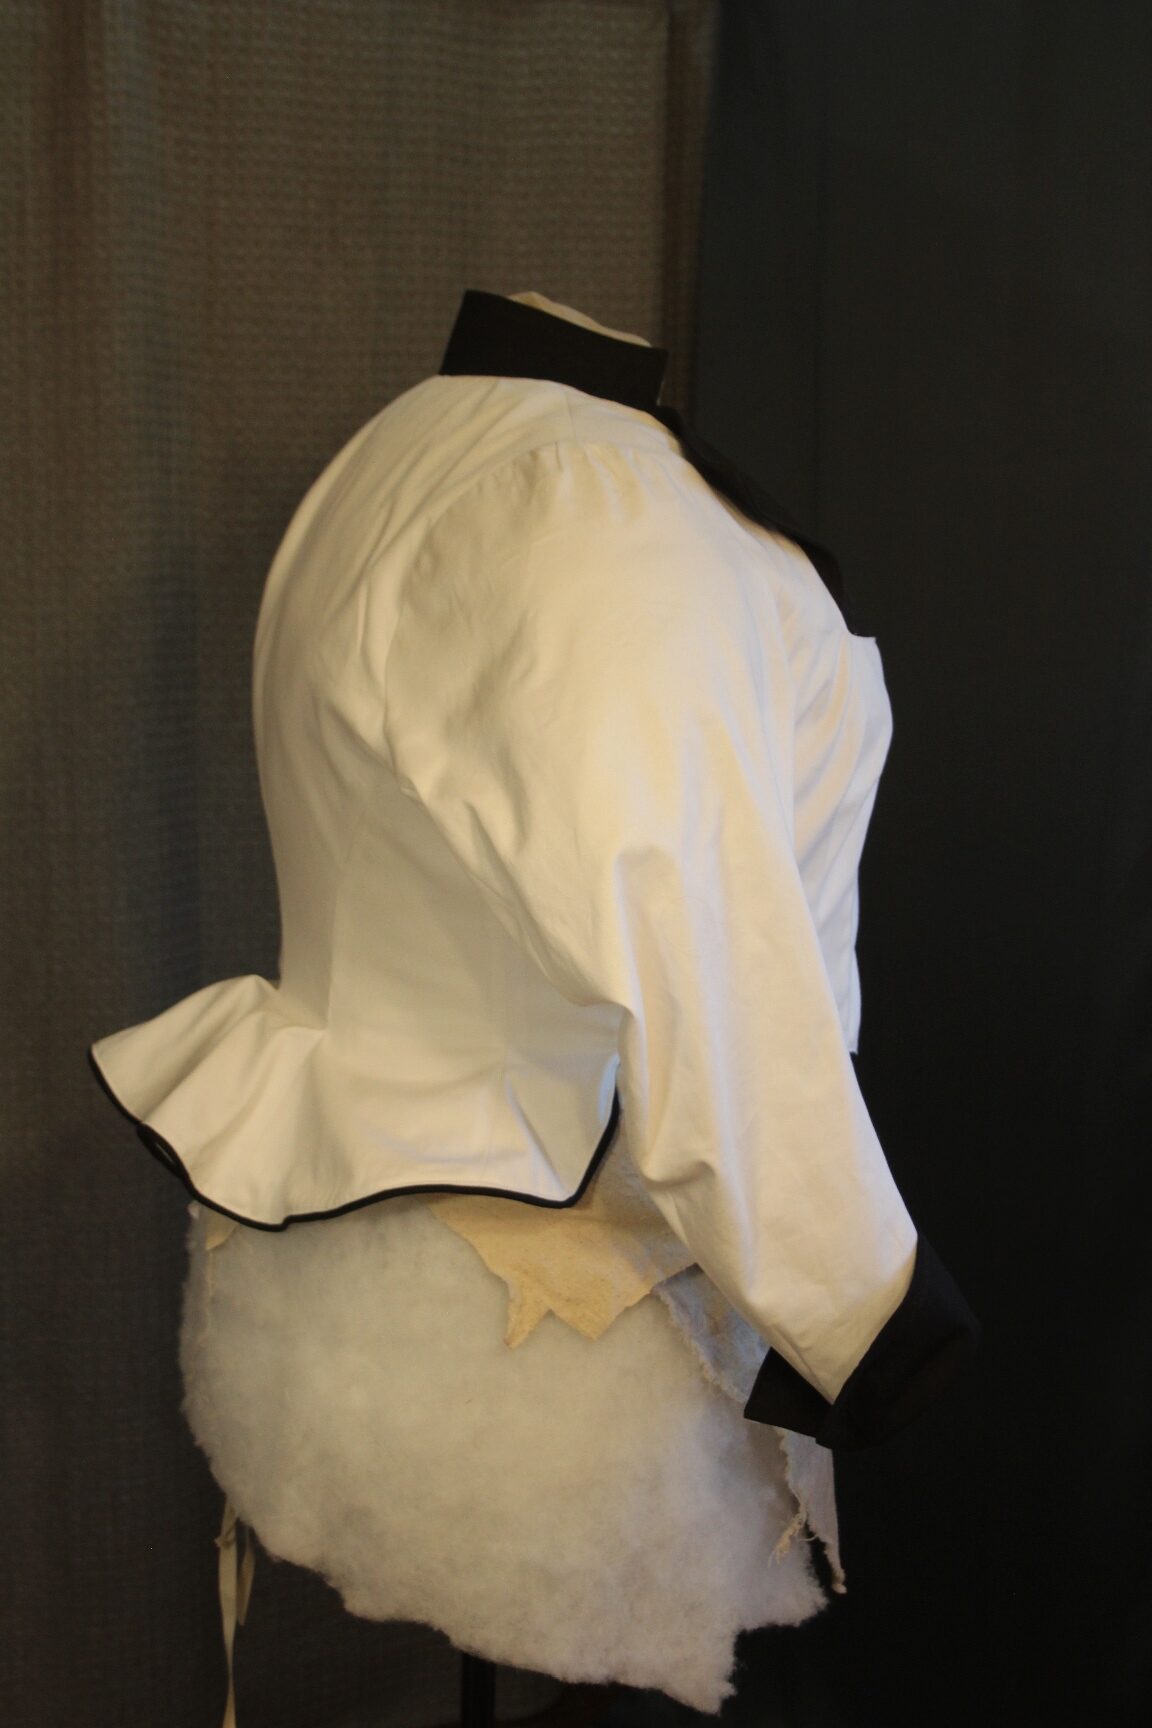
It is actually built like an 18th century “sacque” gown in that the large peplum (little skirts( in back are integrated into the center back piece. It is interesting how many 1880 and 1890 supposedly “new” fashions were actually repeats of 18th century (like the polonnaise Worth claims to have “invented”). This design is very 18th century, except that it is fitted over a curvy corset rather than rigid stays.
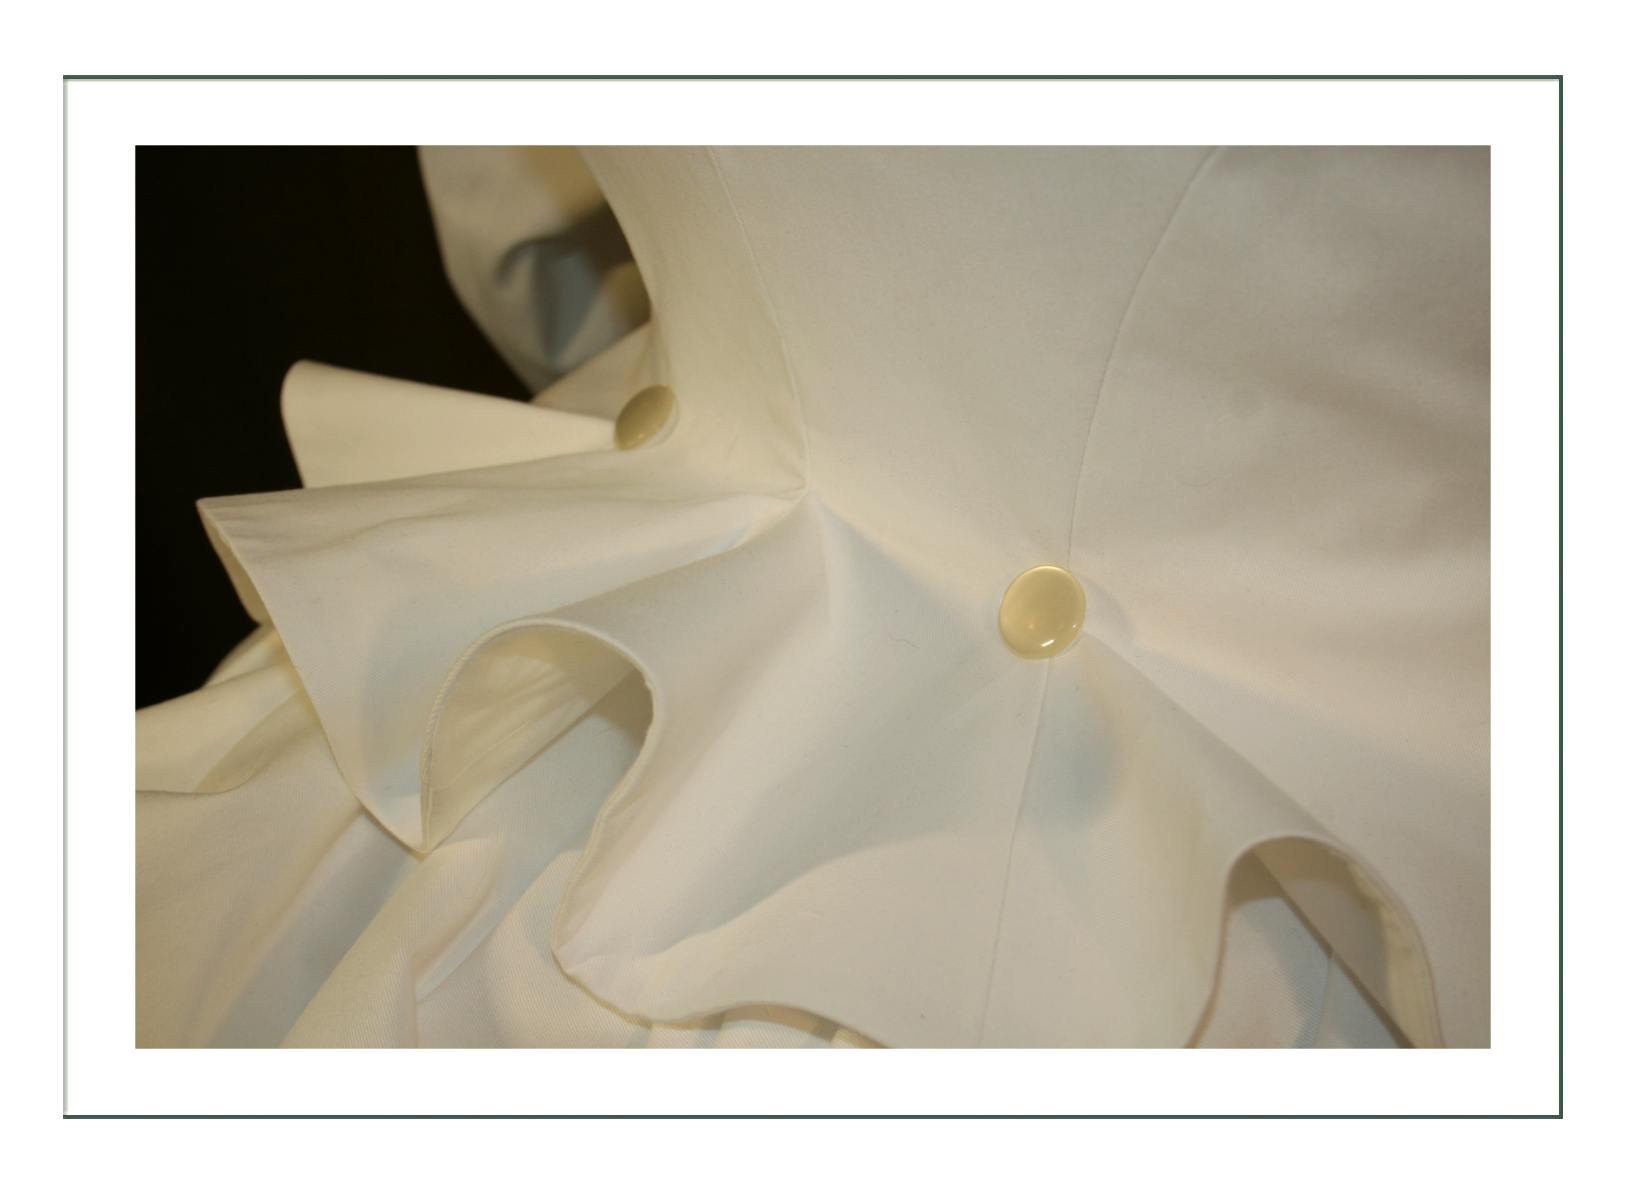
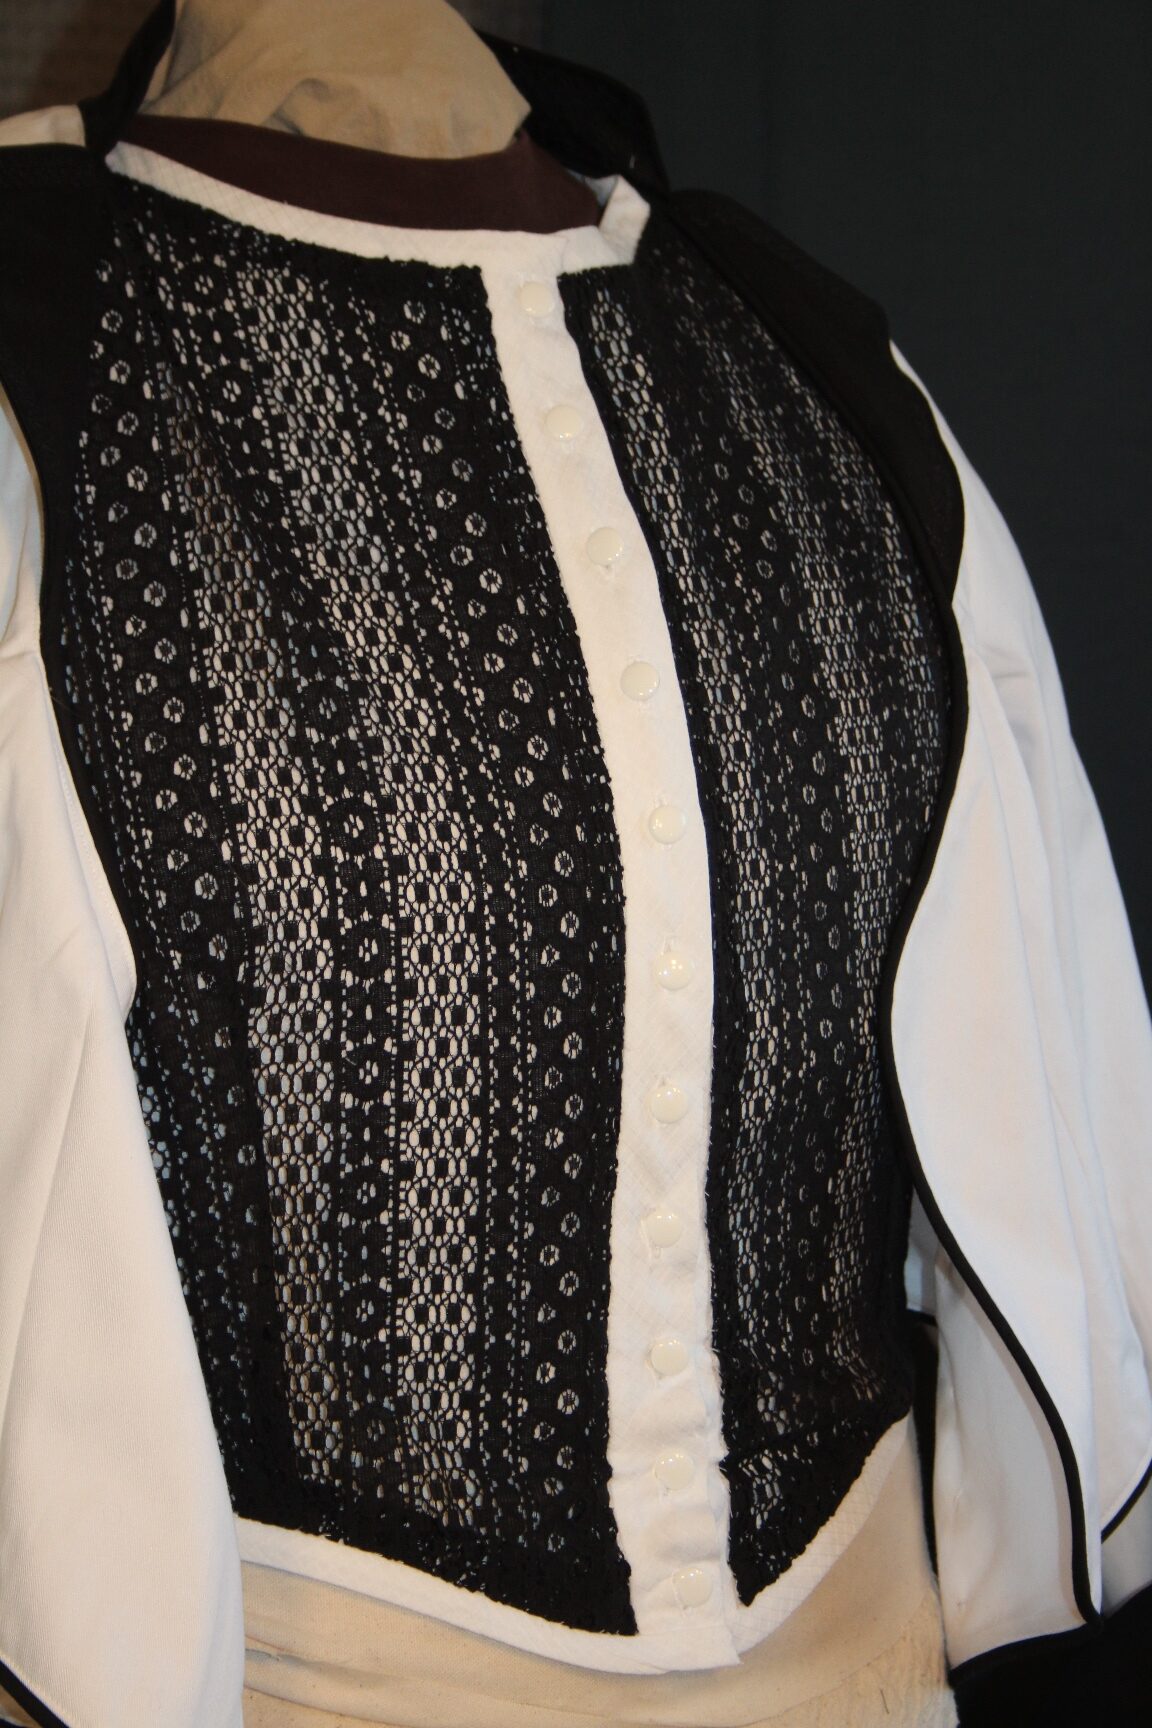
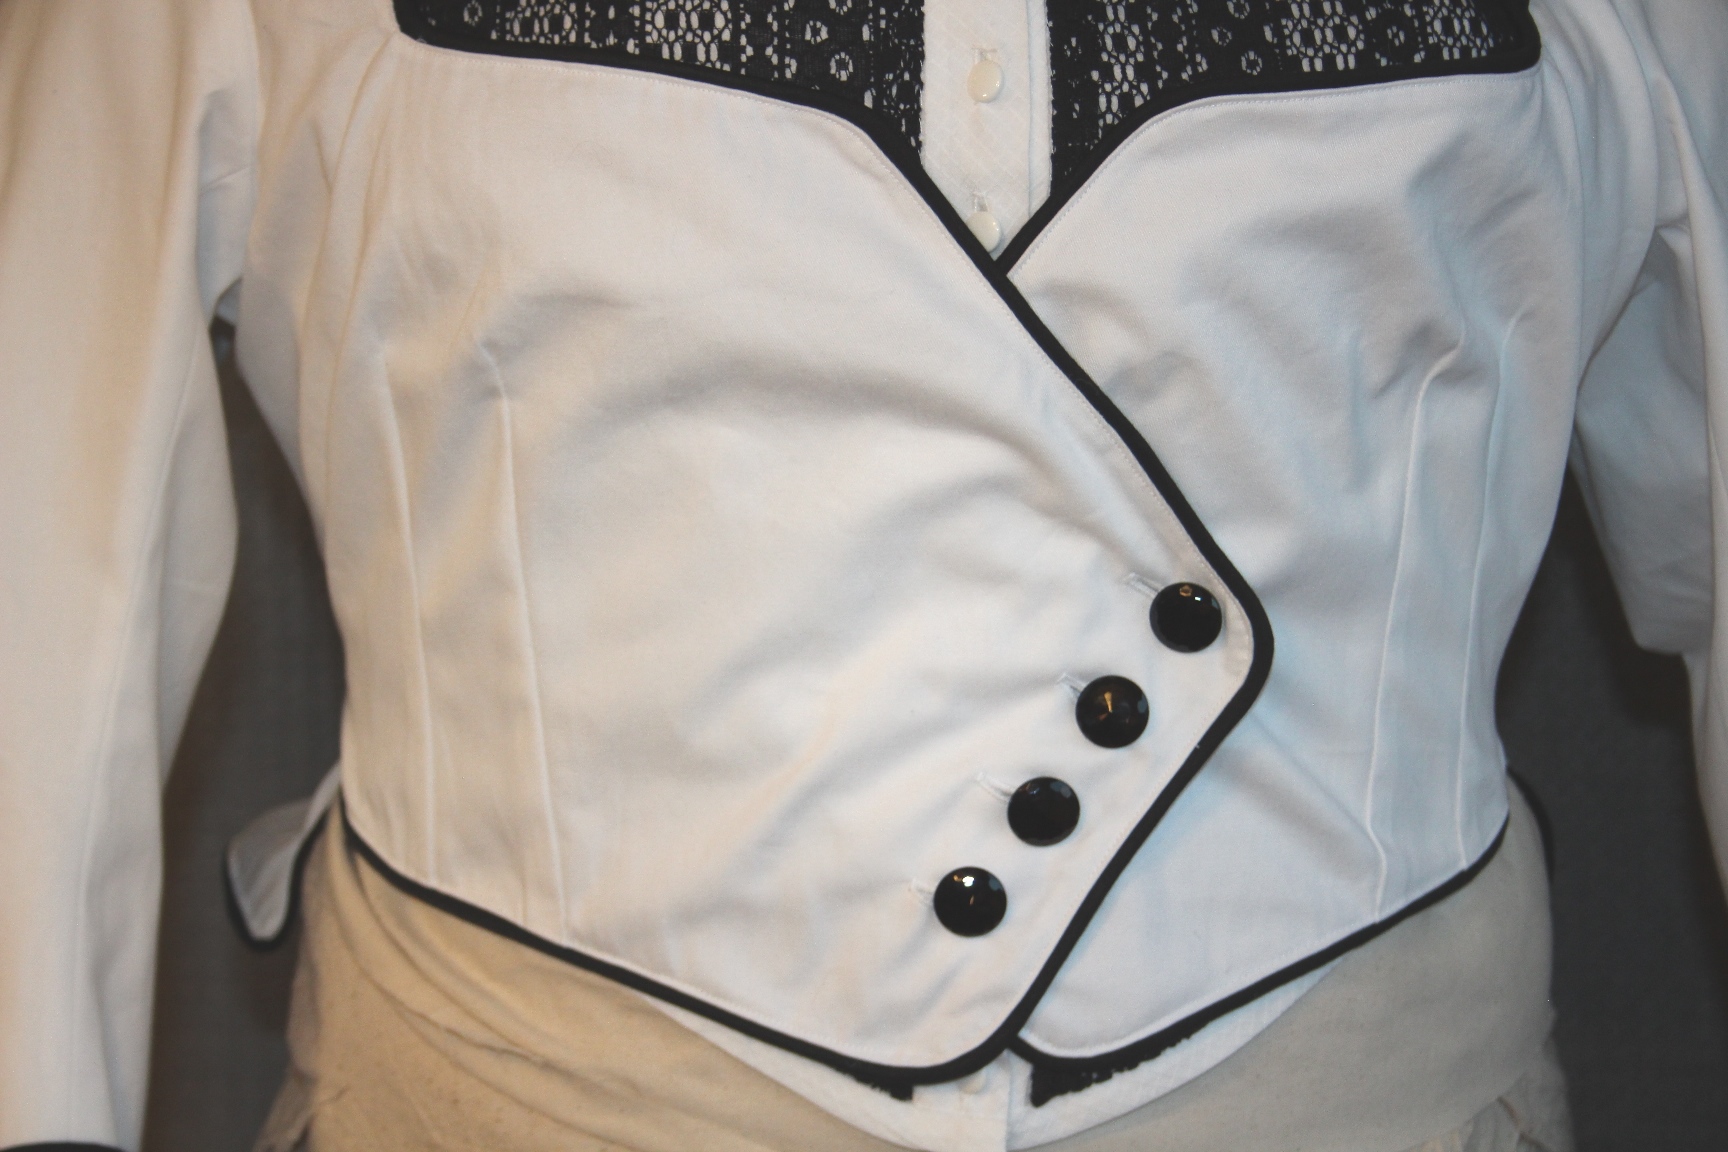
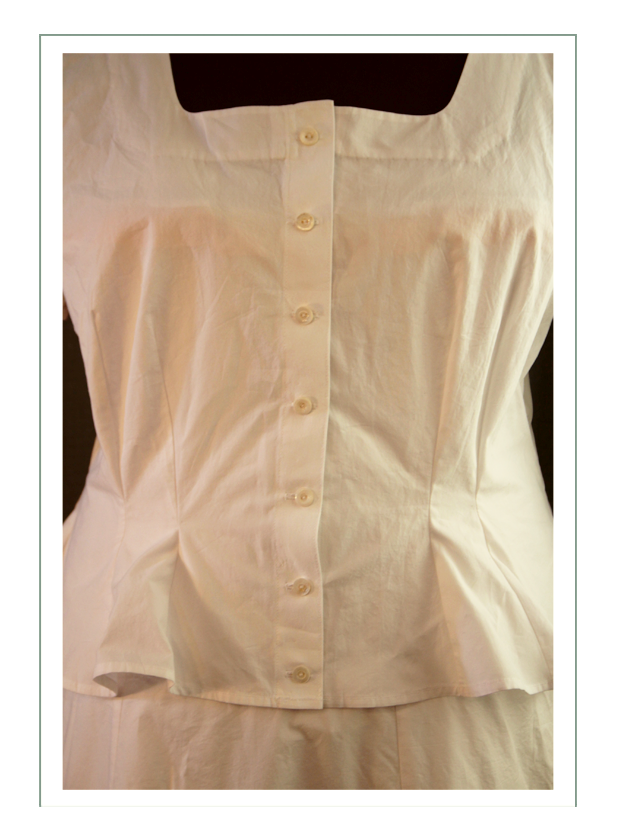
Another necessary design decision was made regarding the buttons. Historically, the buttons would be for ornament only, but Melissa wanted EXACTLY the “white lady” bodice. This meant the bodice had to have:
- Center panel of the main white twill fabric
- Wider front insert panel than historically correct for 1887
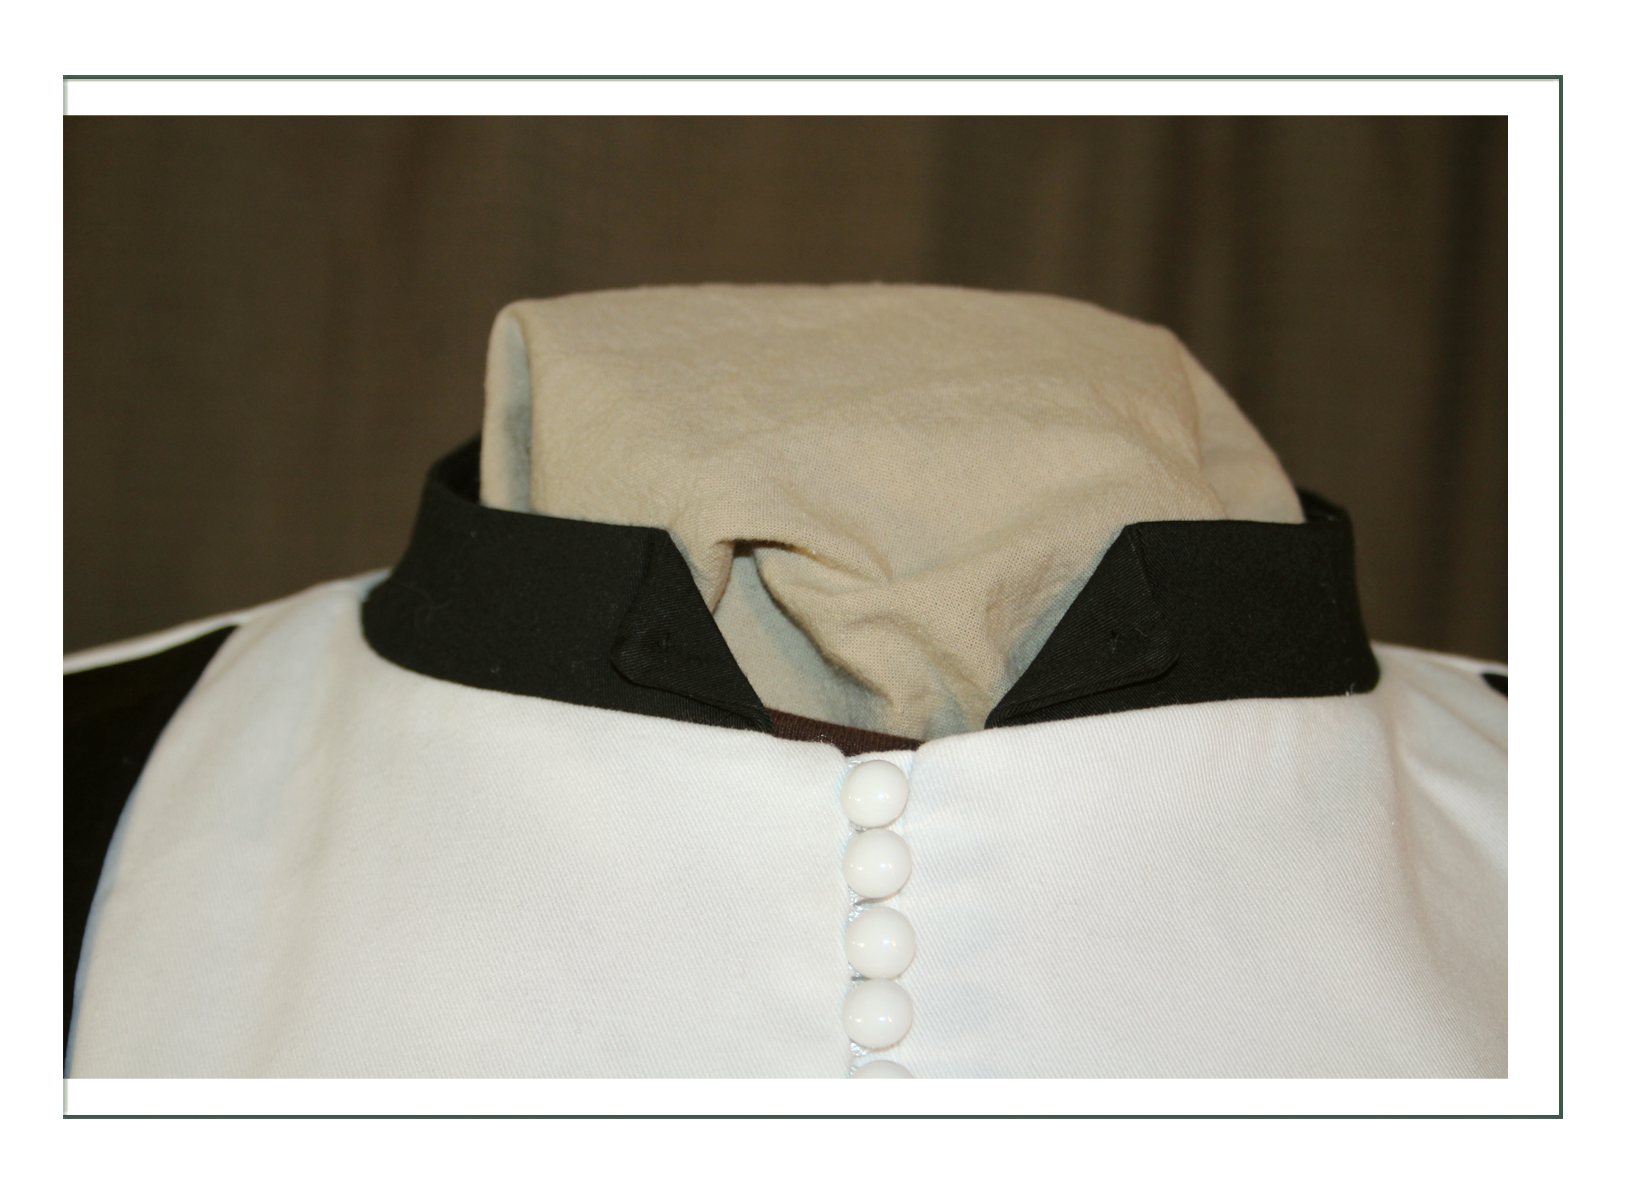
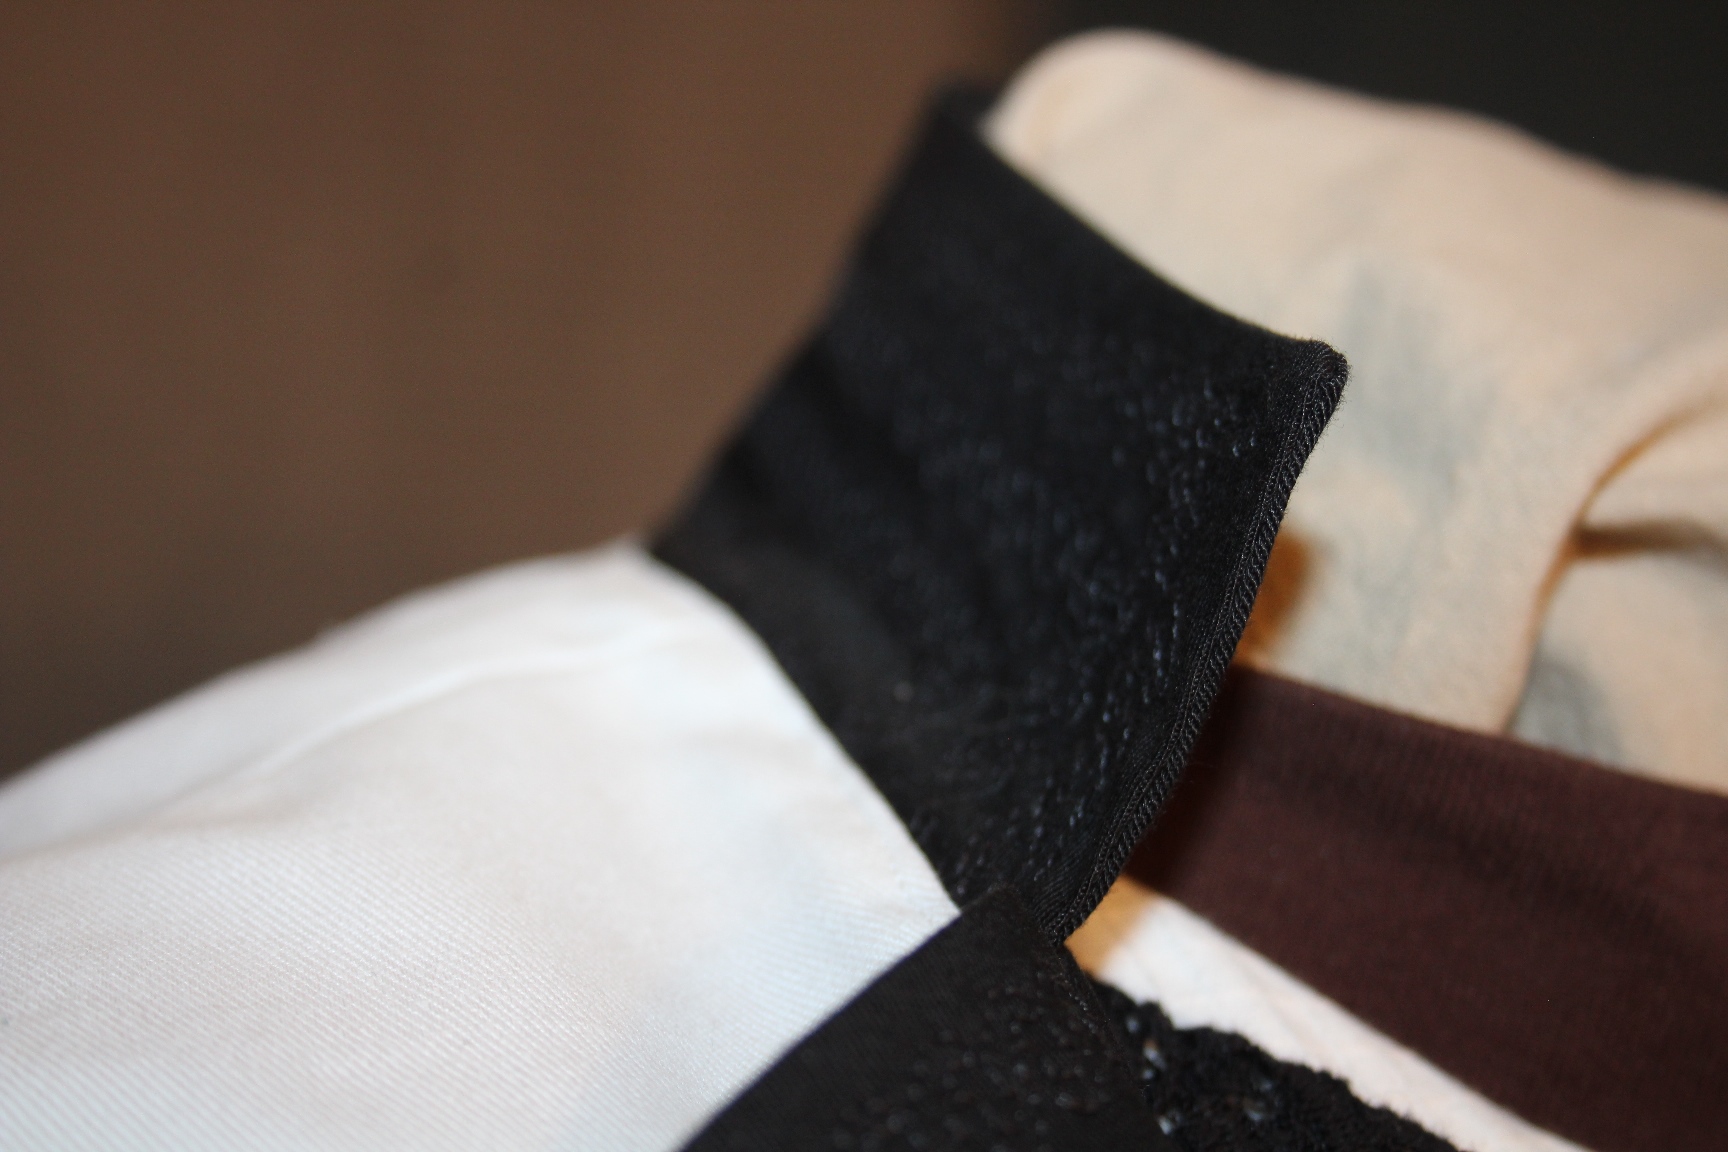
- Wider and more sci-fi type lapel instead of the shawl collar of the day (yet it still had to be a front only collar, with the top integrated into the shoulder seam because it can’t physically make that turn without continuing the lapel down the back too)
- Decoration on the collar, so a specific shape needed
- Collar to go to the waist as per the example
- Buttons center front and hidden, or hooks and eyes (difficult because tension is need for hooks and eyes to work, and we are 1200 miles away and have not had a measuring session even, let alone a fitting session. In the 1880’s they would have had many fittings and could make the bodice extremely tight and fitted; we have no such luxury from distance and with social distancing restrictions)
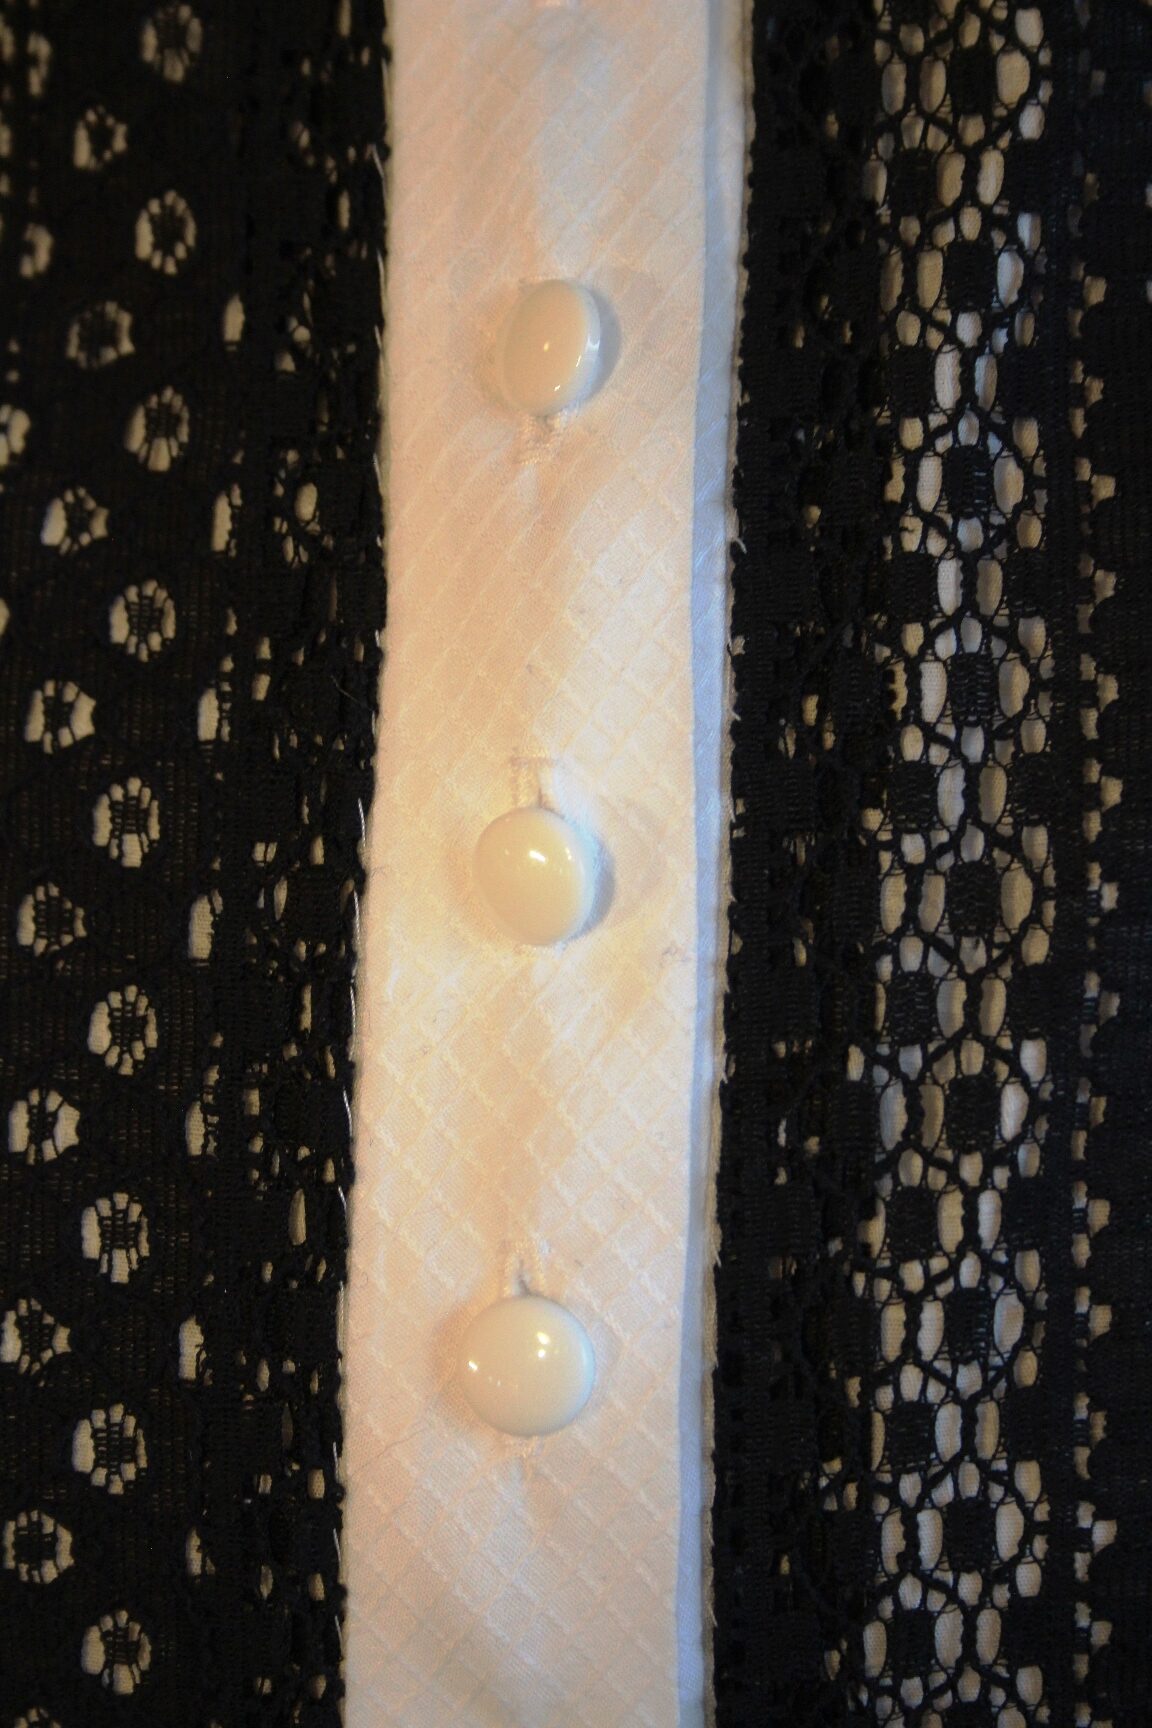
The solution was found in bridal wear. We had 50 gorgeous French glass domed shank buttons that were a perfect match to the white fabric, and very solid and strong and durable too. Placing them next to each other, and using a premade button loop on a trim braid, we found we could insert the braid as if each loop was made by hand. The loops would not show at all with the unique “underflap” construction of our own design, and the buttons would end up “in the pocket”; visible, yet not at all dominant in the solid white front desired by the customer.
The result is an easy to get in to (if a crochet or button hook is used), very durable, and button up front that can be used regardless of the tension across the front of the bodice due to variability in lacing and layering.
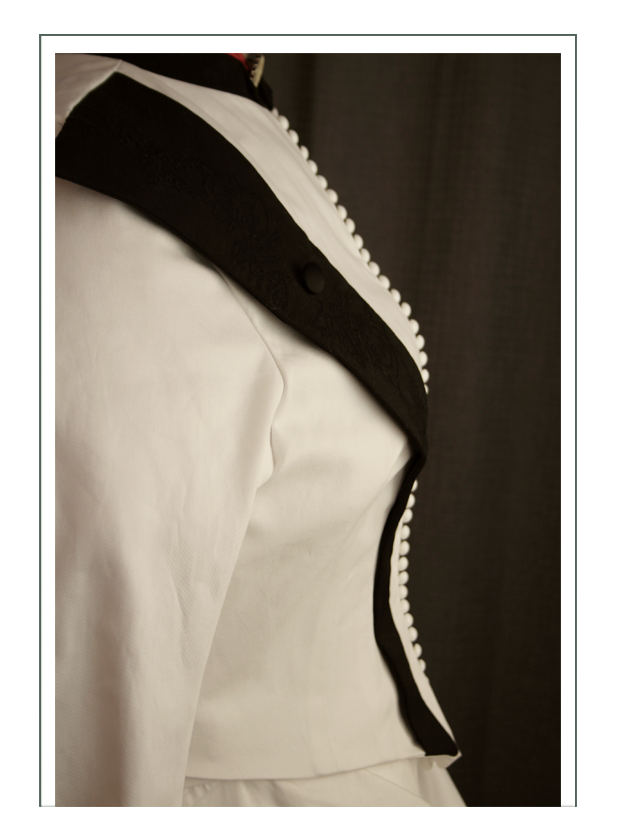
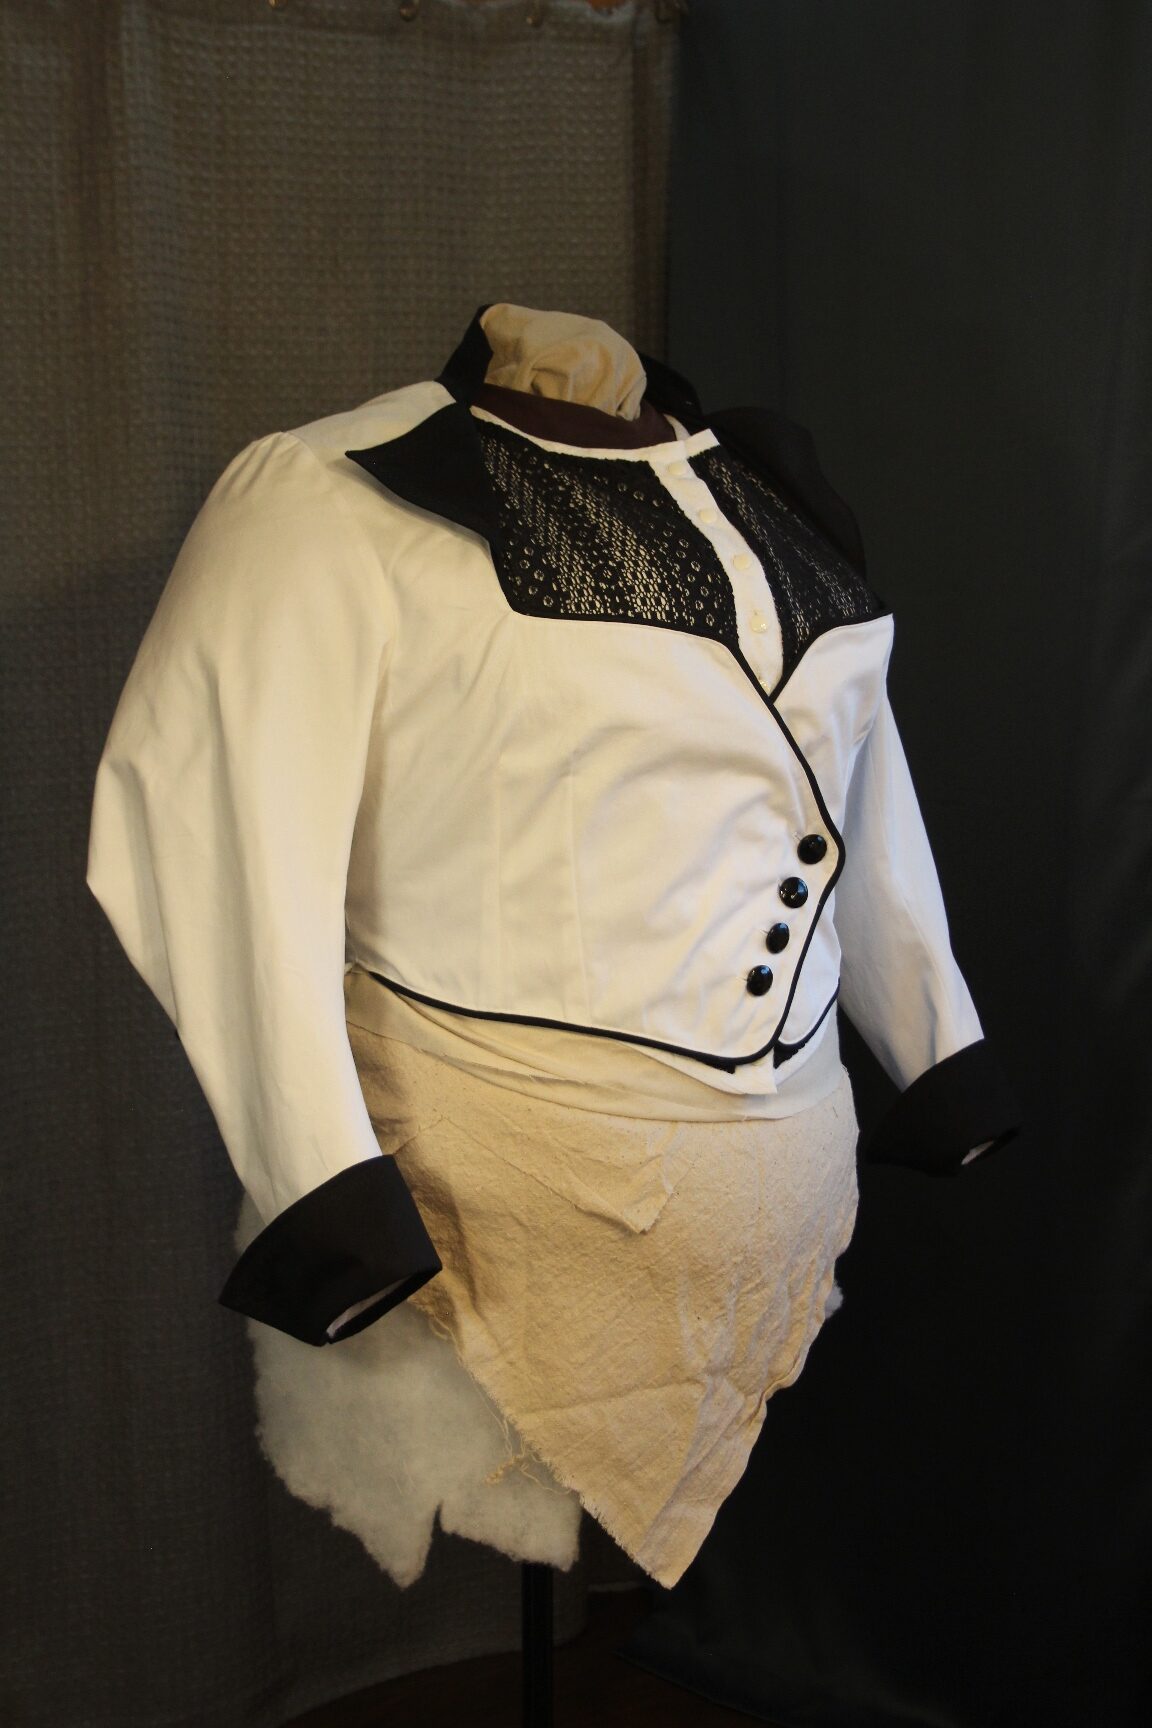
Note we also shortened the stand collar and opened it in front. This was actually being done for sportswear at the time because it gave a woman less restriction in head movement for playing tennis or golf, etc. Melissa had asked to have a loose and short collar, so the little turn in front was a priceless and very accurate fun addition.
Overall, we tried to put a unique “spin” on the “white lady” design so that it has more depth and more character than just flat black and white because that’s a big expanse of just solid white fabric. The soutache embroidery on cuffs and lapels is just for fun and interest.
There are buttons on the back of the peplum and on the skirt waistband for the various bows and scarves that were draped to break up all that white too, and to look like the “white lady”. These can be buttoned on or off easily before or after dressing.
While the layering is challenging with so many tapes and strings internally, the overall look is classy and tailored, with just a touch of whimsy and sci-fi thrown in. How perfect for a Sherlockian character ensemble!


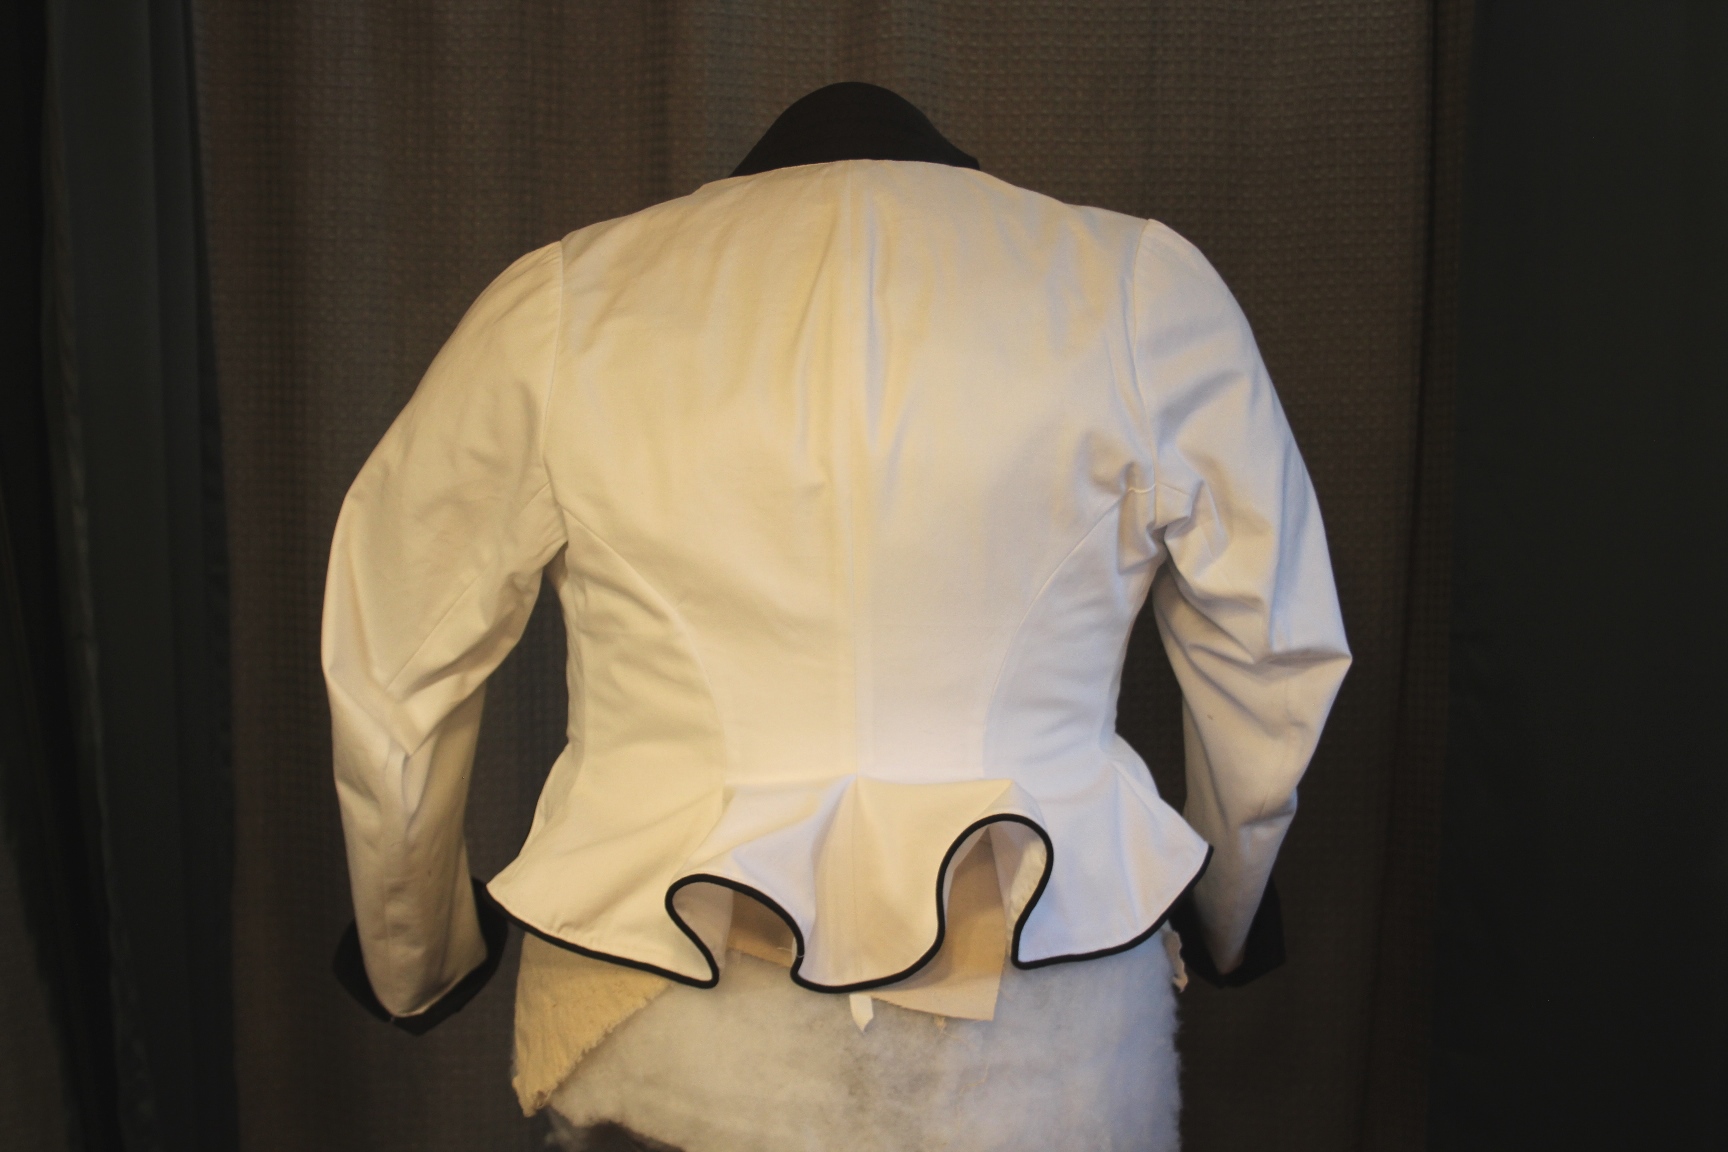
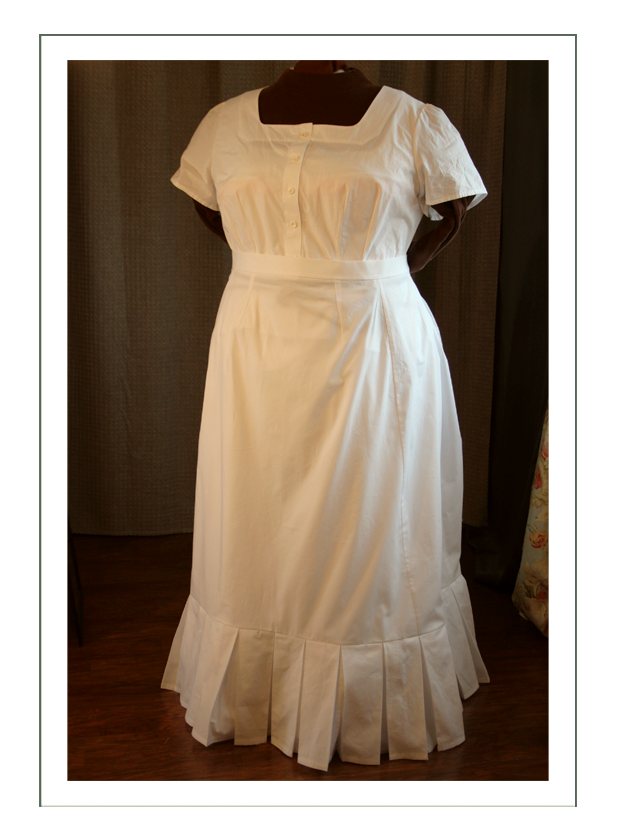
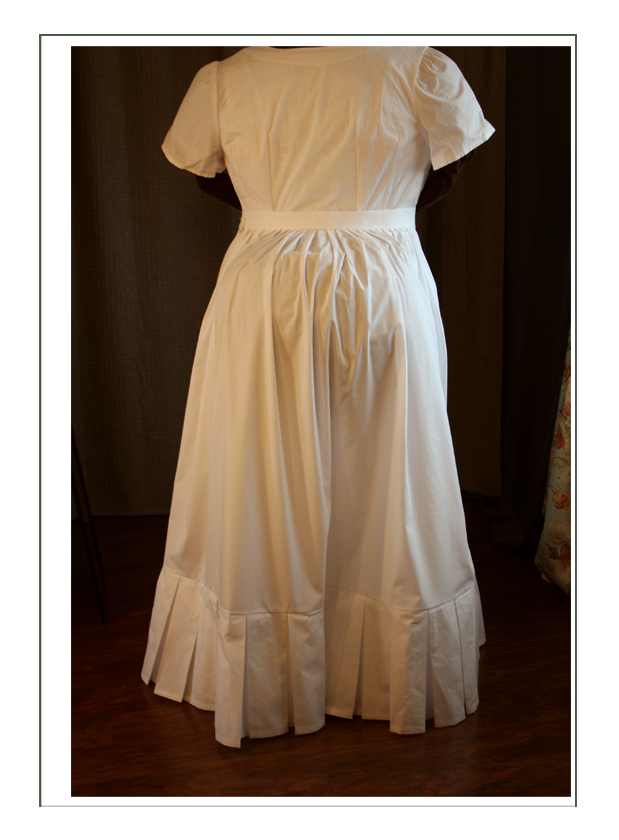
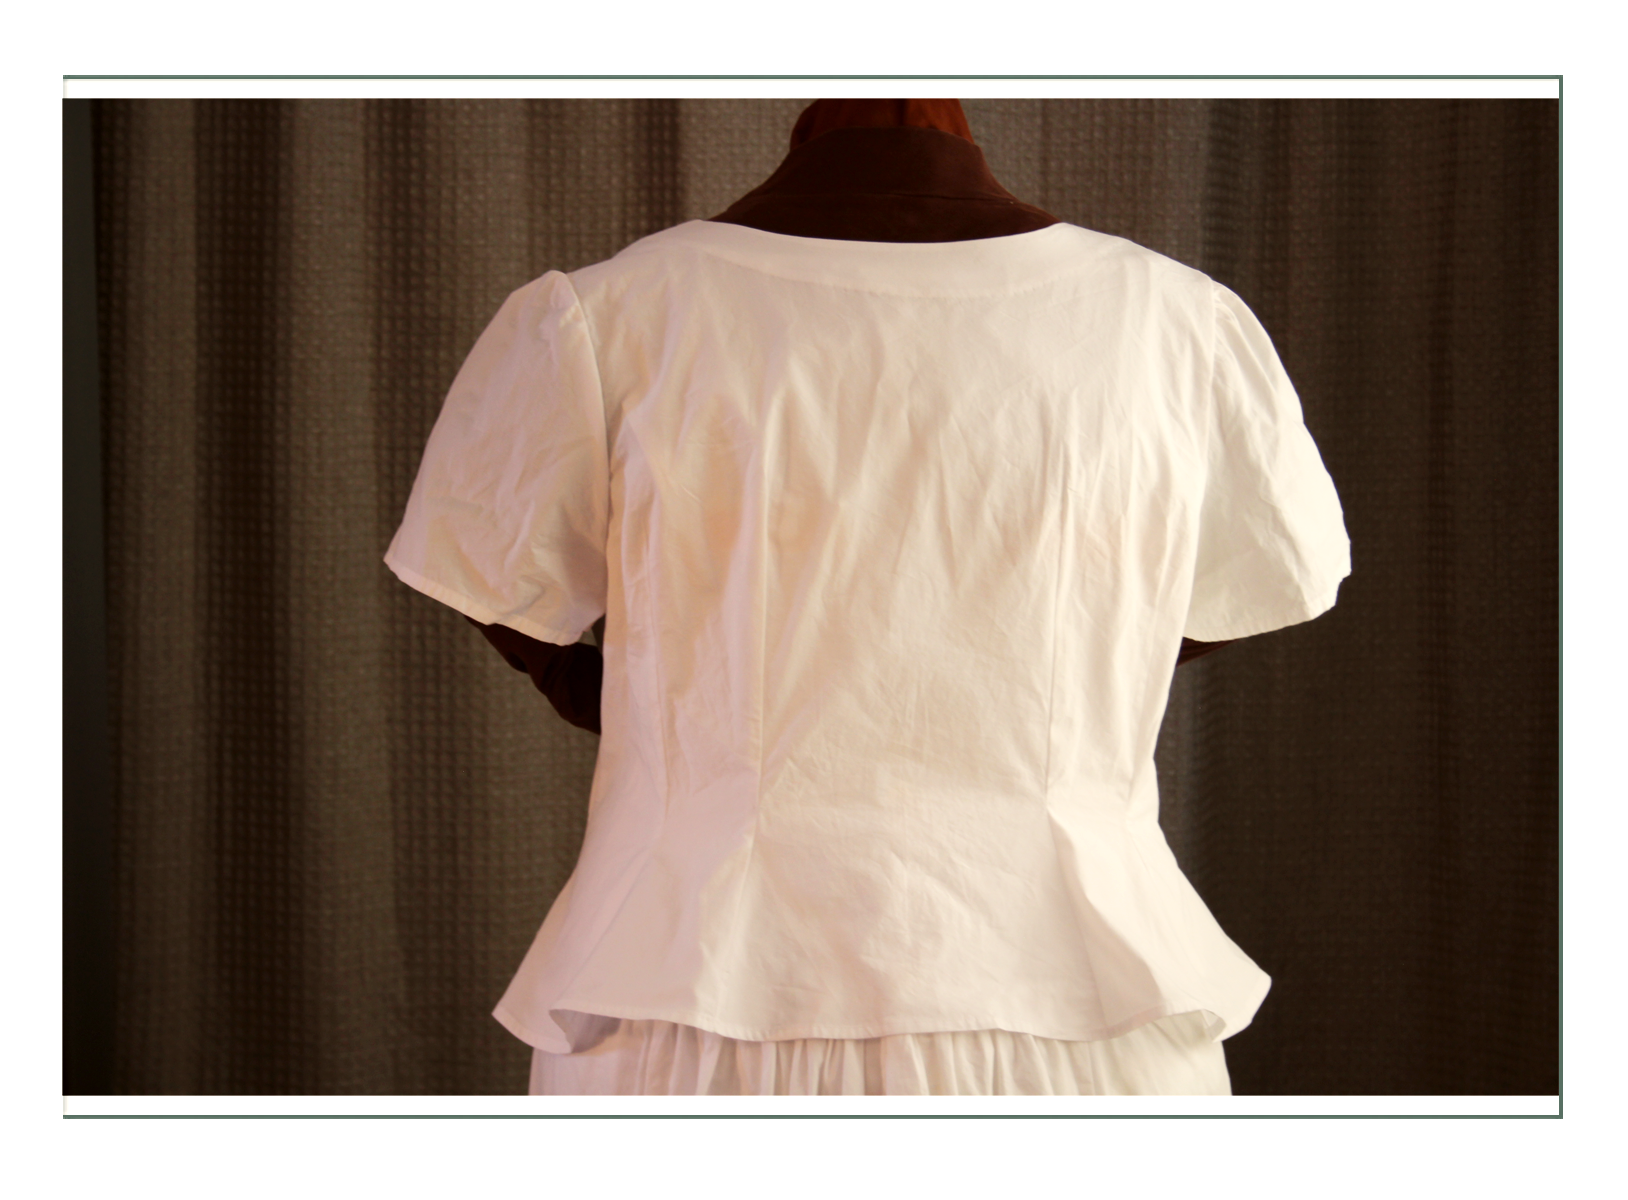
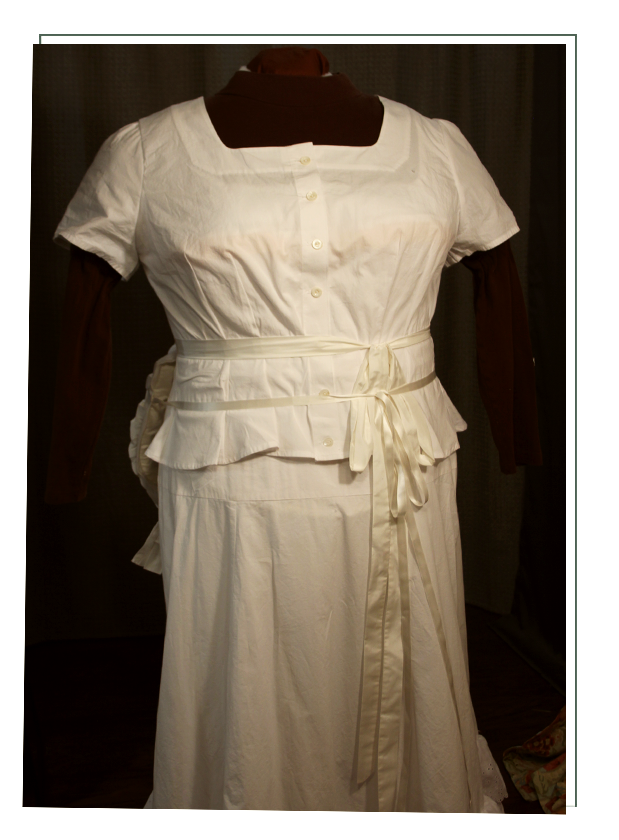
Second Bodice (Remake)
Melissa was not happy with the original bodice because:
a) too many buttons
b) too tight at the neck
c) sleeves too short
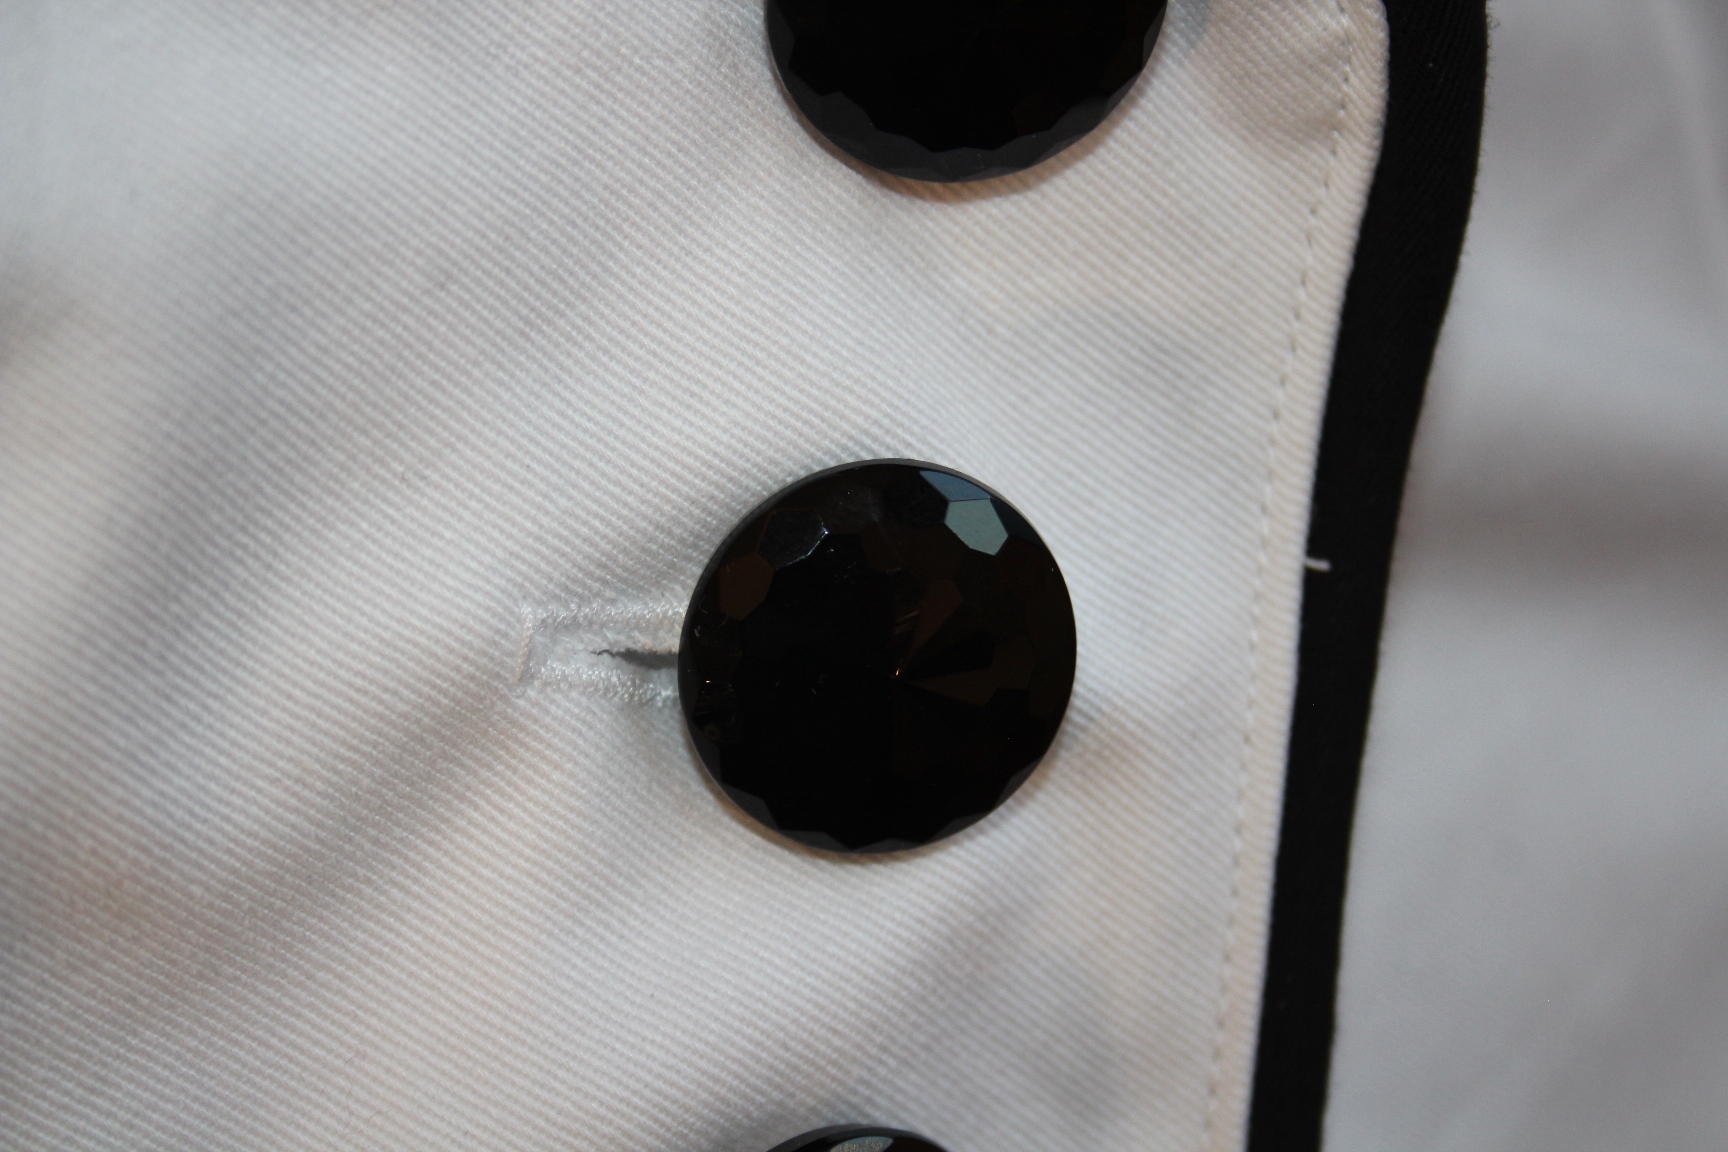
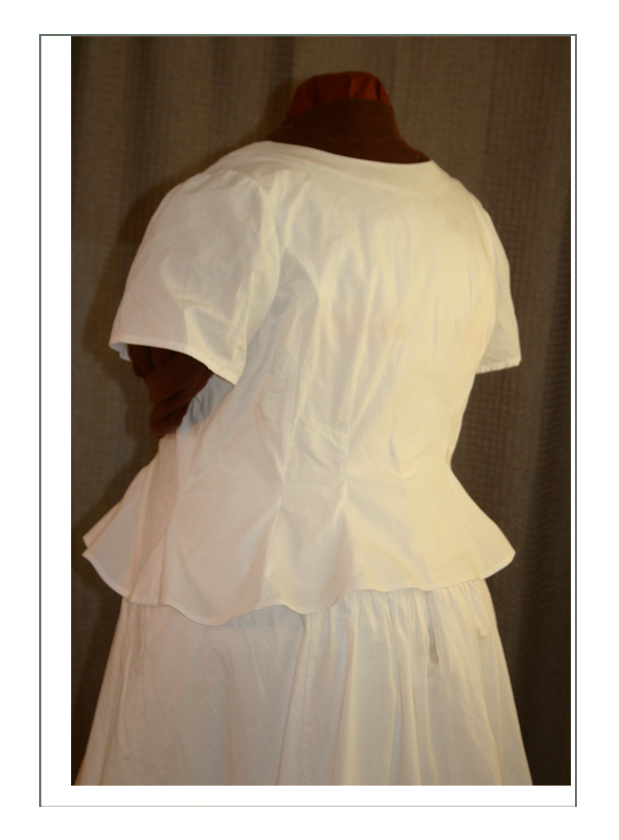
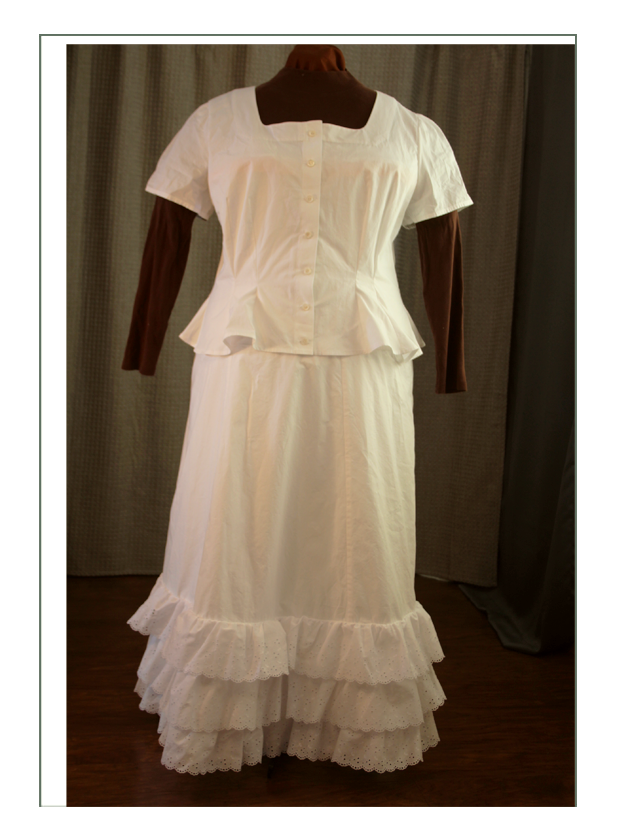
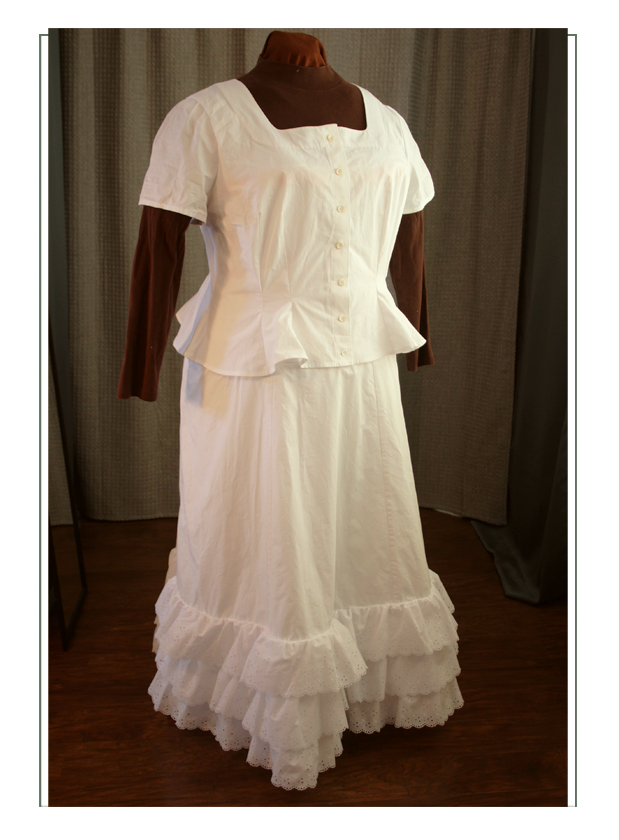
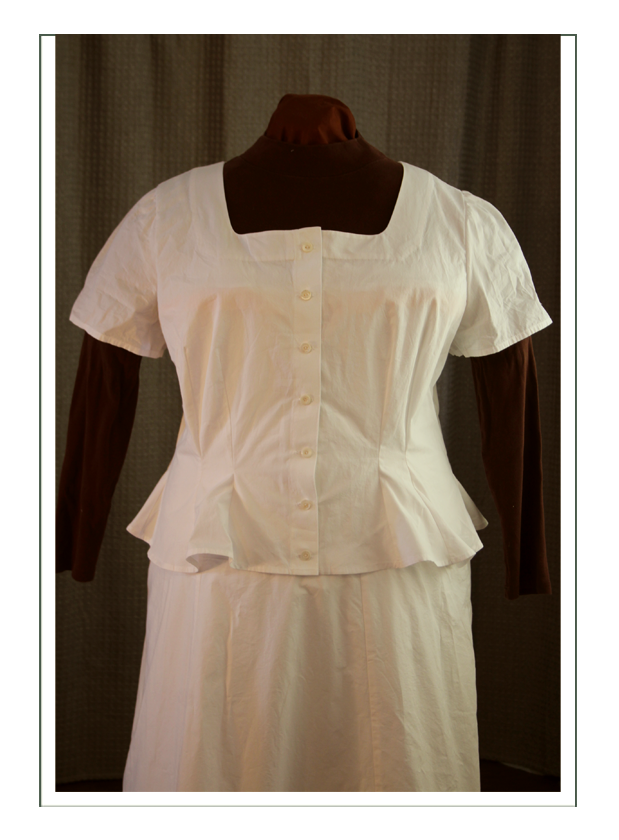
So we made a new one. This is based on a real 1887 extant garment and a complete restoration of a real garment of the era. It has the same key elements (color scheme, contrast, sharp collars, fit in the body the same with boned seams and darts, stand collar) but differs in:
a) easy on and off with less buttons and big buttons
b) open neckline with stiff collar only in back
c) longer sleeves that can also be rolled up or down to fit
d) corrected neck to shoulder length of seam
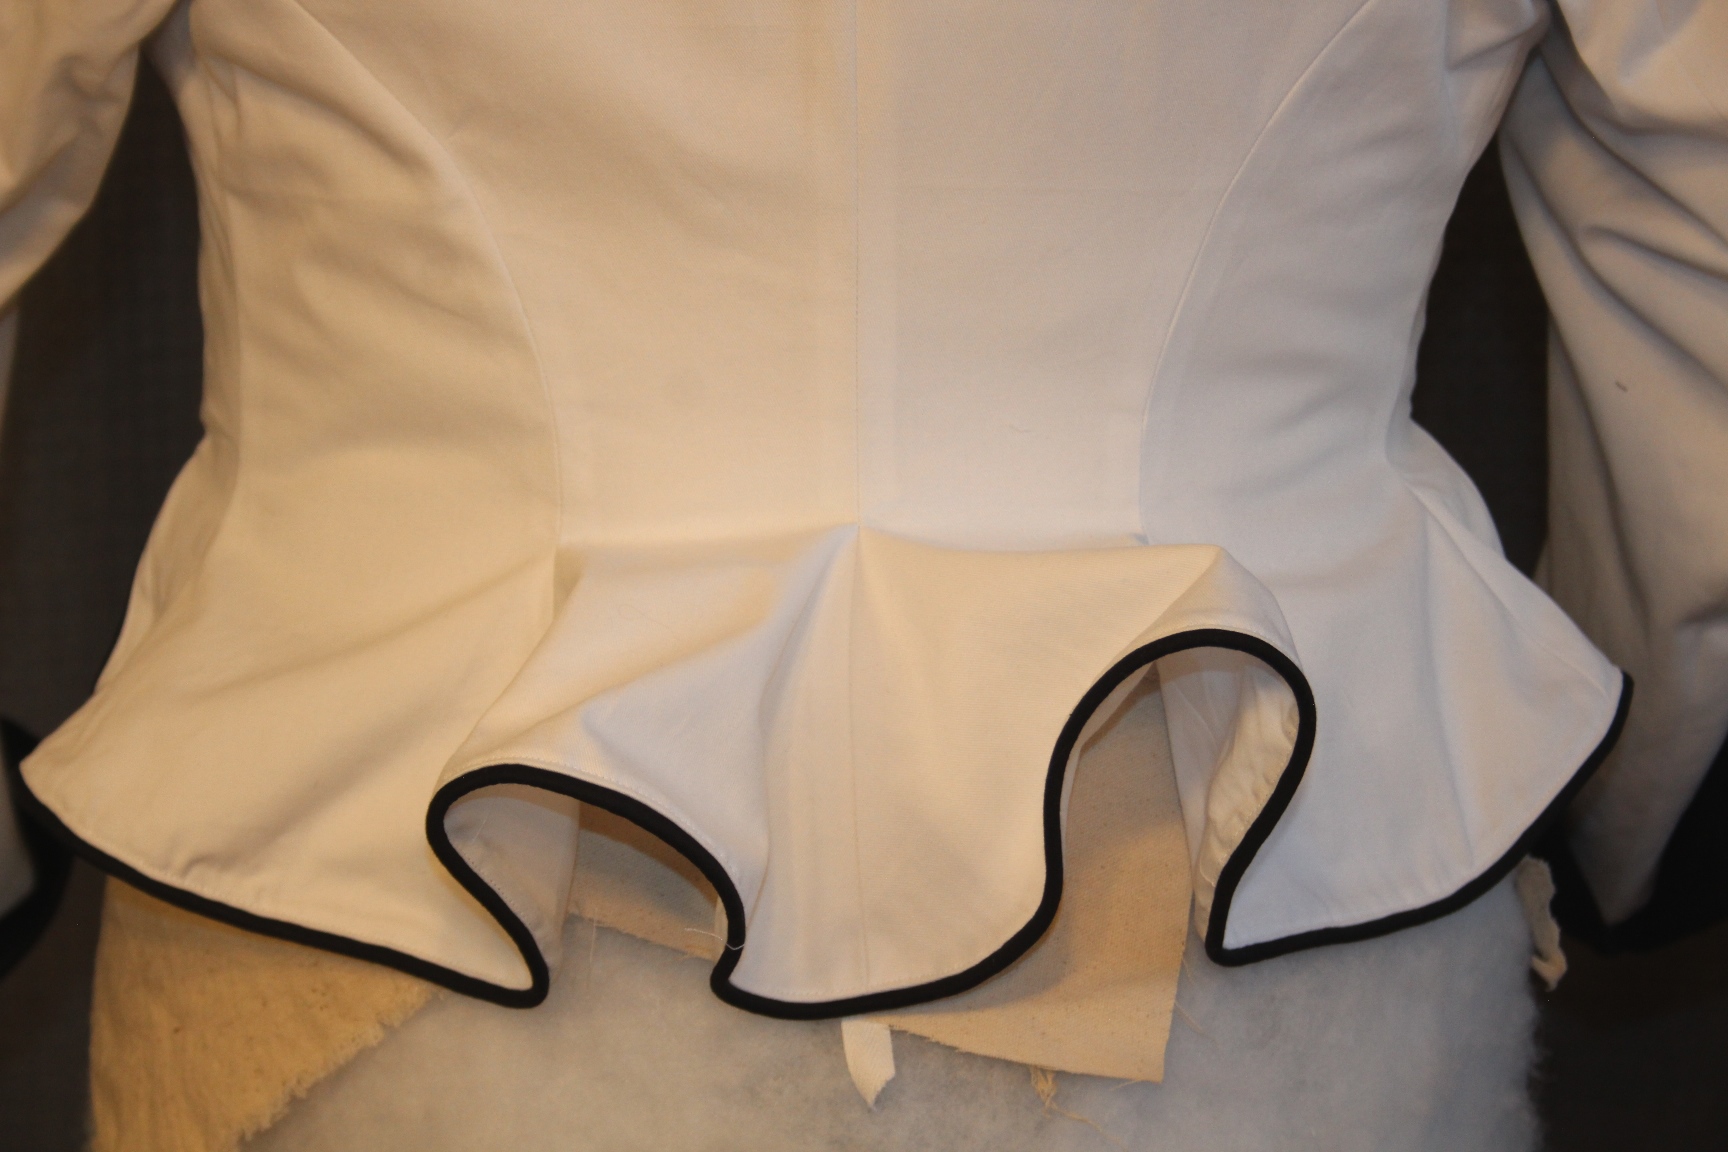
Also, the vest (“revers”) can be back or white (if stitching removed). It’s very adjustable by moving buttons, and siple to wear. The piping gives a nice shape to the peplum which is the same as bodice 1.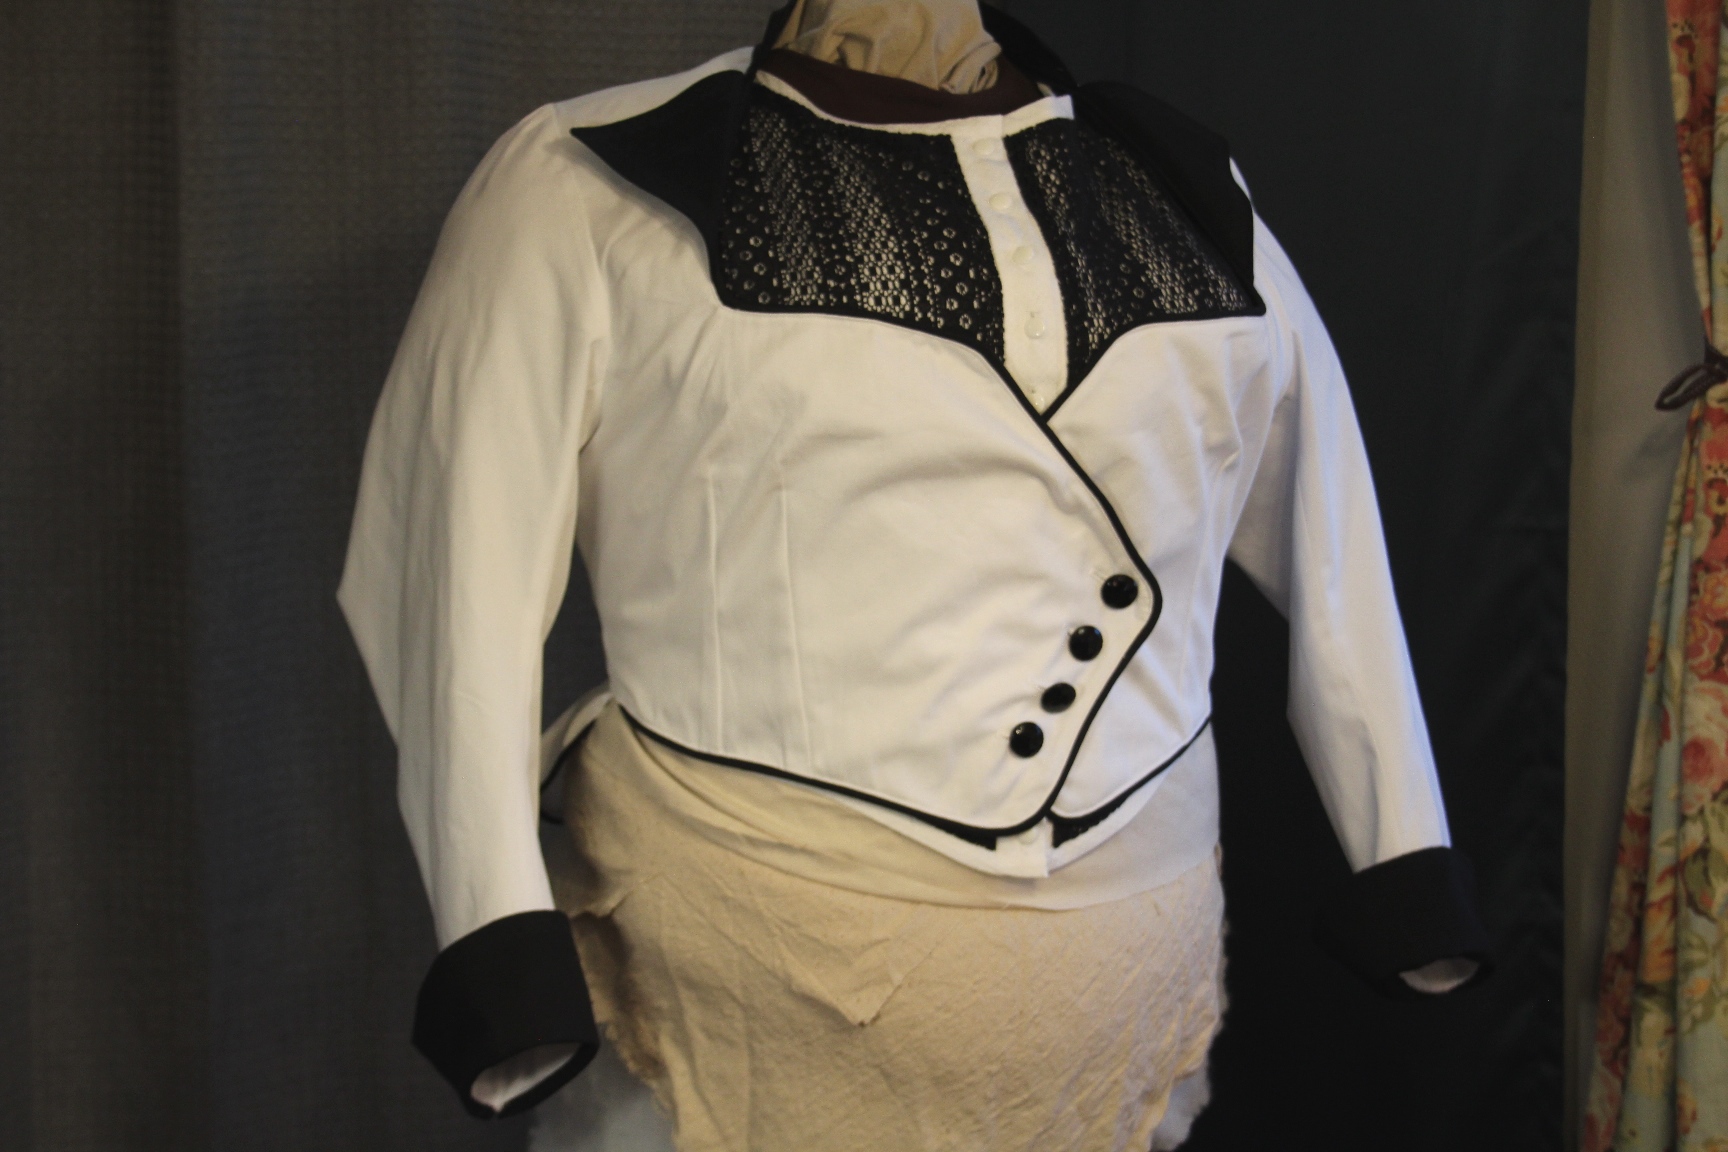

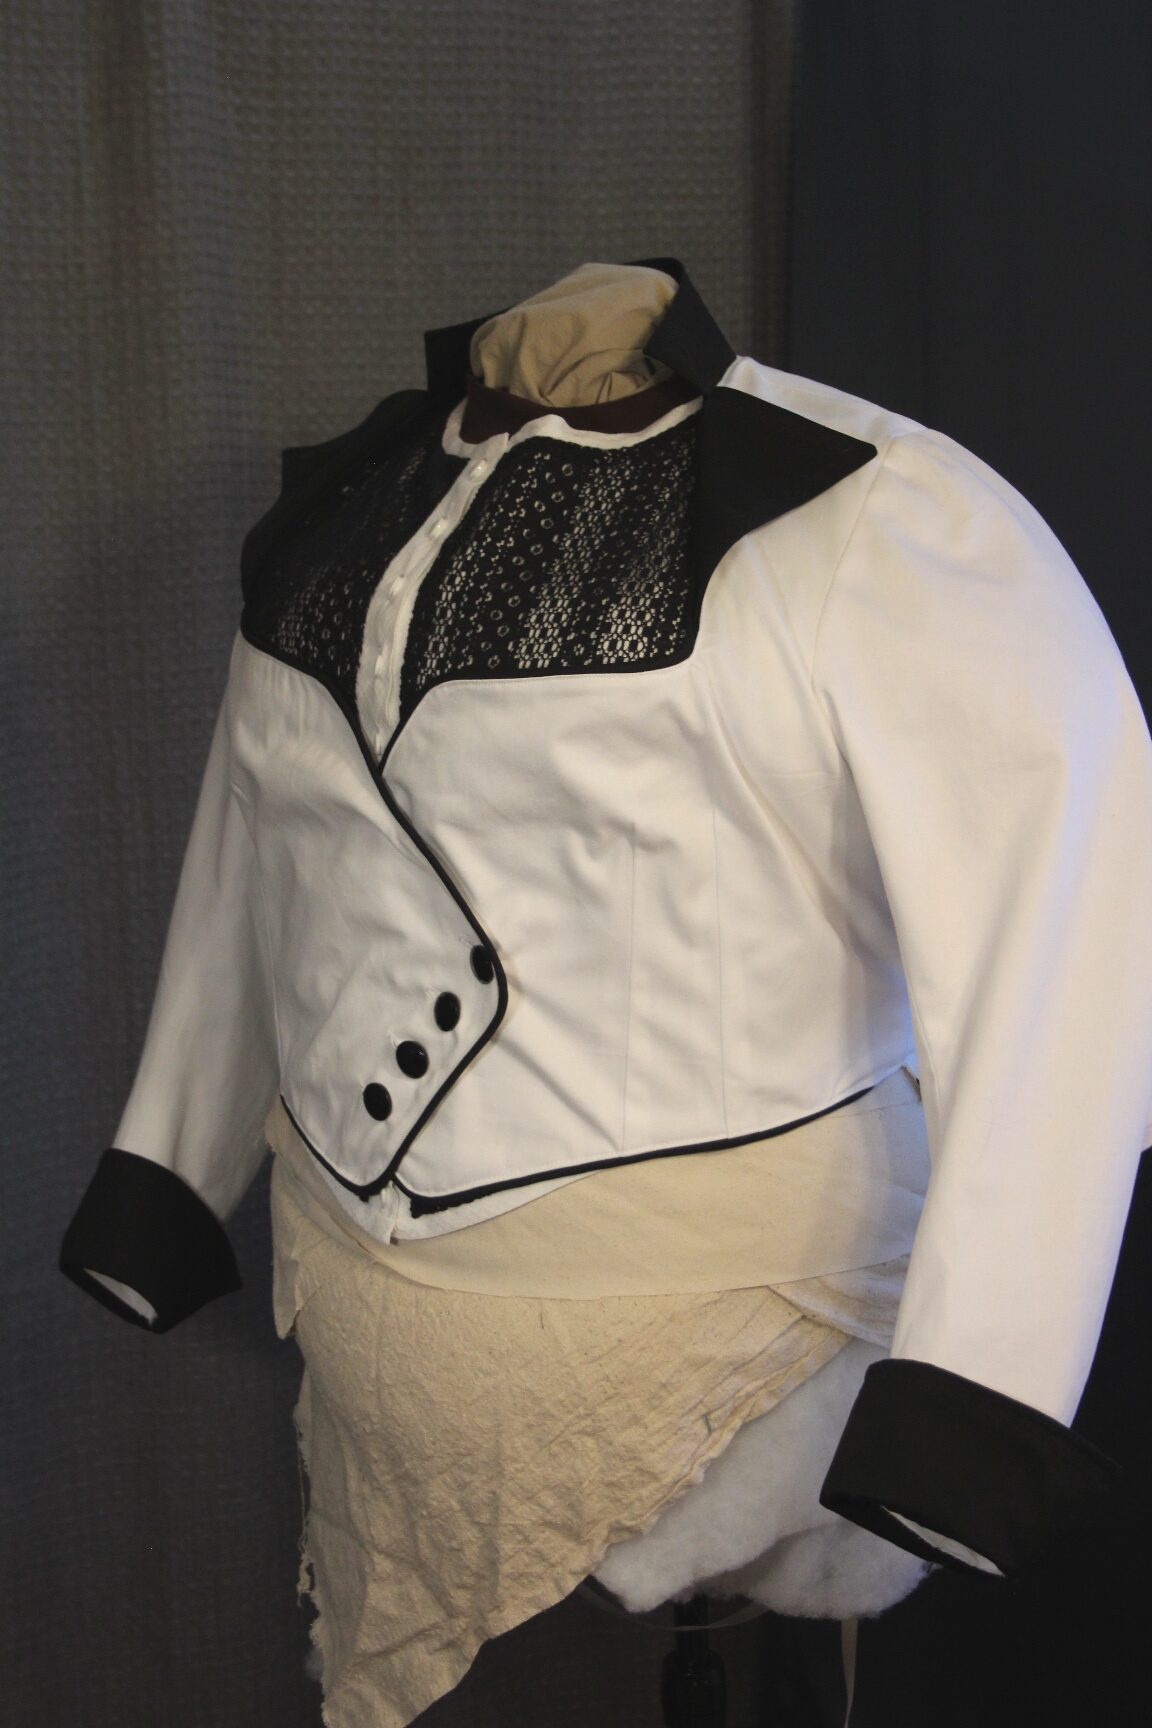


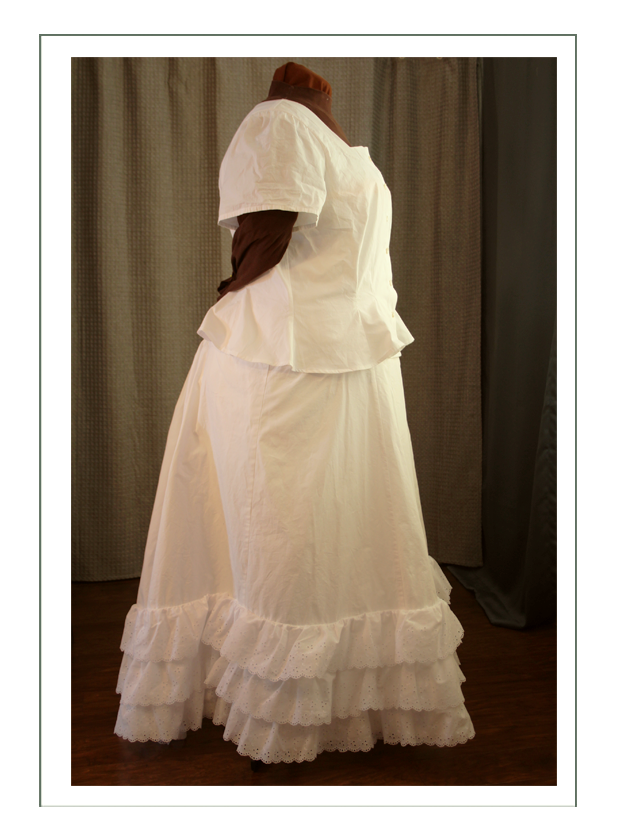
We had to do this without measurements, the corset to fit over, photos to work from, and a draping dummy. Melissa had all her components, so we photoshopped the new top onto the rest, and here is our best effort at the finished project!
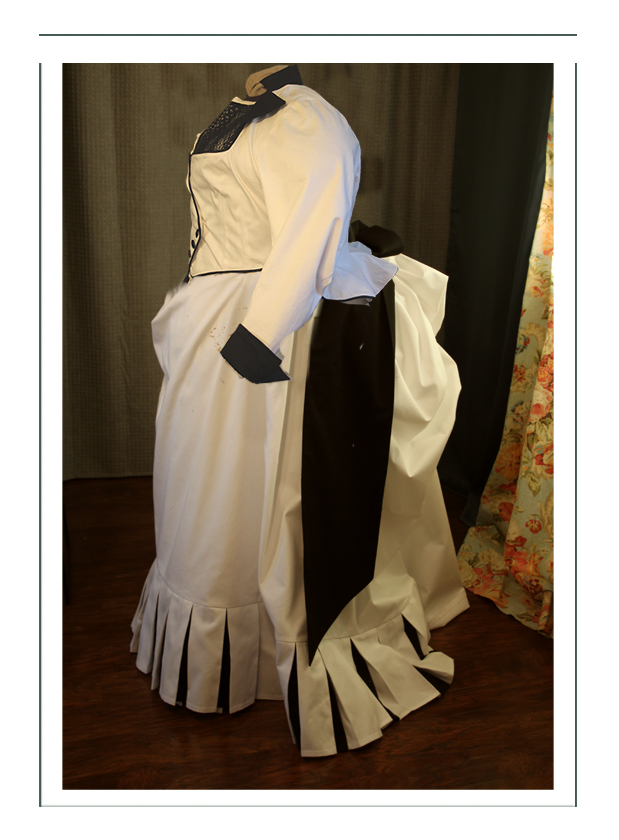
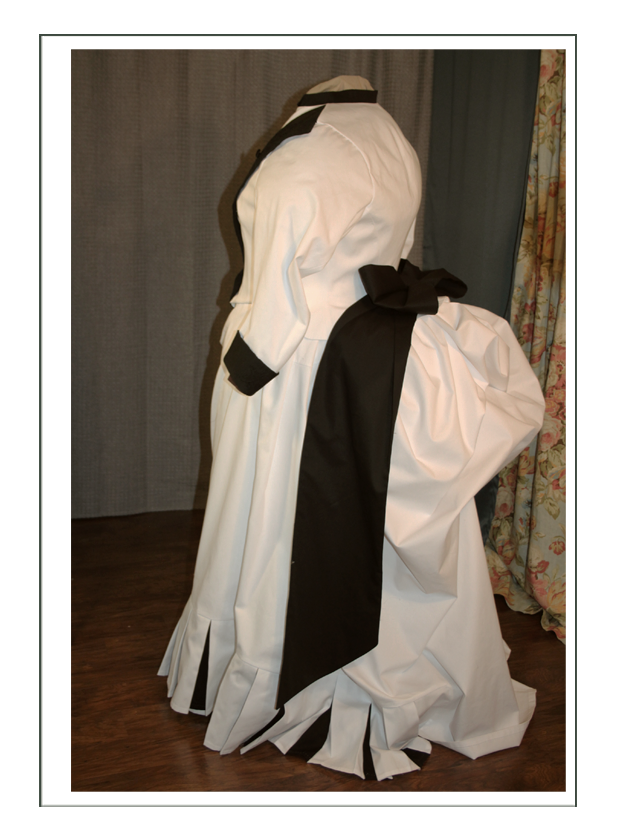
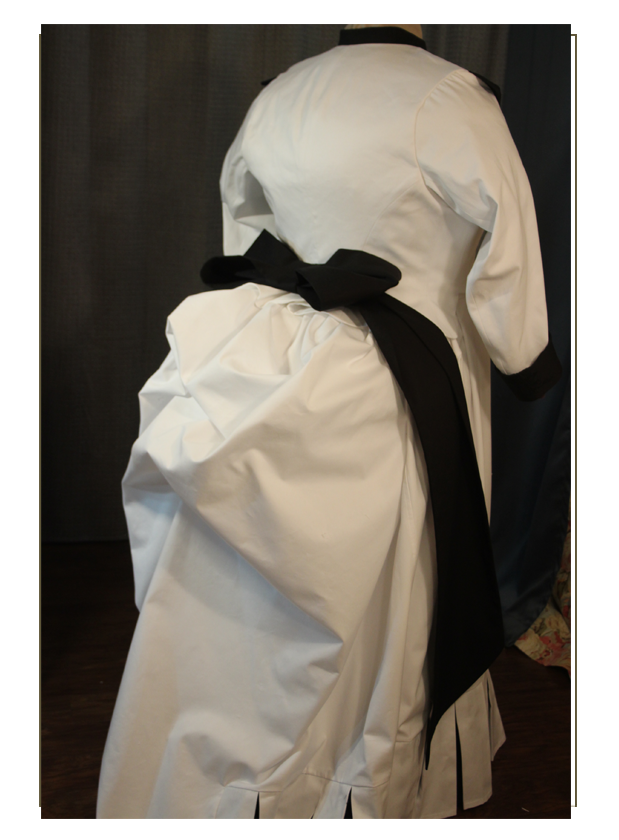
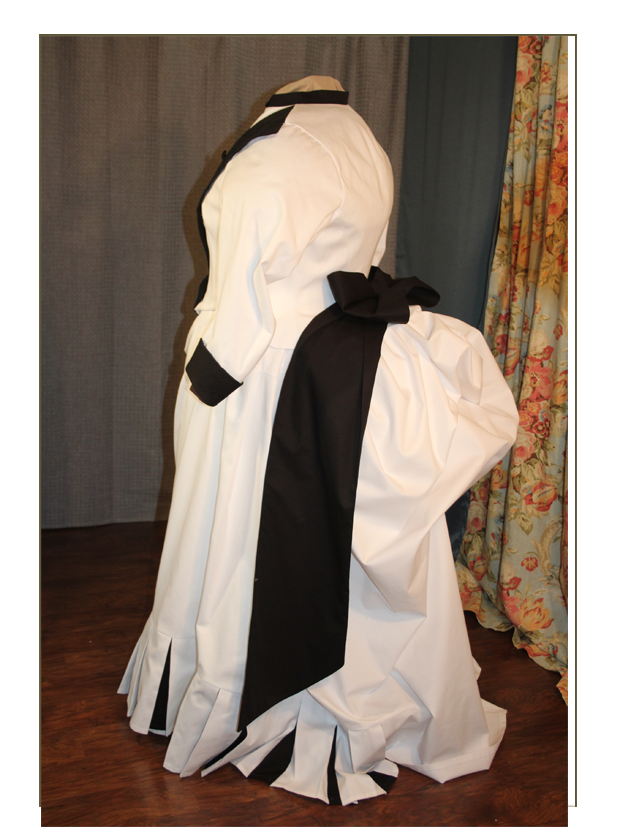
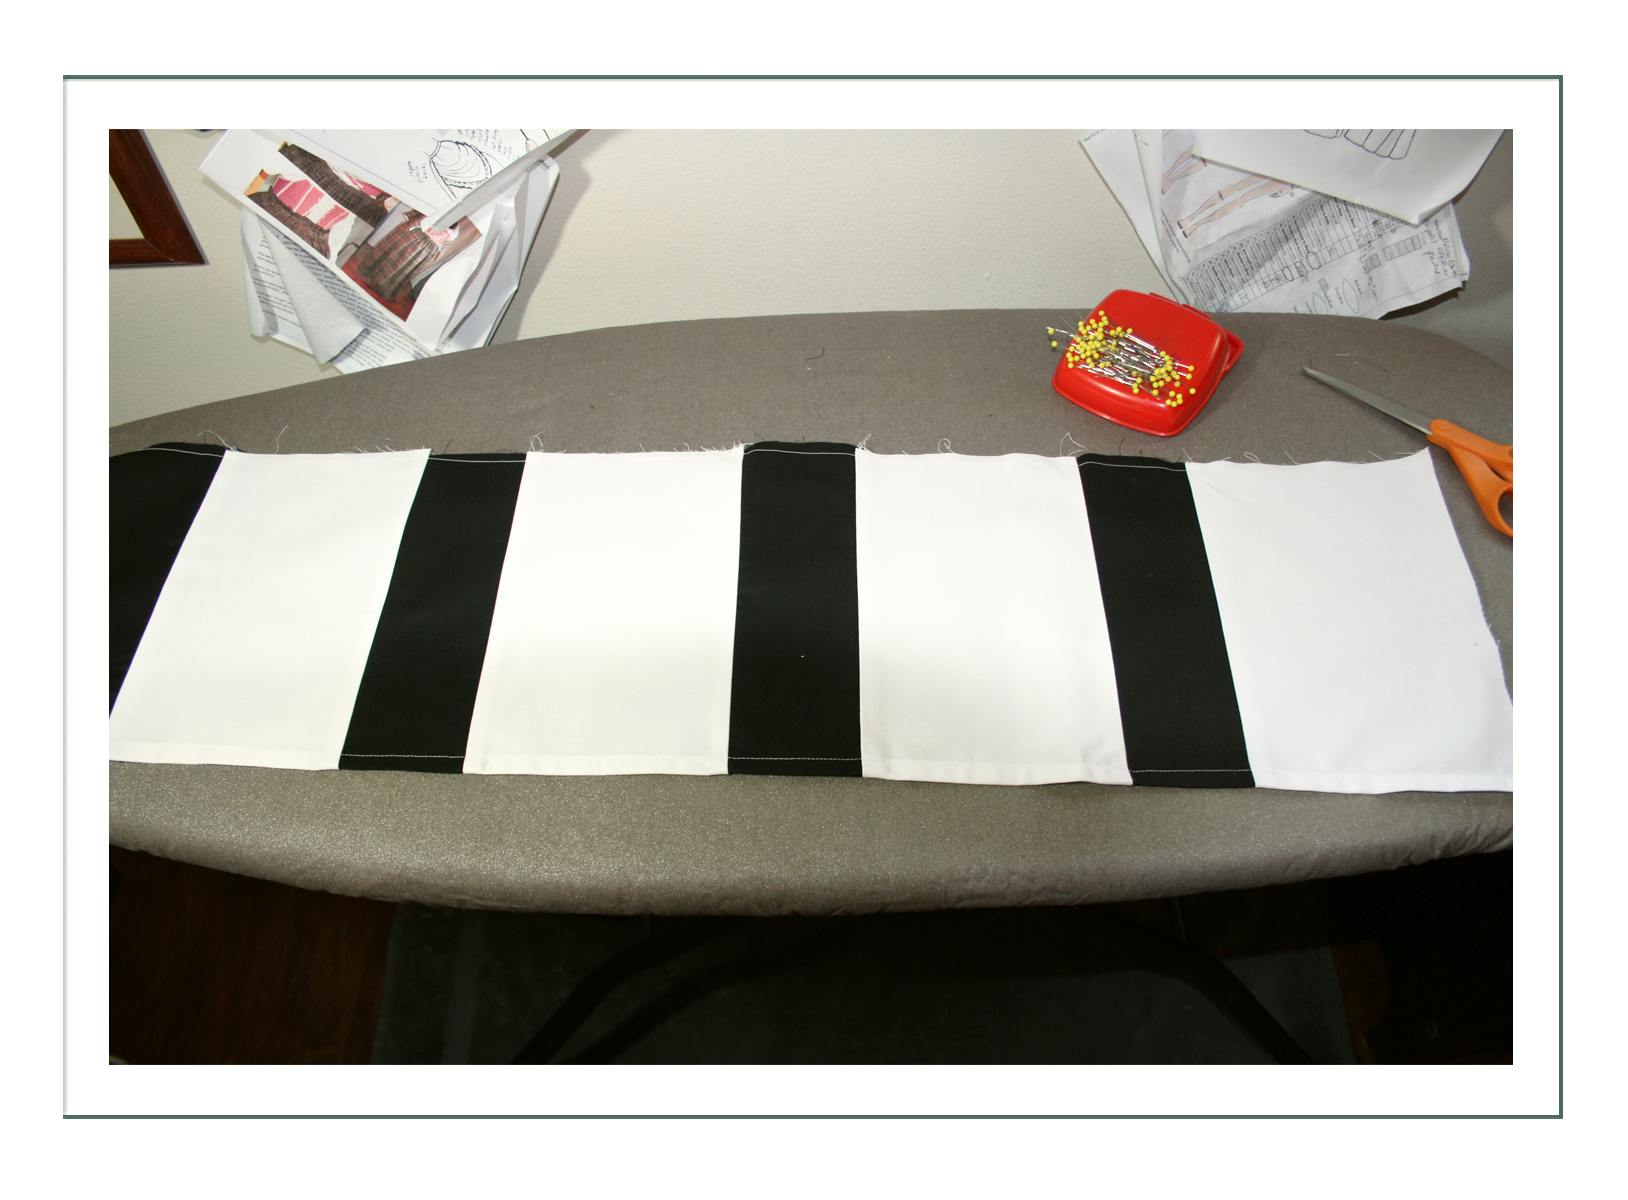
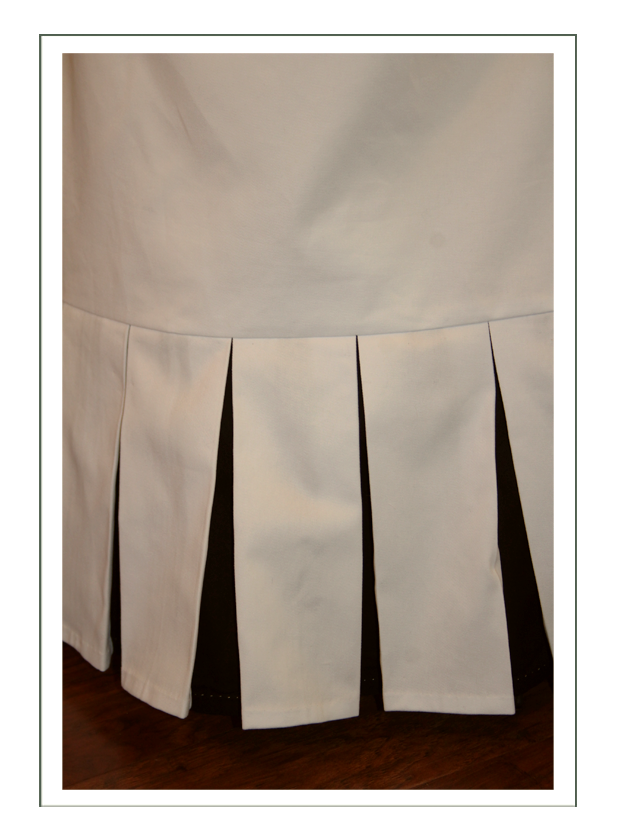
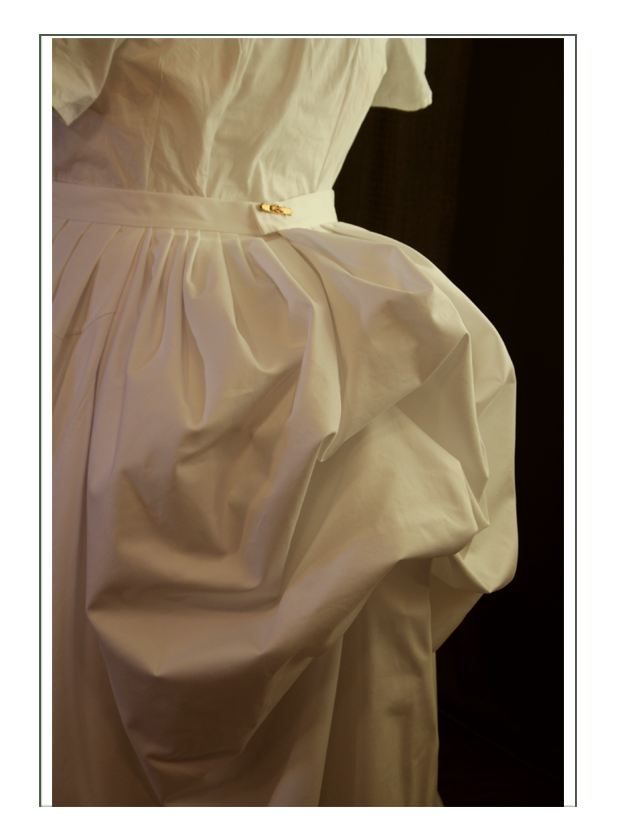
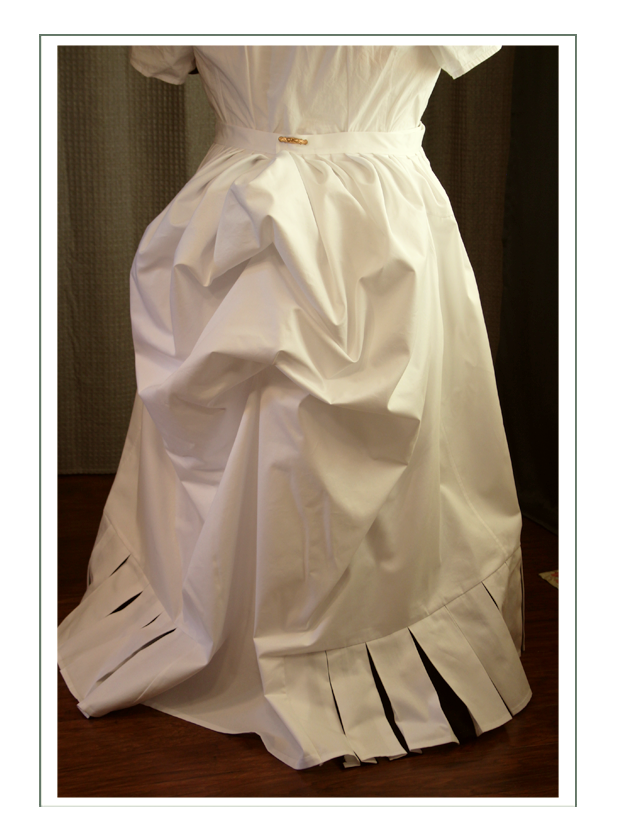
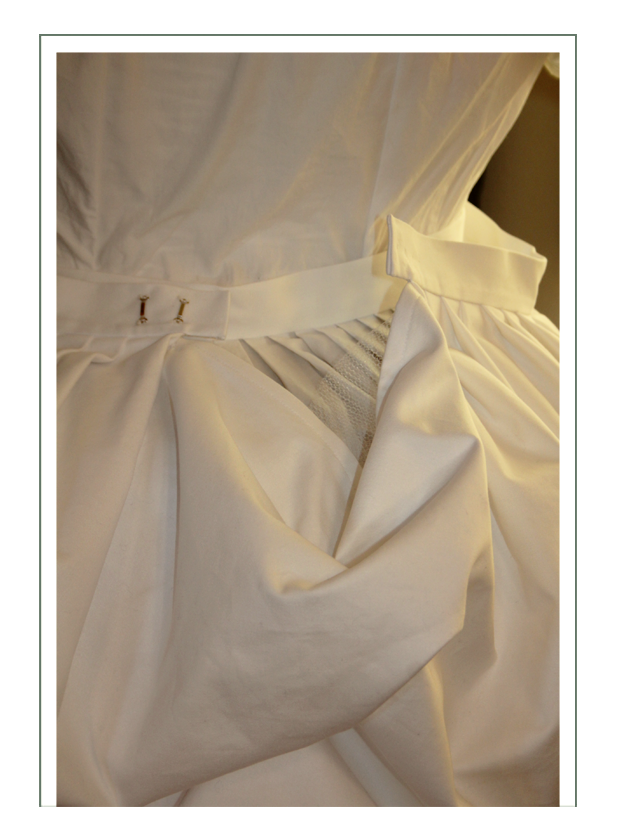
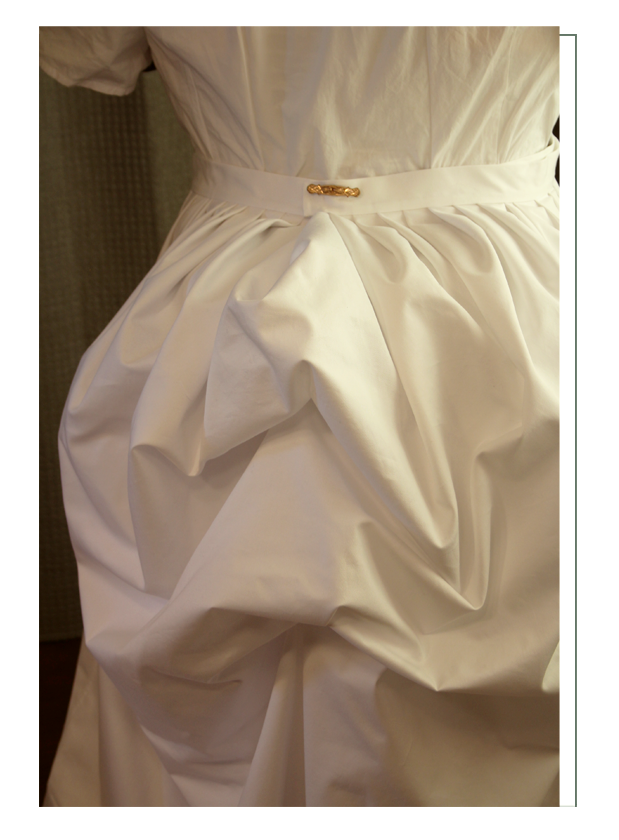
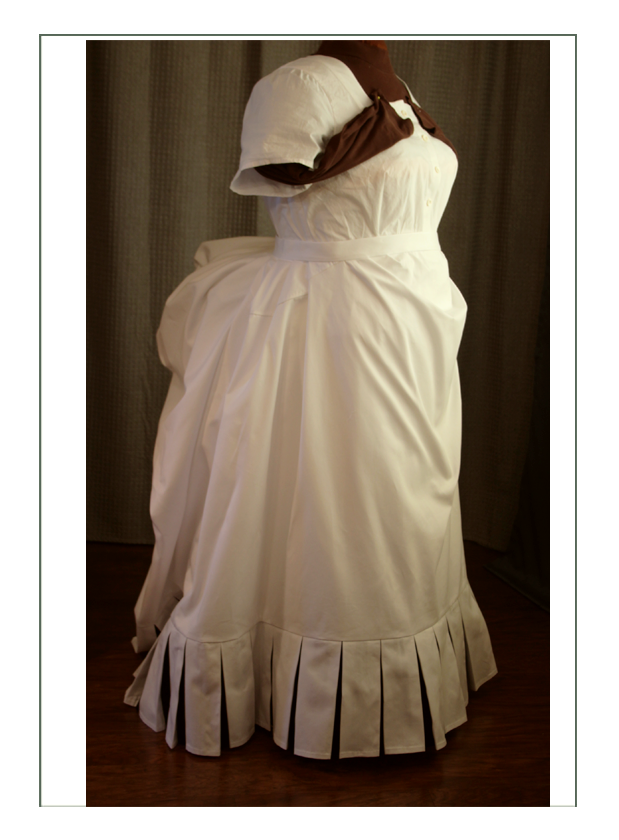
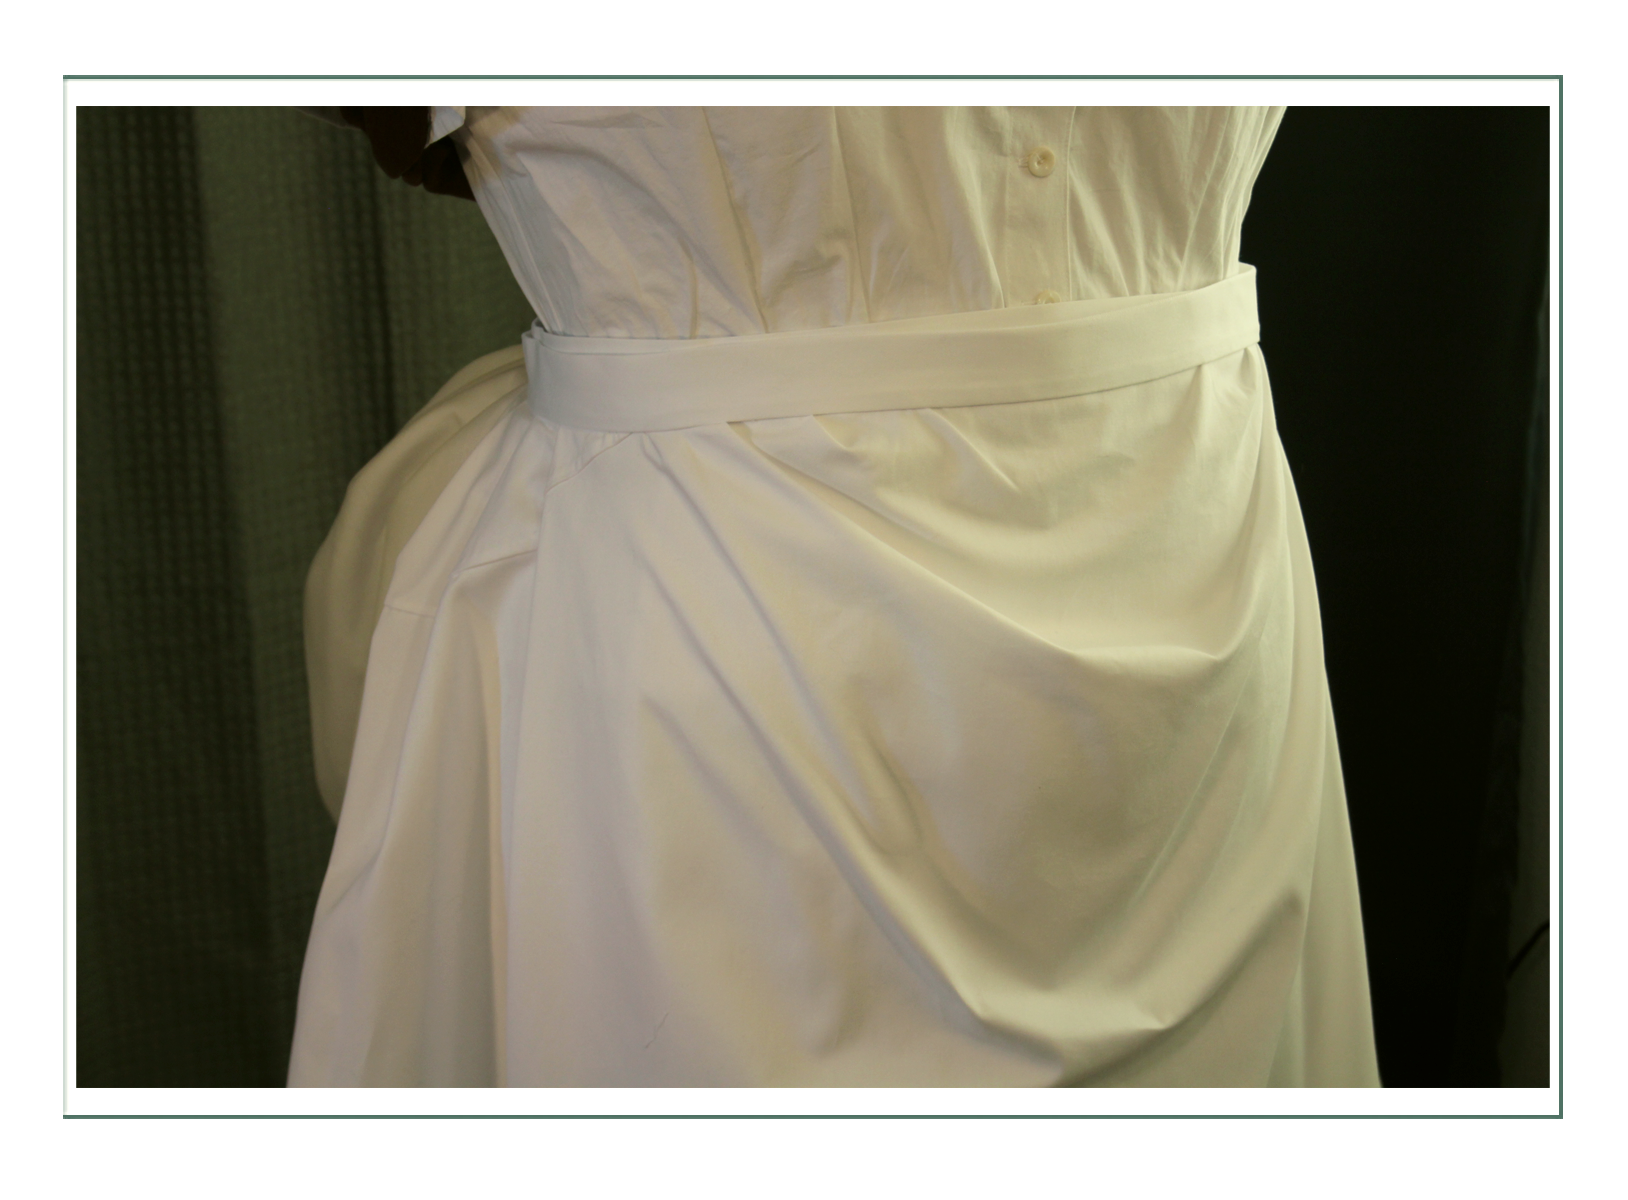
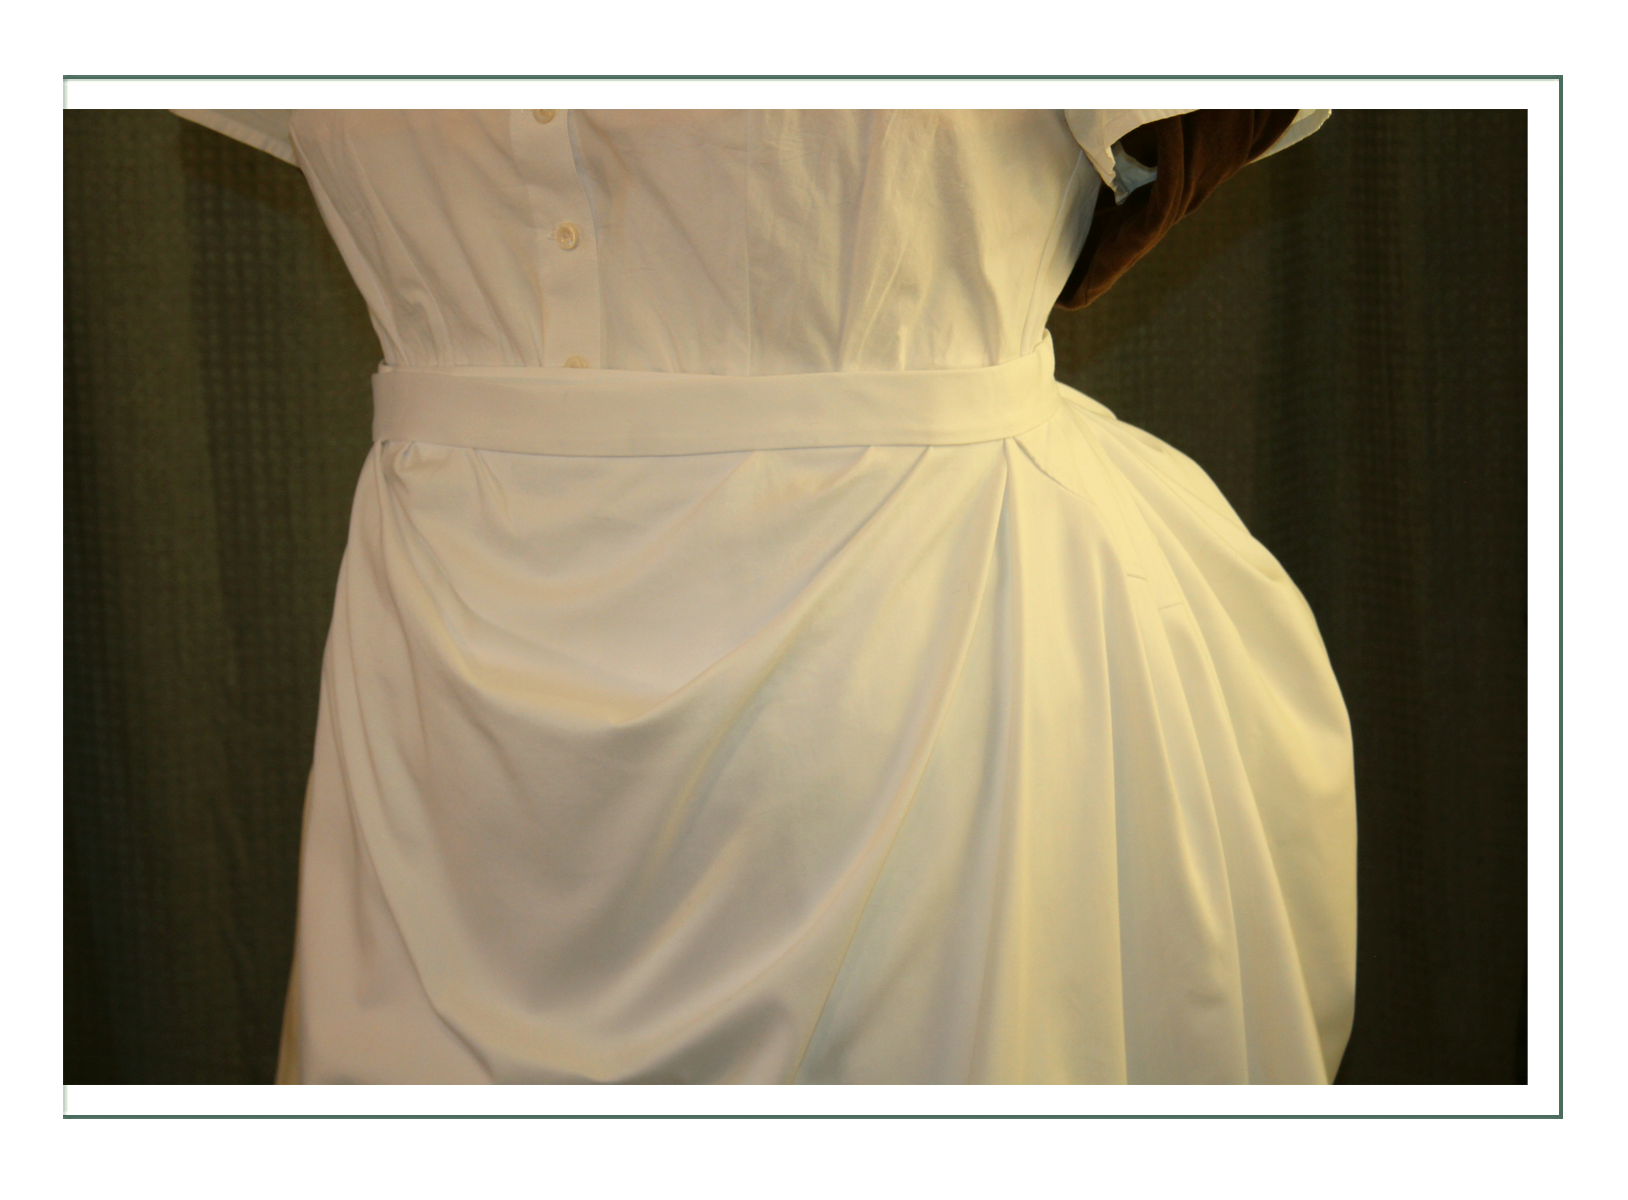
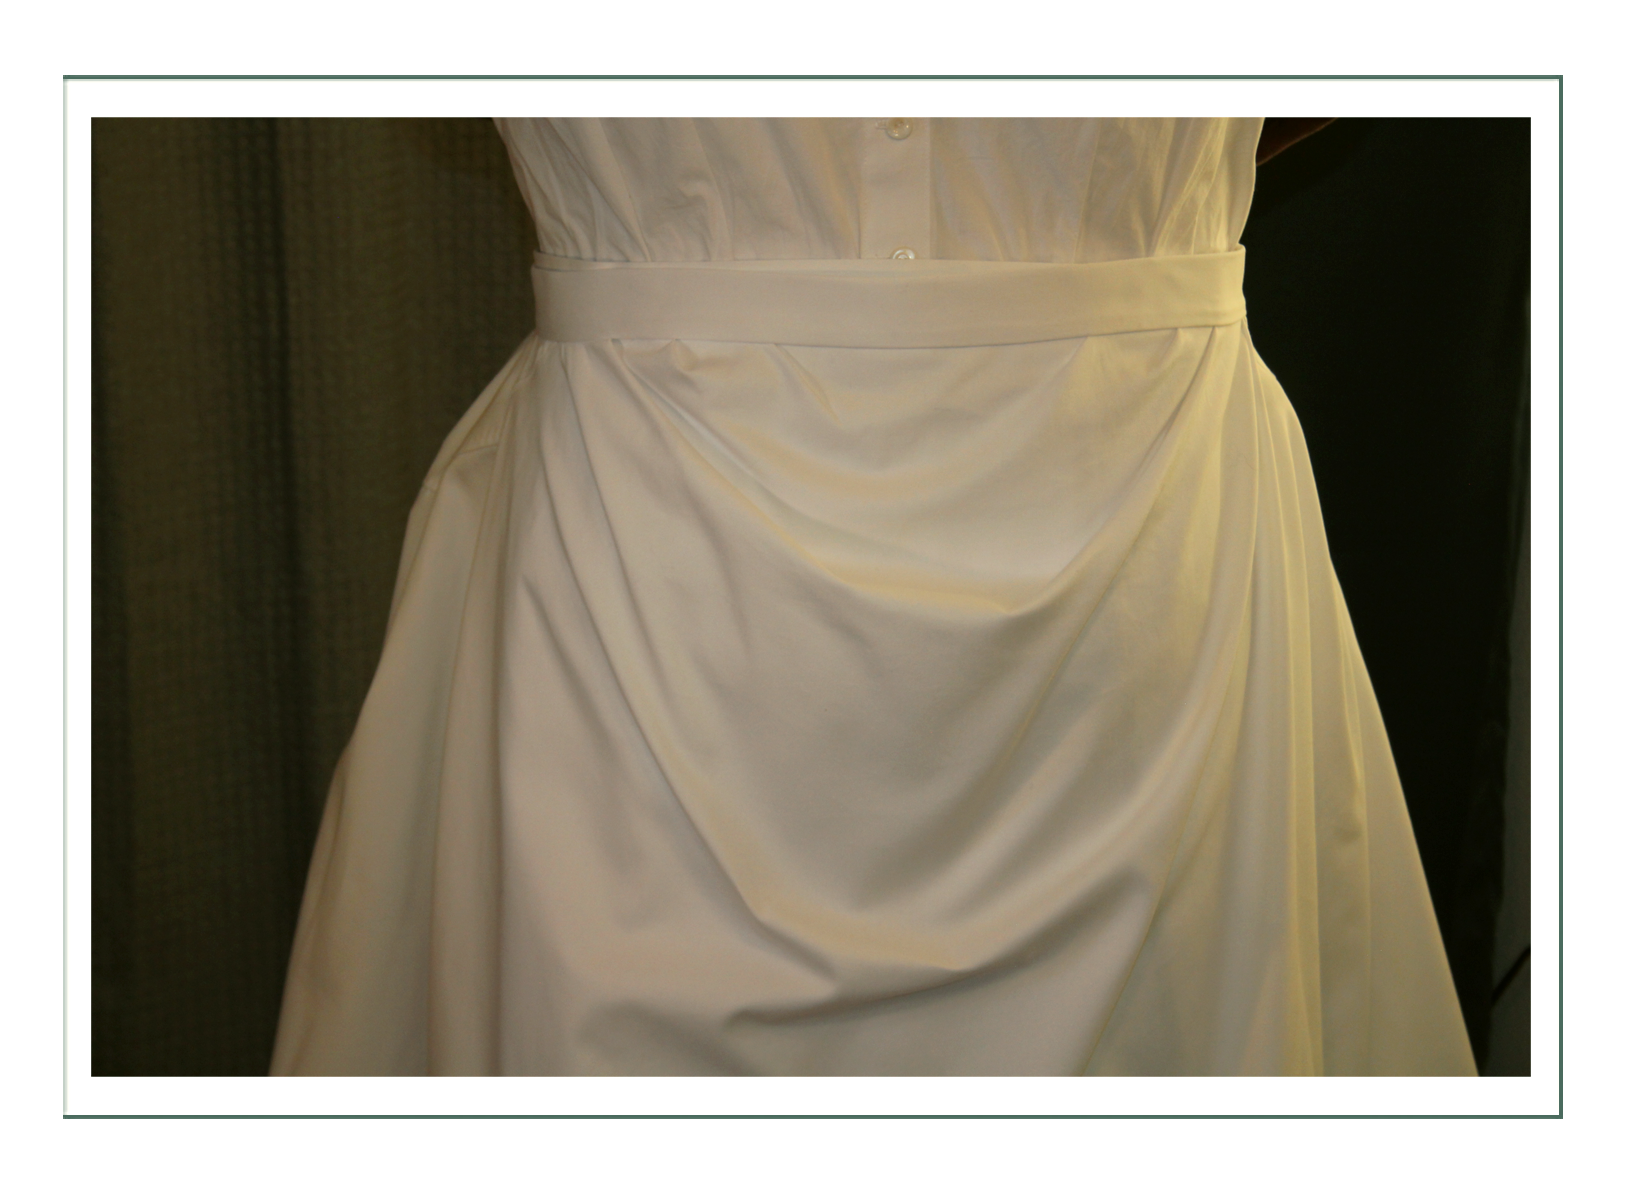
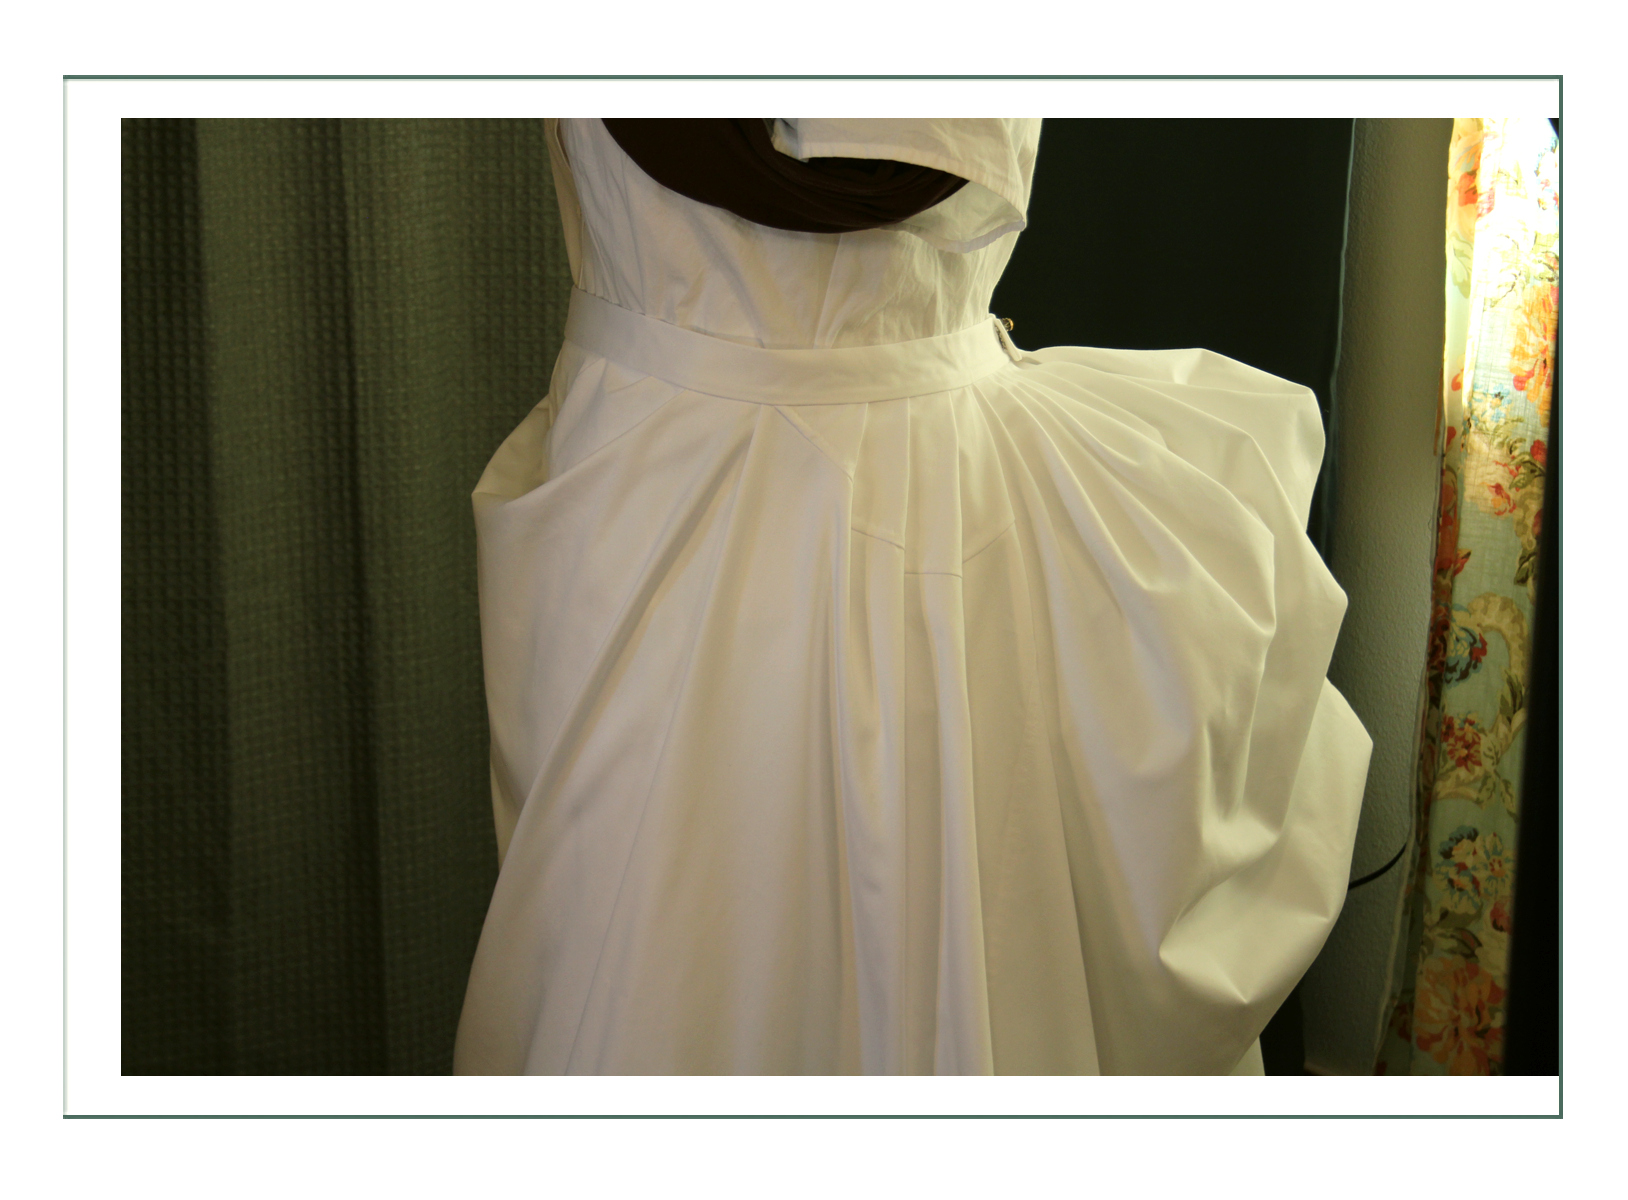
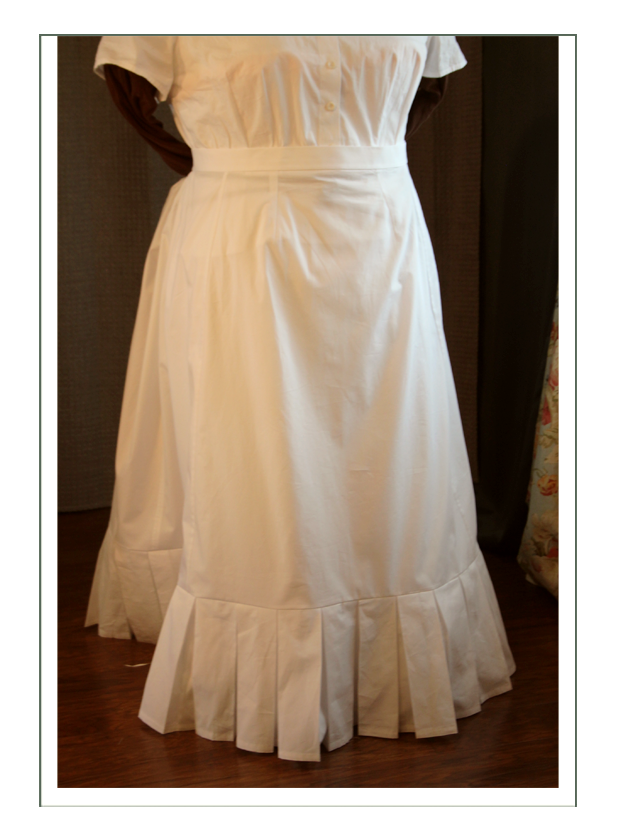
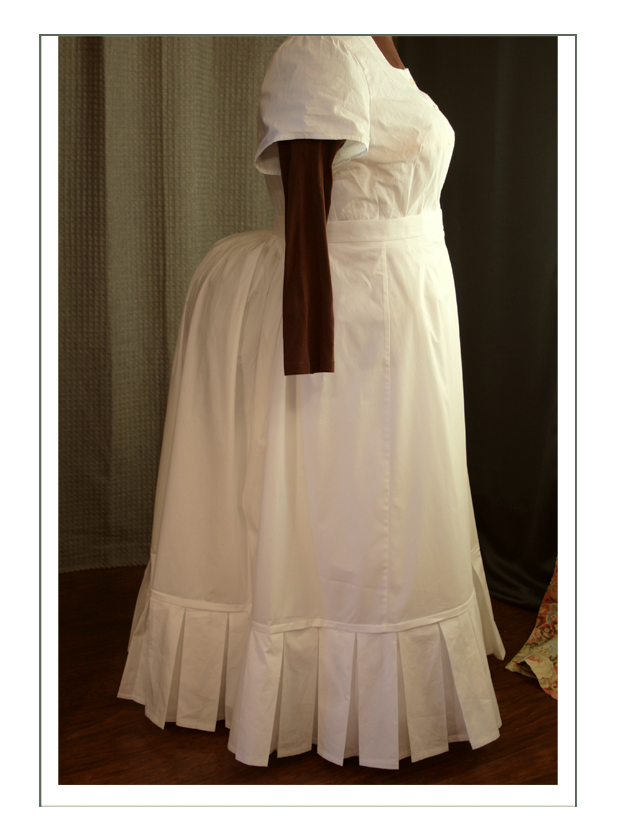
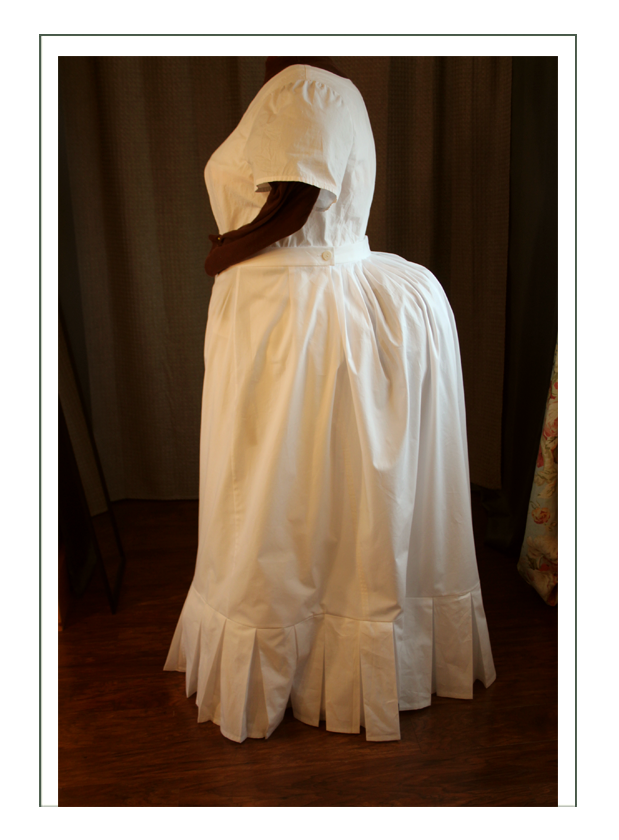
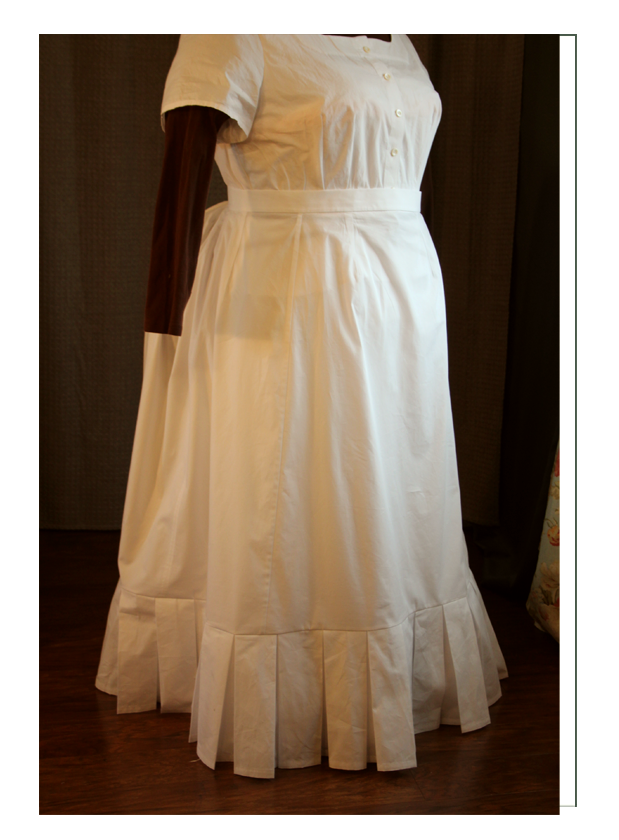
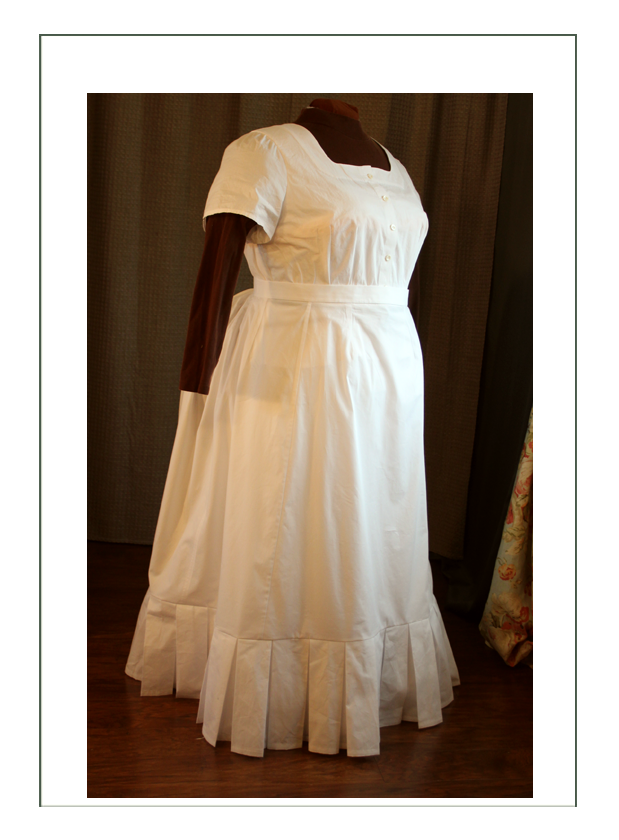
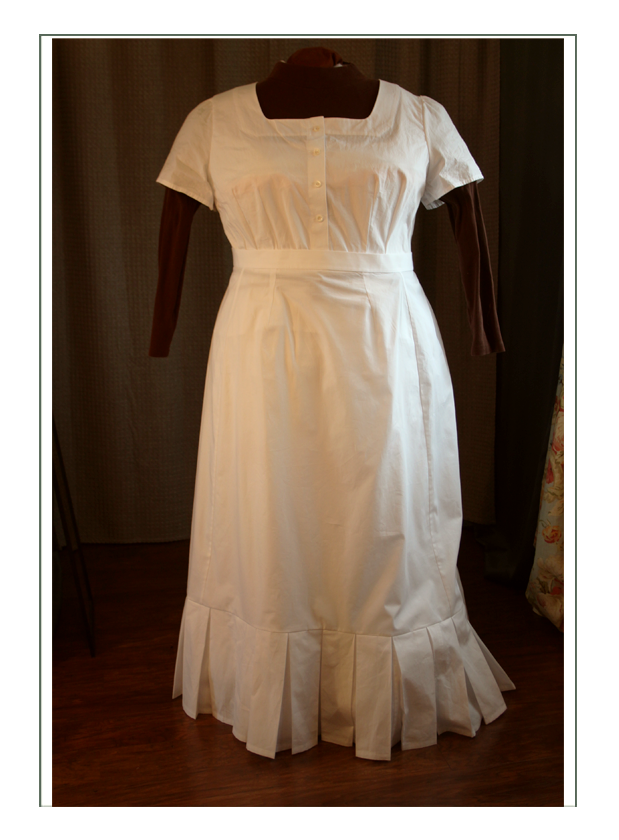
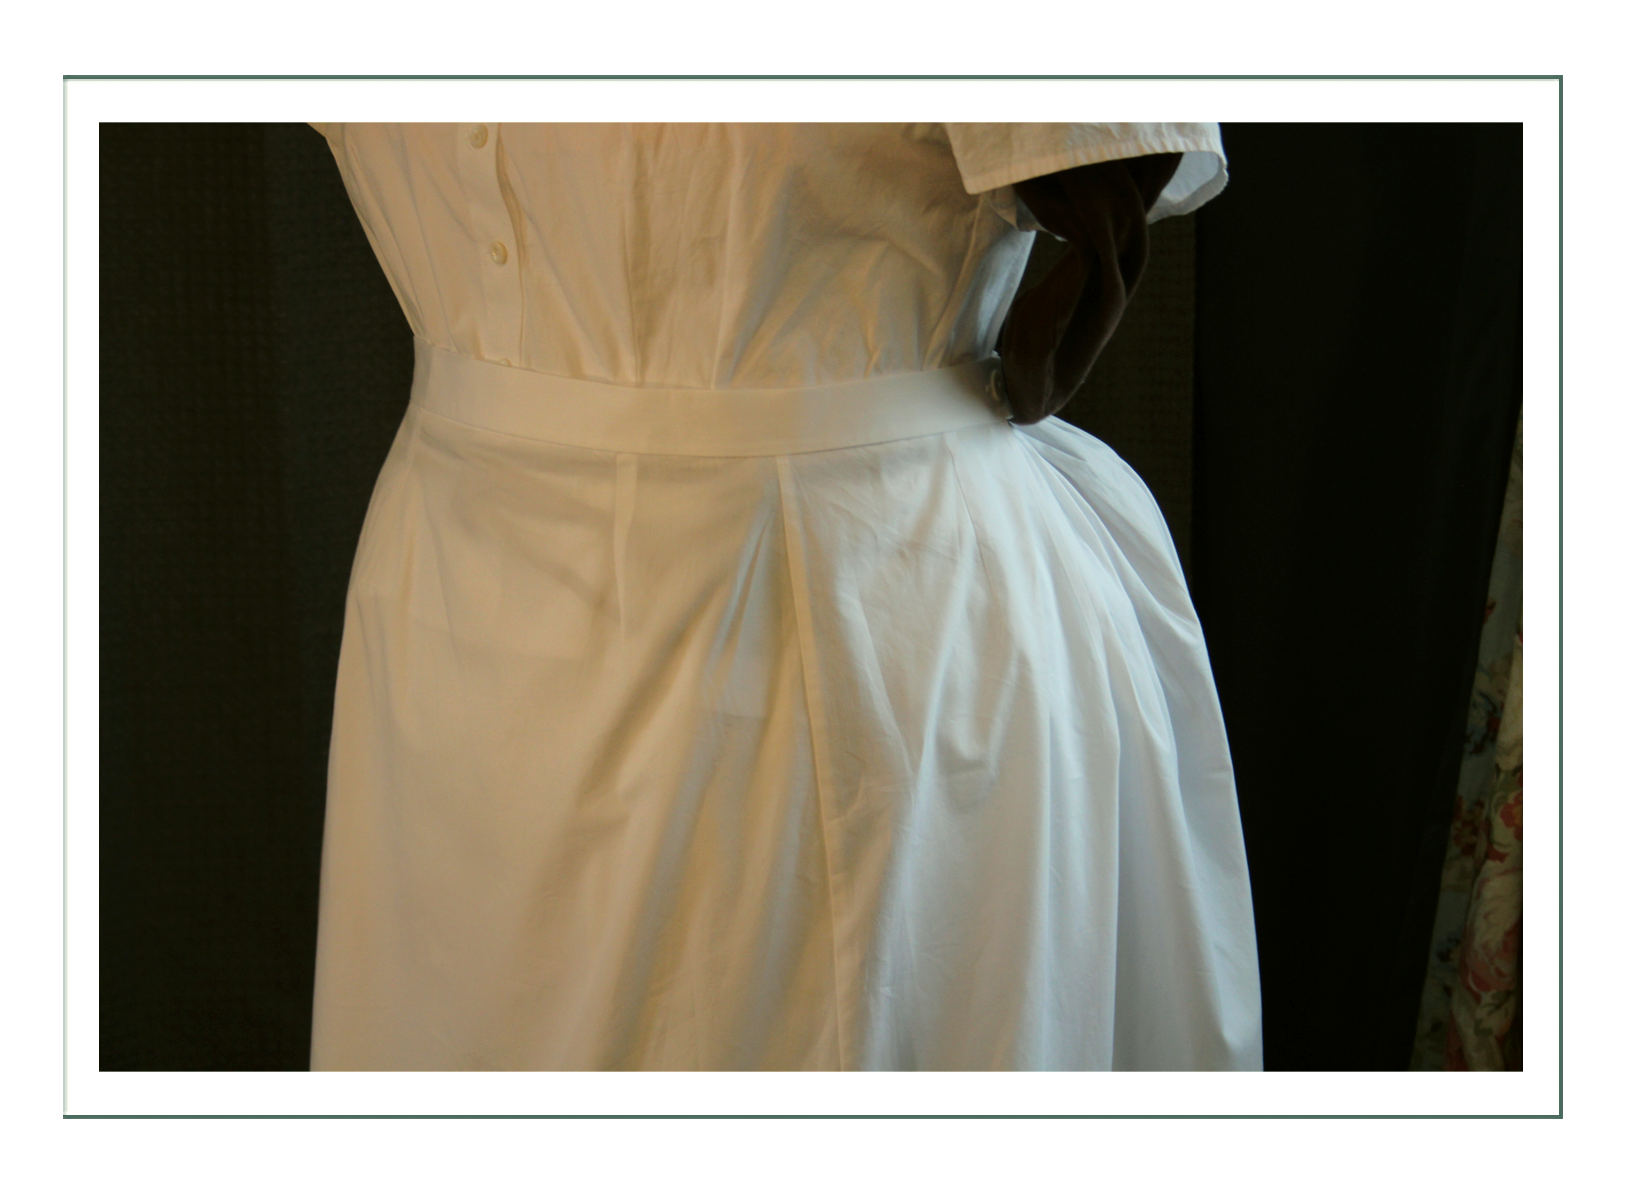
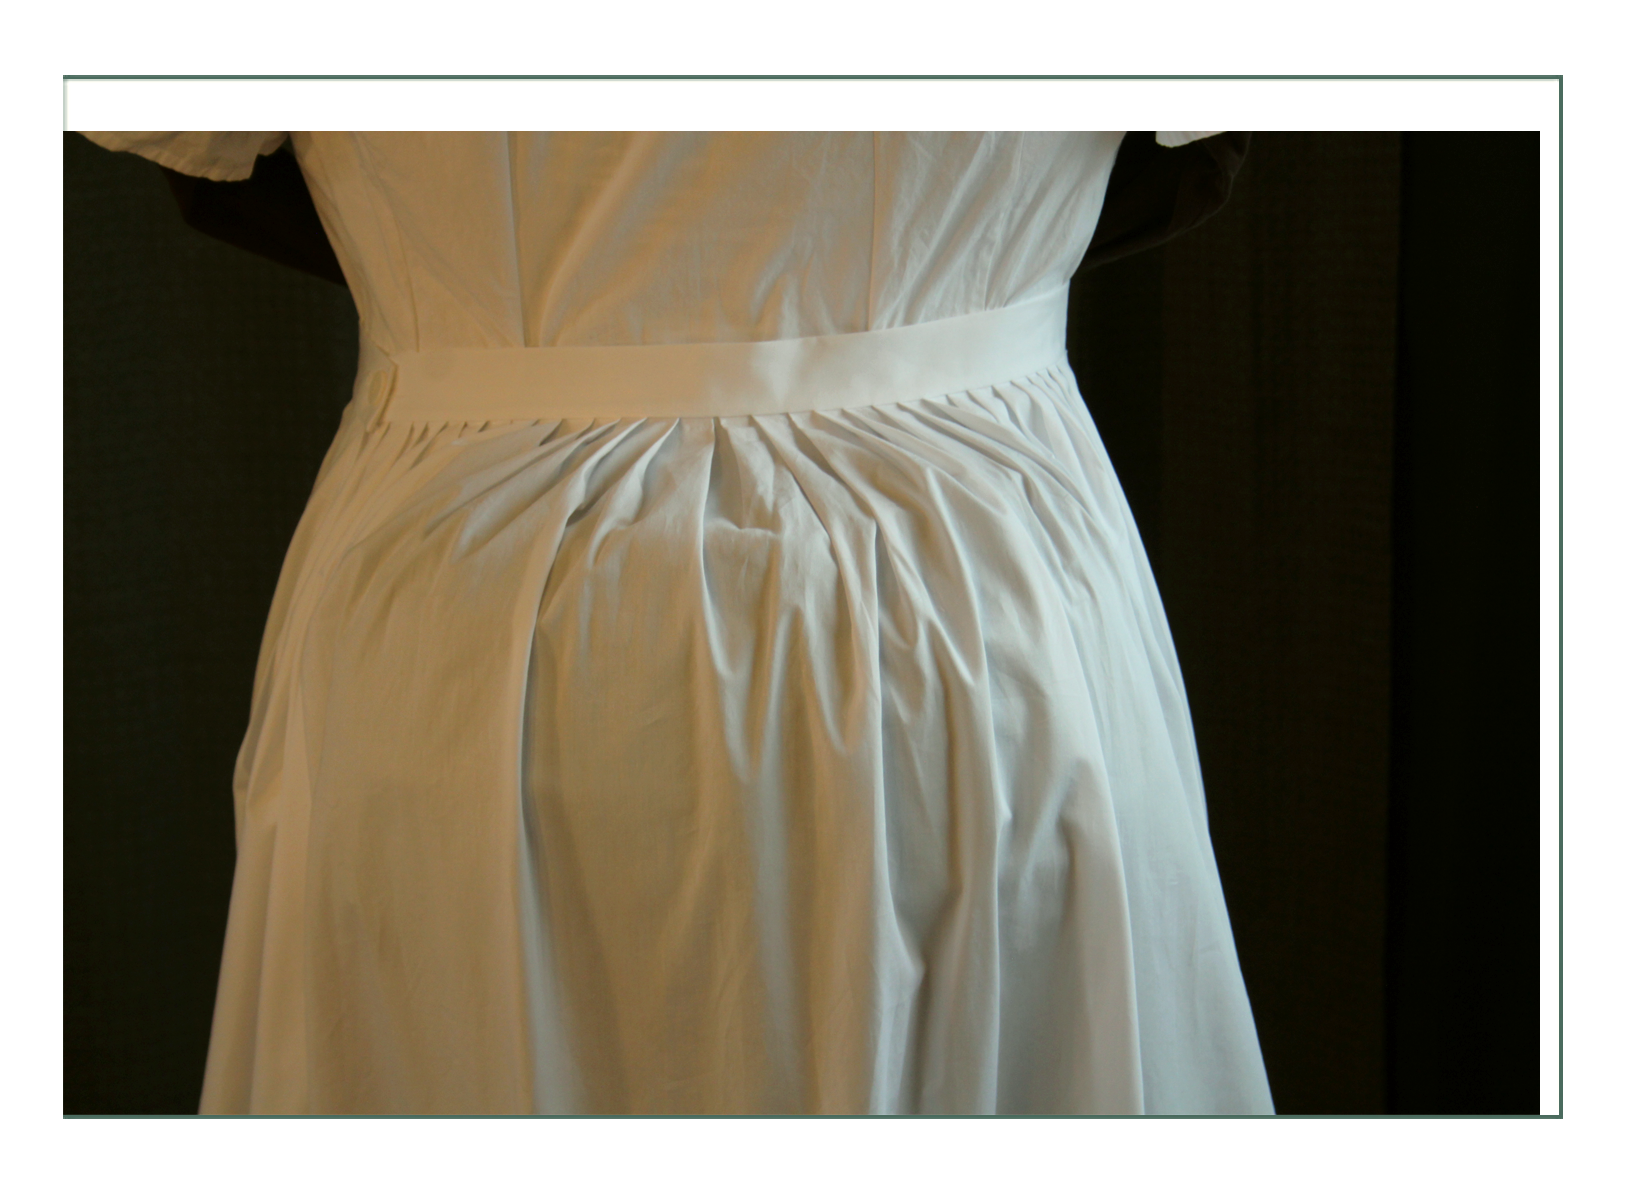
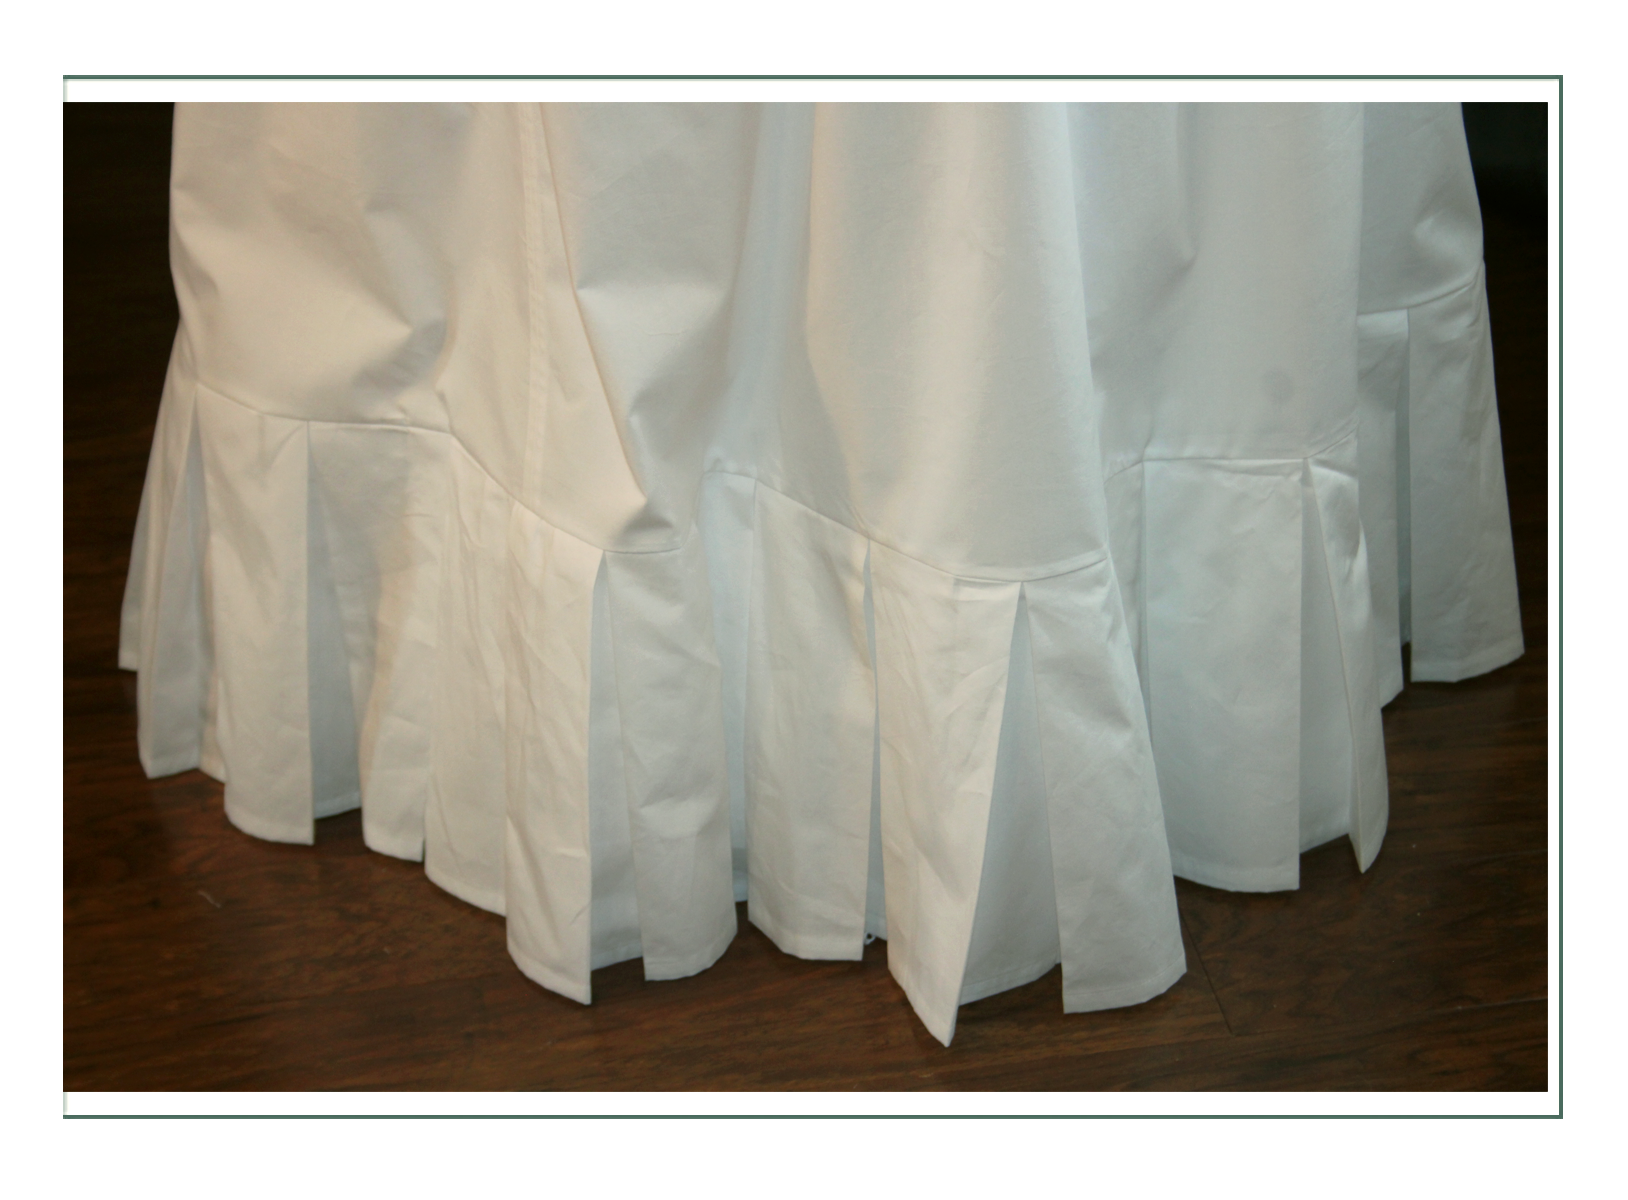
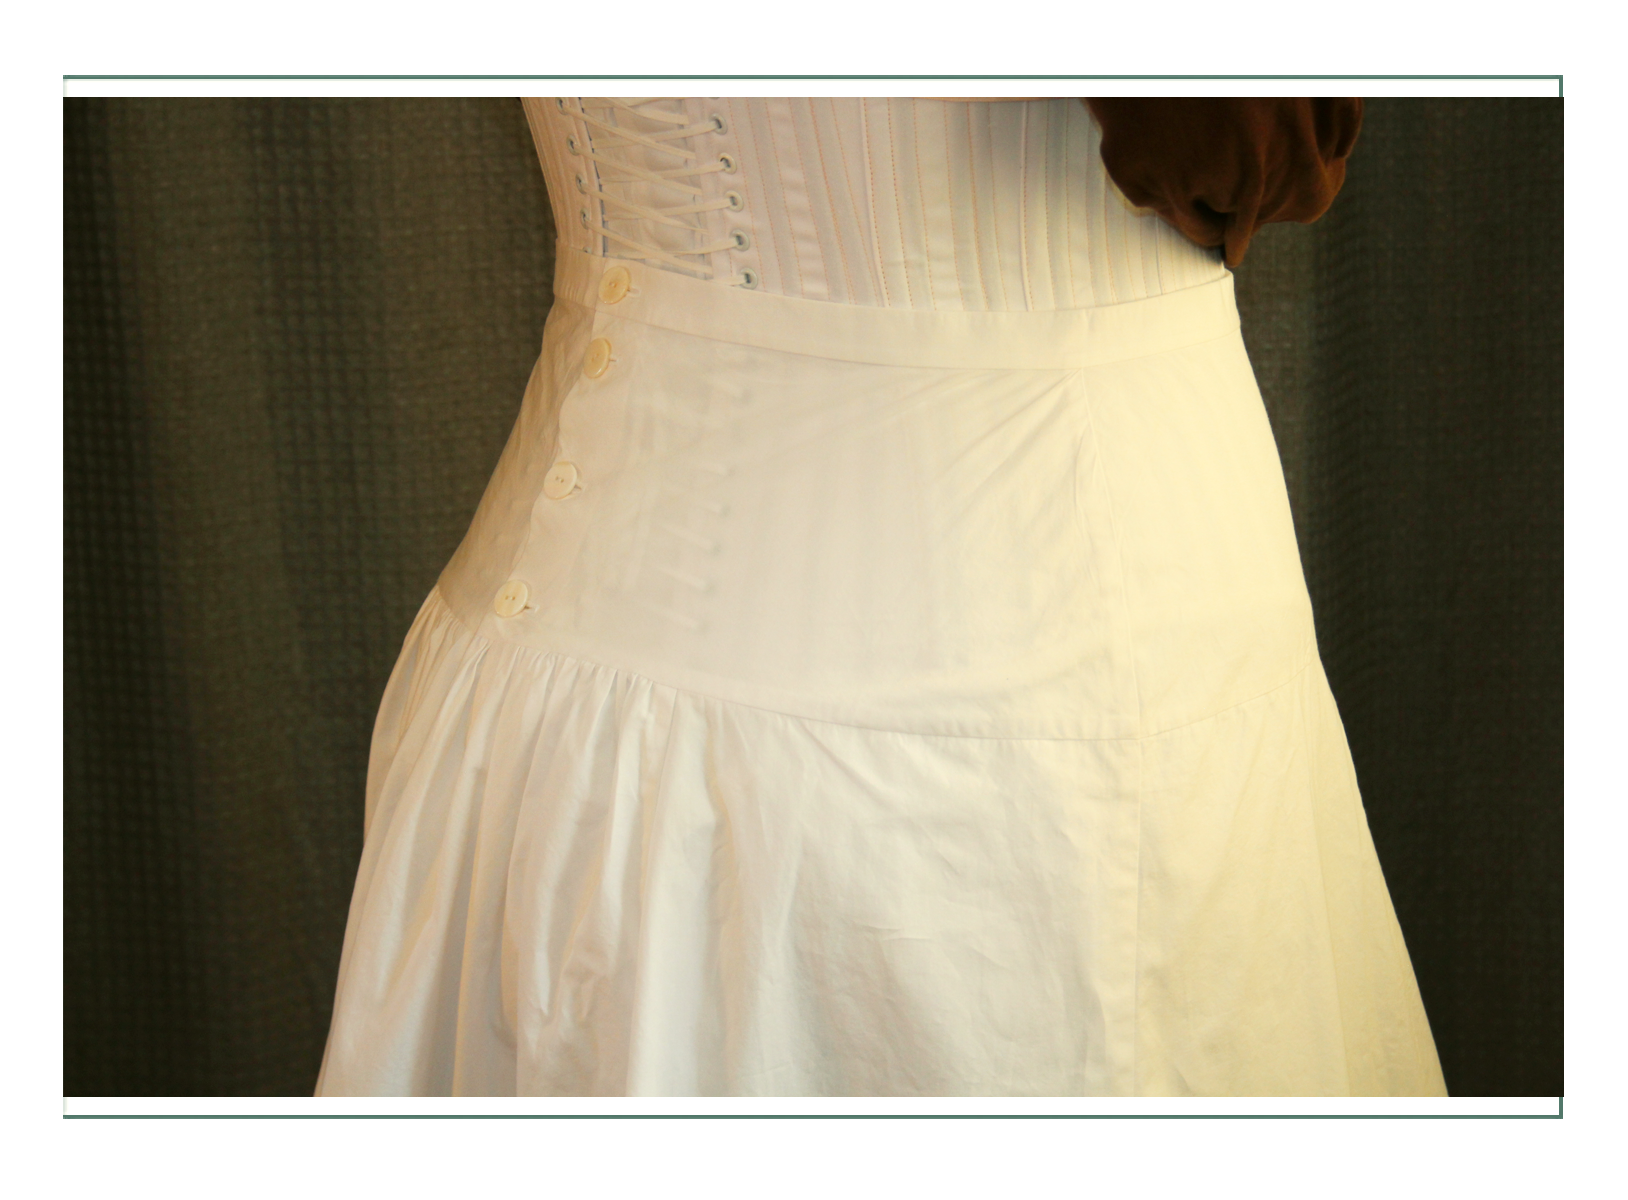
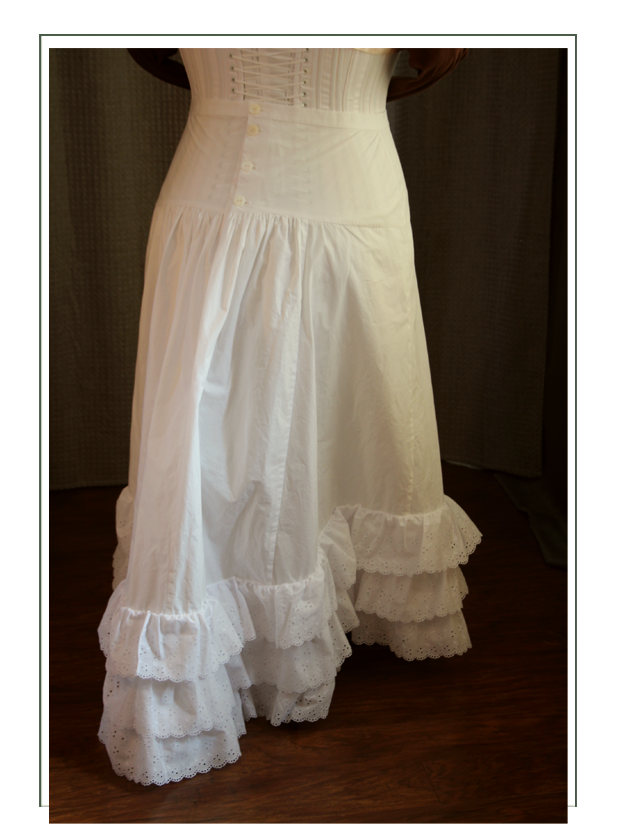
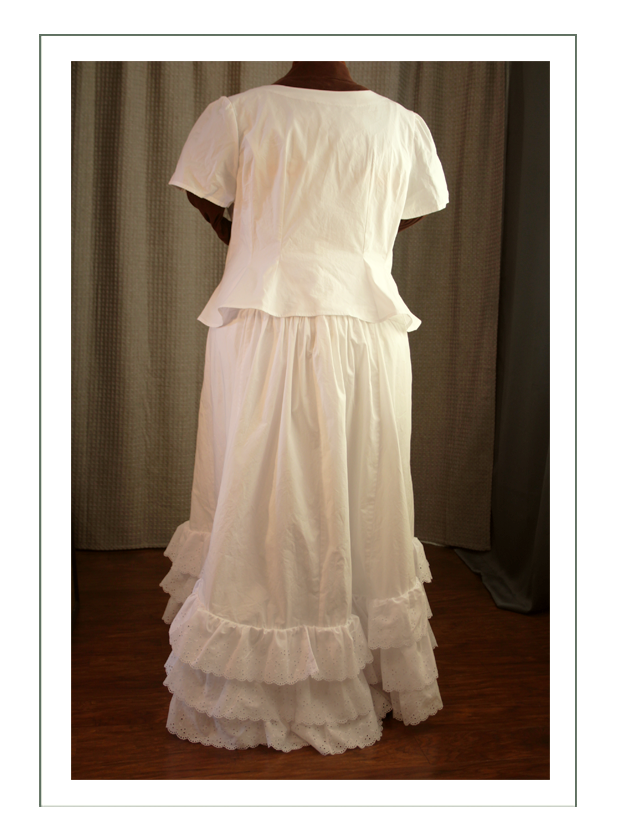
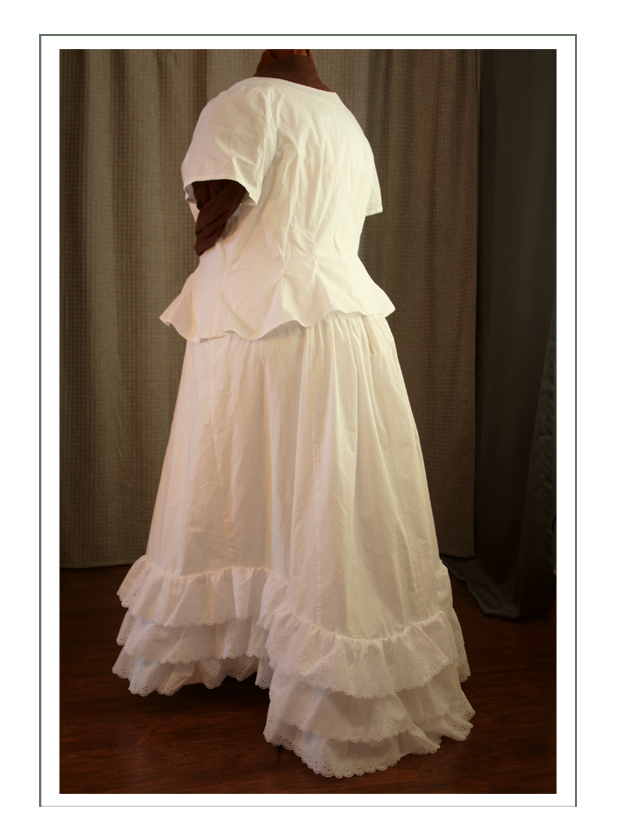
Outer Skirt
This is made of twill 100% cotton white fabric, with kilting (historic method of pleating specific to the Late Victorian era) using 100% cotton fine black twill. There is a structural netting inside, and this is shown over the bustle, underskirt, petticoat, corset, corset cover, and combination undergarments. The “poufs” are made through strategic draping and inner tapes (like balloon shades/curtains).
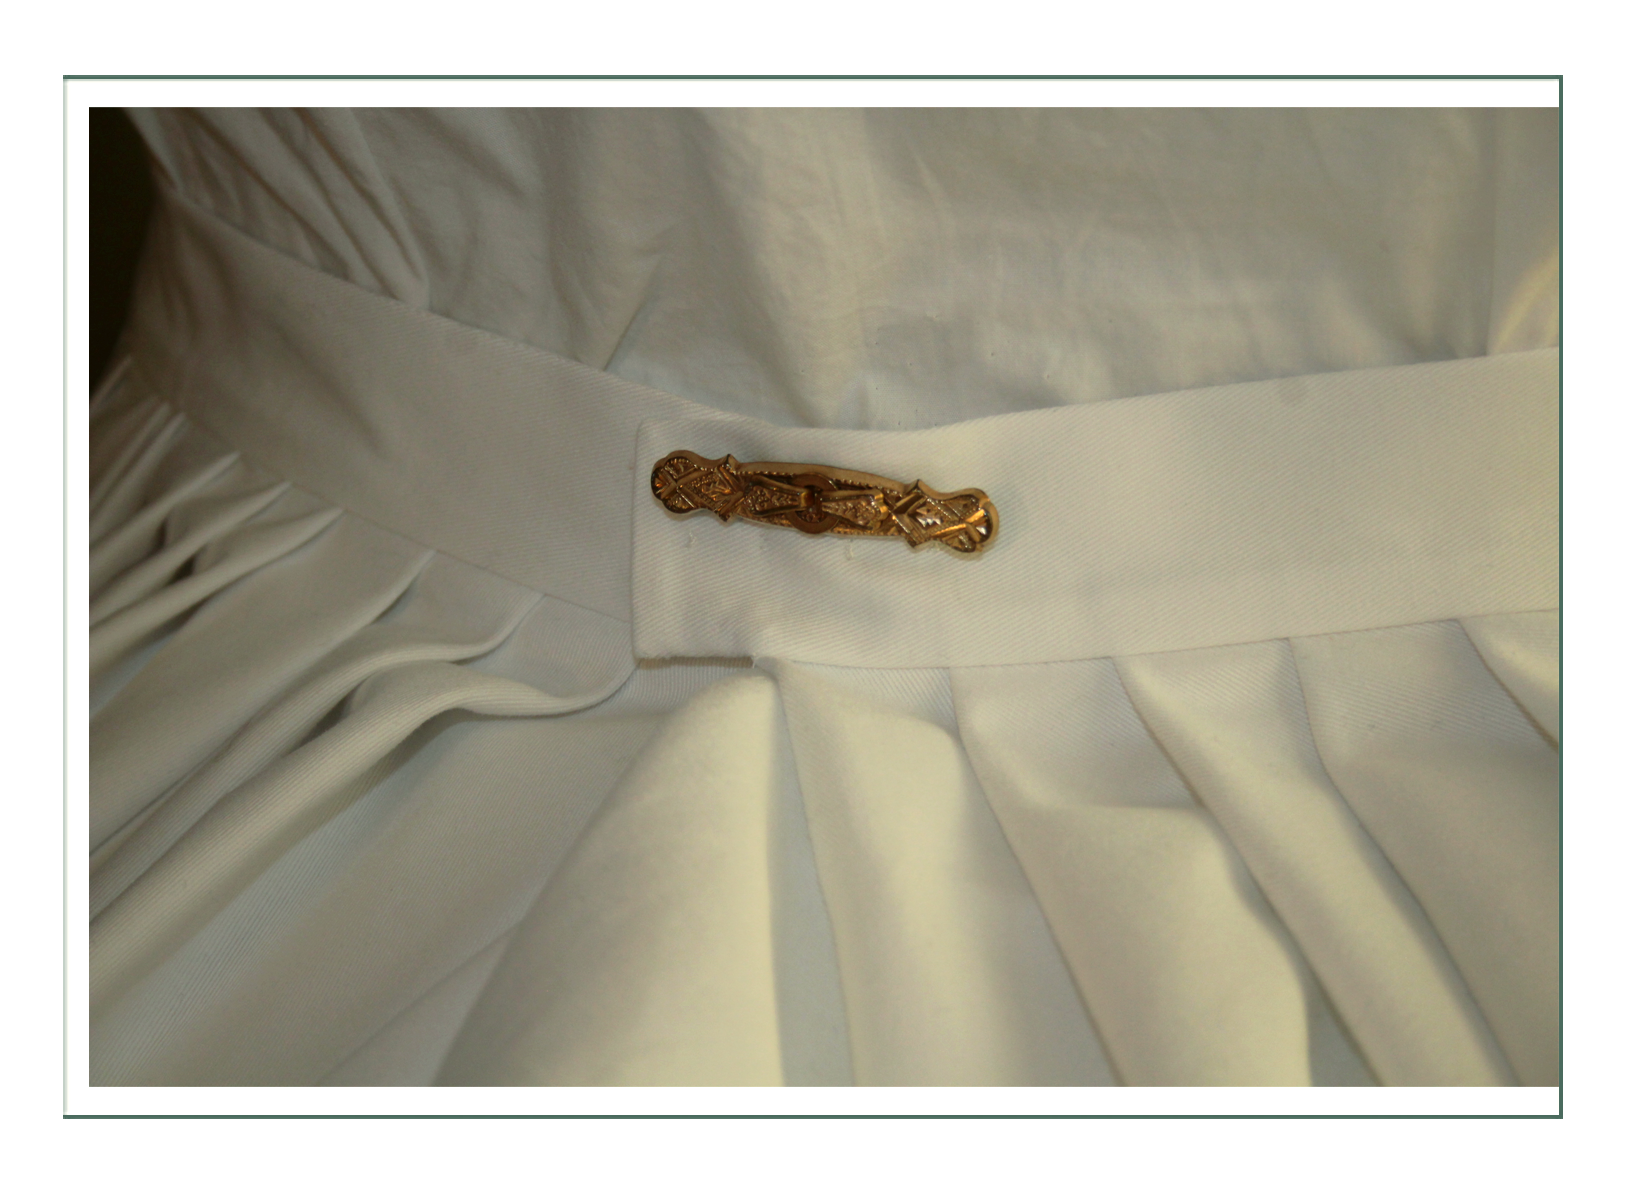
We decided to put in hooks and eyes for strength because the twill when doubled up as needed for a strong and durable waistband is rather thick. The planned pin is an antique from about 1900, and is used in this situation for decoration.
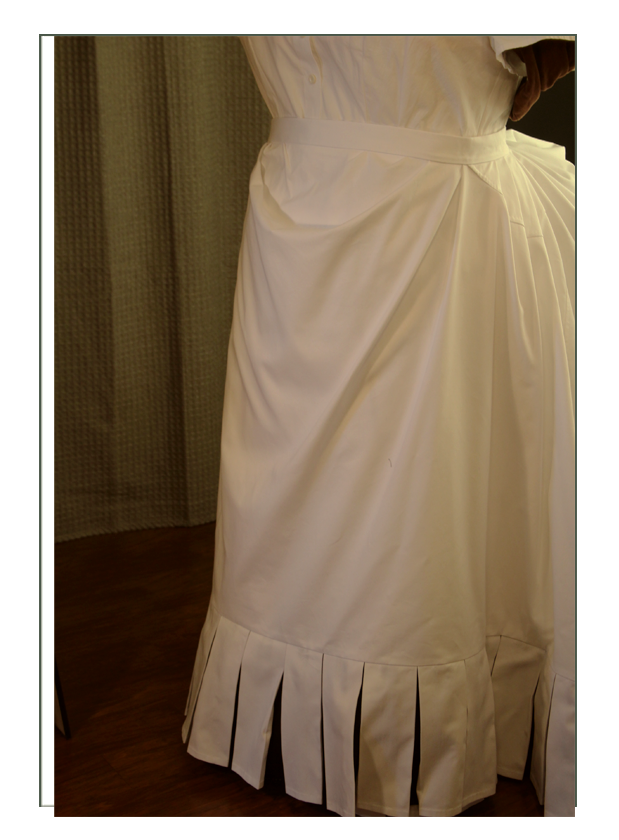
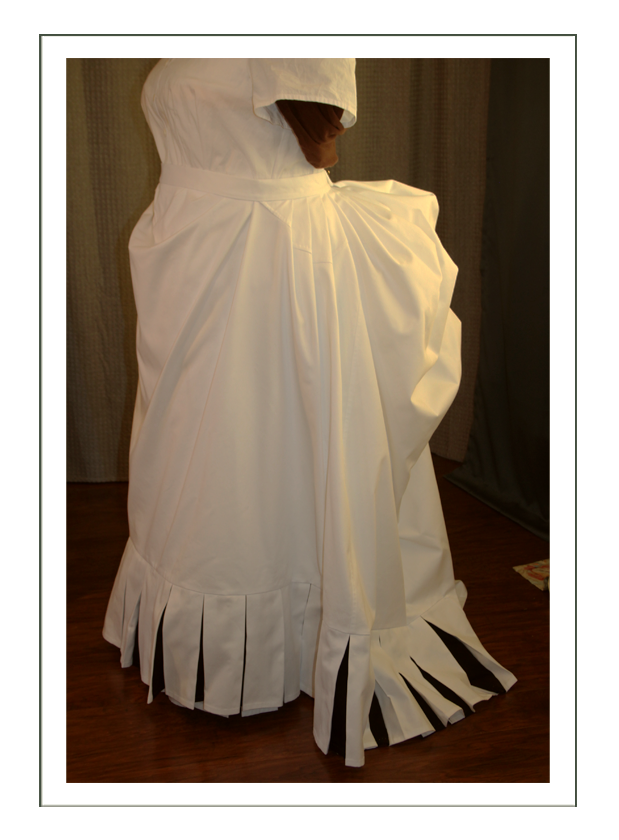
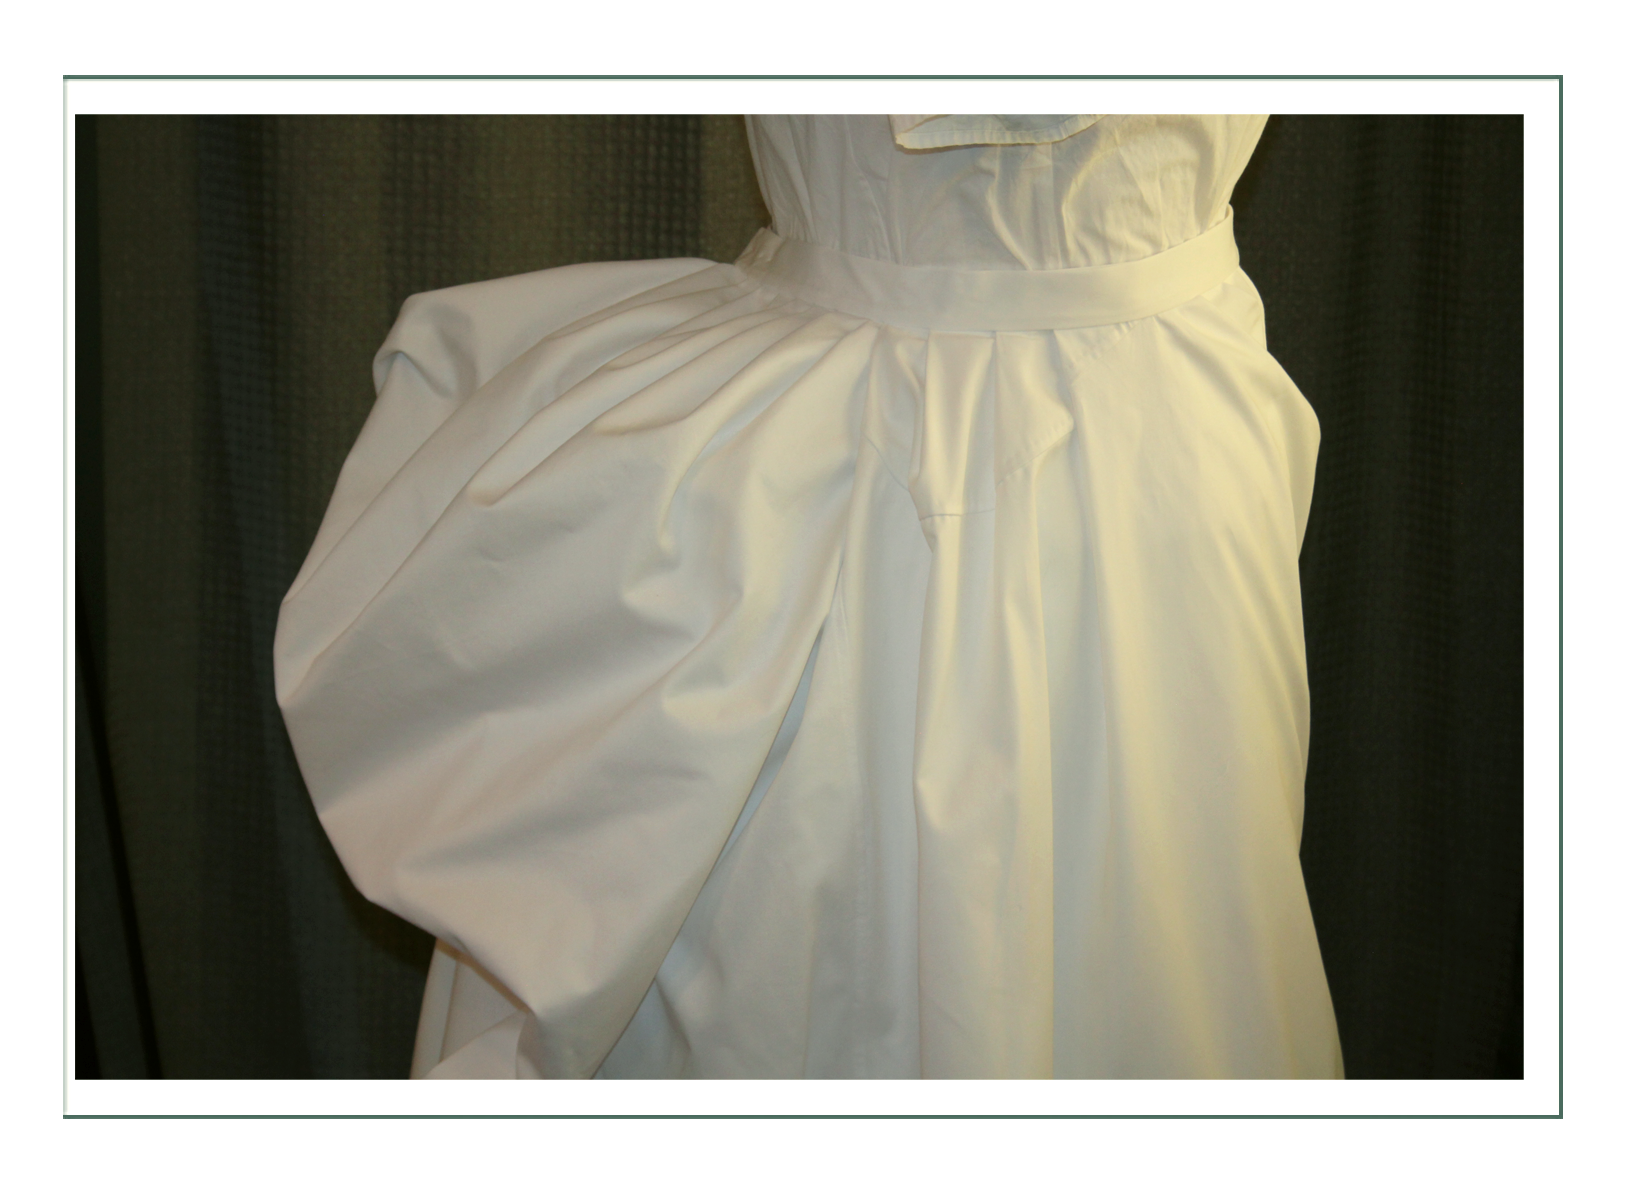
Note the careful, subtle draping built into the front of the skirt. Earlier in history, this was made by a separate garment called a drape or tunic. As the 1880’s progressed into the 1890’s, this front draping was integrated into the skirt itself as it would in the next decade evolve into a more symmetrical skirt notable at the end of the Victorian era which would herald the gored skirts of the Edwardian.
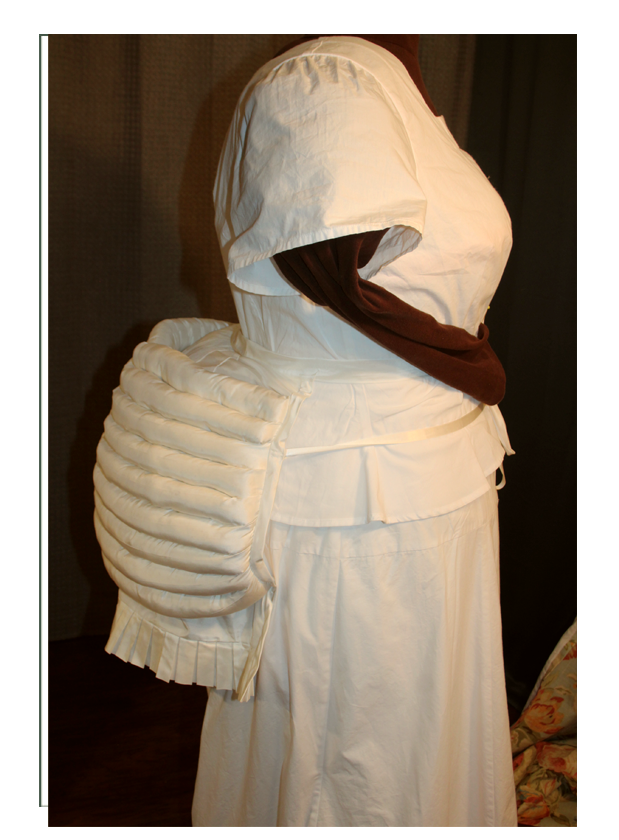
Surprisingly, the twill was not as heavy in weight as anticipated, because the structure of the bustle and tapes meant less fabric was required than say in the late 1870’s. Instead, we were disappointed it was somewhat sheer, necessitating the addition of a foundation or underskirt worn between petticoat and outer skirt. As you can see in these photos, the underskirt completely hides the brown color of the temporary bustle (final bustle as seen below is white).

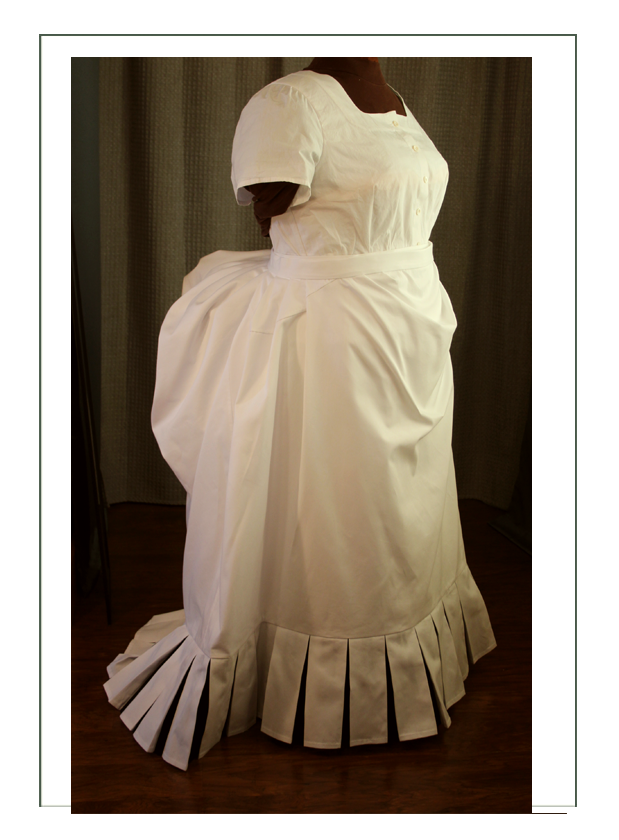

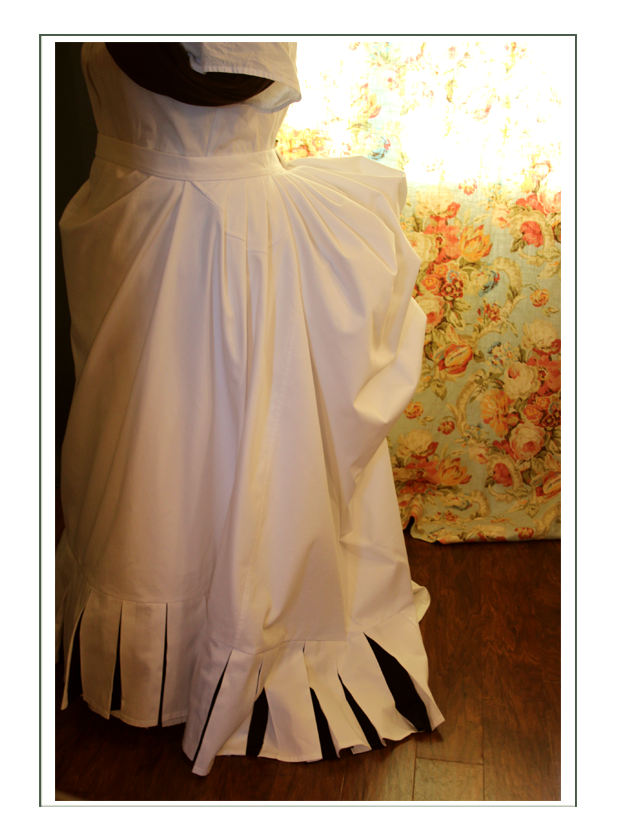
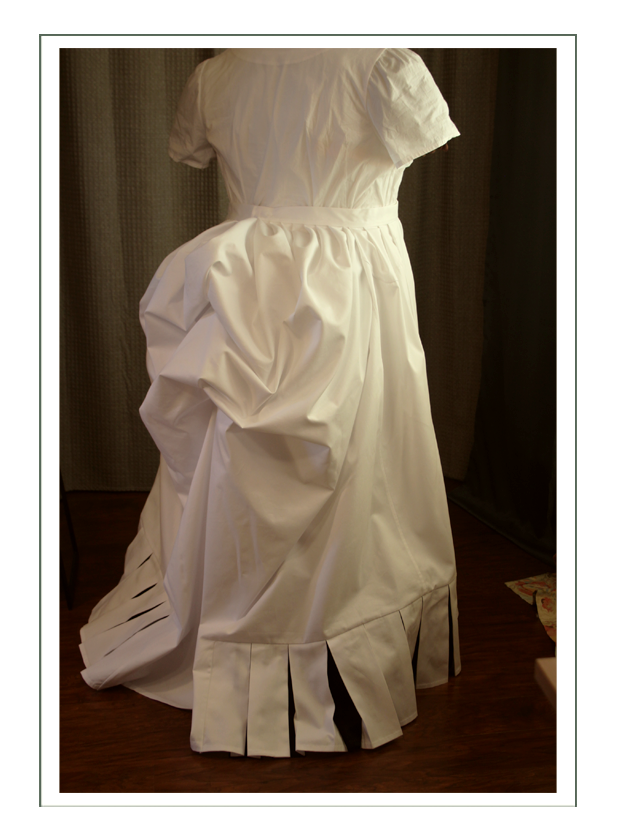
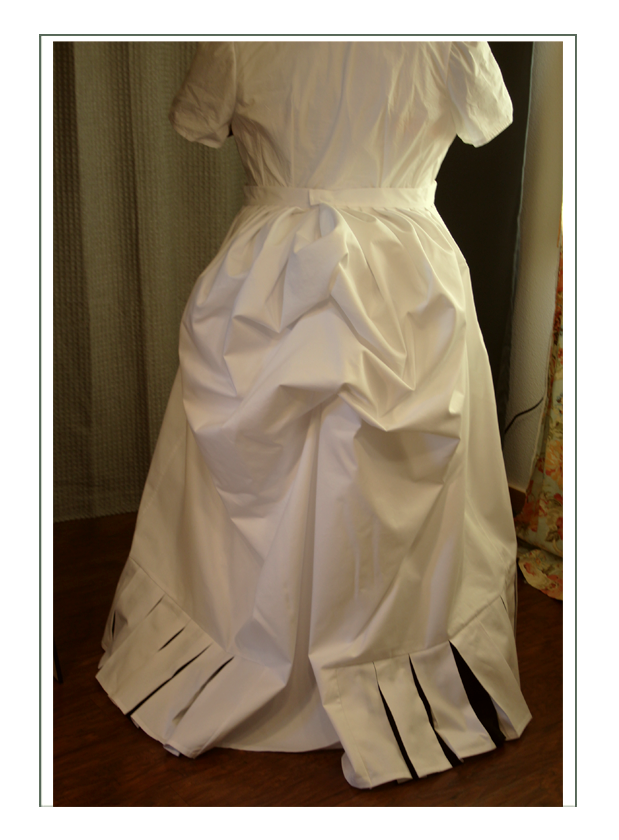
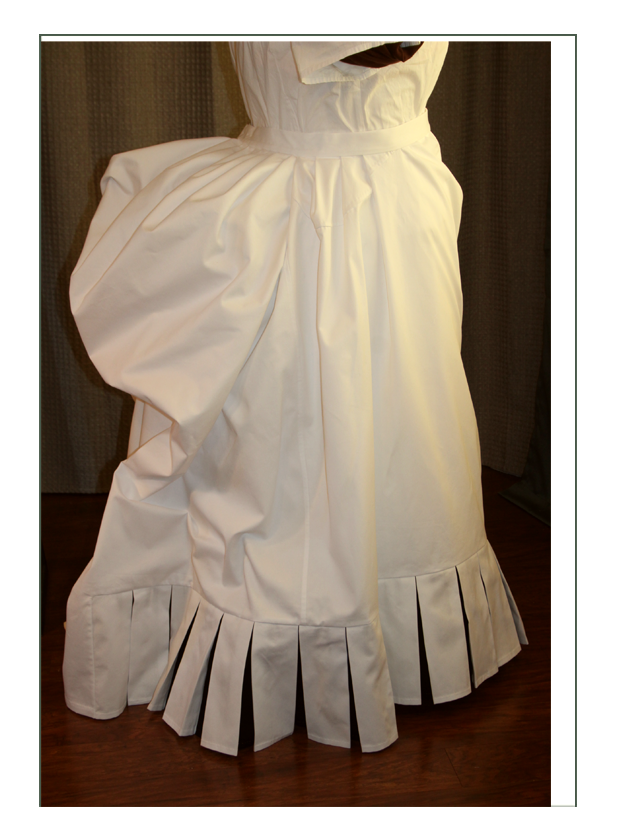
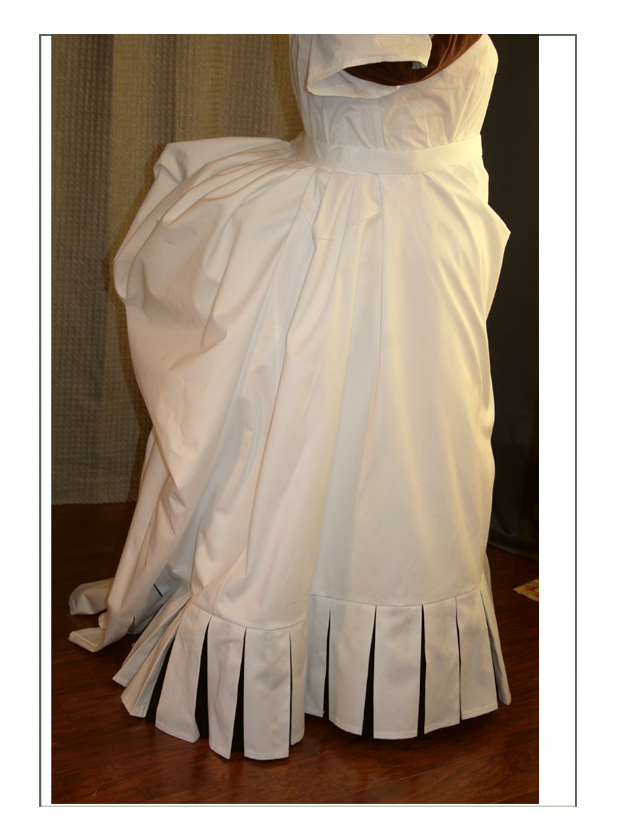

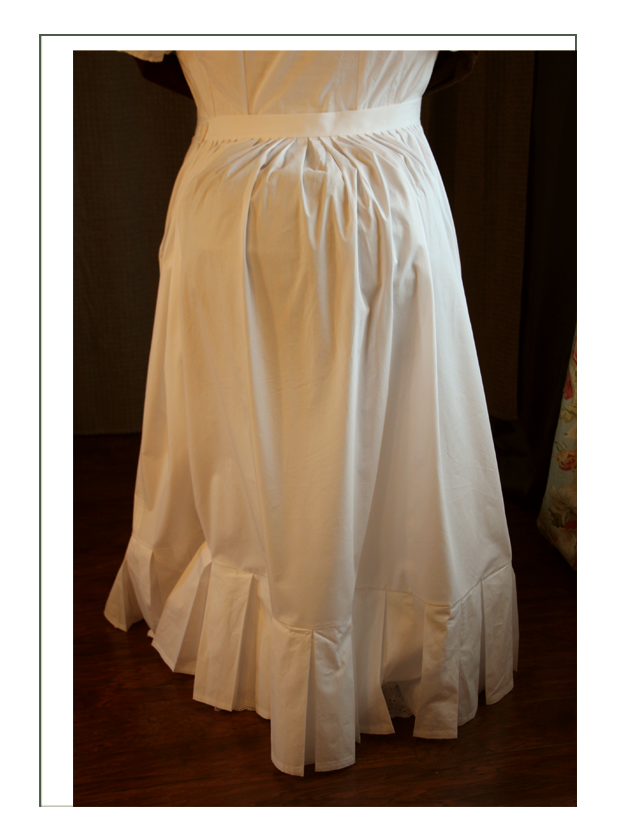
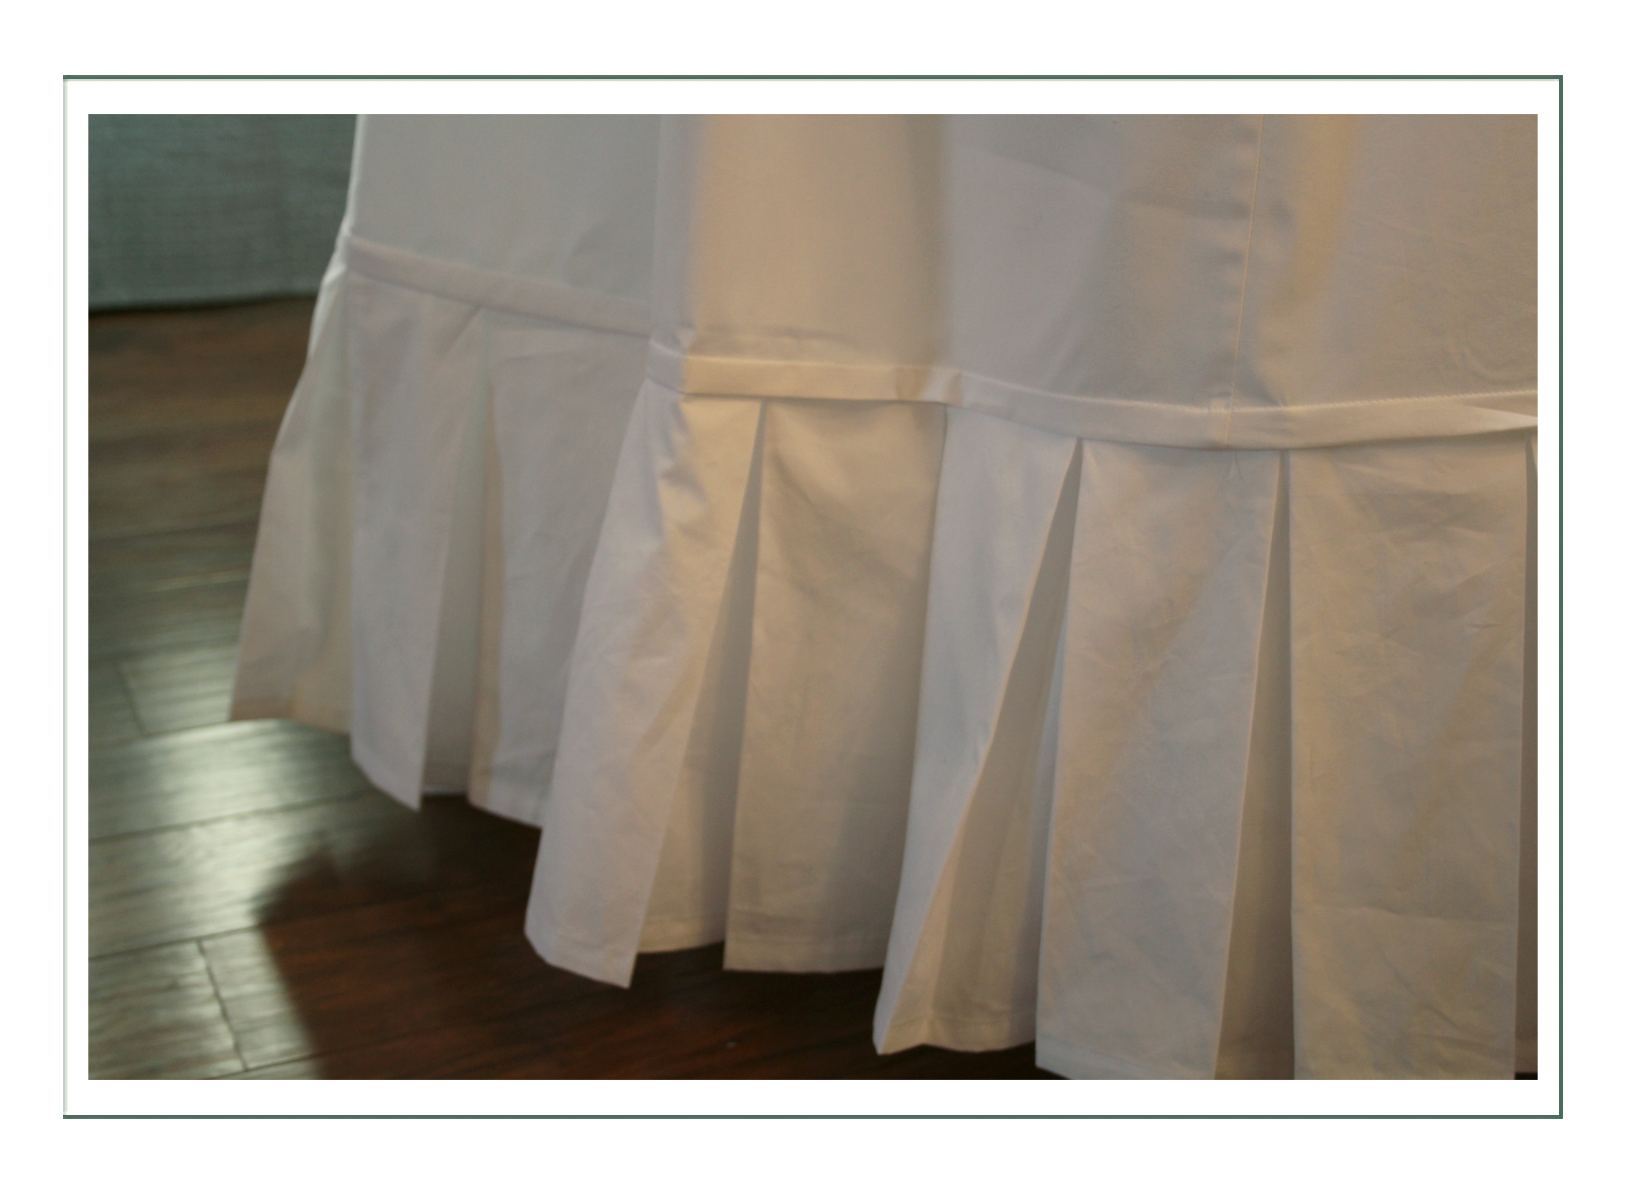
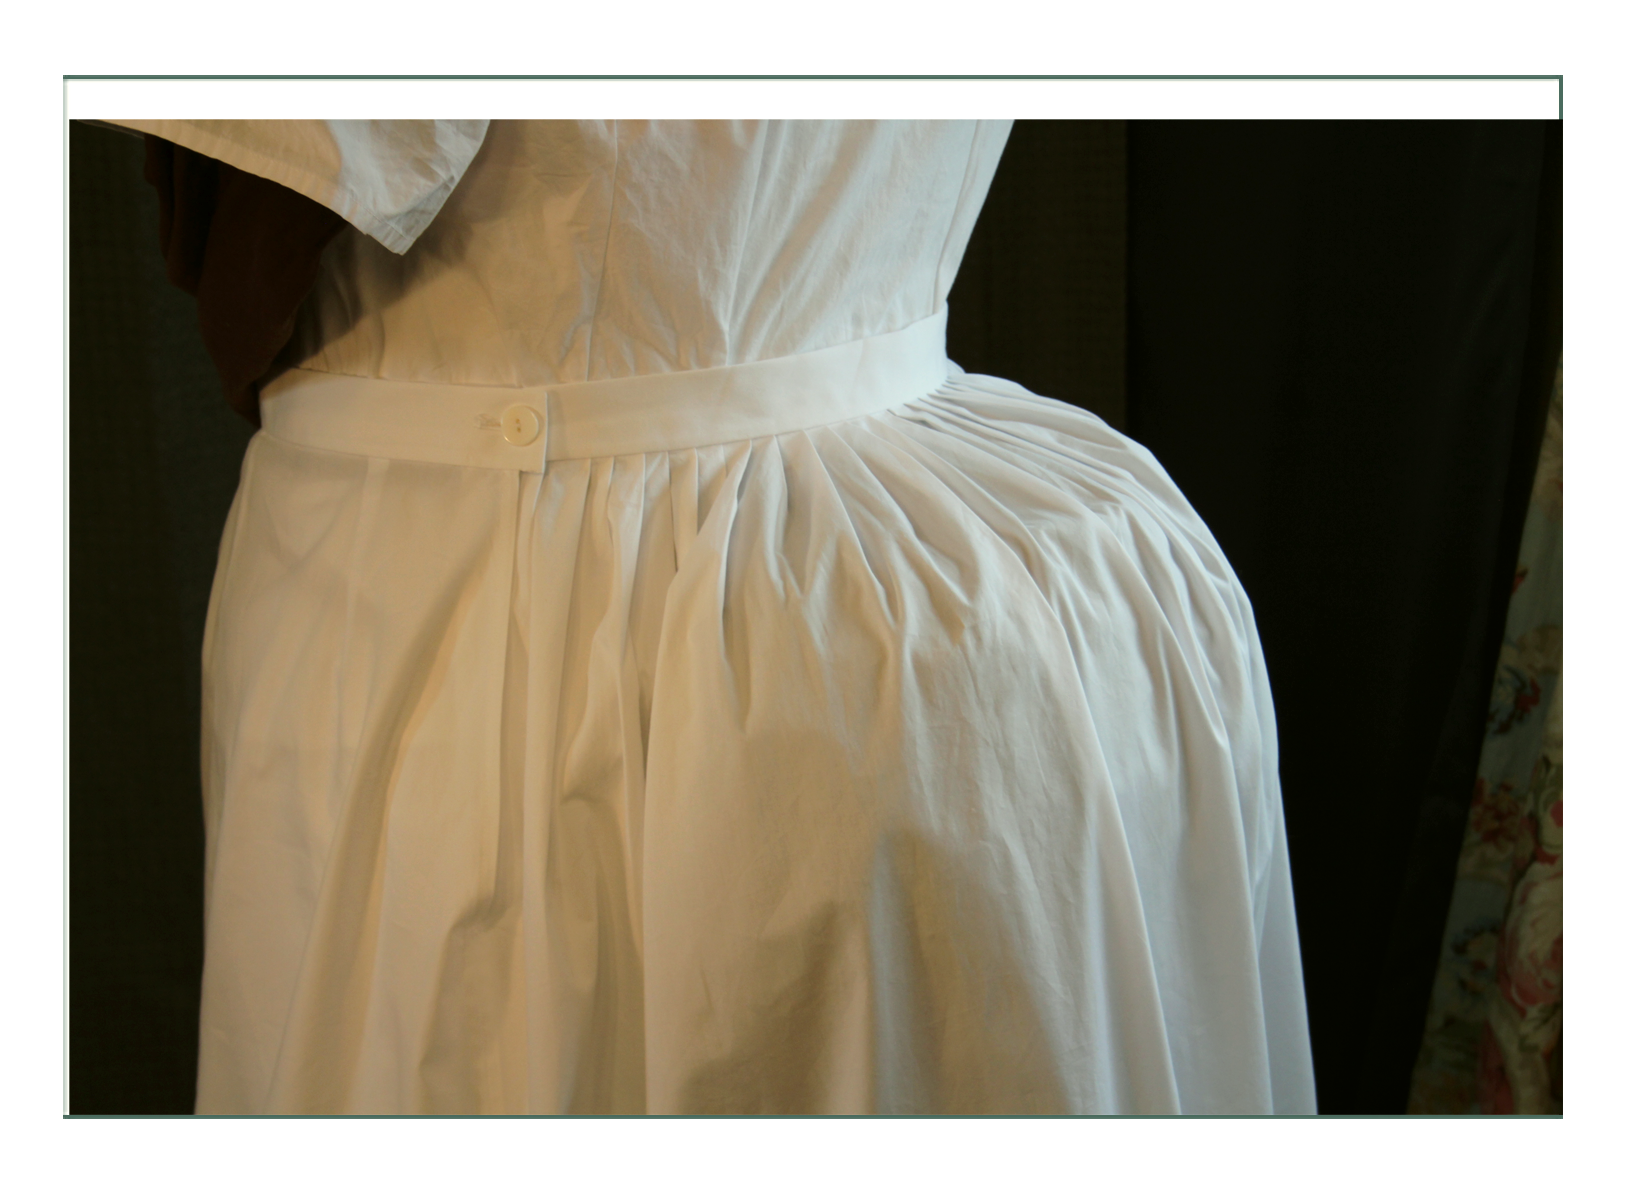
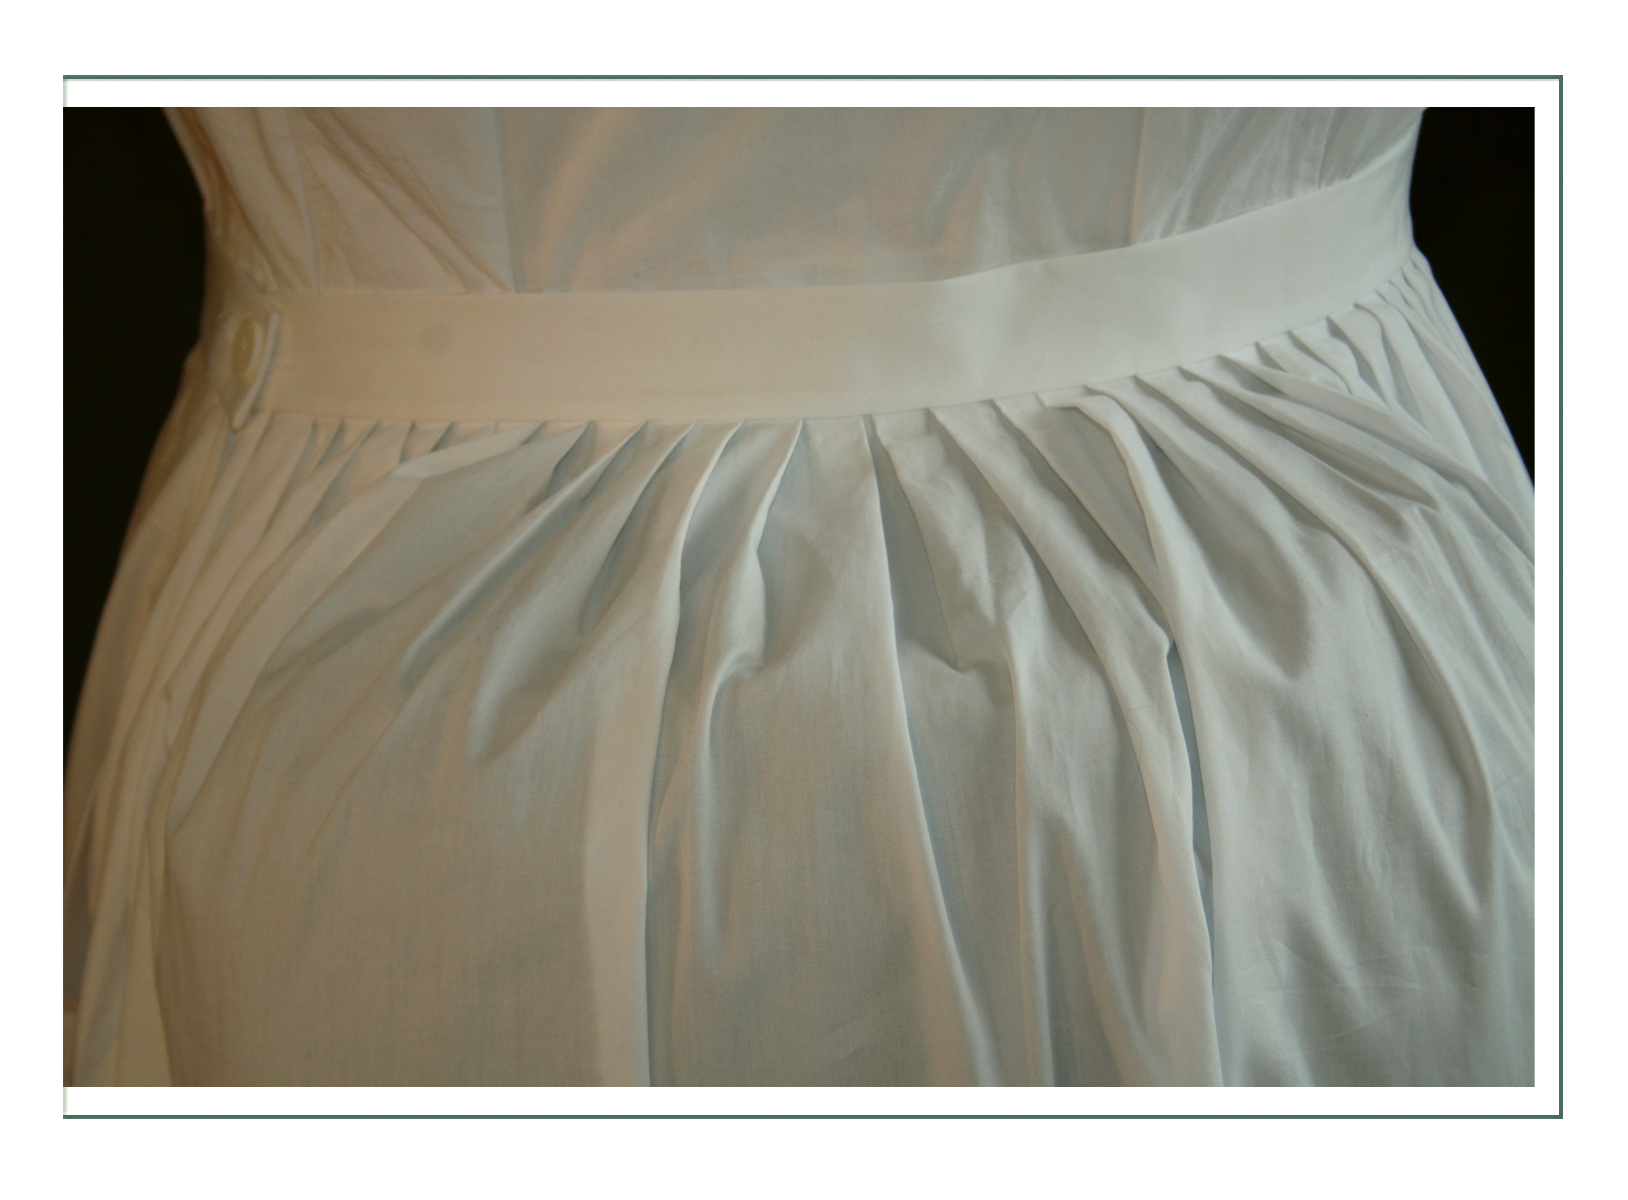
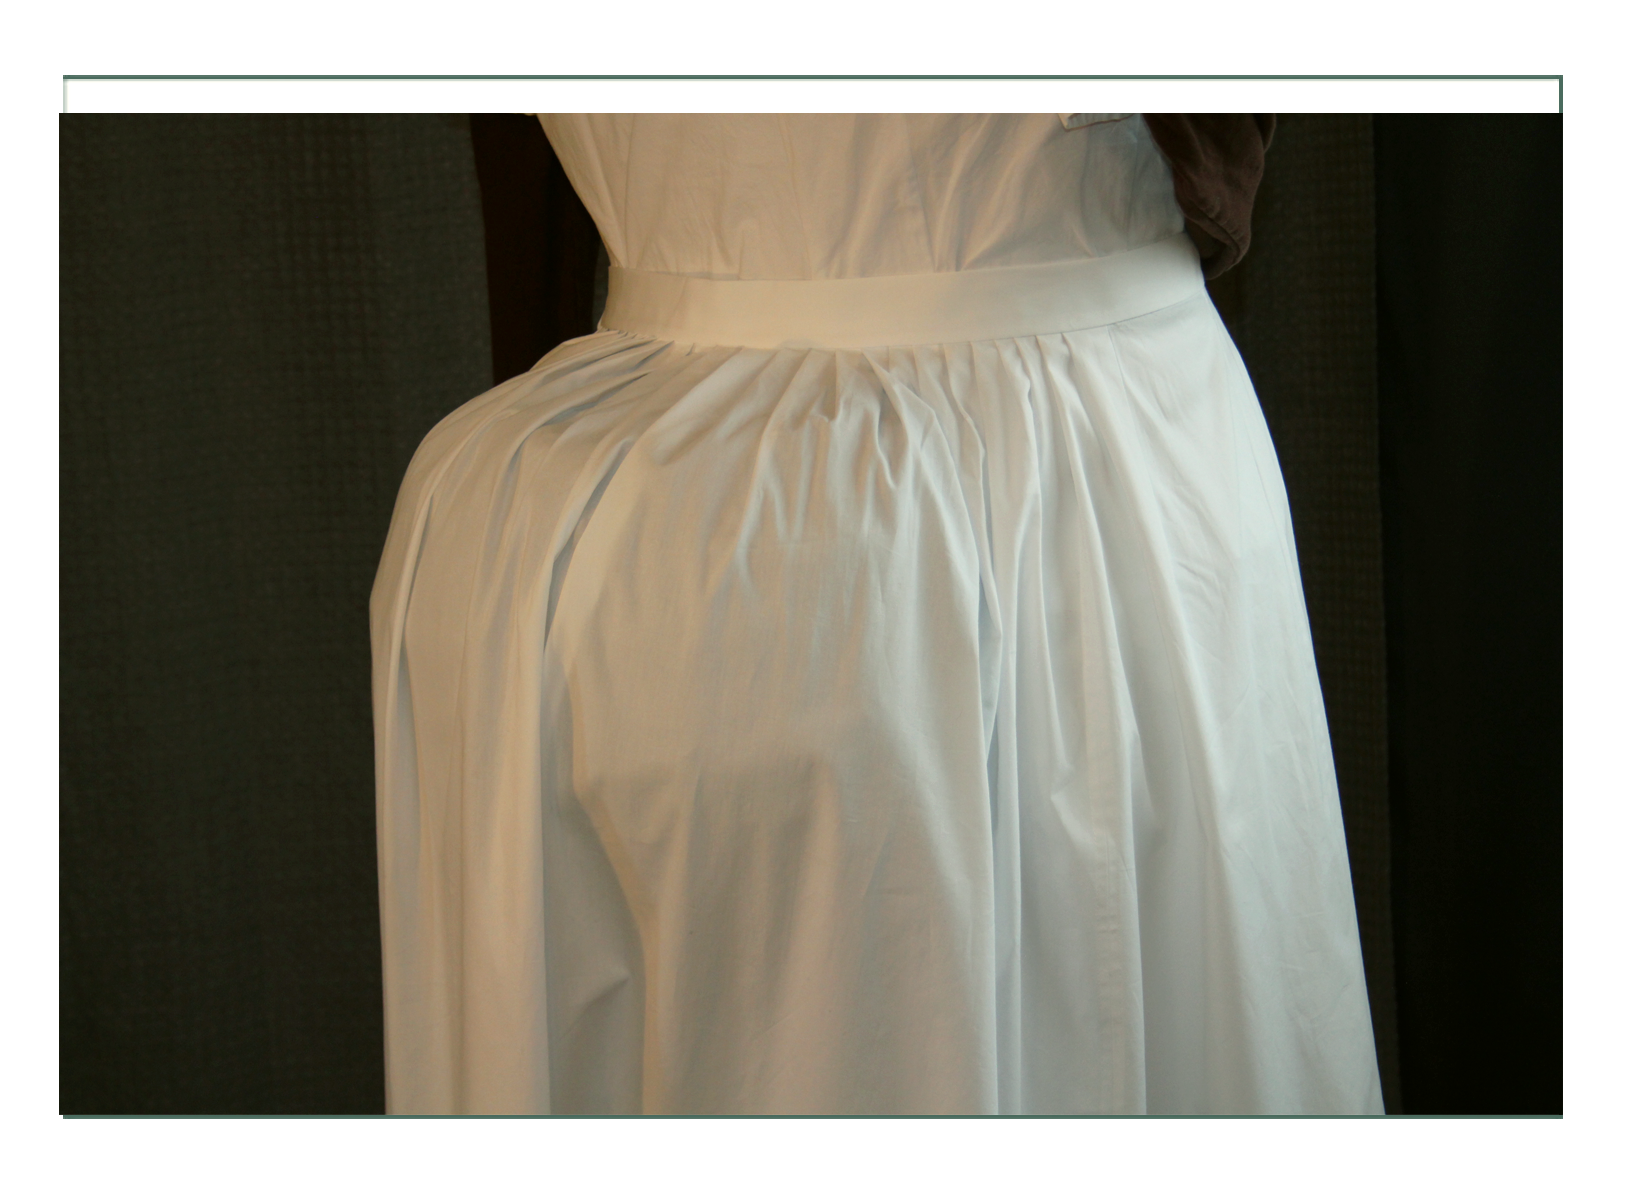
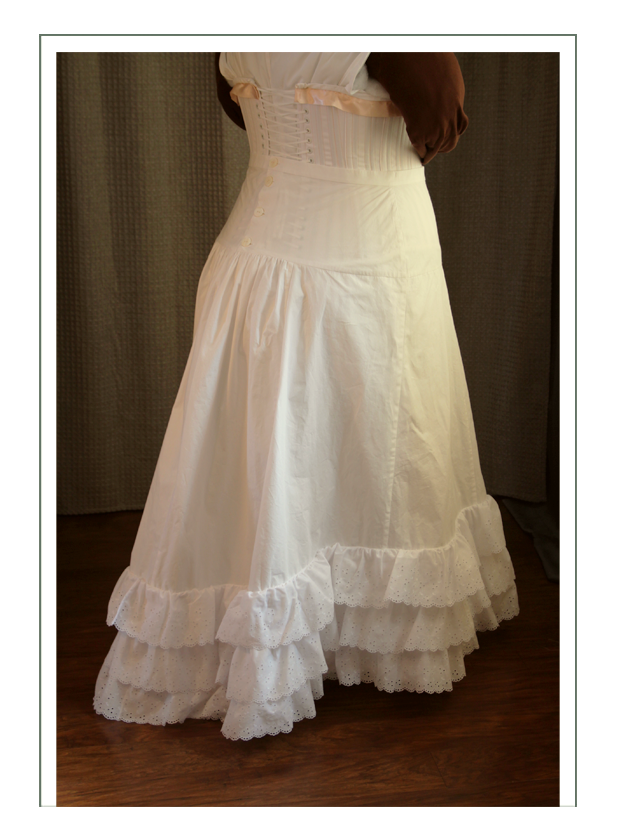
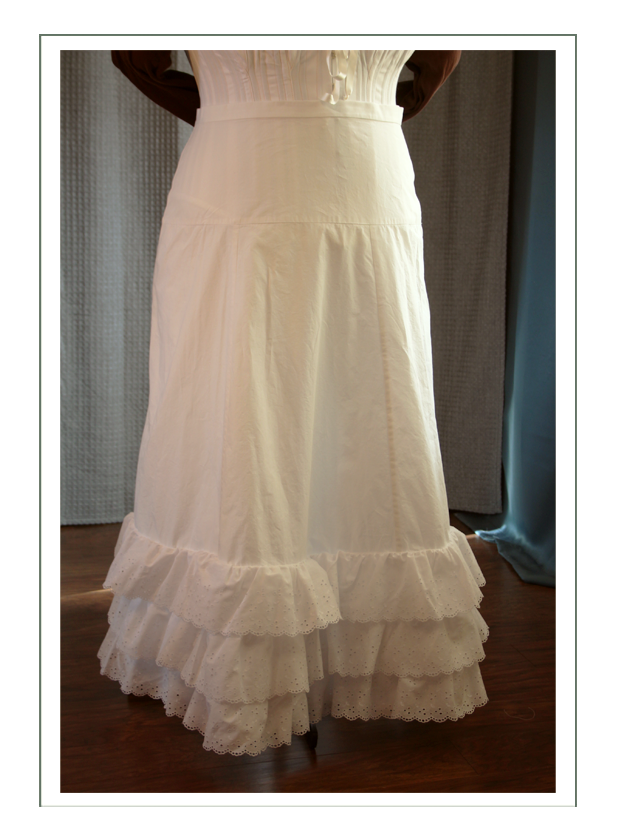
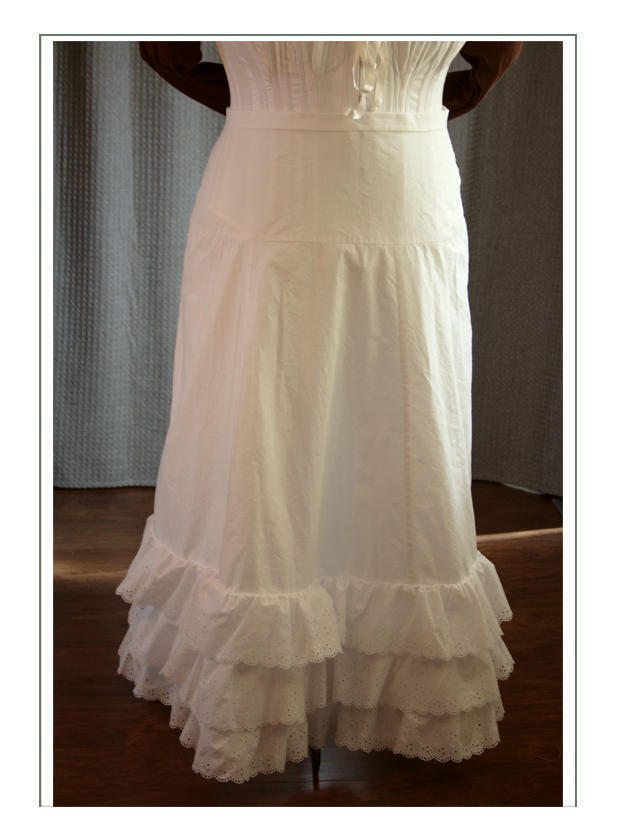
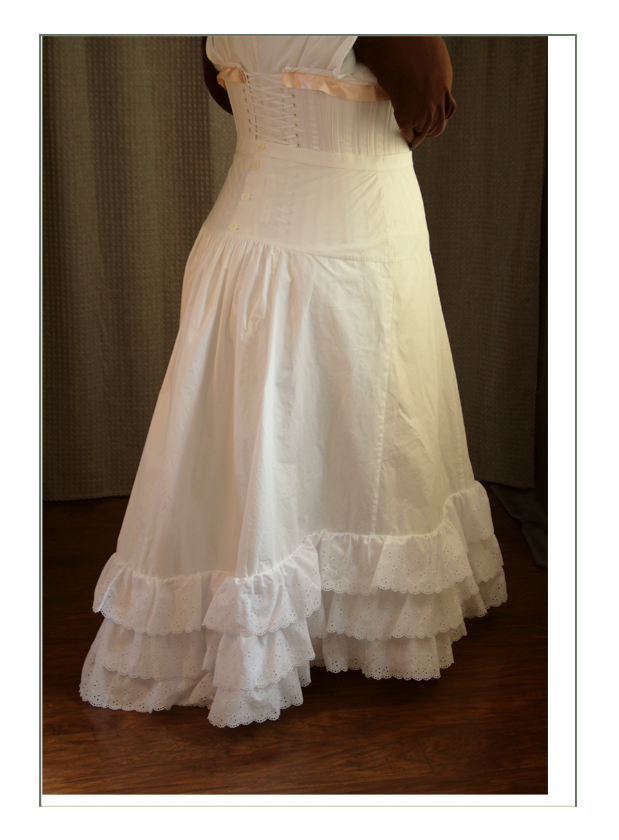
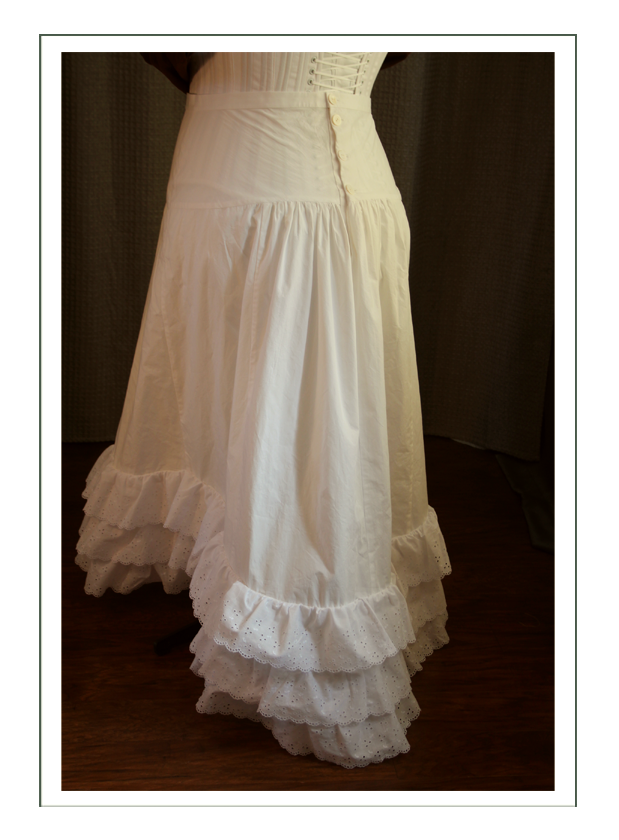
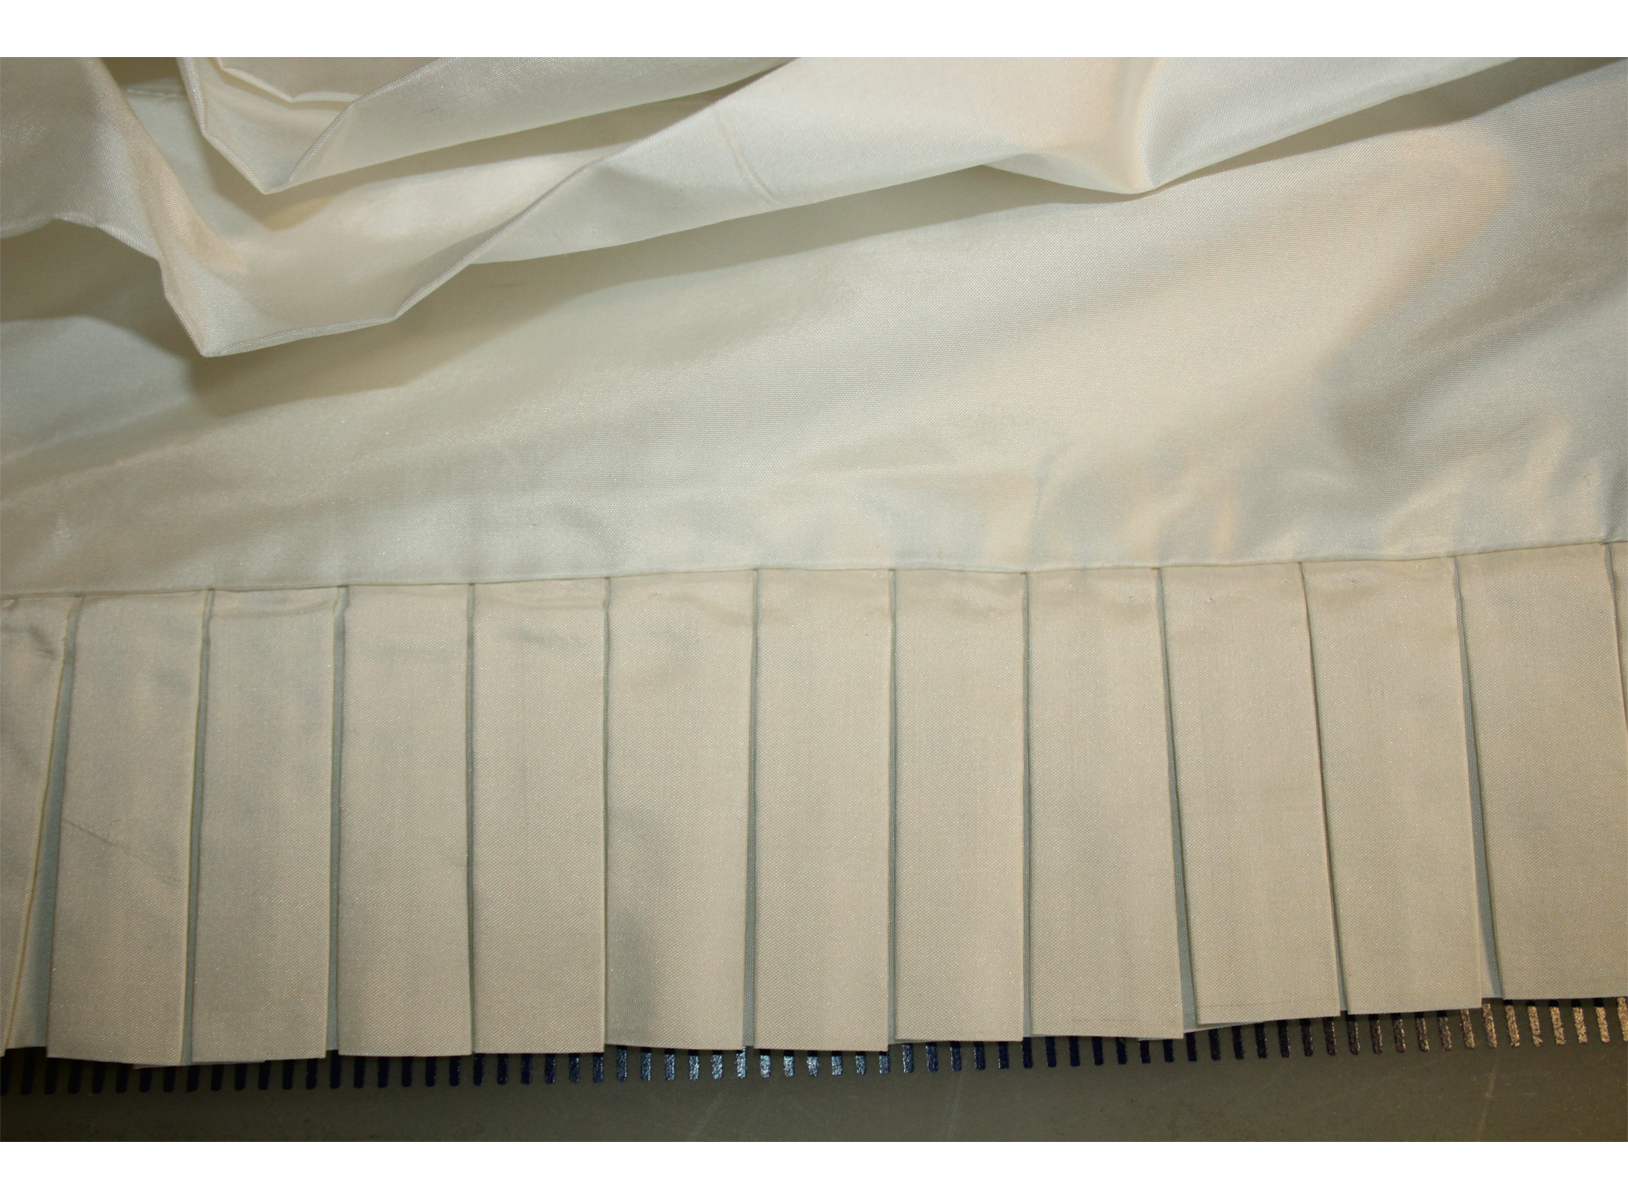
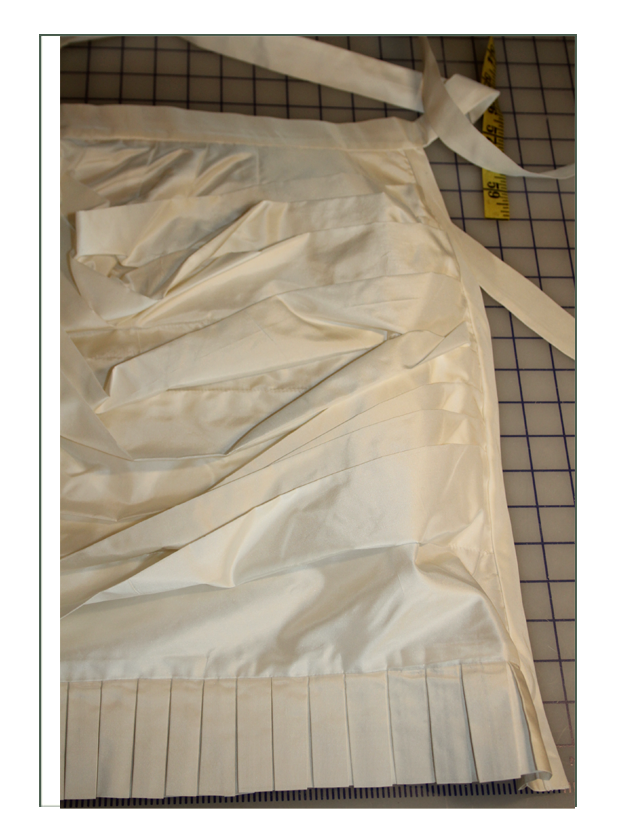
Foundation/Inner/Under Skirt
The underskirt was necessitated by the sheerness of the twill outer skirt. It is made of 100% cotton poplin which is very much like a light and stiff cotton sateen. It has a sheen, and is a bit sheer in itself. Worn over the petticoat and under the outerskirt, however, it makes for a solid, white, non-see through skirt.
In the 1890’s, this would have been built into the structure of the outer skirt. To give Melissa more for her money, we made it a separate and complete garment which can be worn as a skirt on its own or as a single petticoat.
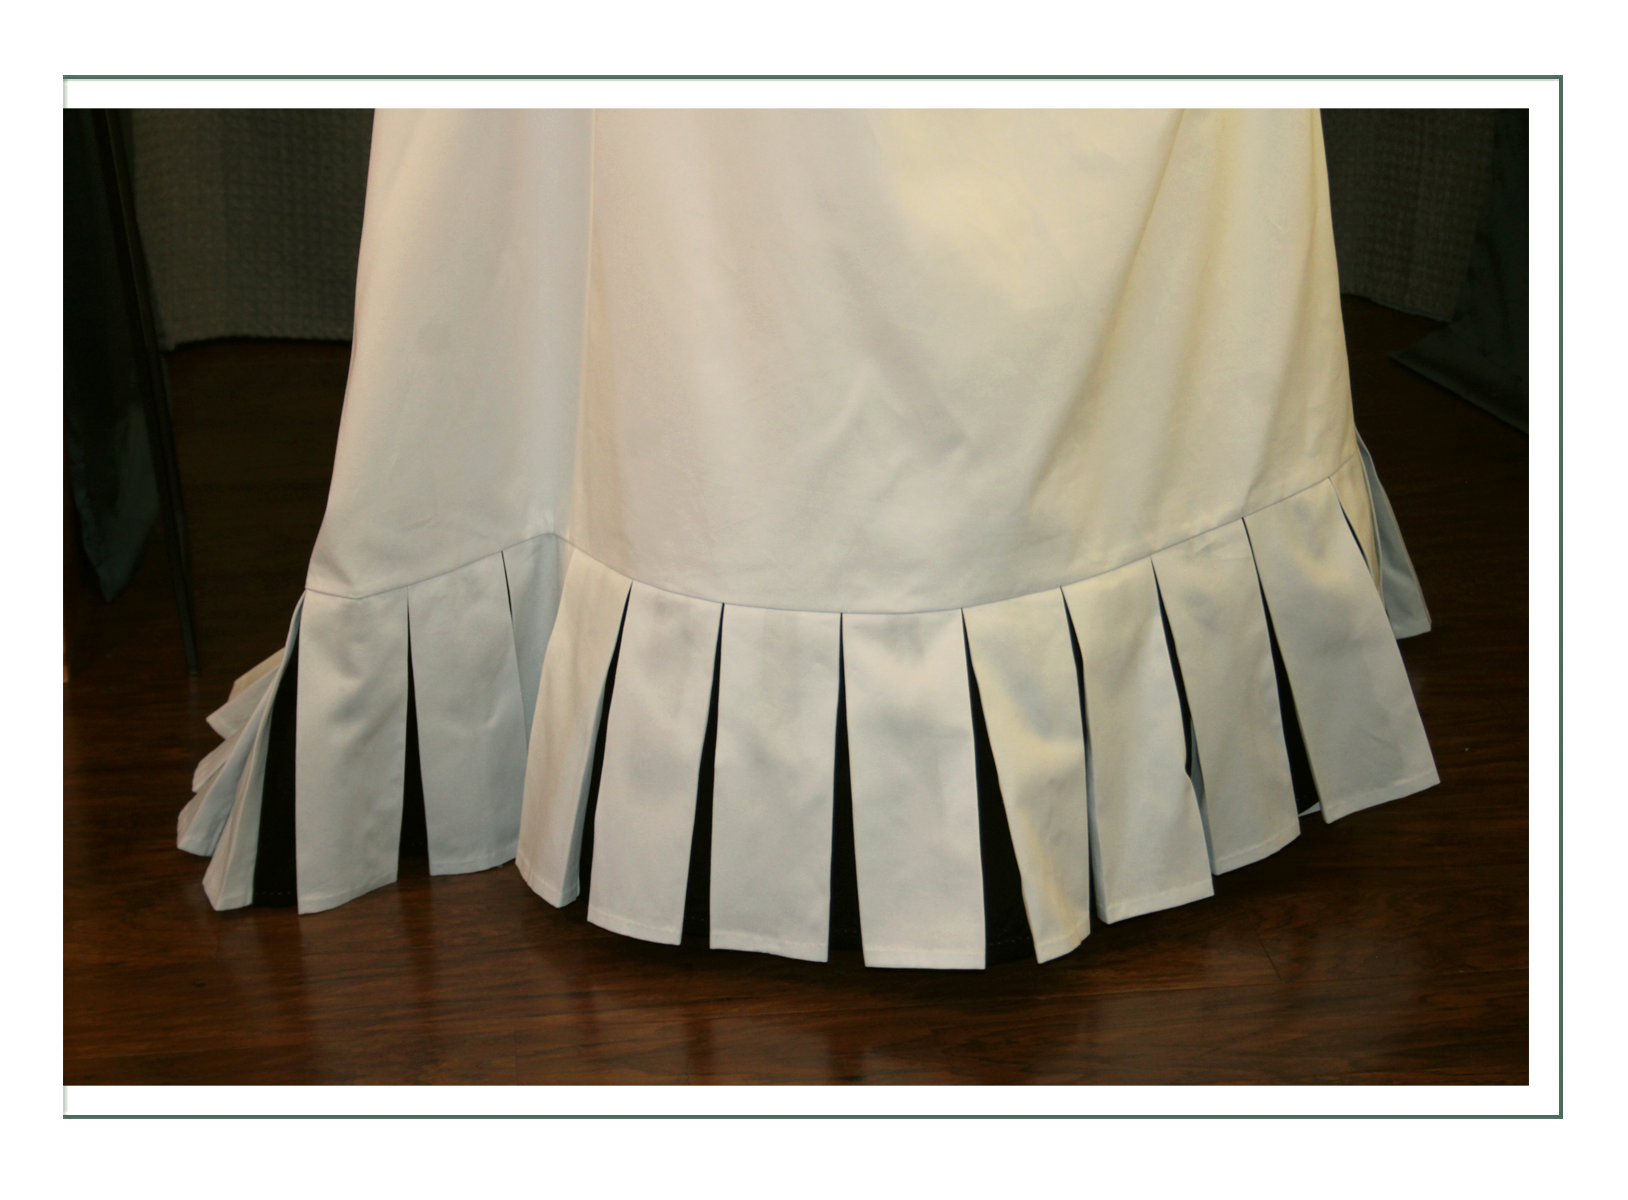
The challenge we encountered, however, was that we were basing this on an historic pattern for the correct underskirt for this outskirt. Typically in 1887, this underskirt would be made in a different fabric than the outer skirt, and the outerskirt would be draped up so the underskirt could peak out at the bottom and in the back.
That means the design of the underskirt has to have trim to coordinate with the outer at the hem. In this case, the underskirt, had we built it historically correct, would have not only restricted the feet from “kicking out” the quilting, but it would have restricted forward movement. Further, the underskirt built as described, would have smashed the petticoat totally, defeating the whole purpose of wearing a petticoat with fullness below the knees to help create the silhouette.
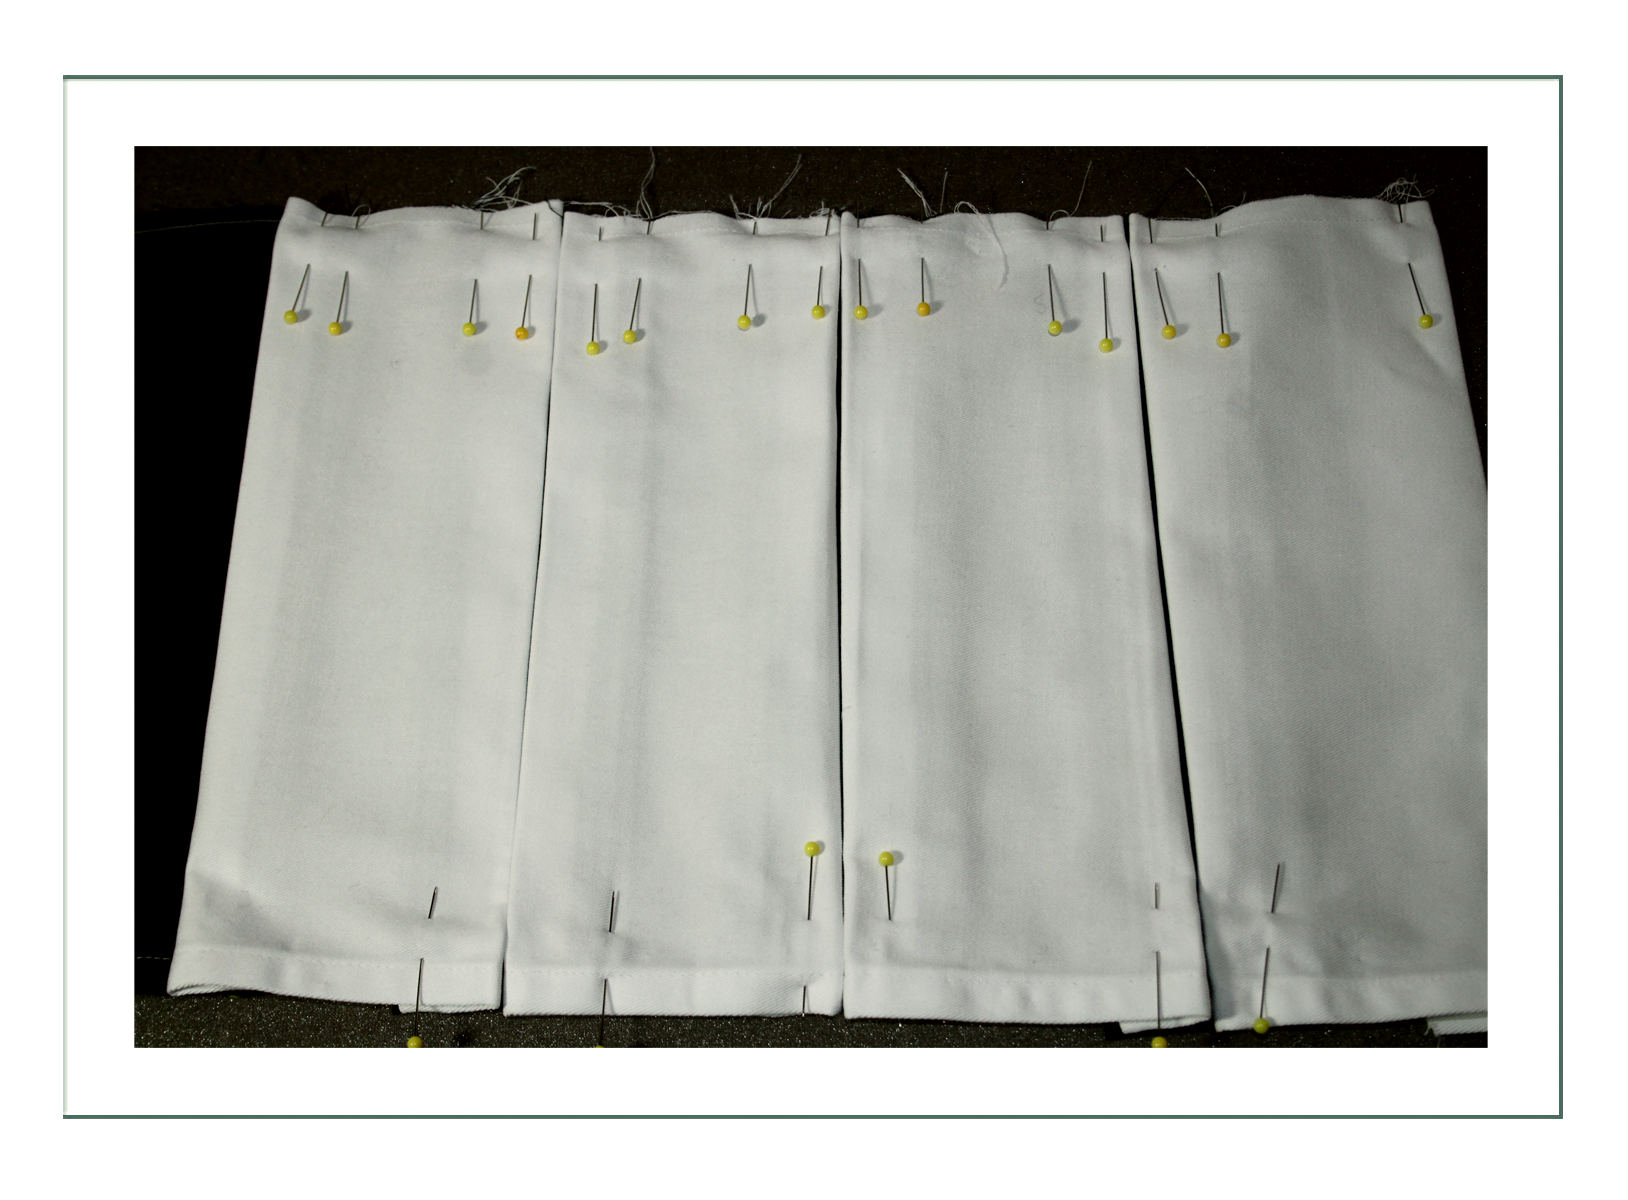
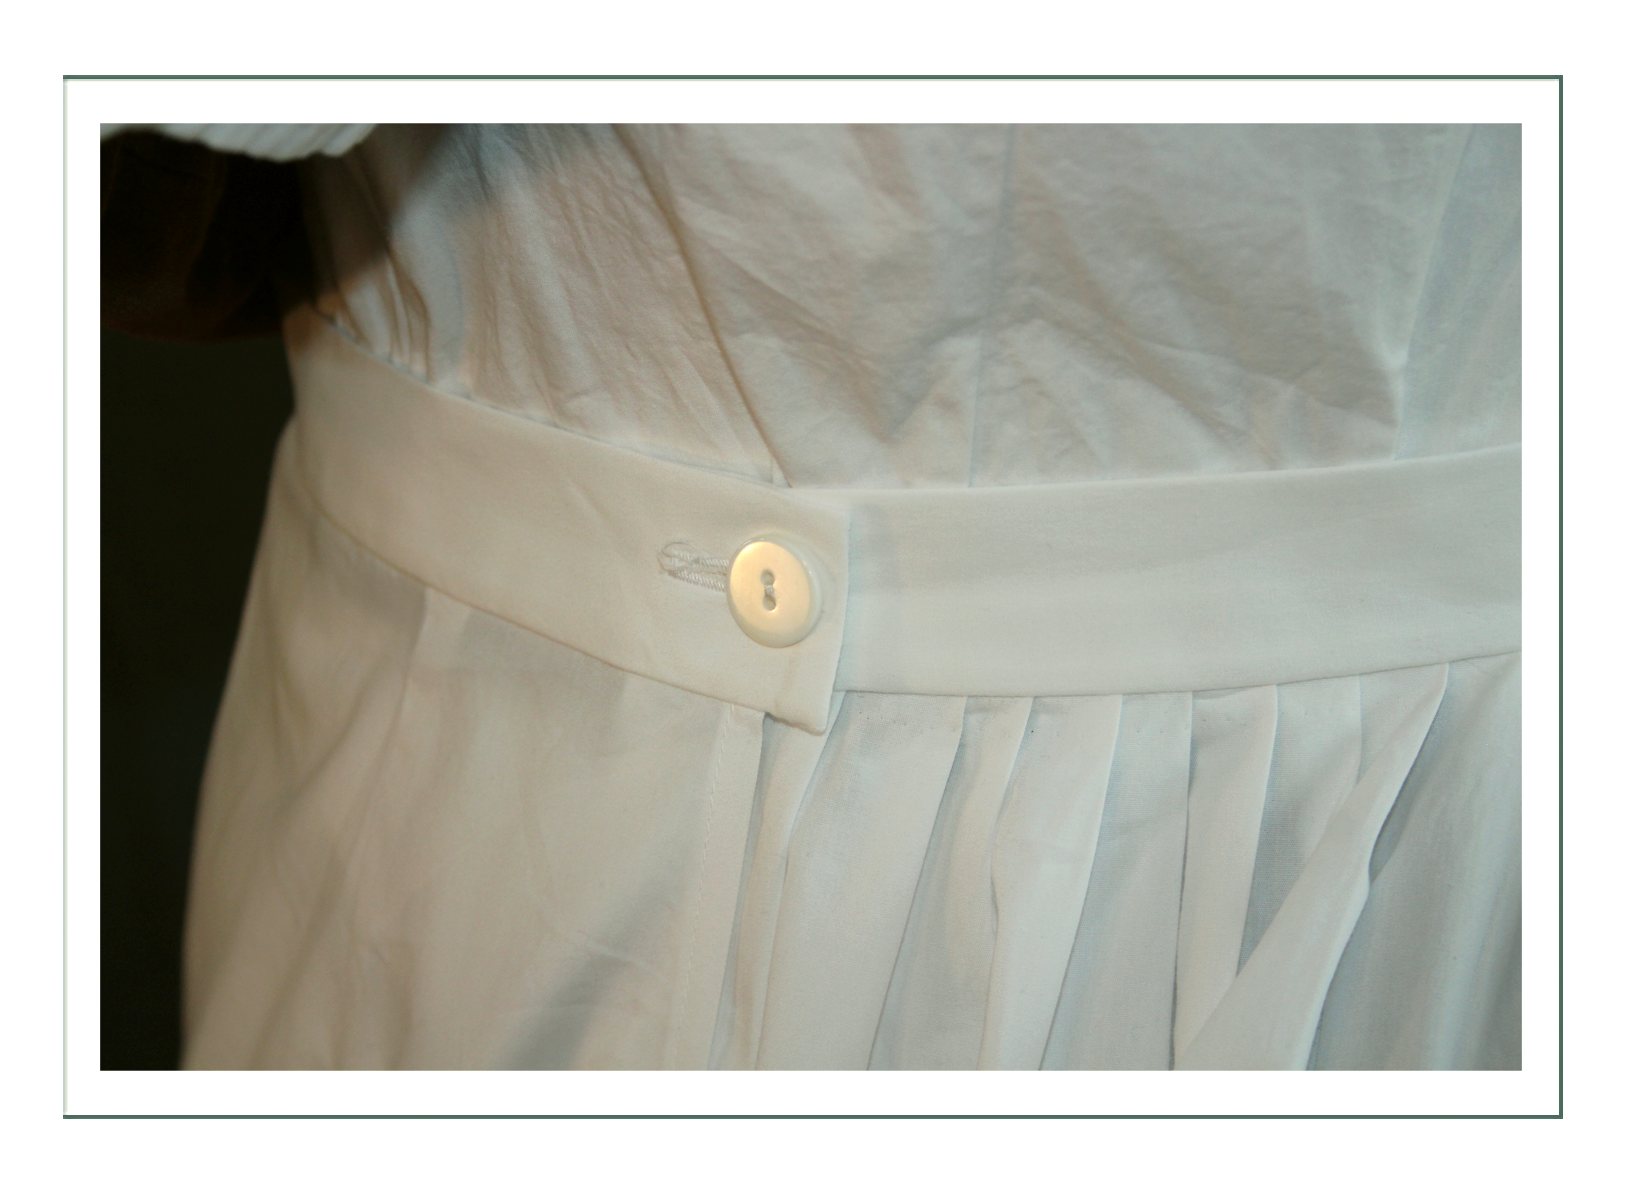
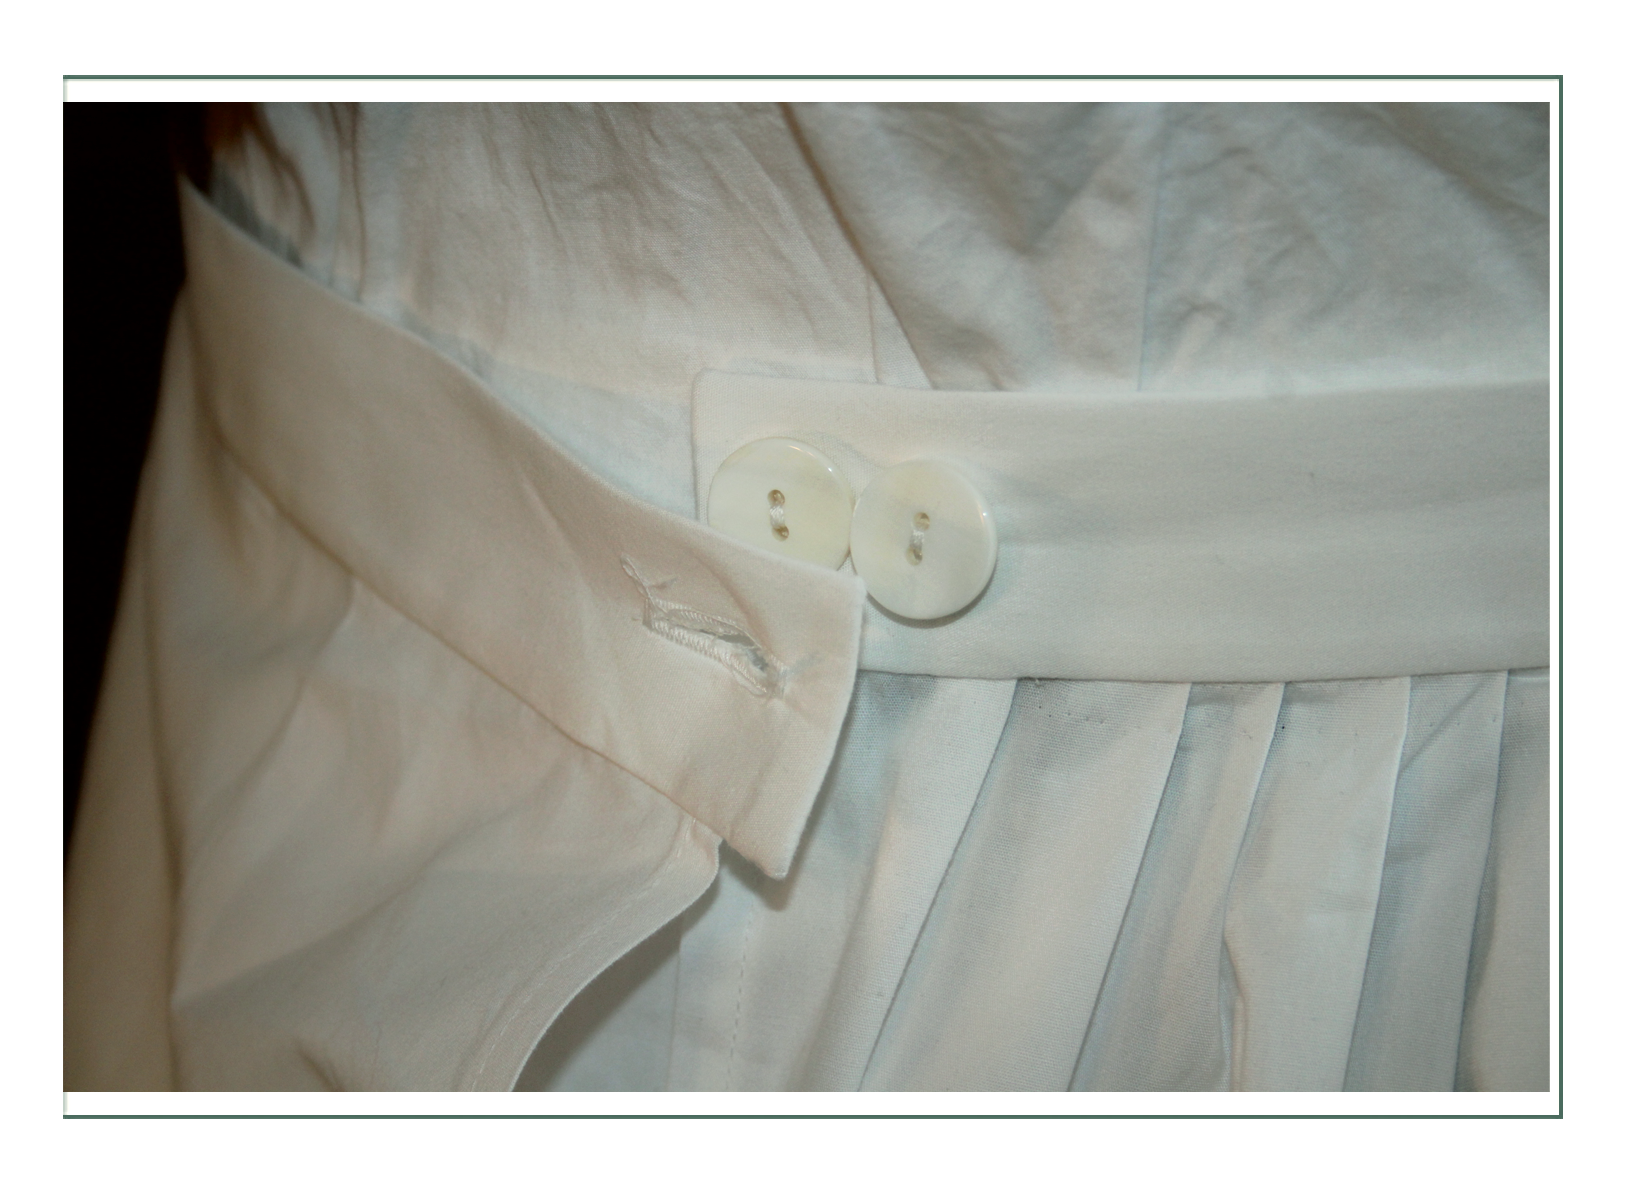
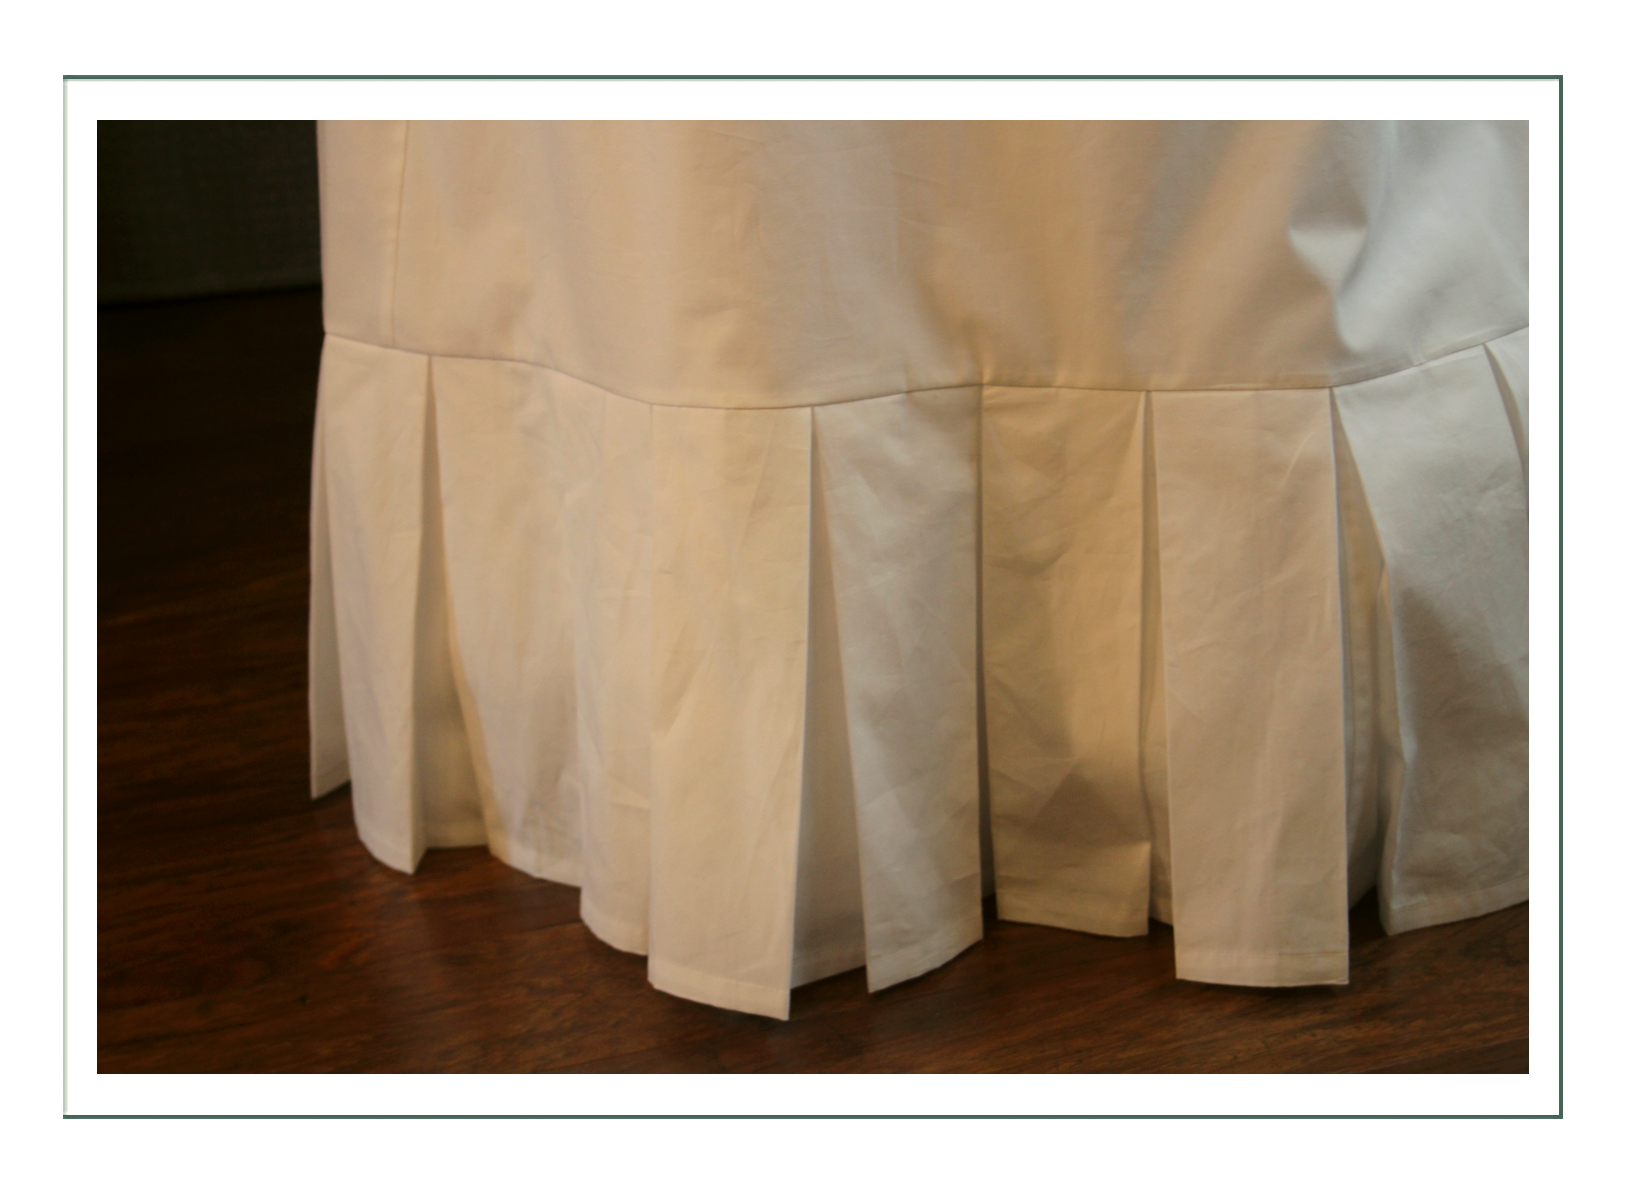
The solution was simple although time consuming: we built the same kilting as for the outer skirt, so it would release the petticoat underneath and would “kick” the same as the outerskirt. Because matching the kilts while moving along would be nearly impossible, we made more kilting pleats and at a narrower width so it has more movement than the outer kilts.
These photos are taken with the underskirt worn over the brown temporary bustle. It is pleated to fit this bustle, and buttons at the side back to keep the fullness towards the back. It should be worn very tightly in the waist and can be worn above the waist if desired.
To play it safe, we pleated the kilting at the top to shorten the skirt overall by 1+”. Because the draping of the outerskirt varies with how you wear it, there was a risk of the underskirt showing in front. Shortening it took care of any future problems and moved the top of the kilting higher so it will move more than the outer skirt’s kilting.
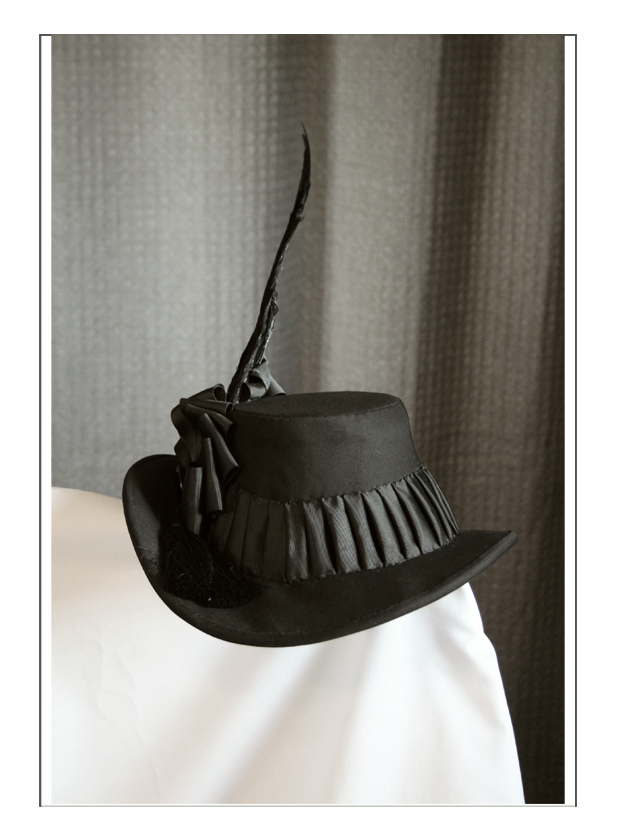
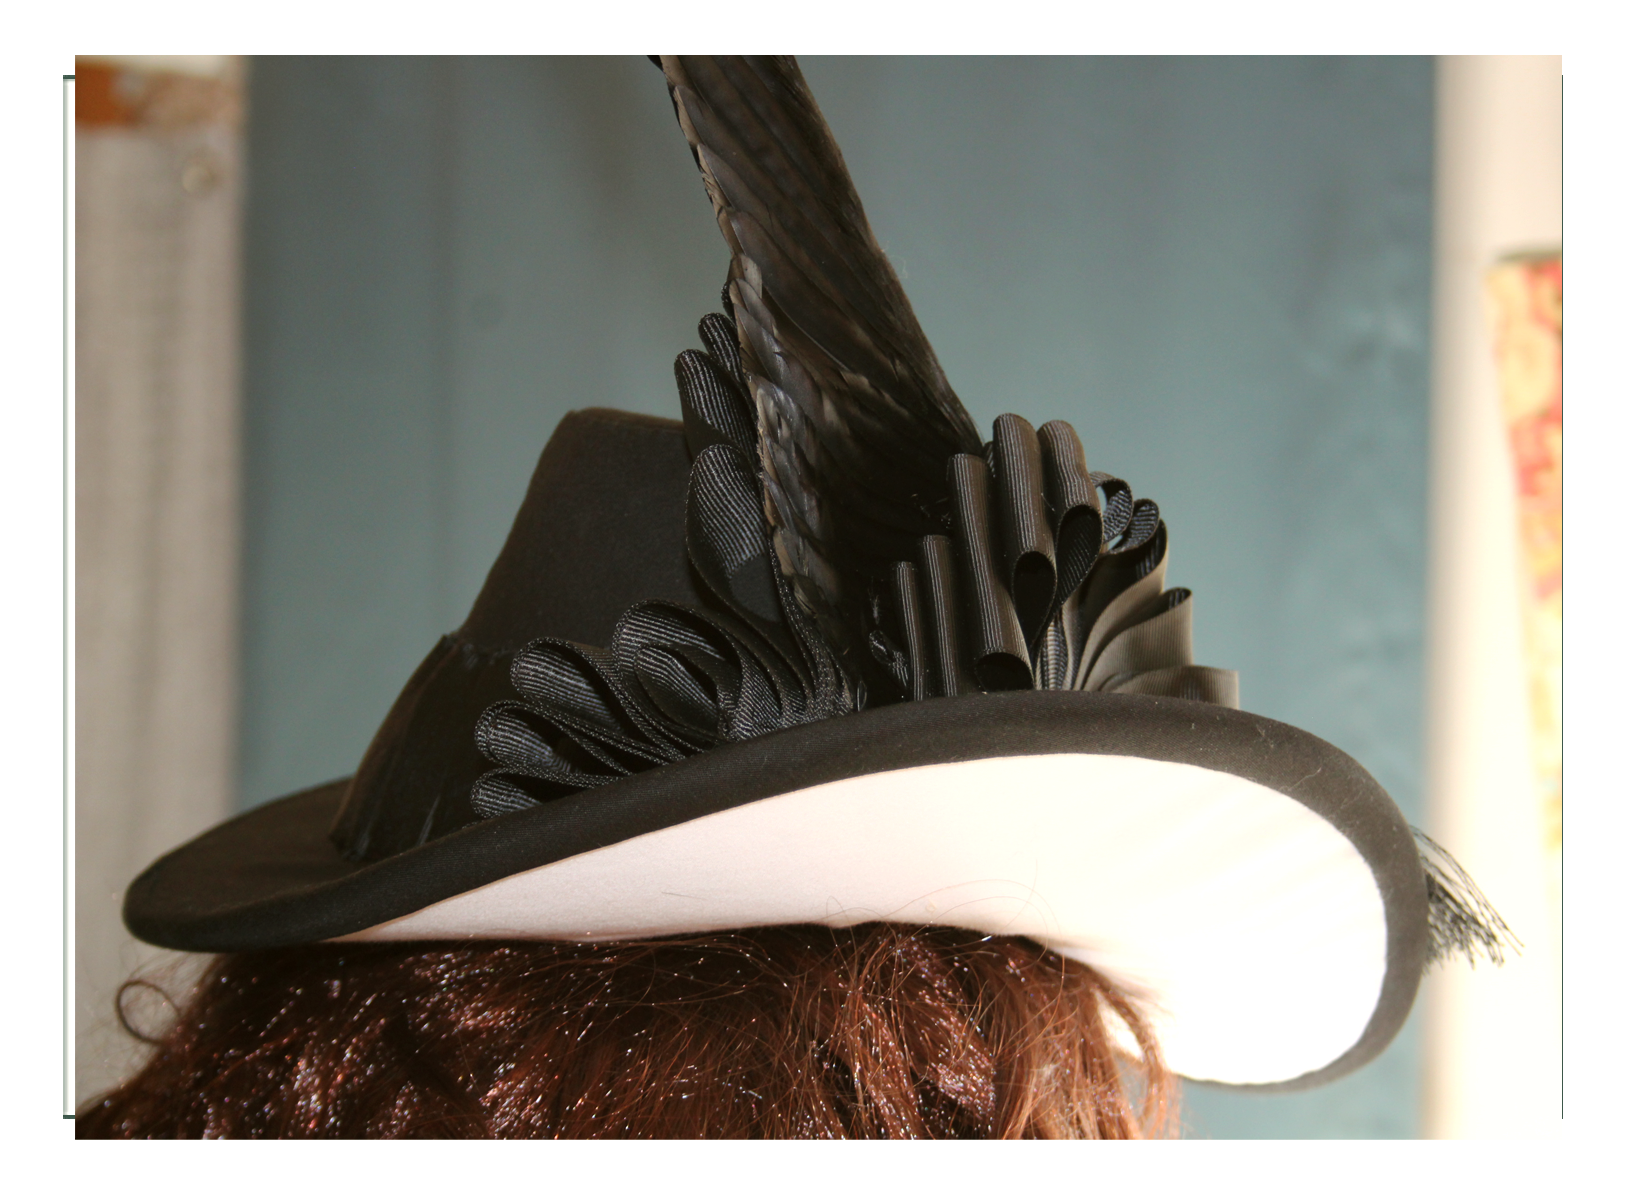
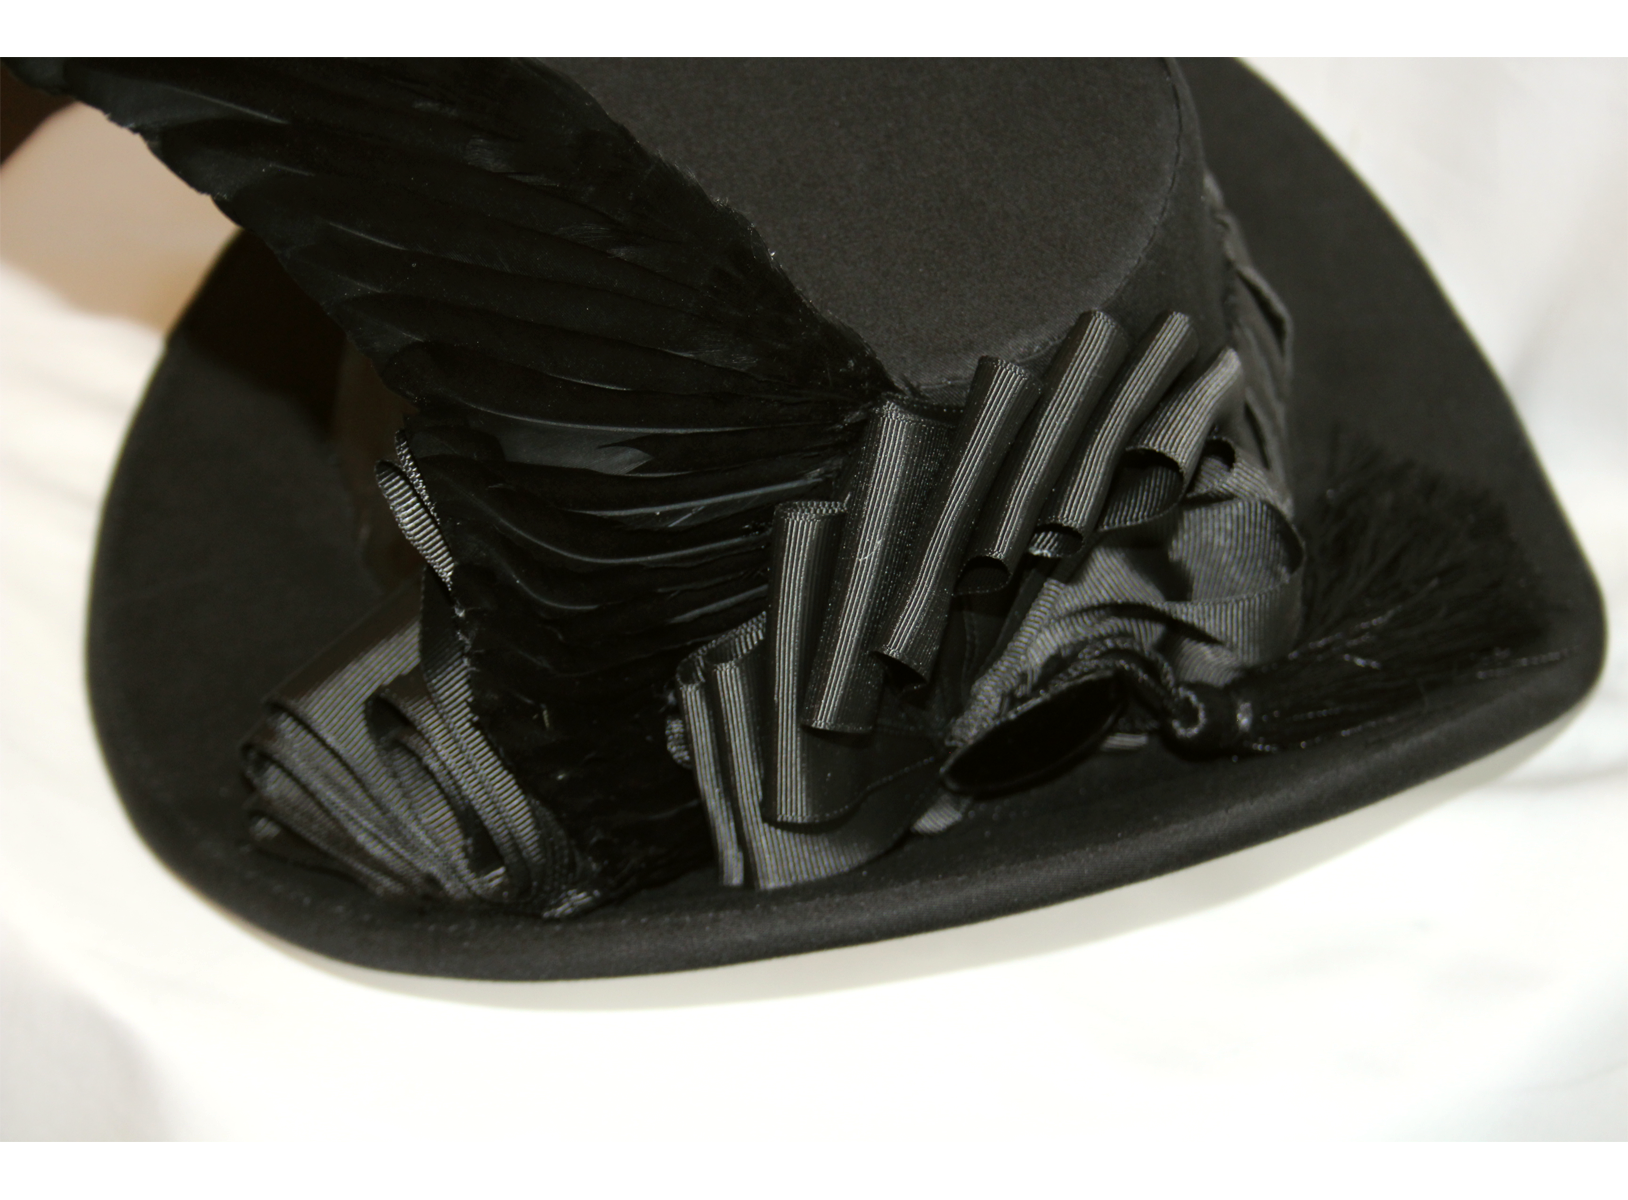
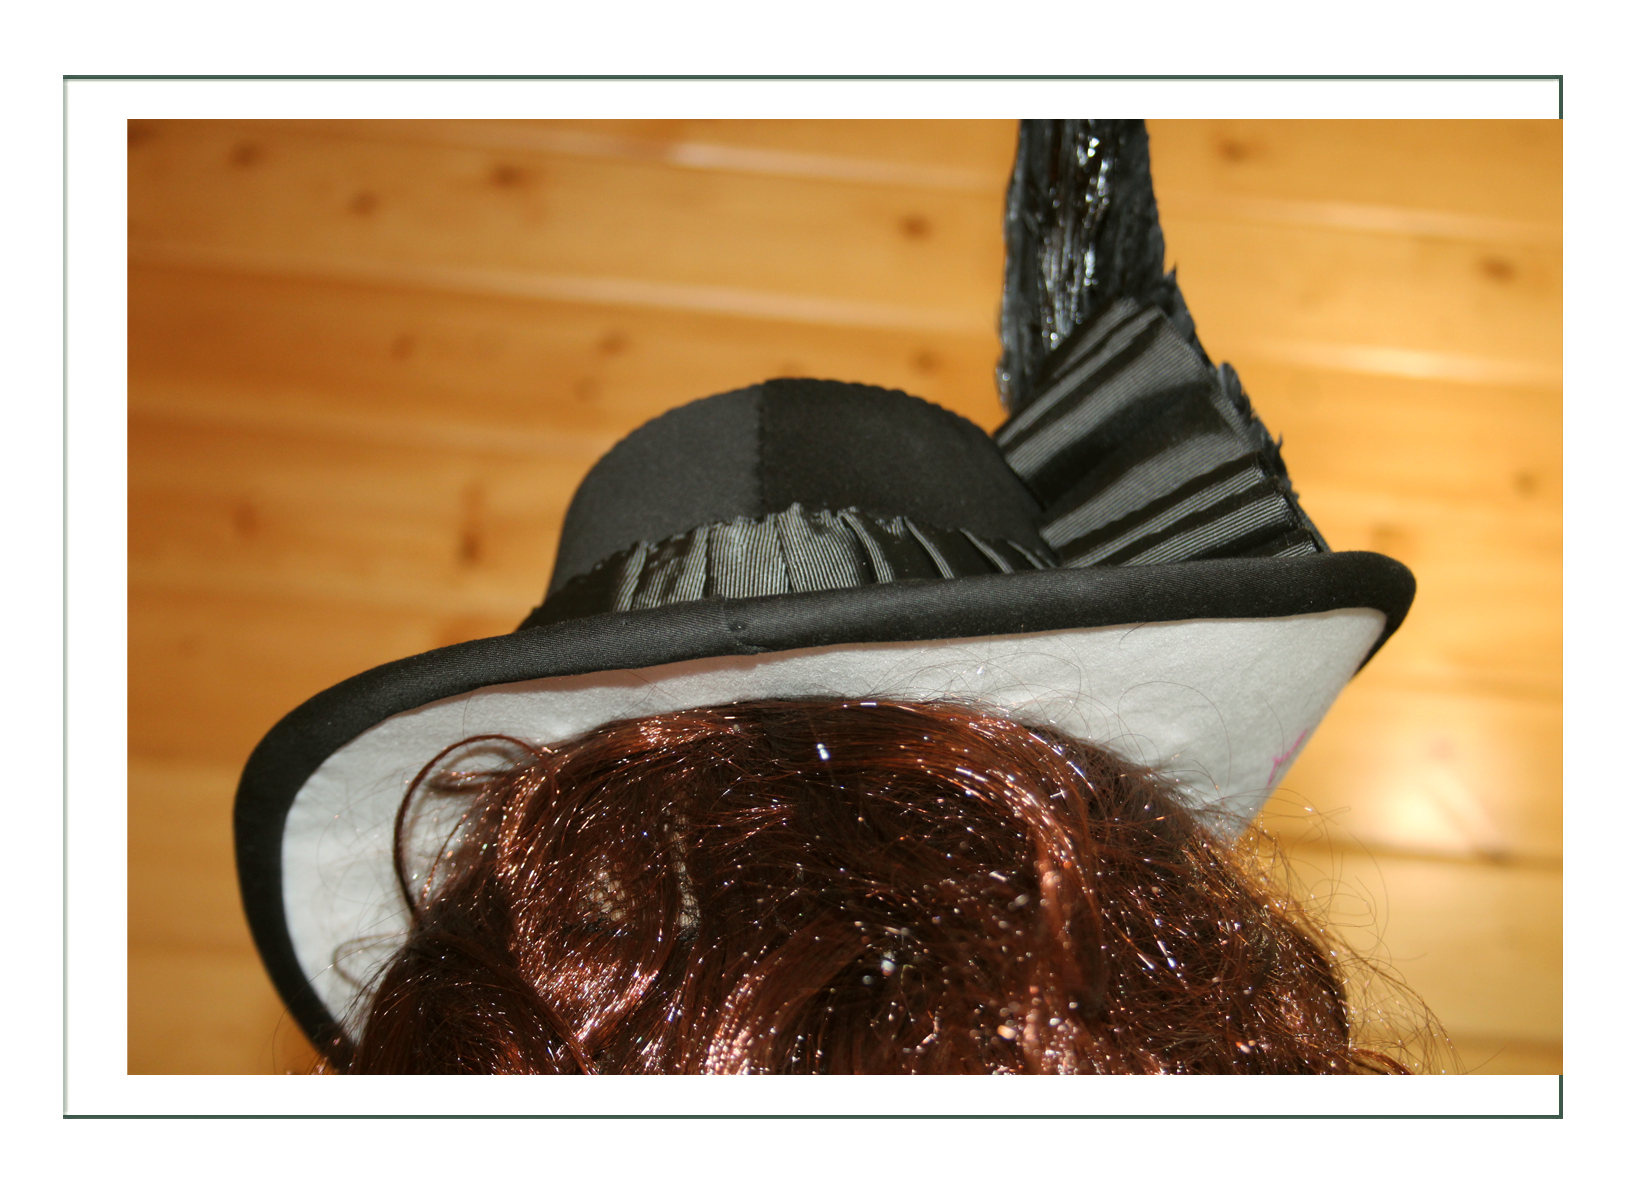
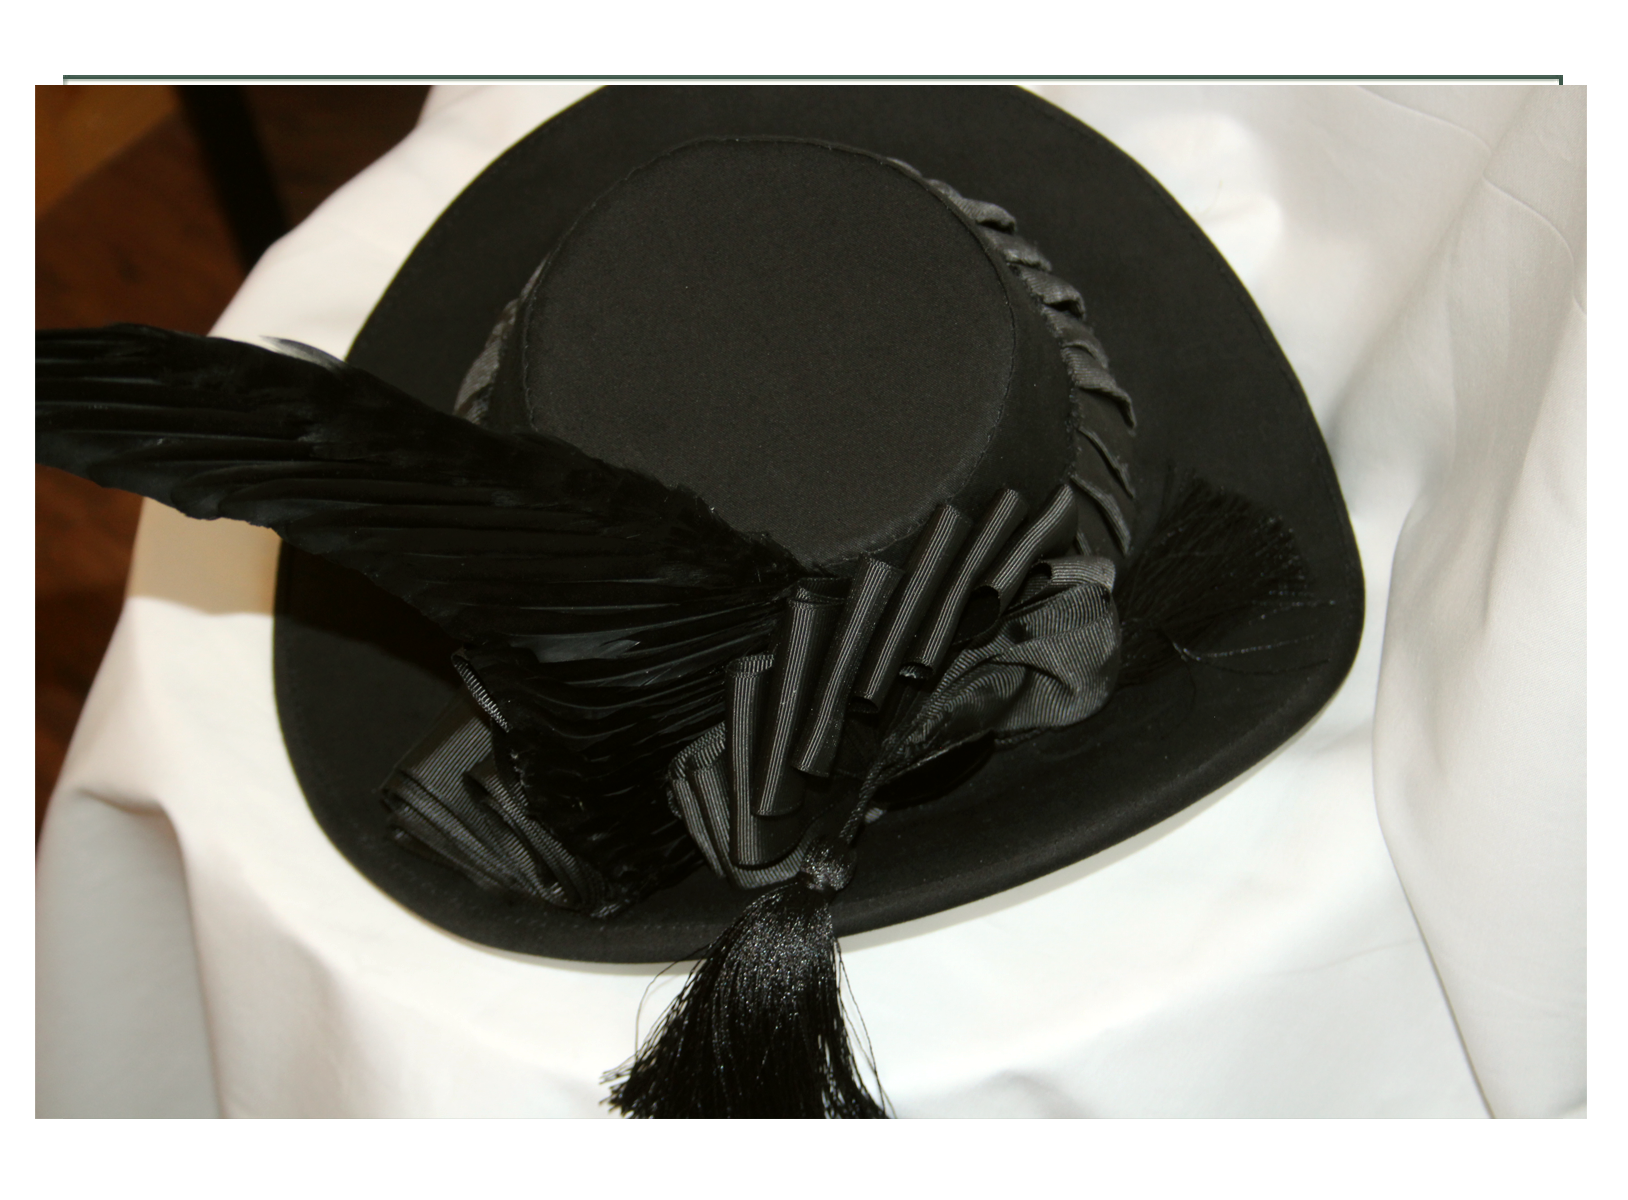
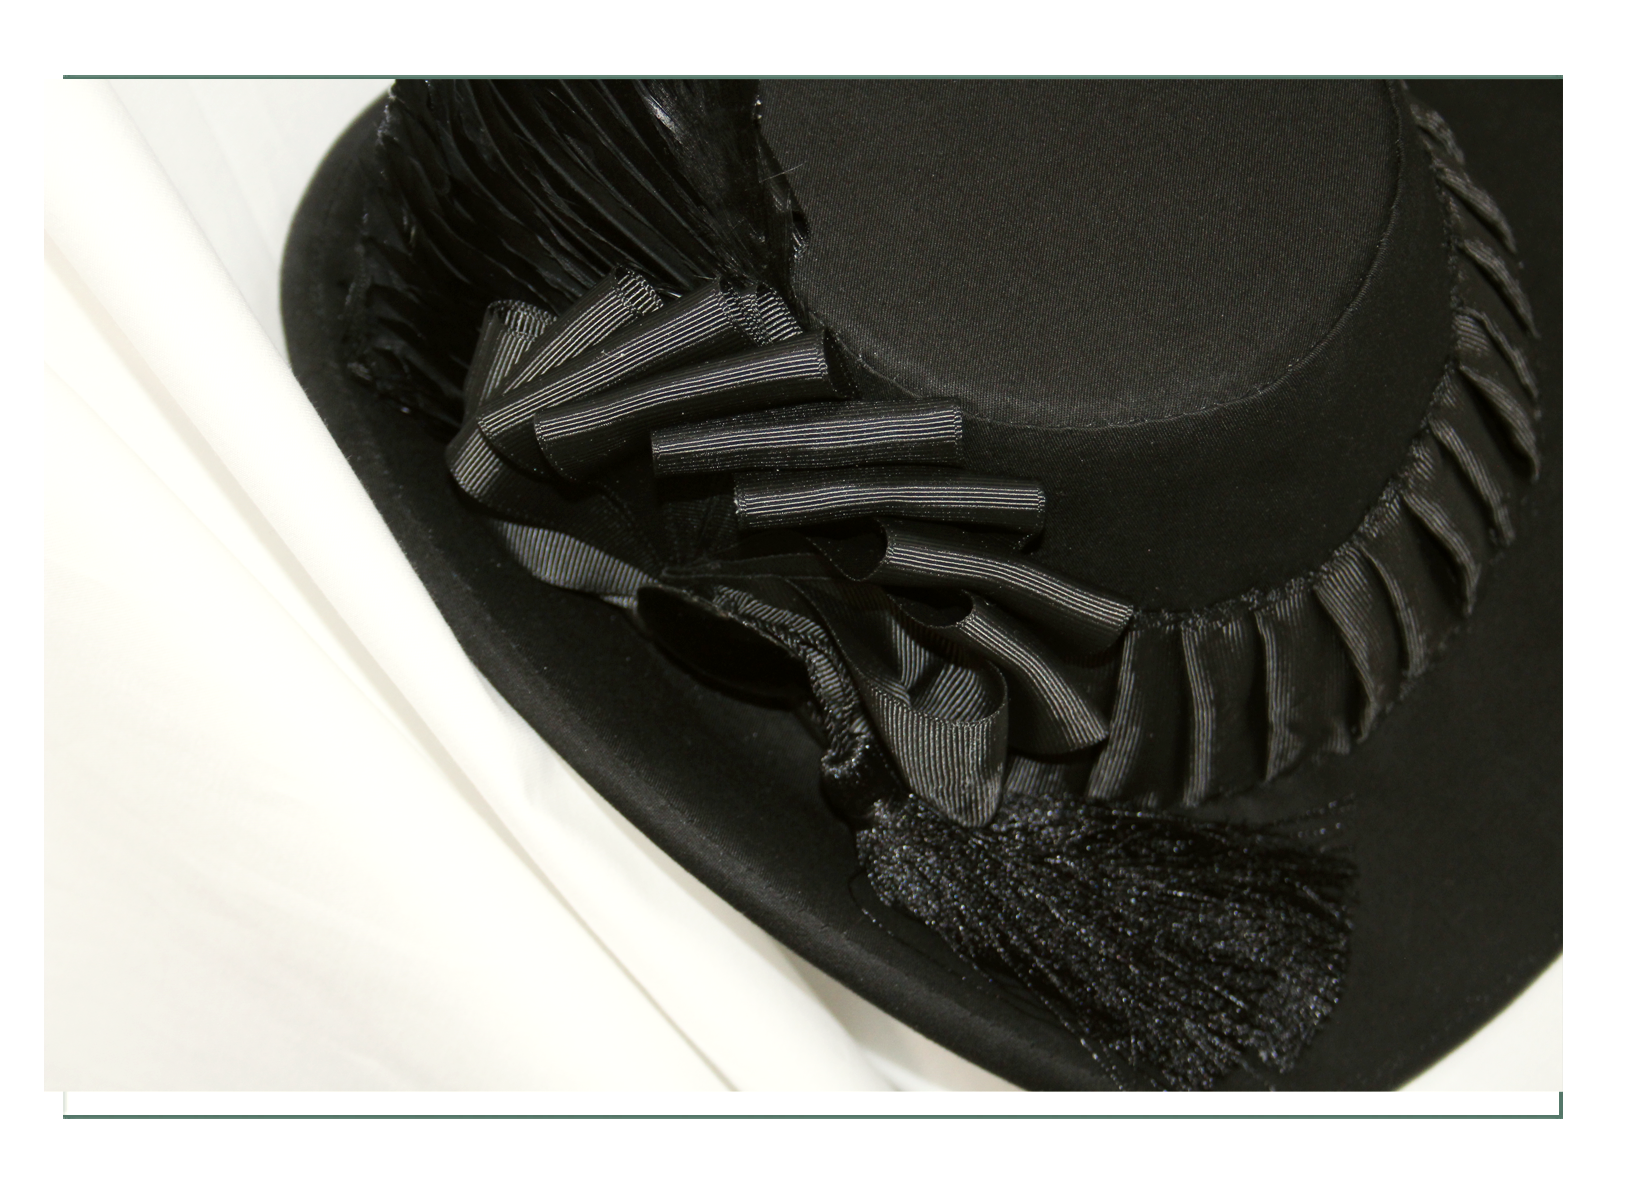
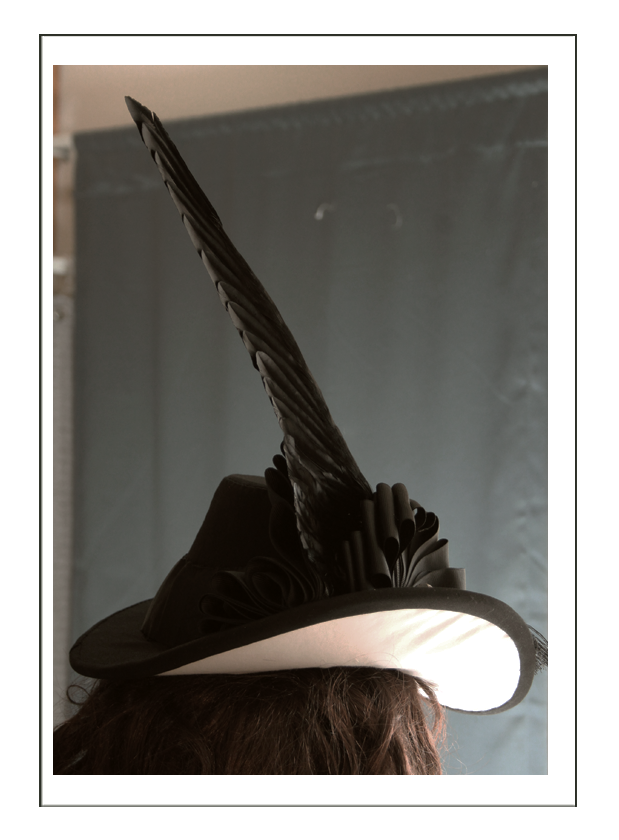
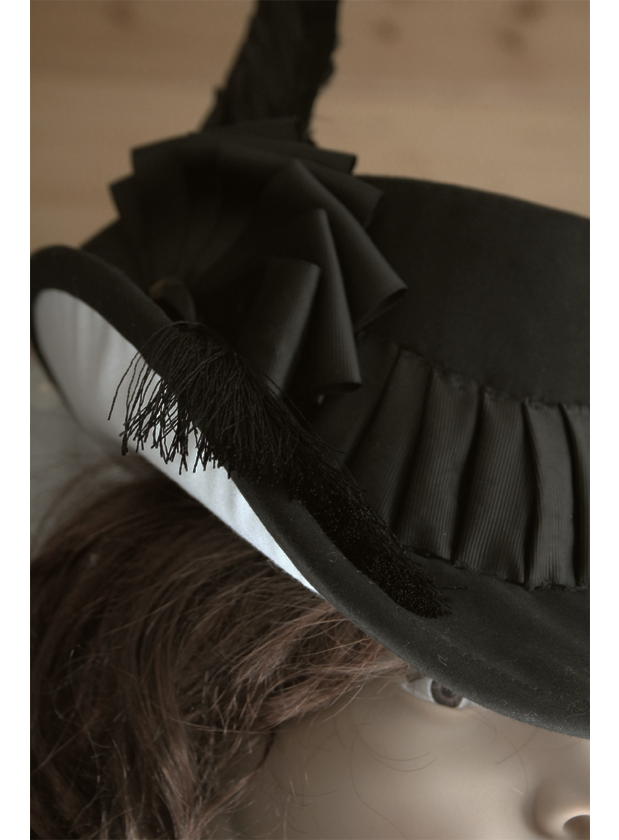
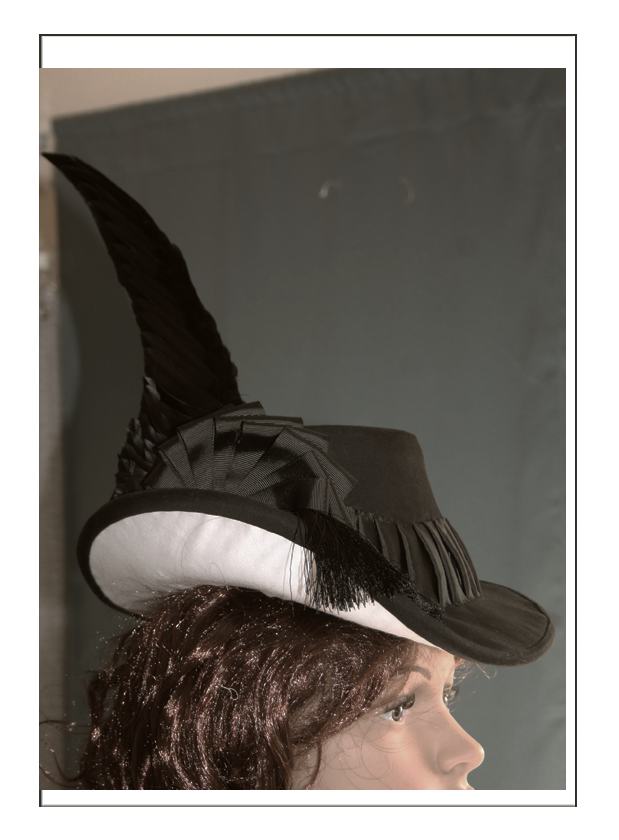
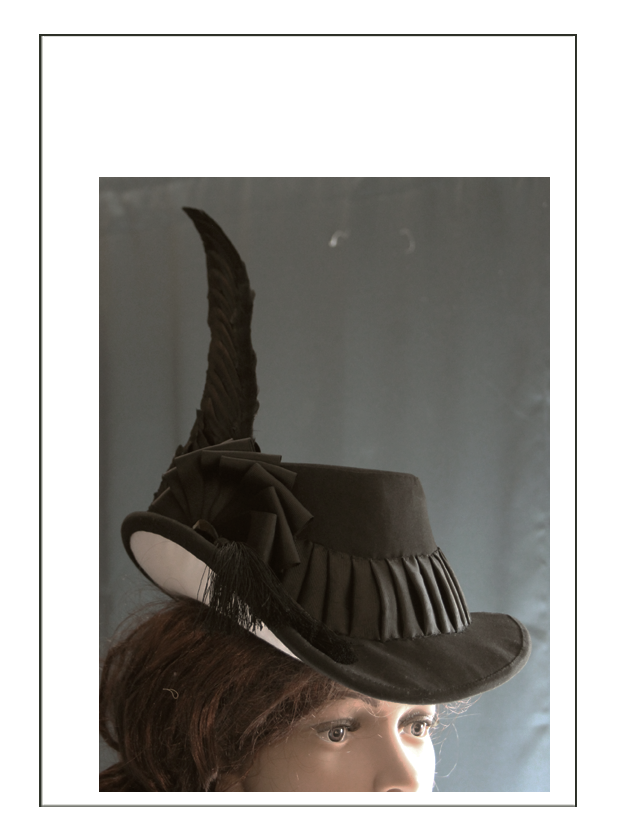
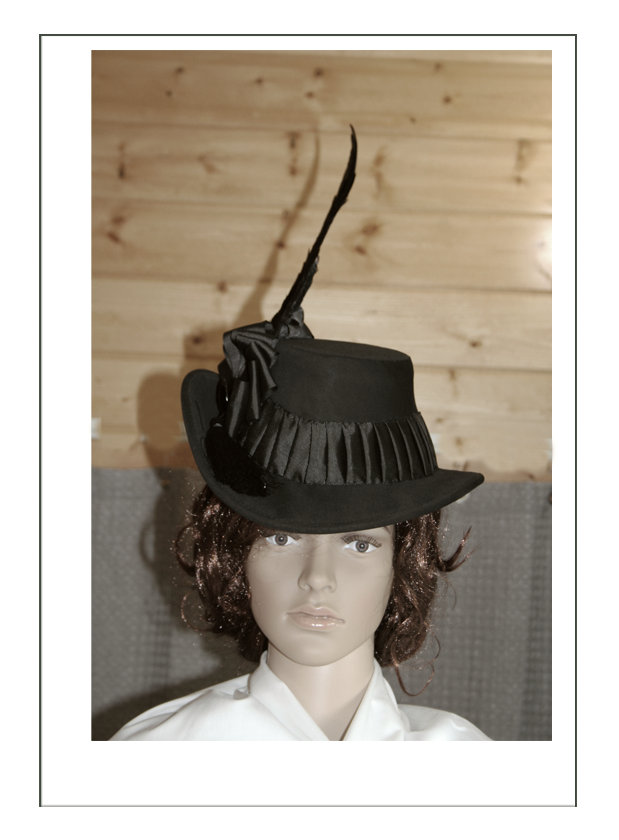
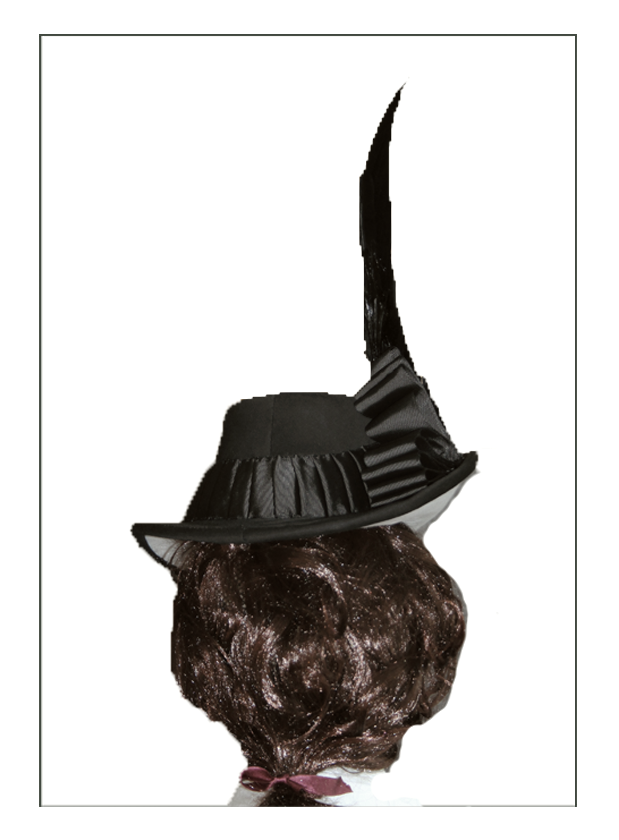
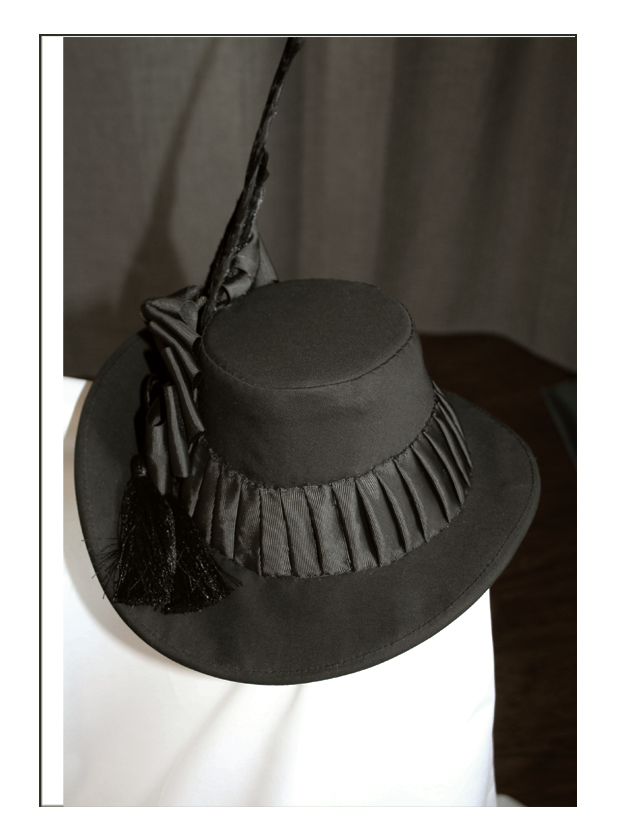
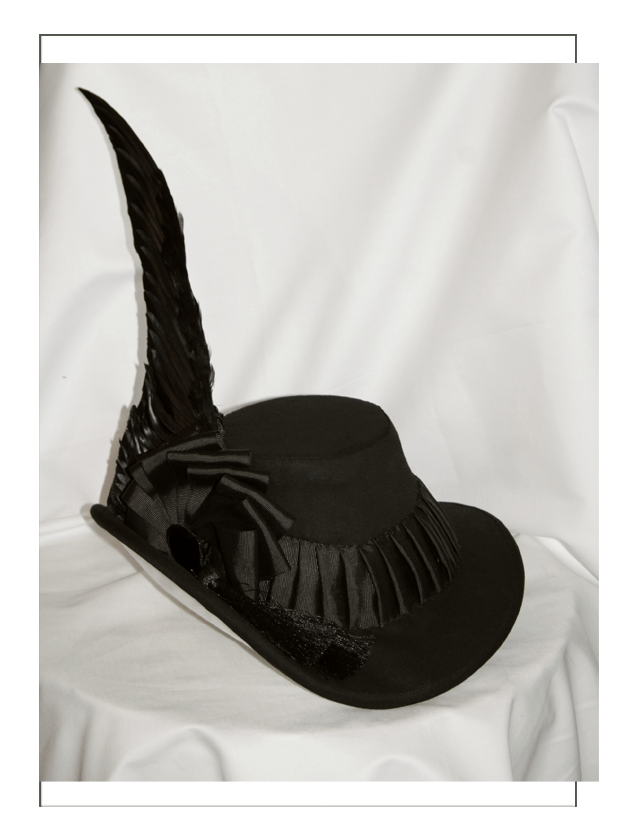
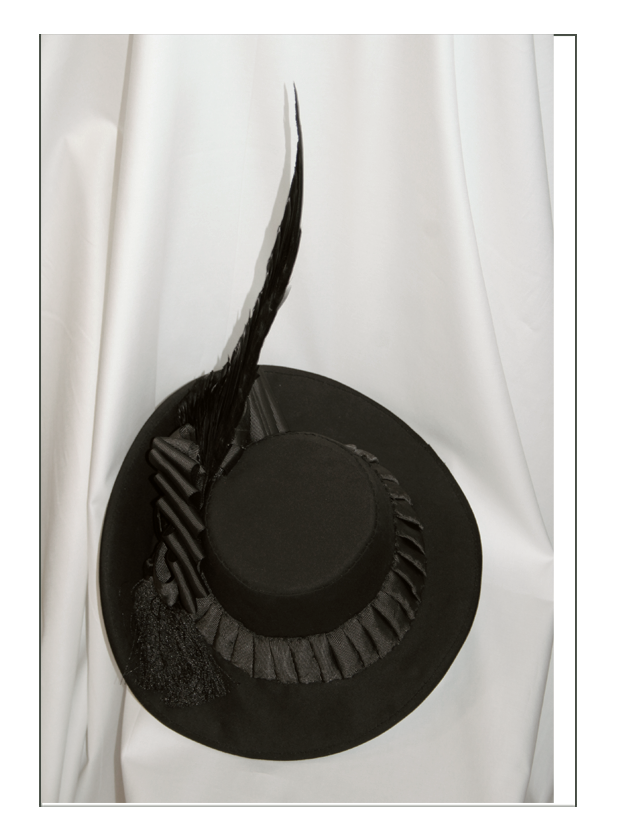
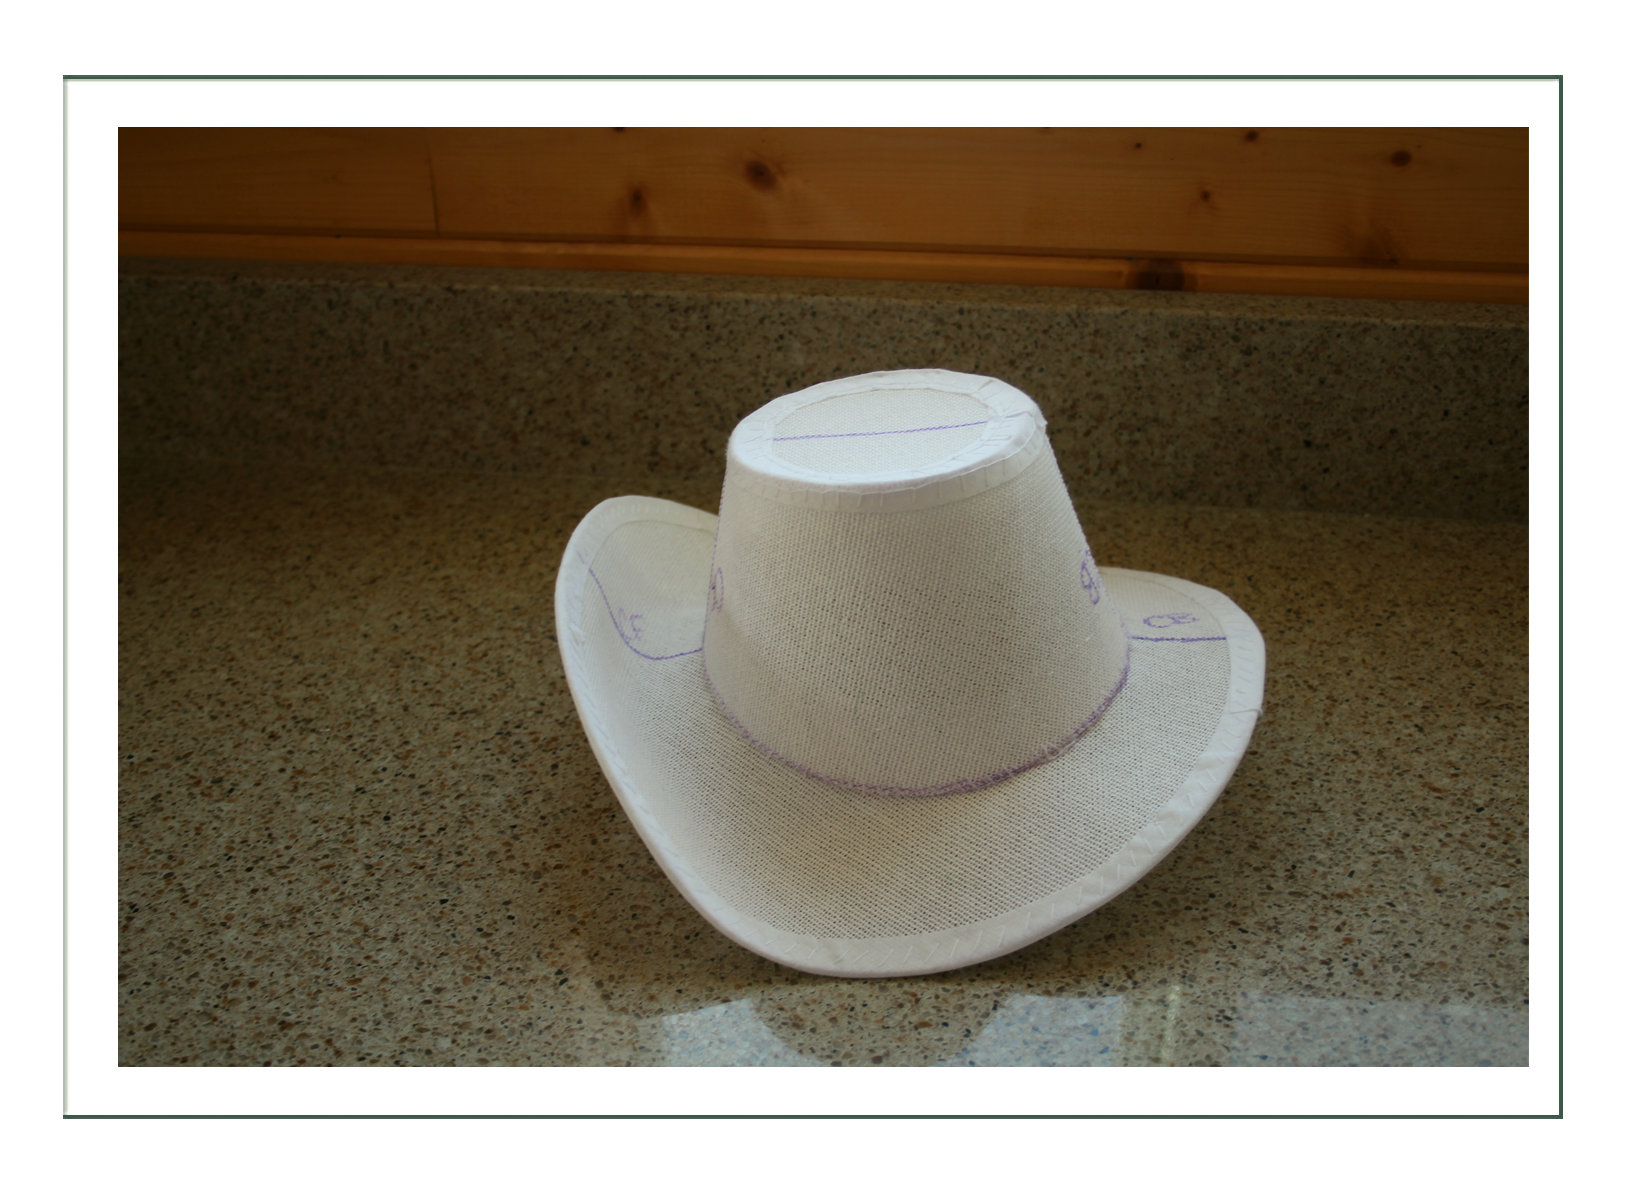
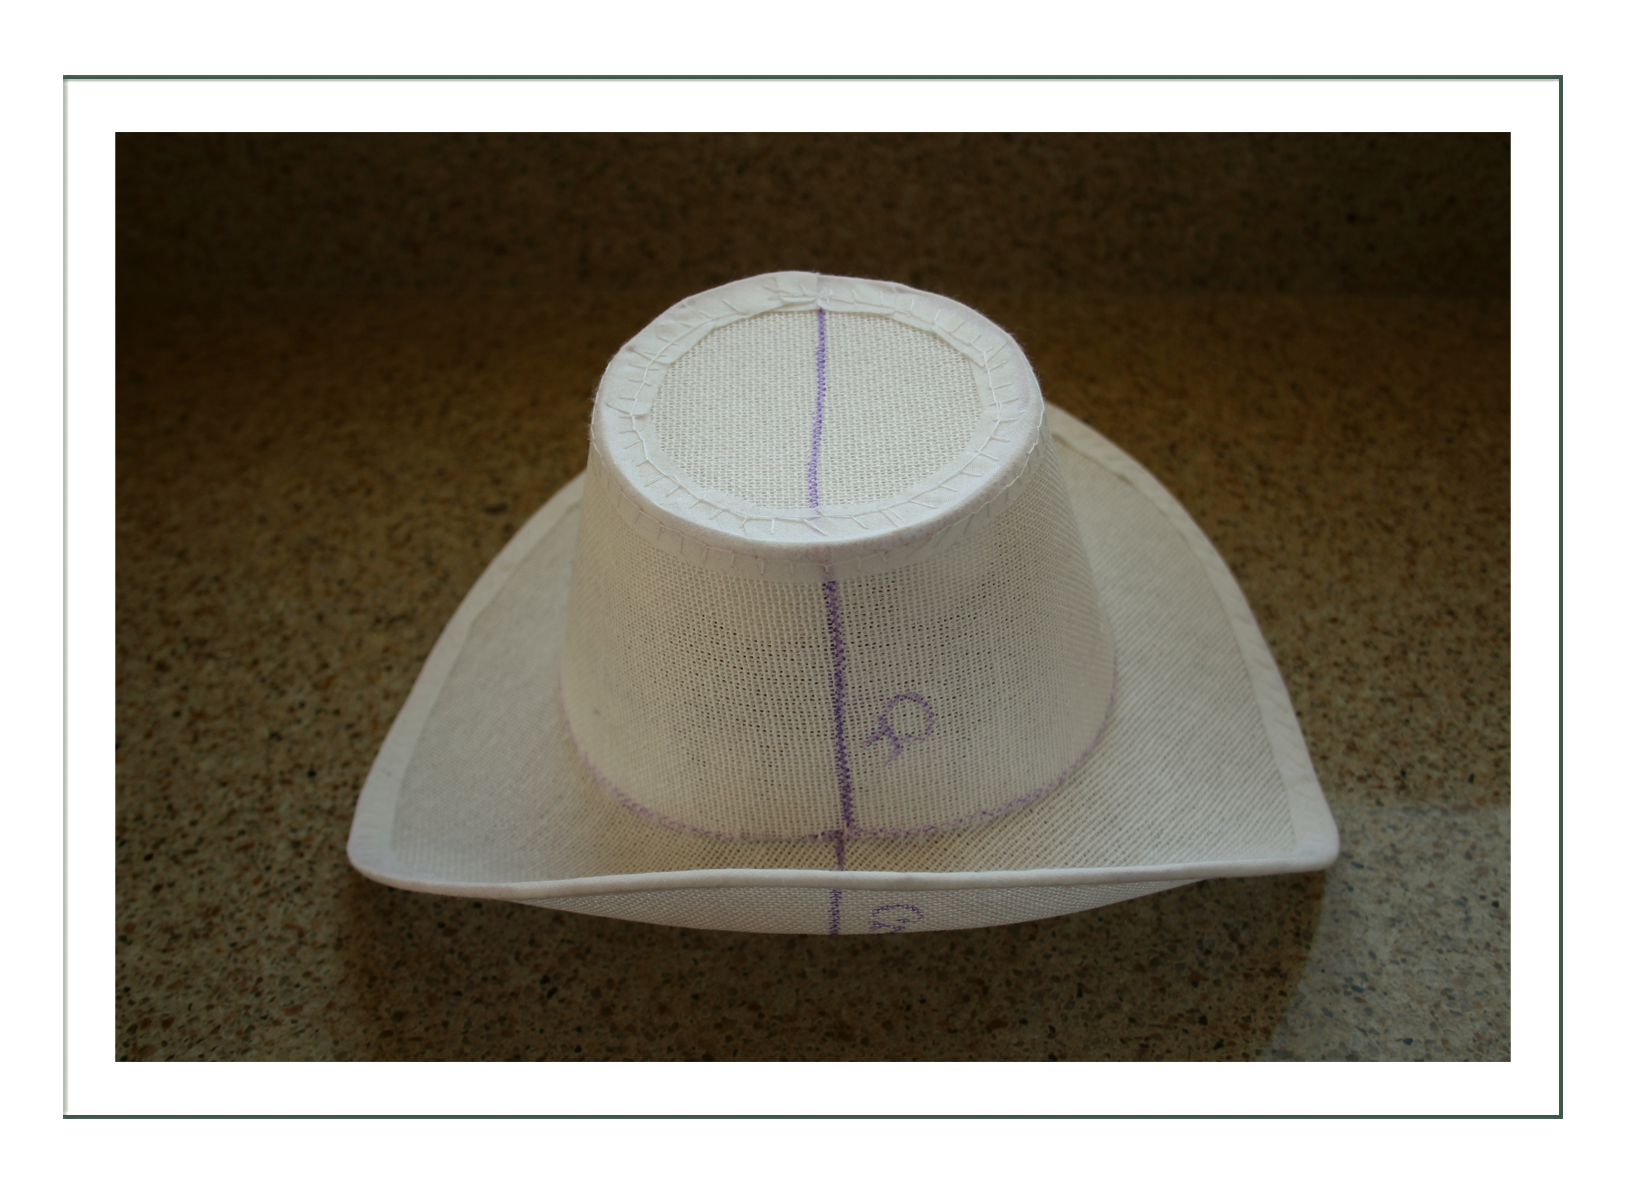
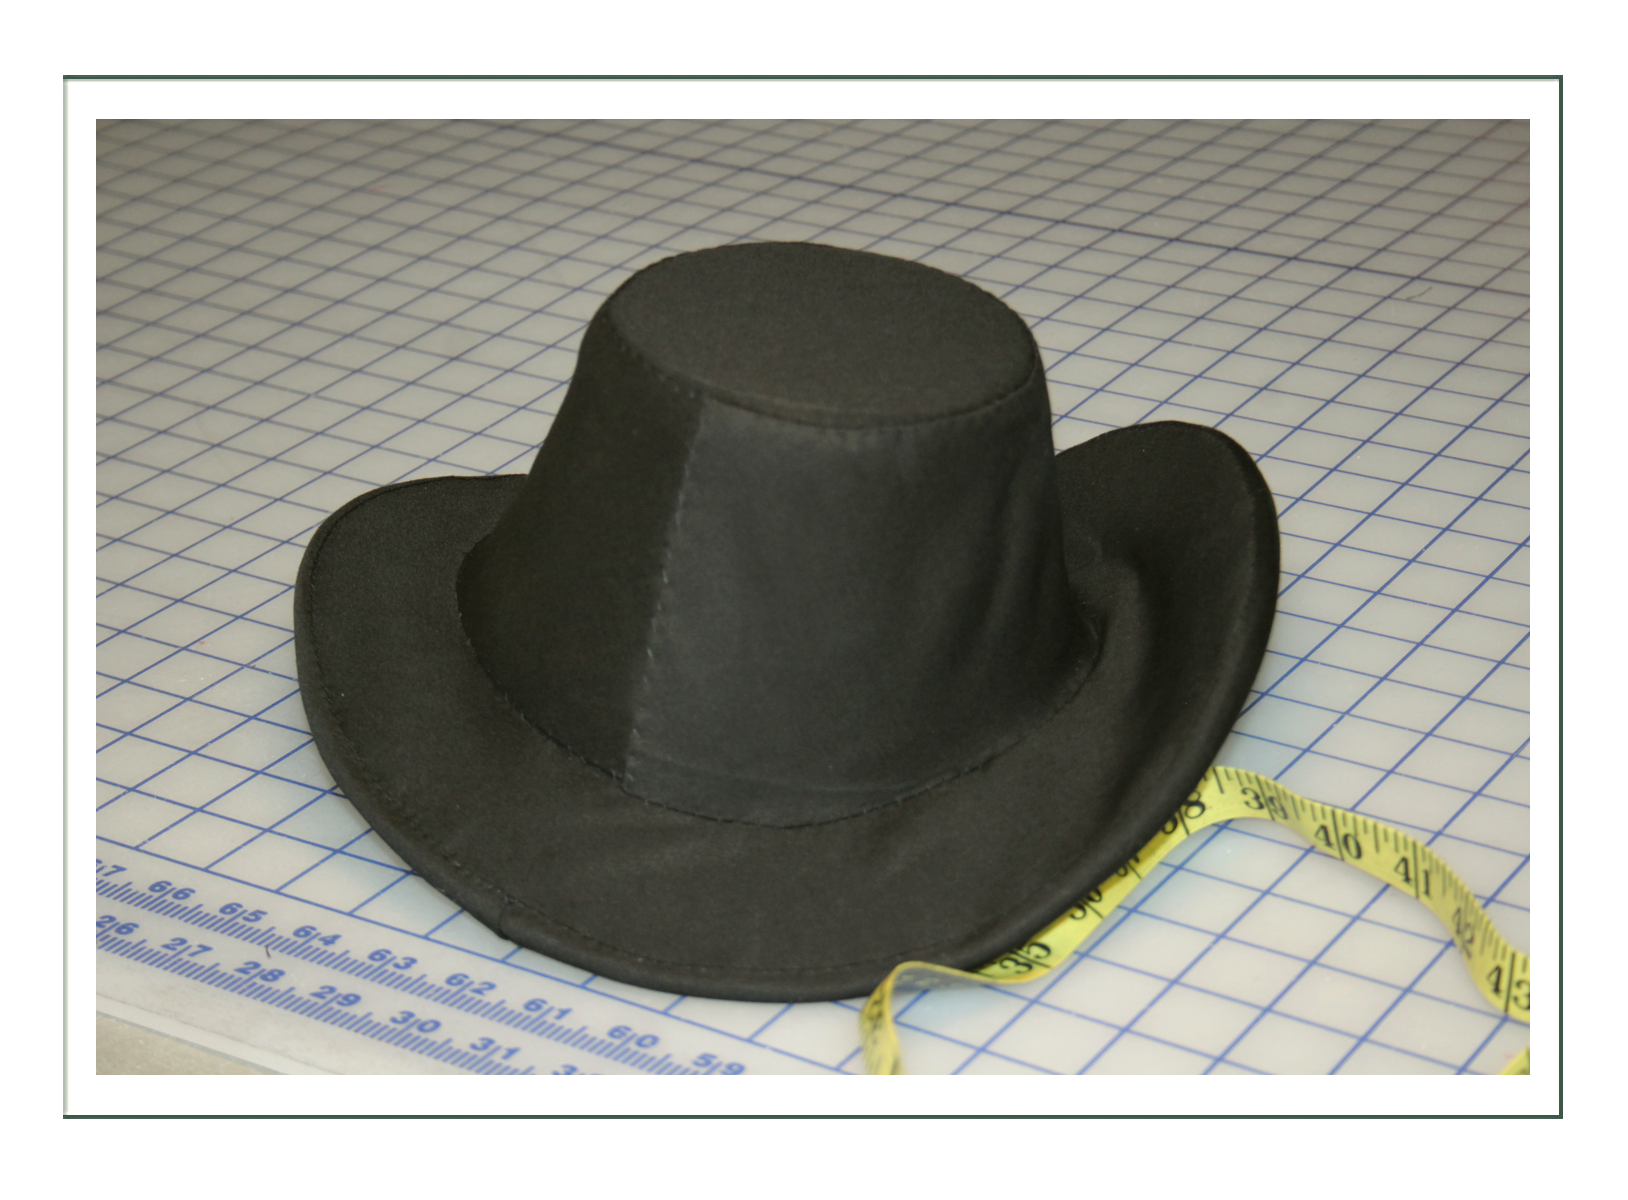
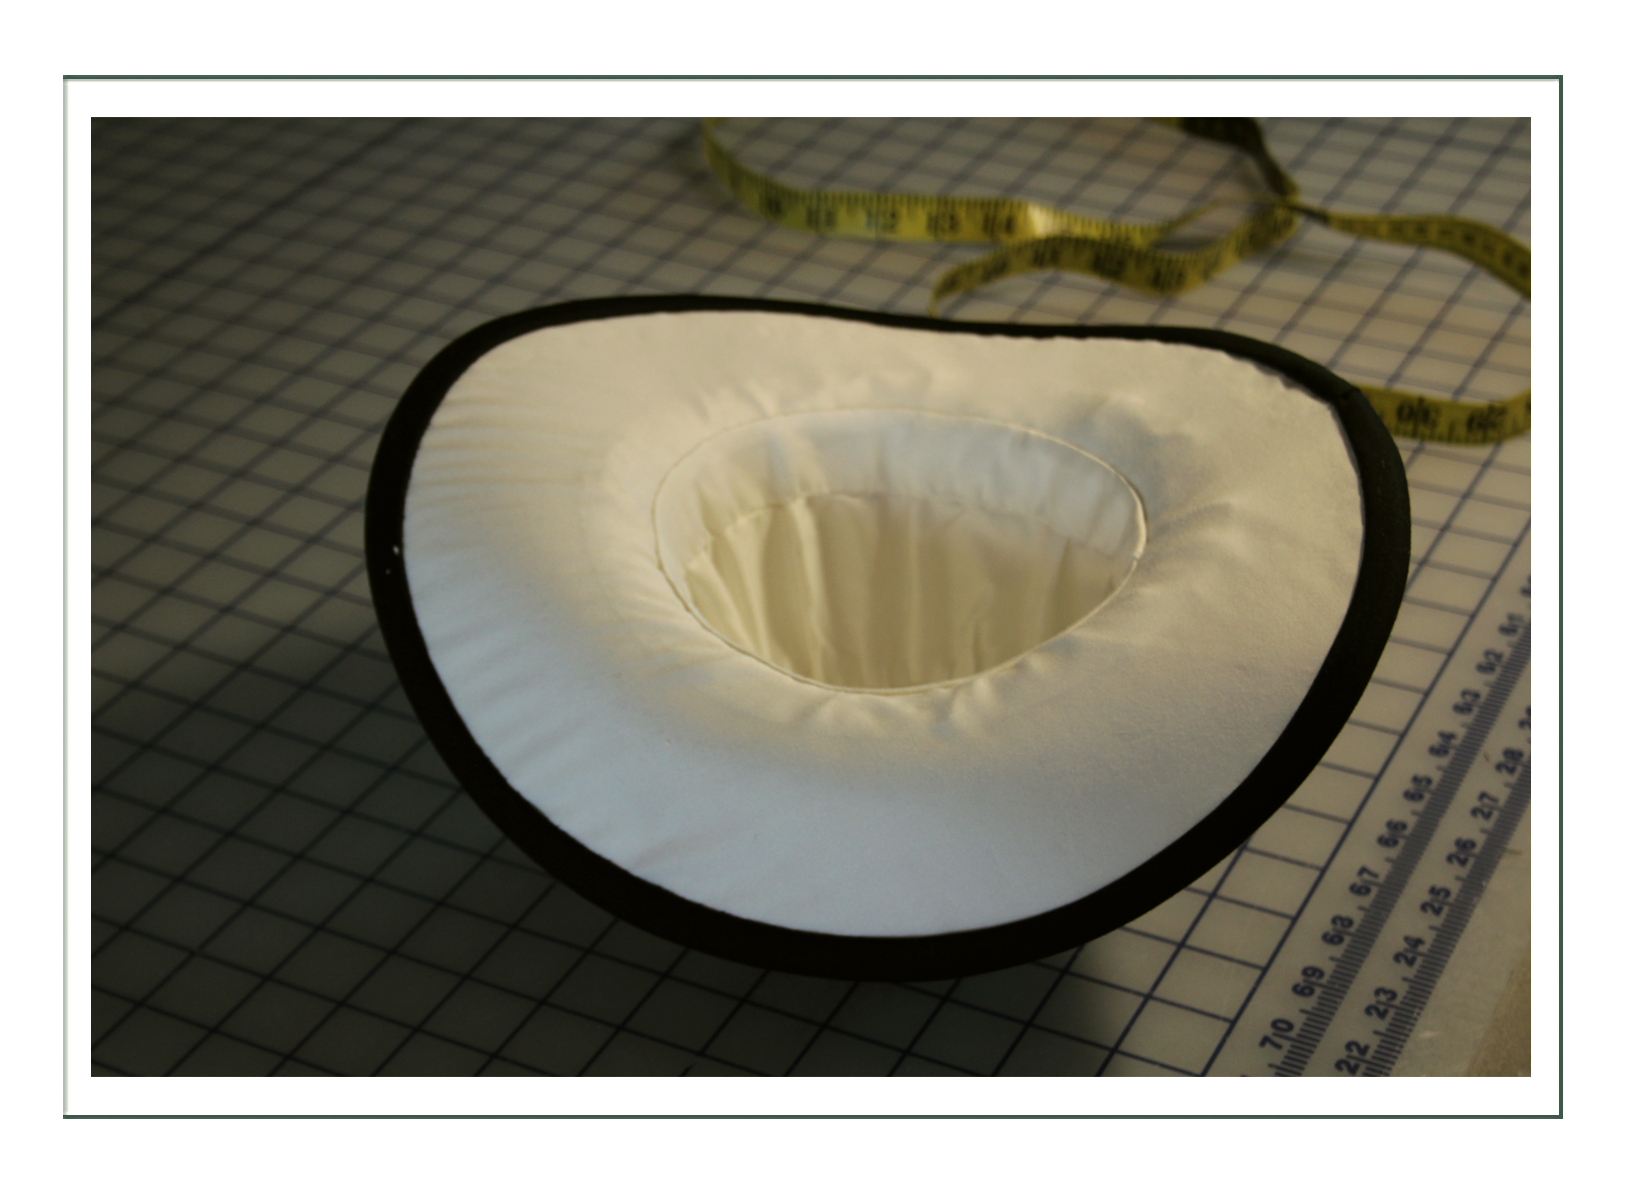
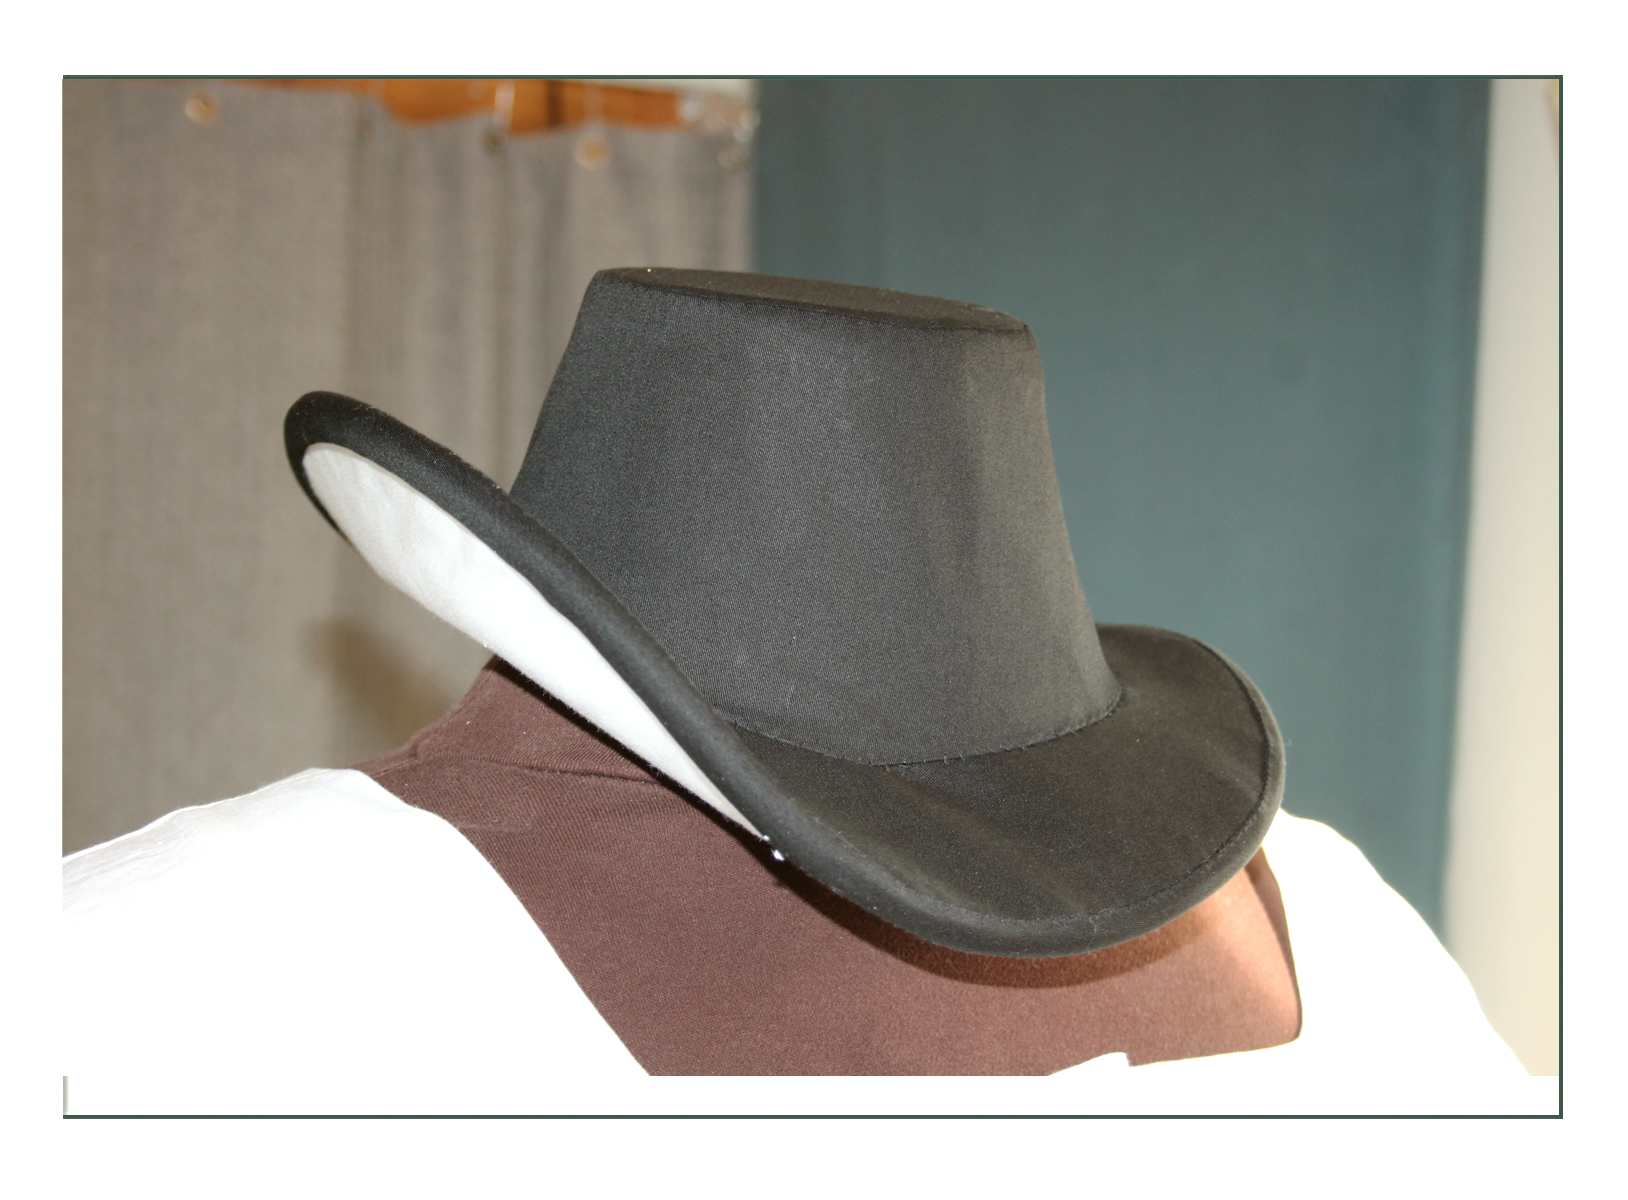
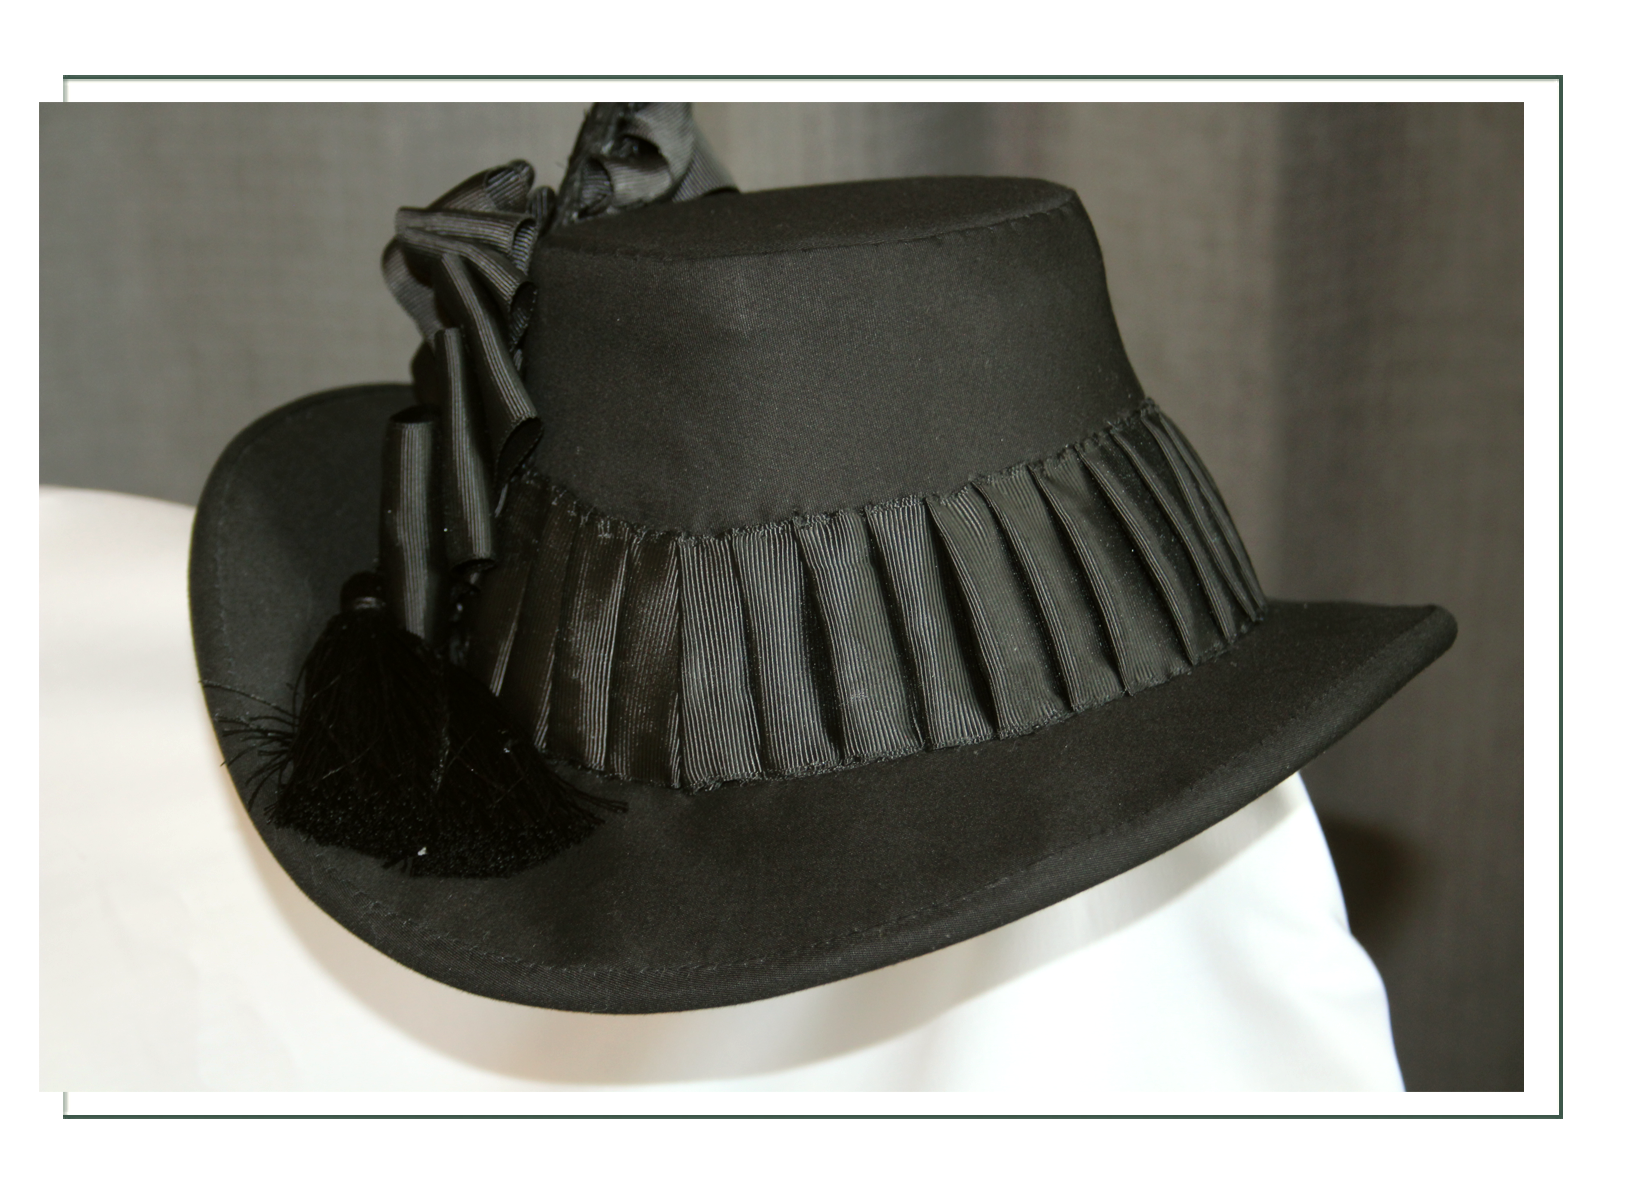
Bonnet
A real antique ravens feather (compilation), antique black jet button, grosgrain ribbon, and self-fabrics, this is a heavy double buckram bonnet. It balances to lay flat on the head, but is meant to be worn tipped and pinned to a high hairstyle.
The challenge with this was the semi-sheerness of the outer fabrics, and their being thin. Putting black over white or vice versa, something was always showing through as gray.
The mulling layer is 100% cotton flannel, which basically meant builting the frame 3 times. There was also the challenge of stiffening and strengthening the feather to be more durable, and the somewhat floppy grosgrain ribbon (should have bought petersham millinery) was hard to work with.
After making the kilted hat band which reflects the design of the skirt, we then looked at extant examples again and realized they had the same problem we did – a conical tower of a crown does not wrap smoothly, even with a bias cut. Their solution in history was to wrap a scarf around horizontally. NOW they tell us..!
The other challenge was getting photos. Our mannequin is already 6’4″ tall, and add a 14″ feather and that put us outside the light stand and above the background.

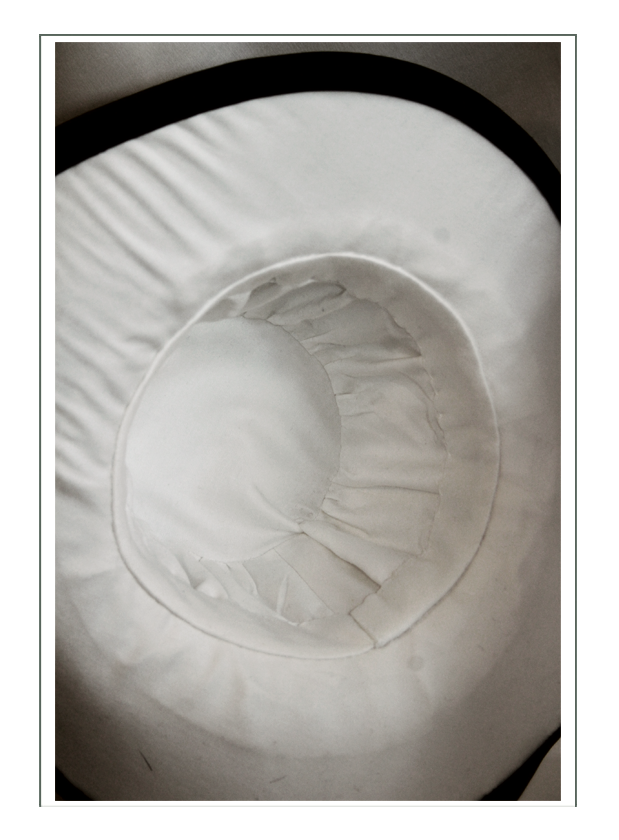
Constructing the Bonnet
Reticule & Accessories
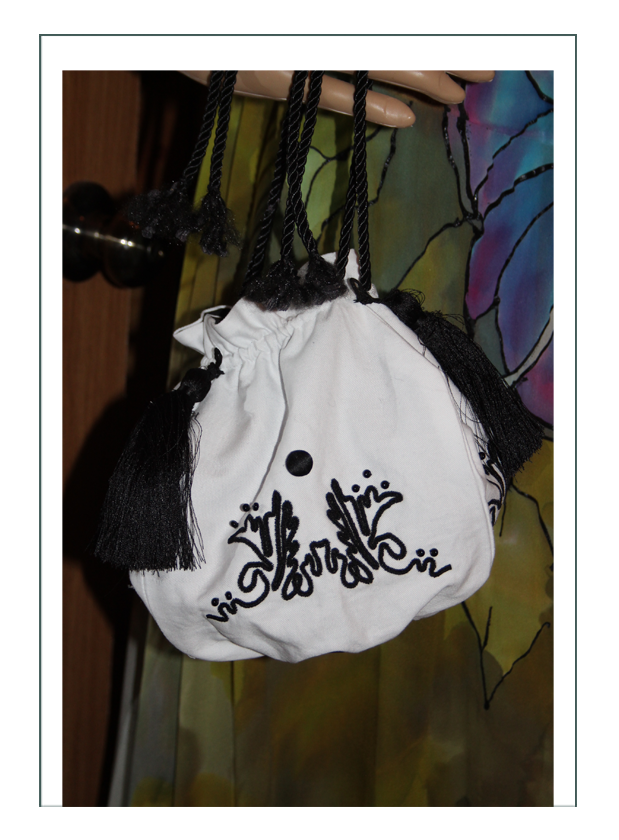
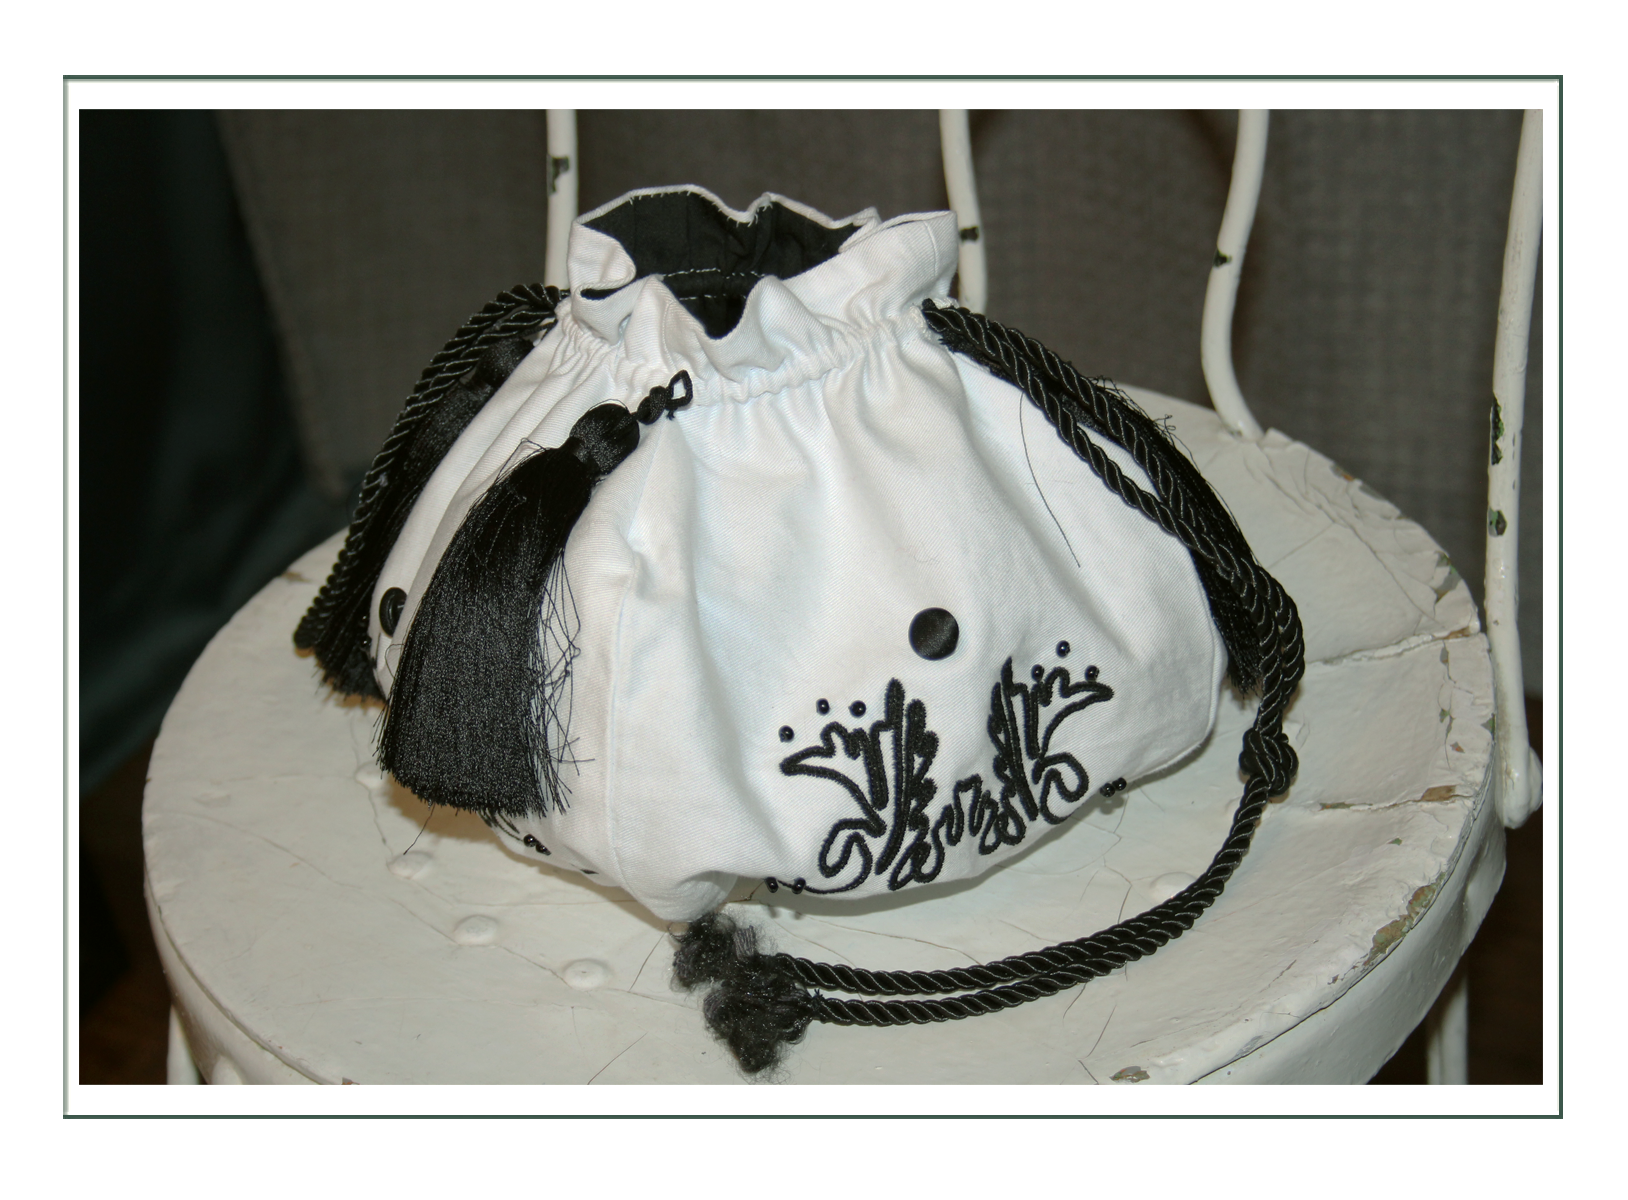
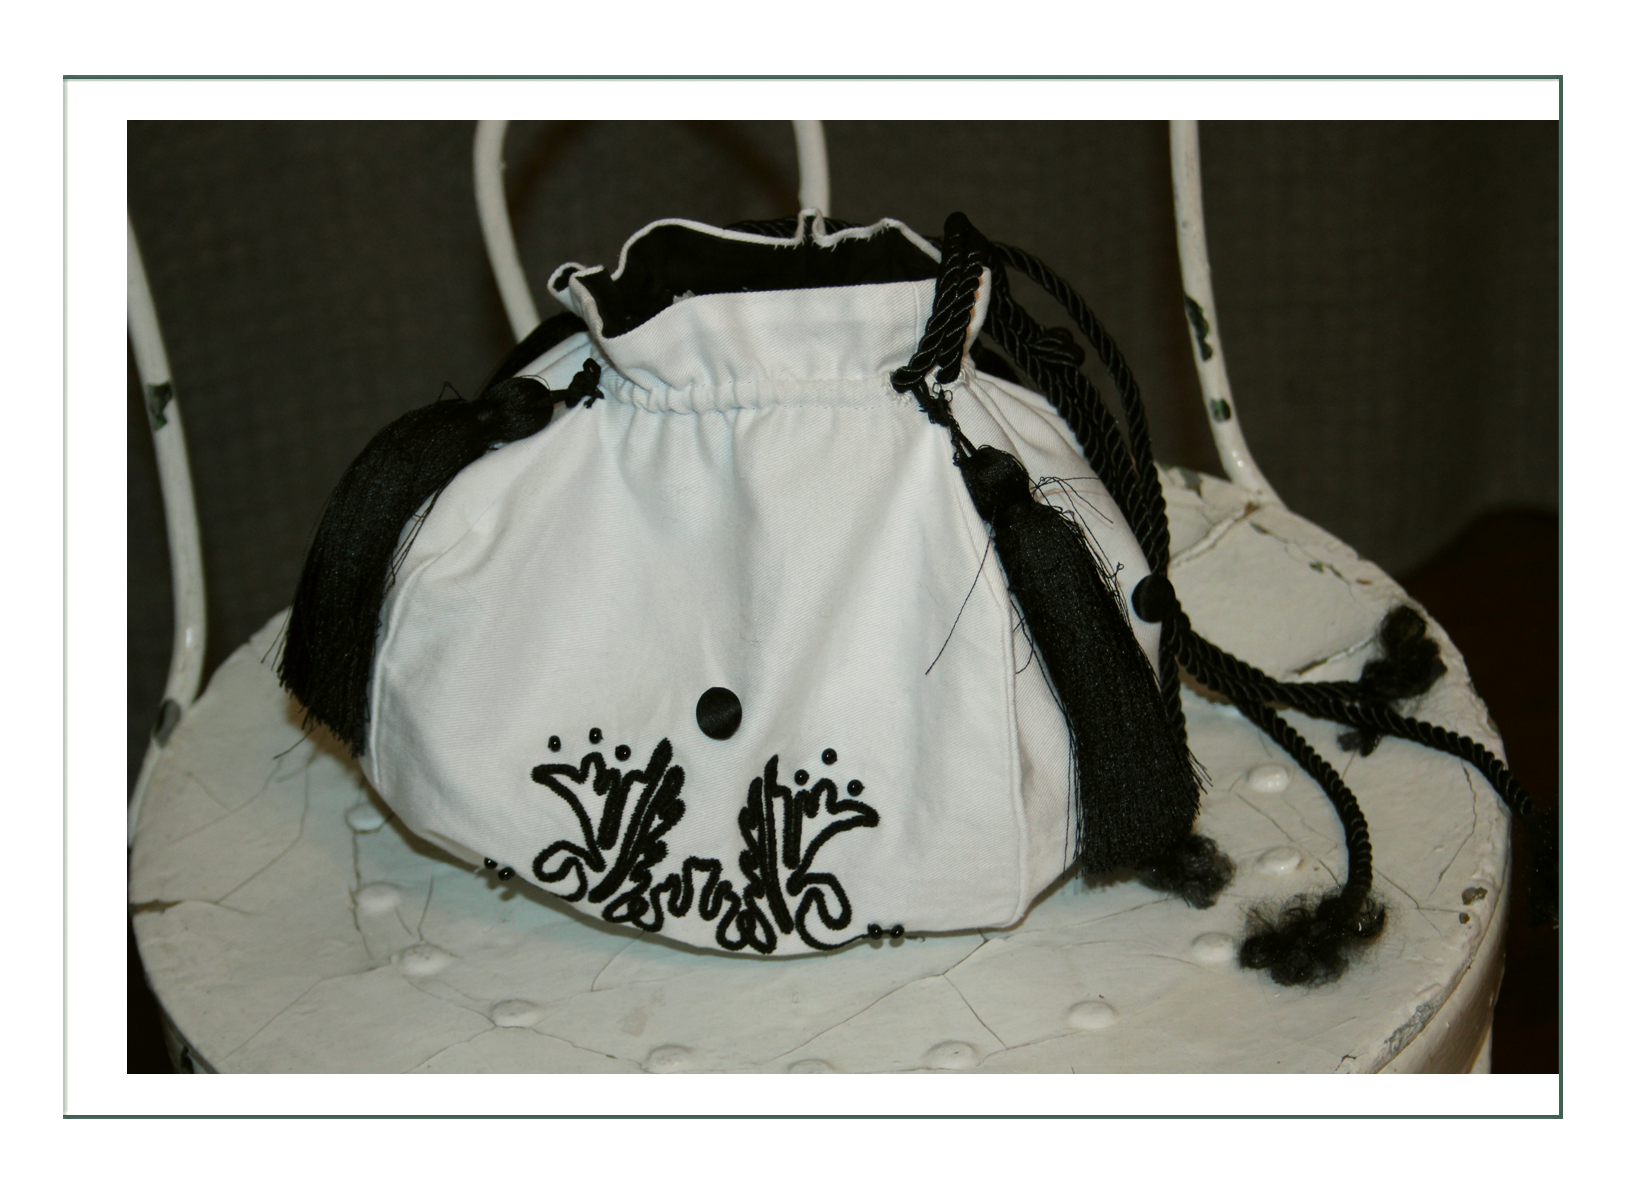
Reticule 1 – Cinching
In design development on the previous page, you will note there were two basic types of handbags/reticules: cinching and clasp; specifically kissing clasp. Since there are absolutely no patterns, and few detailed pictures or descriptions of late 1880’s bags, the reticule project was completely from our heads.
Pressure was on, as Melissa had requested one to be as unique as the project and her personality. She said she’s known far and wide for her reticules.
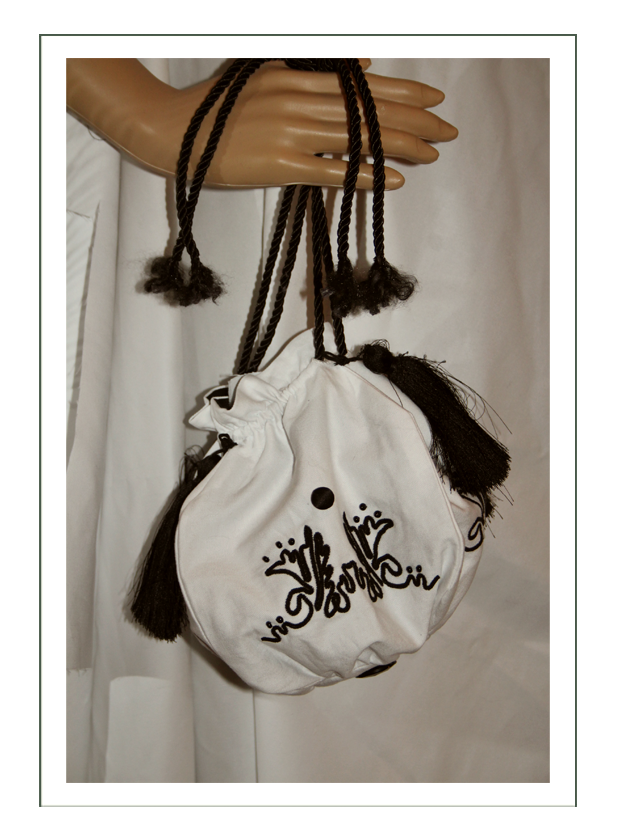
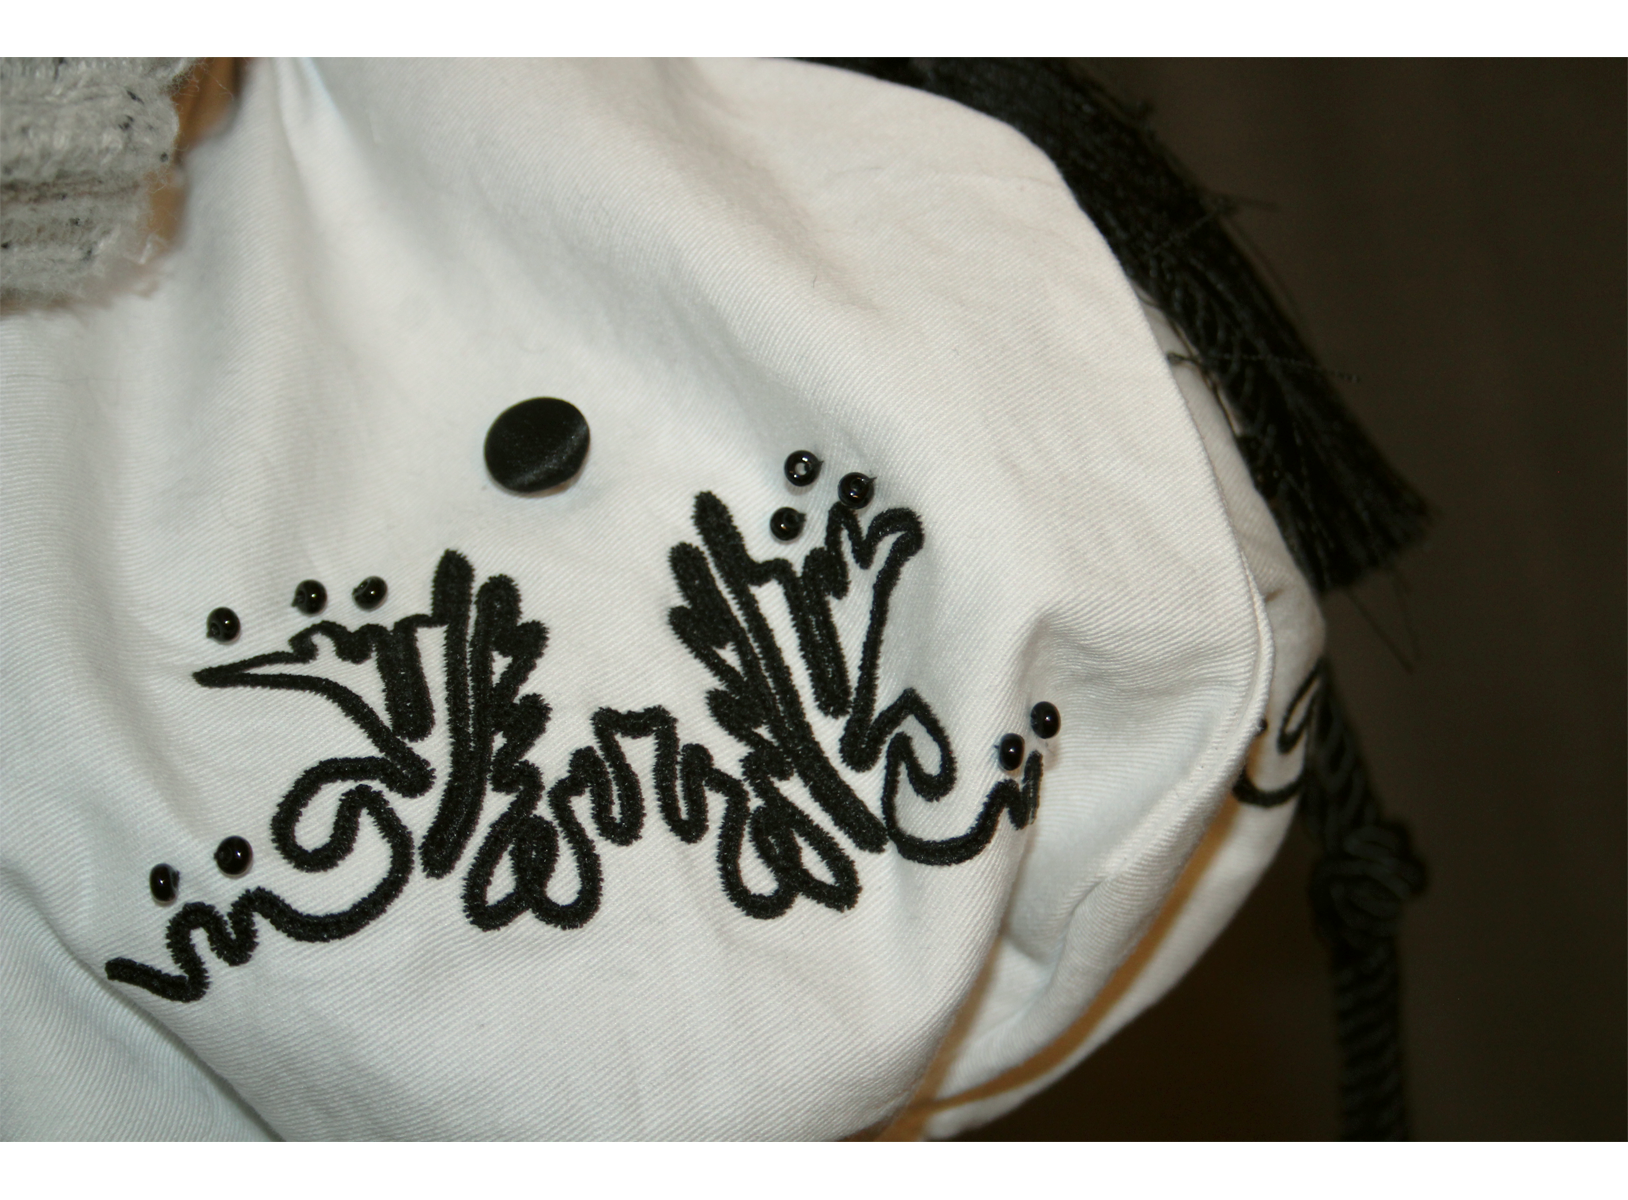
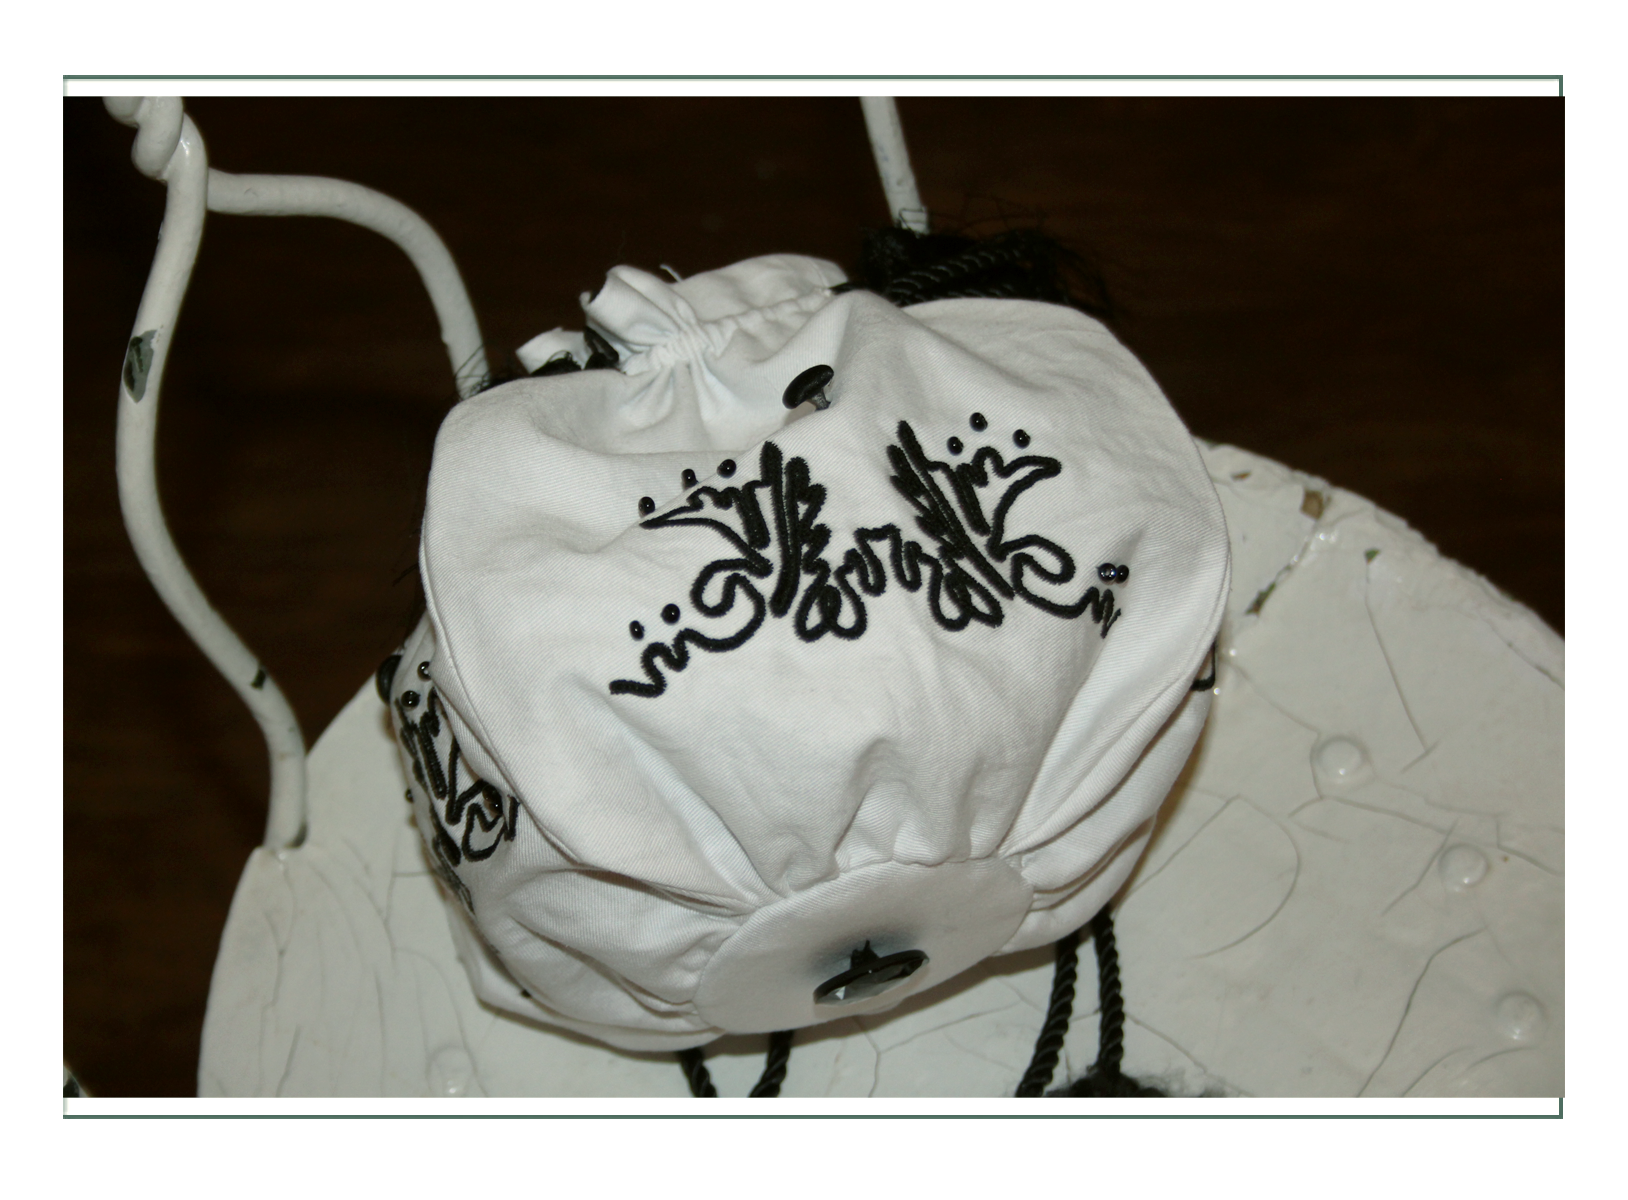
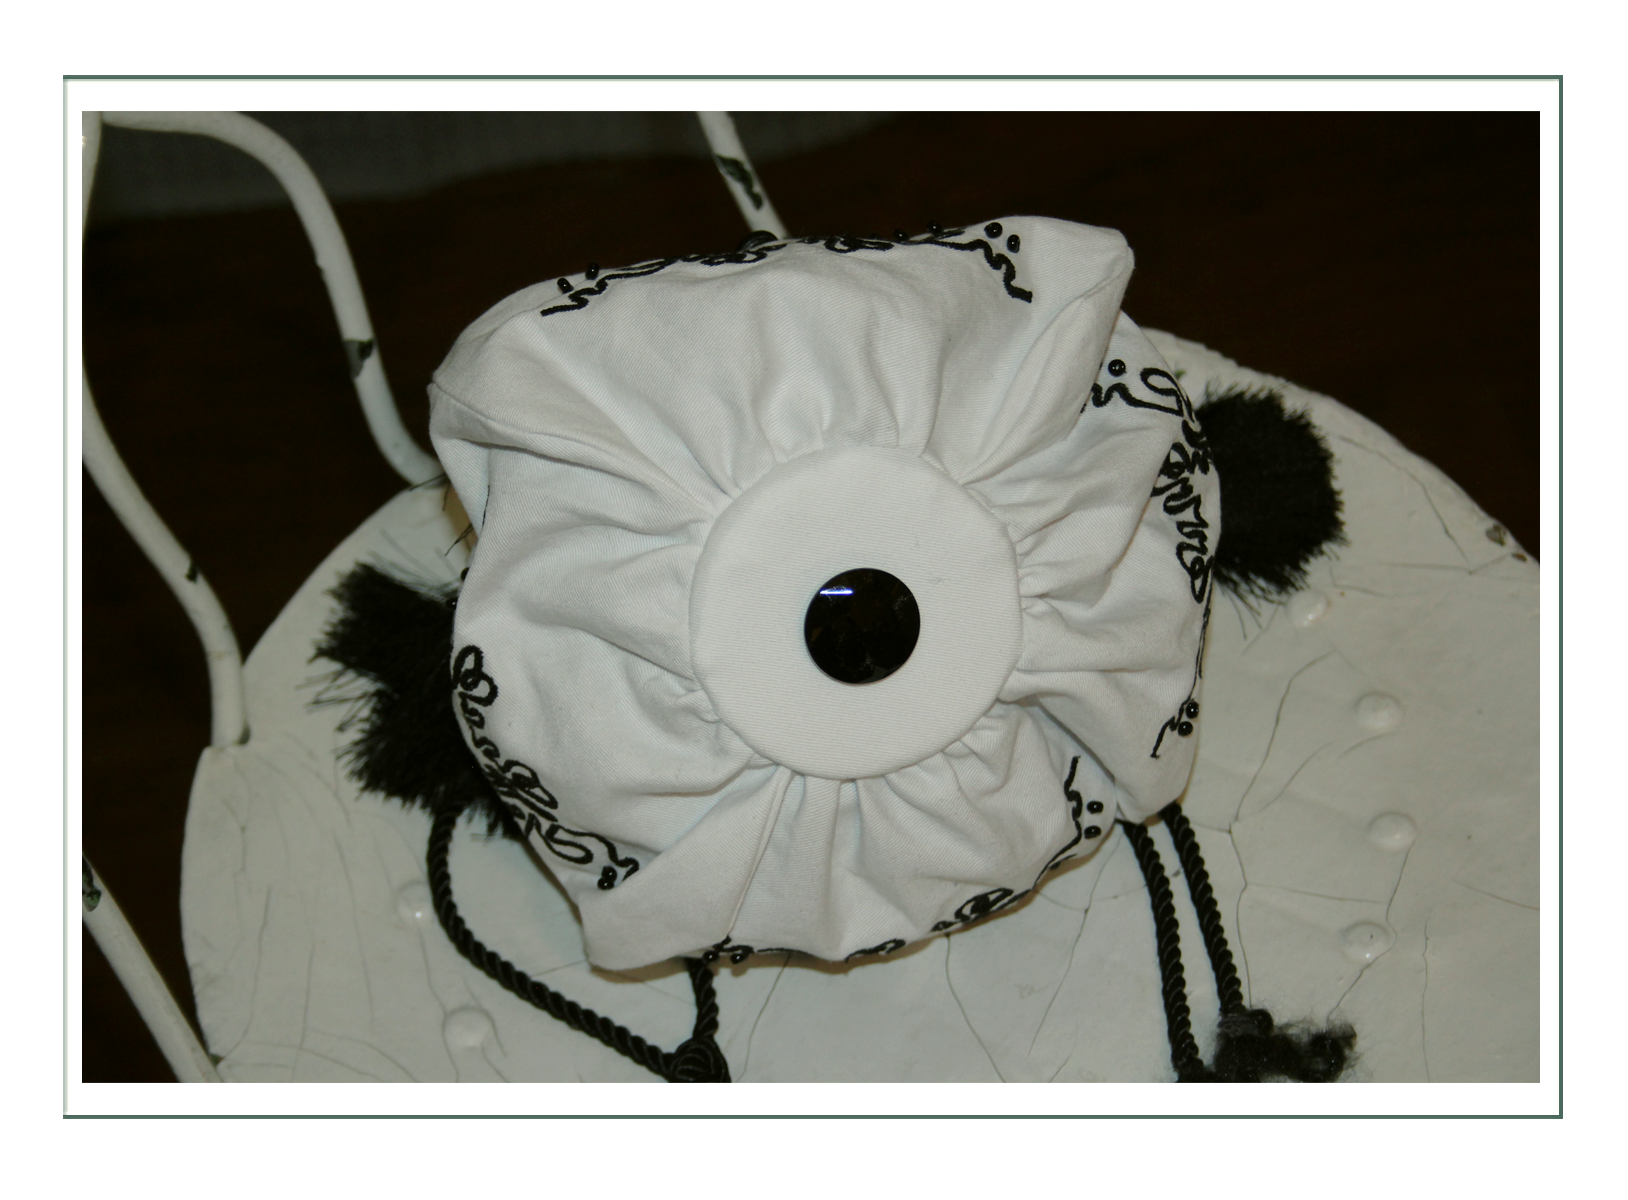
Attempt #1 is a cinching bag very like early 1800’s examples as seen on the design page. It is built much like a hot air balloon or a water bottle. We chose to coordinate soutache in the reticule with that of collar and cuffs on the bodice, and to keep it light and whimsical.
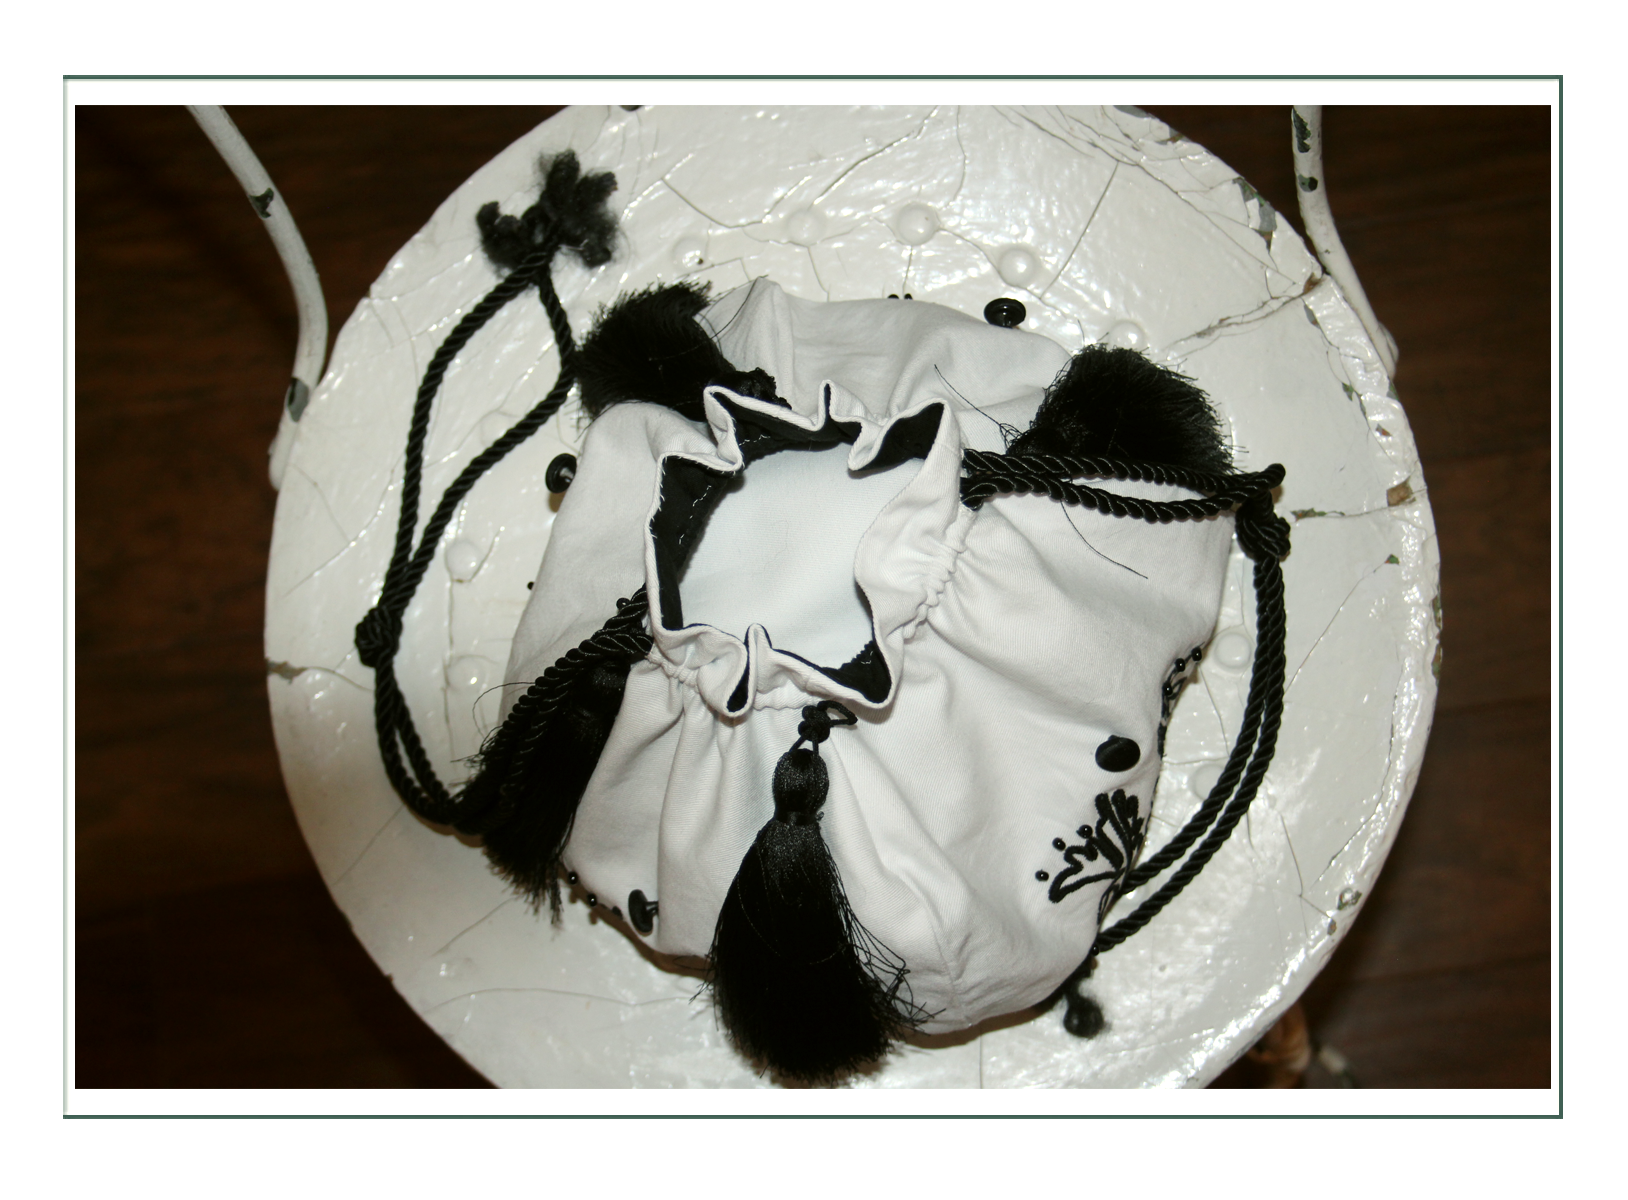
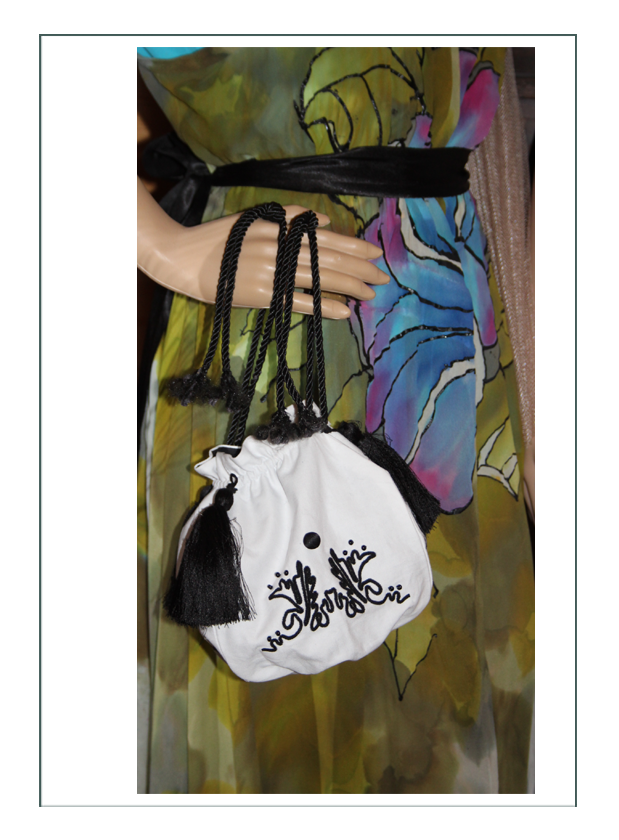
The result was a cute little pot-bellied bag with an interpretive plants-in-the-garden design, real silk tassels, a button to match that on the bonnet, and floppy cinching cords. It will be worn white on white, but it is lovely with rich hues and saturated colors too as shown in the photos in front of an Edwardian garment we had on one of our mannequins.
The problem was that the twill with fine twill full lining was too thick to gather nicely into the cinch, so the bag hangs lop-sided and it’s hard to get in and out of. Thus we decided to try another approach using a kissing lock style and shape more typical of the end of the century rather than the beginning. The shape and style of Reticule 2 was fashionable from the 1860’s to the 1890’s. Beaded reticules were popular well into the middle of the 20th century too.

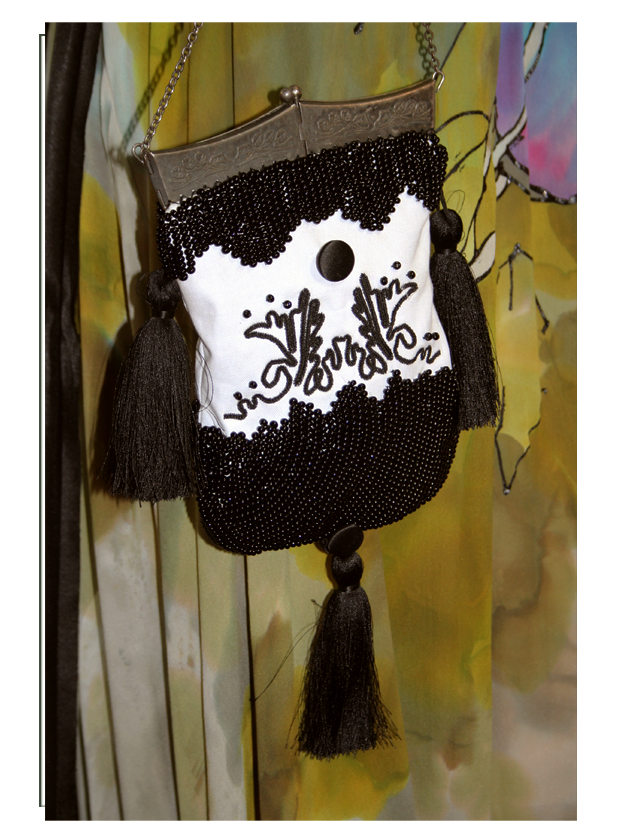
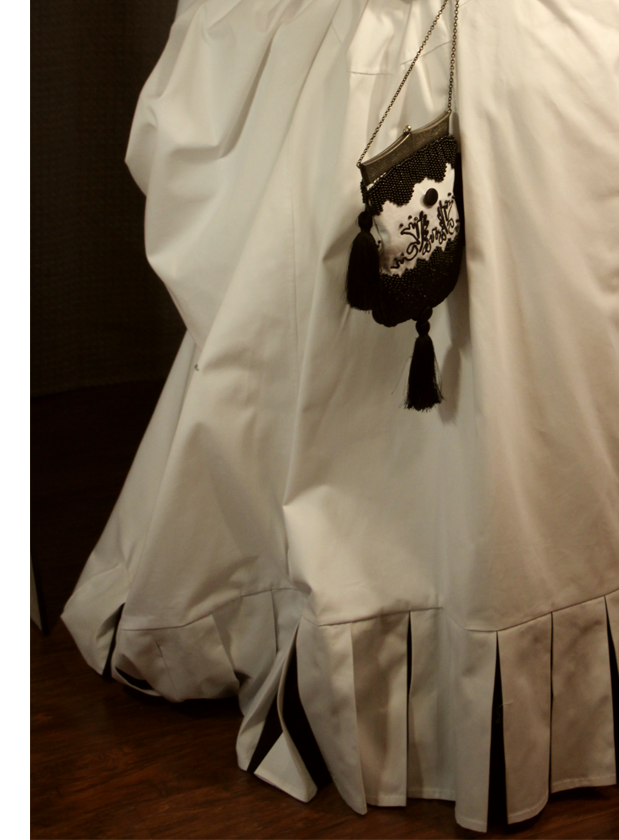
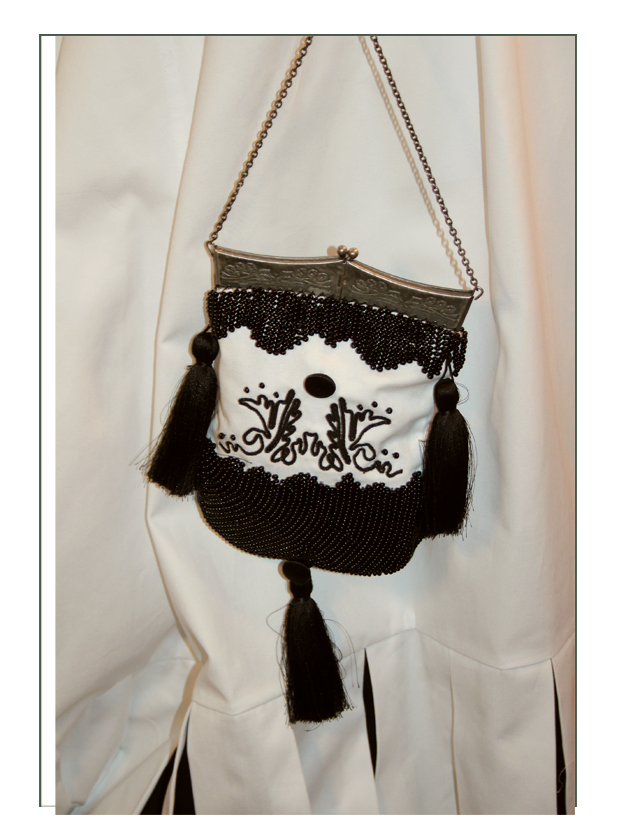
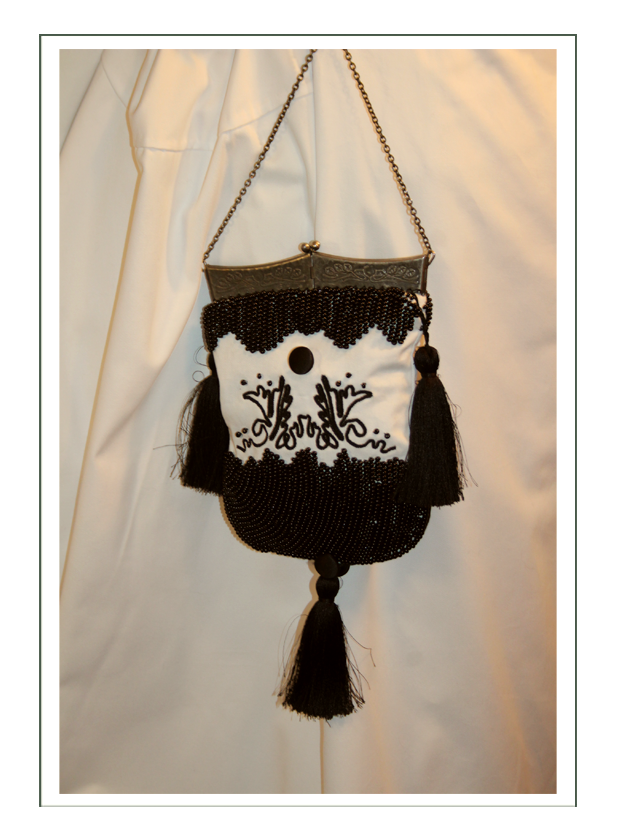
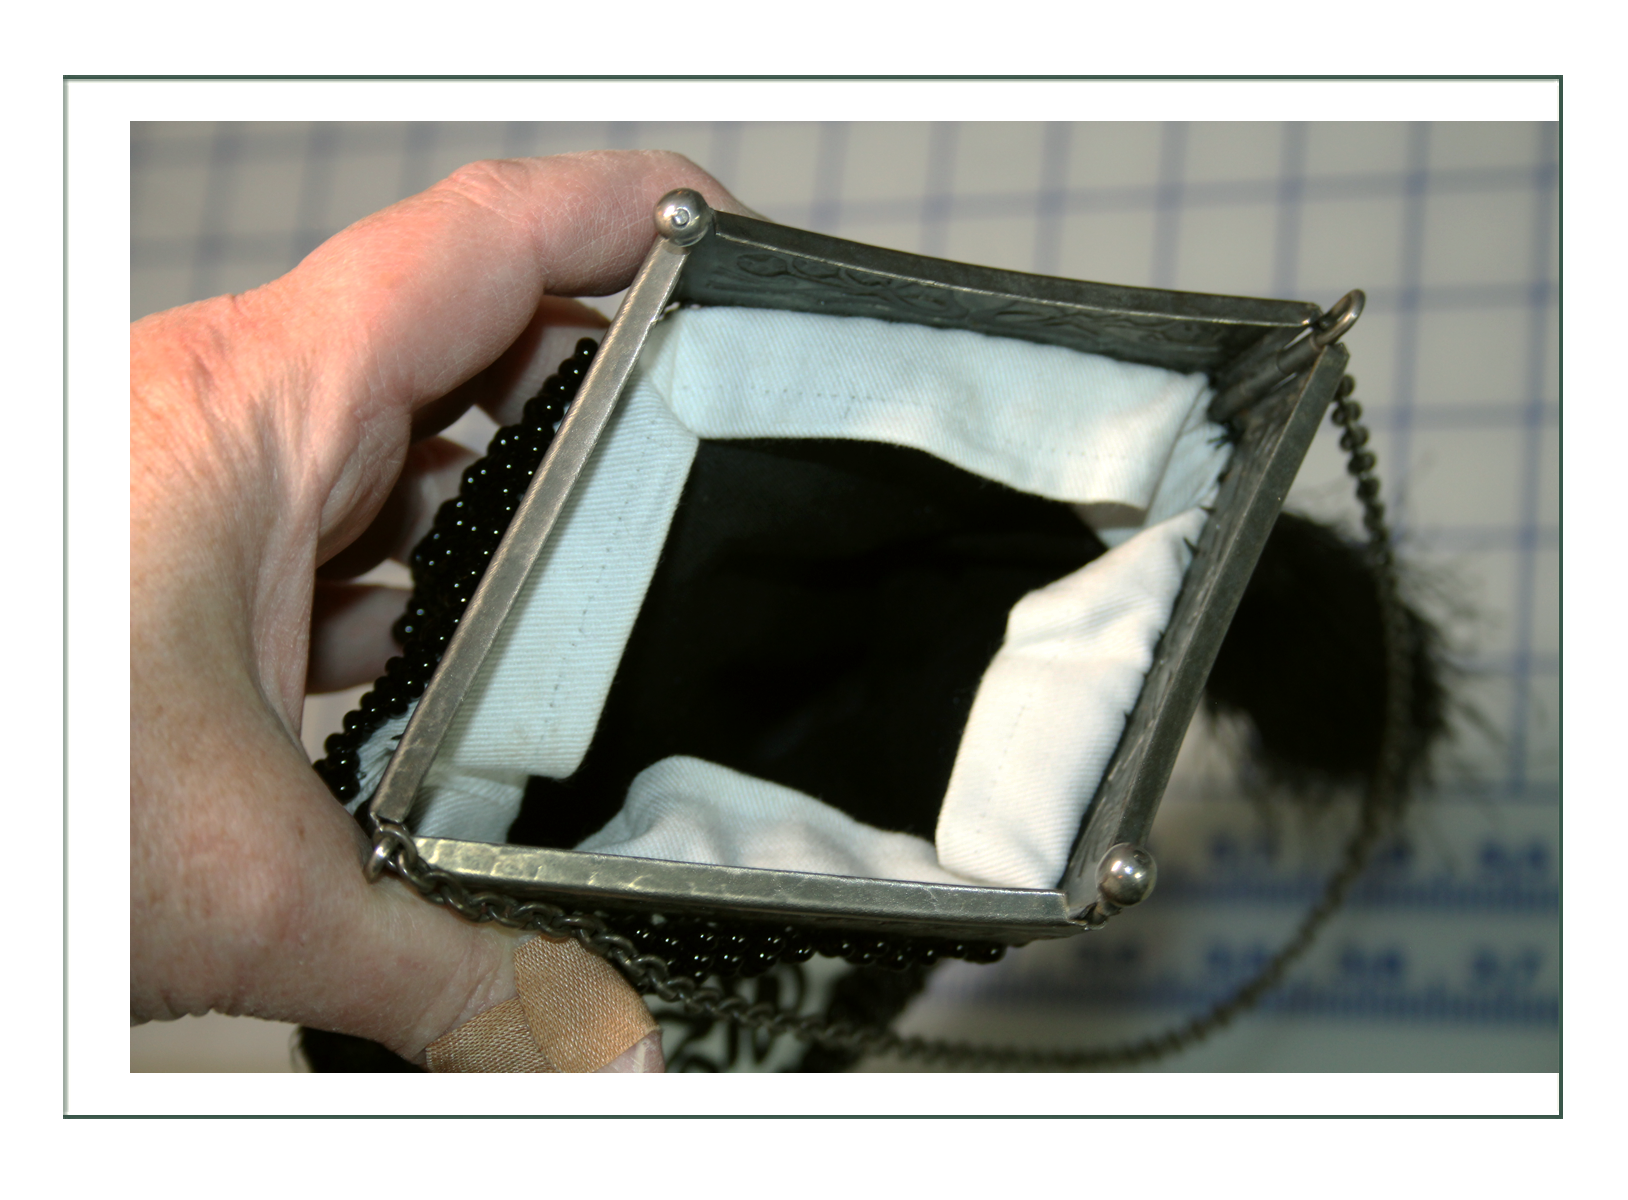
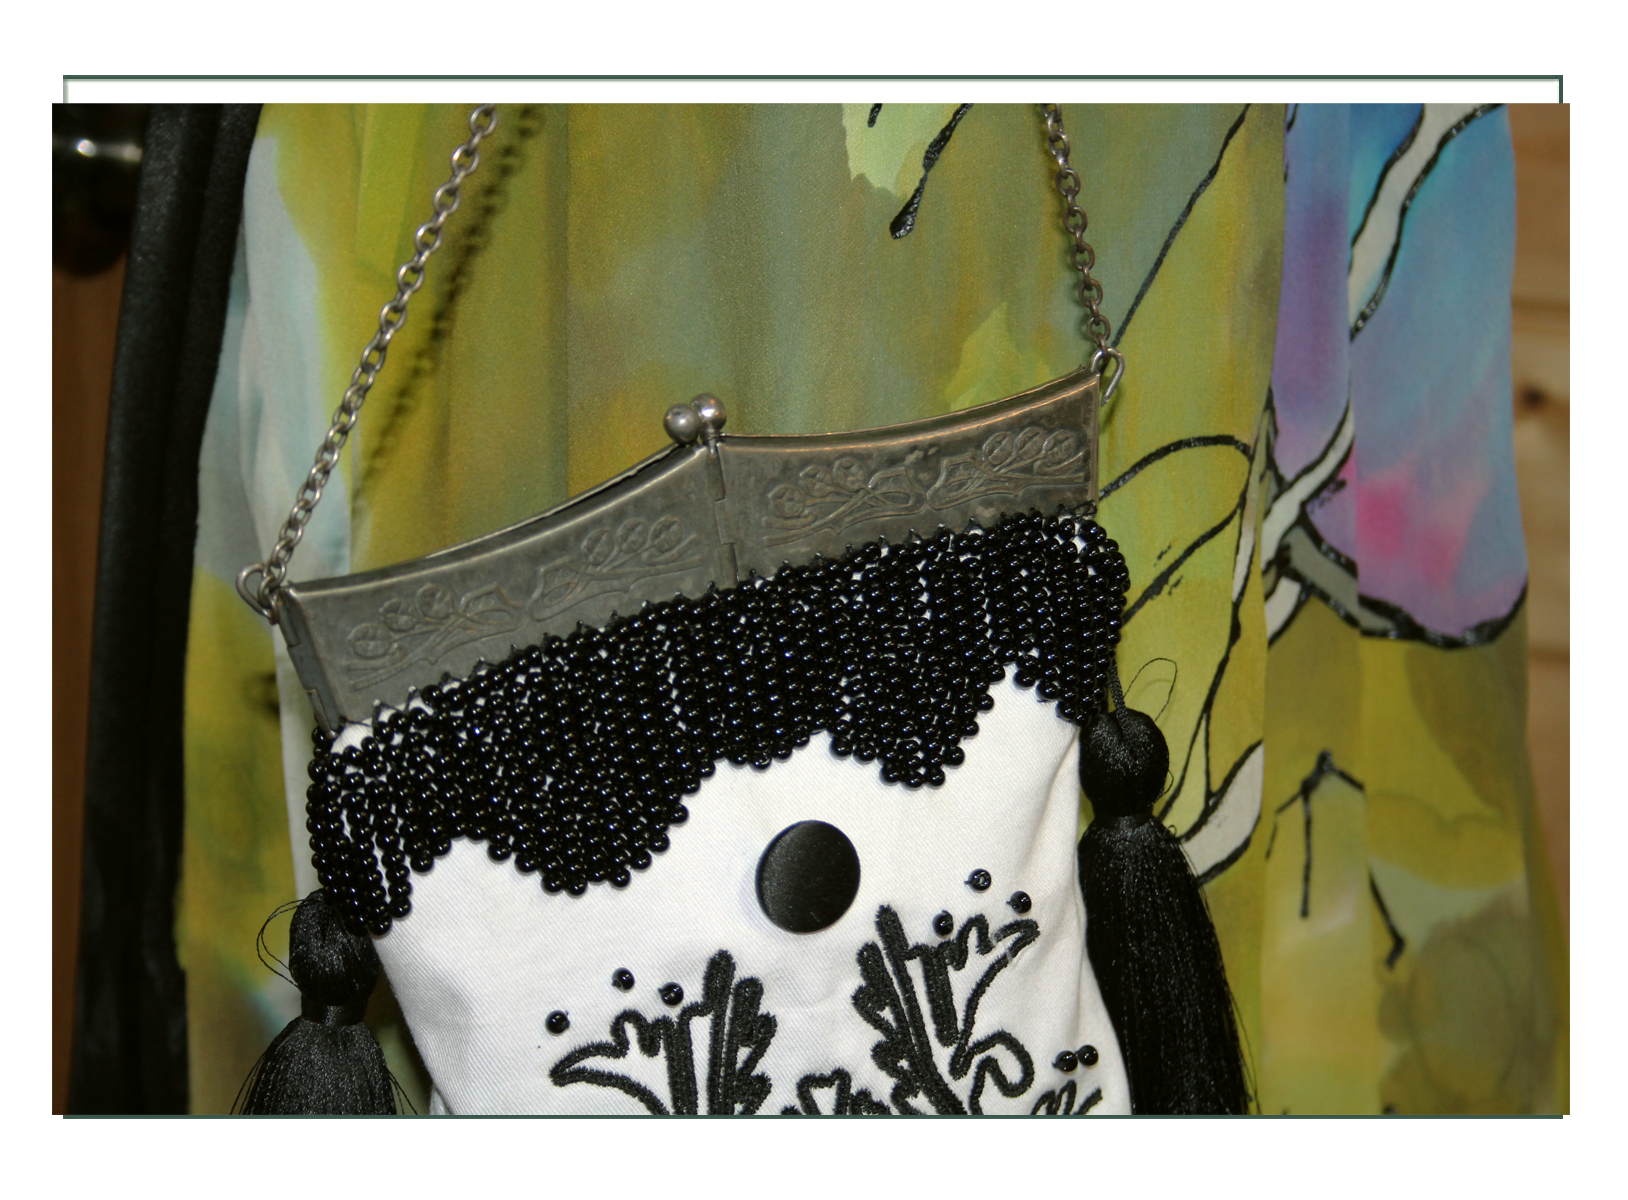
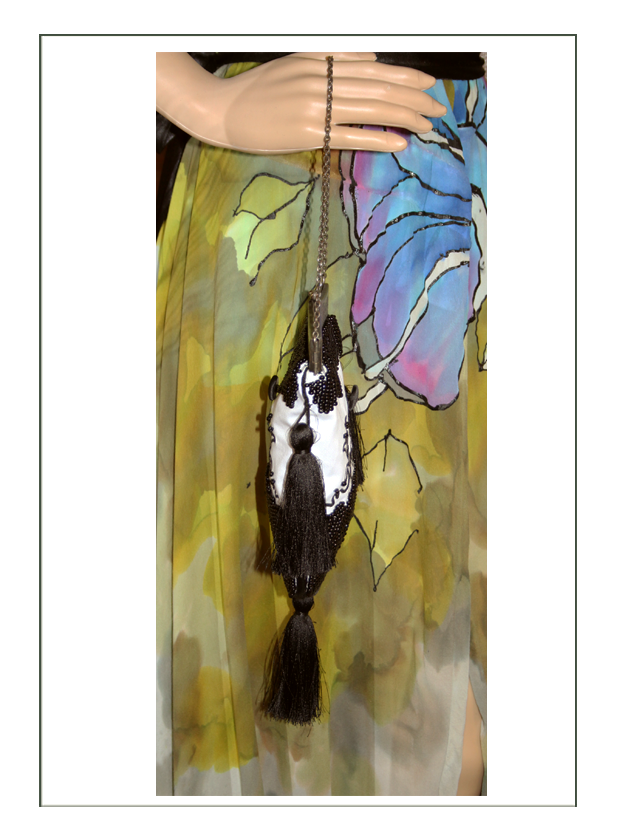
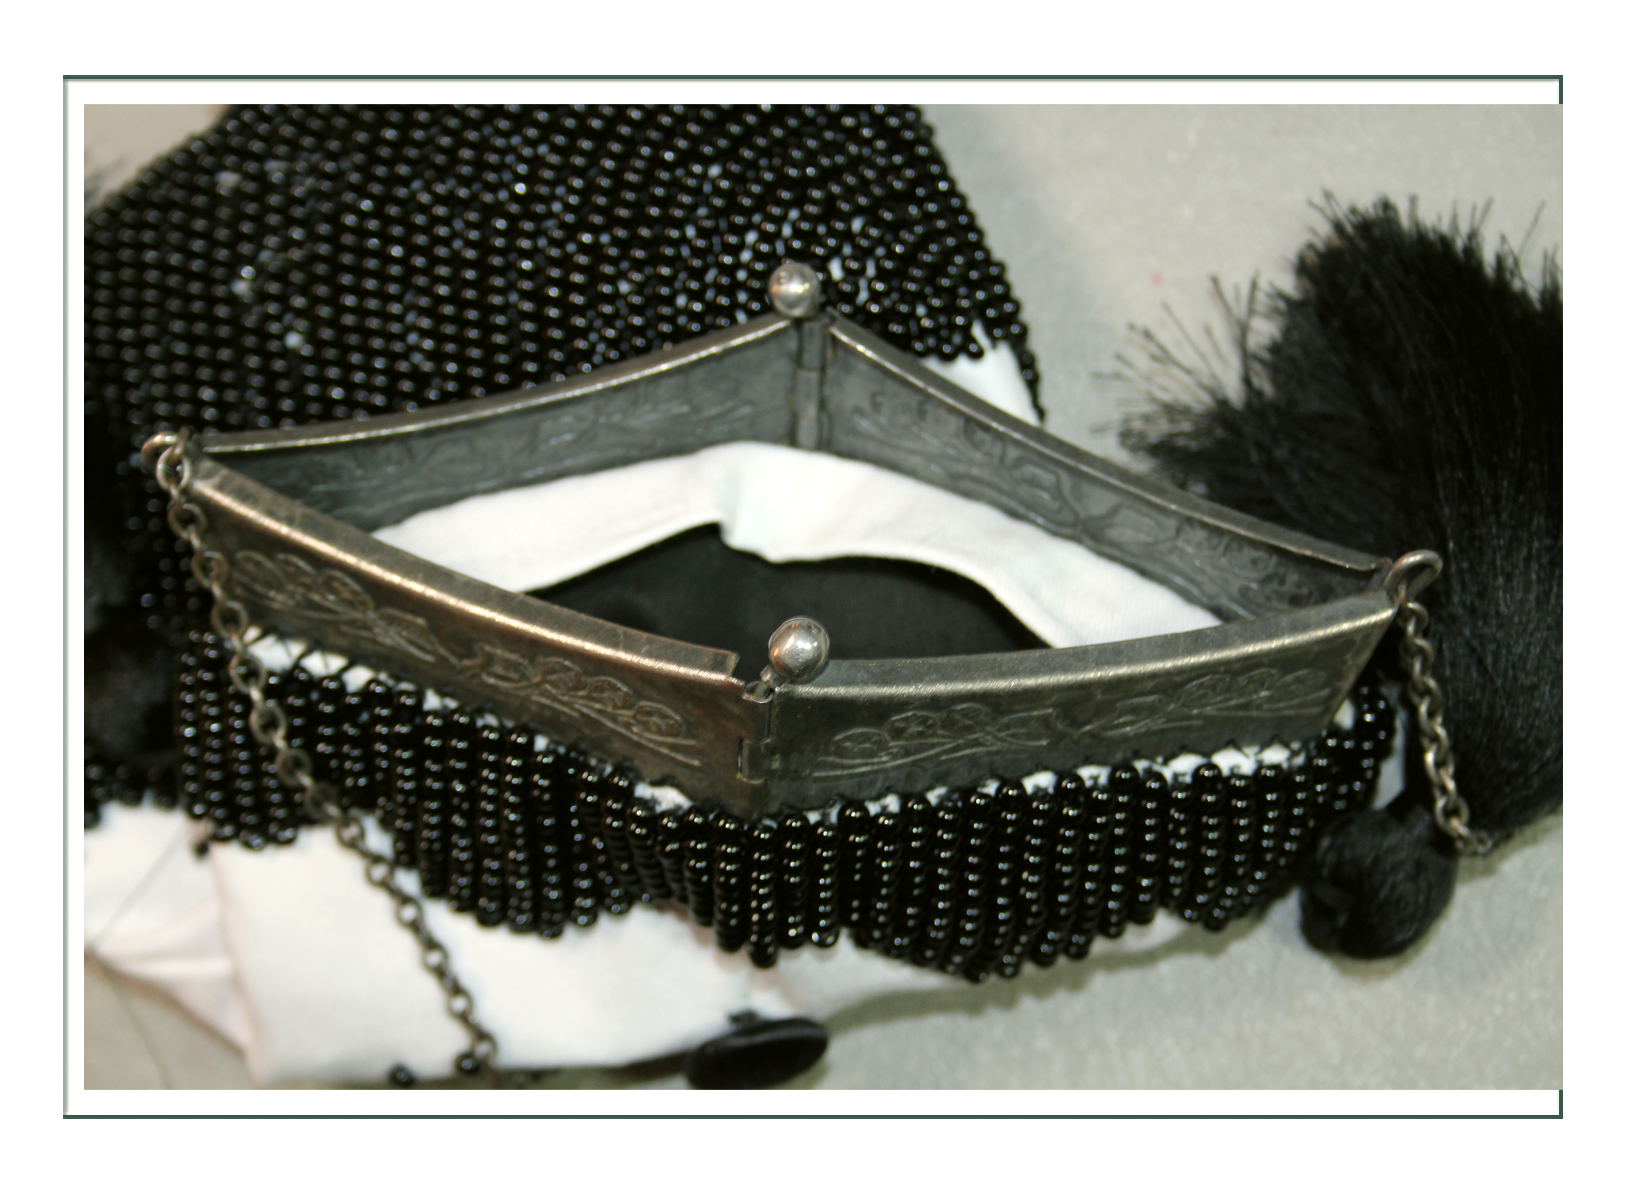
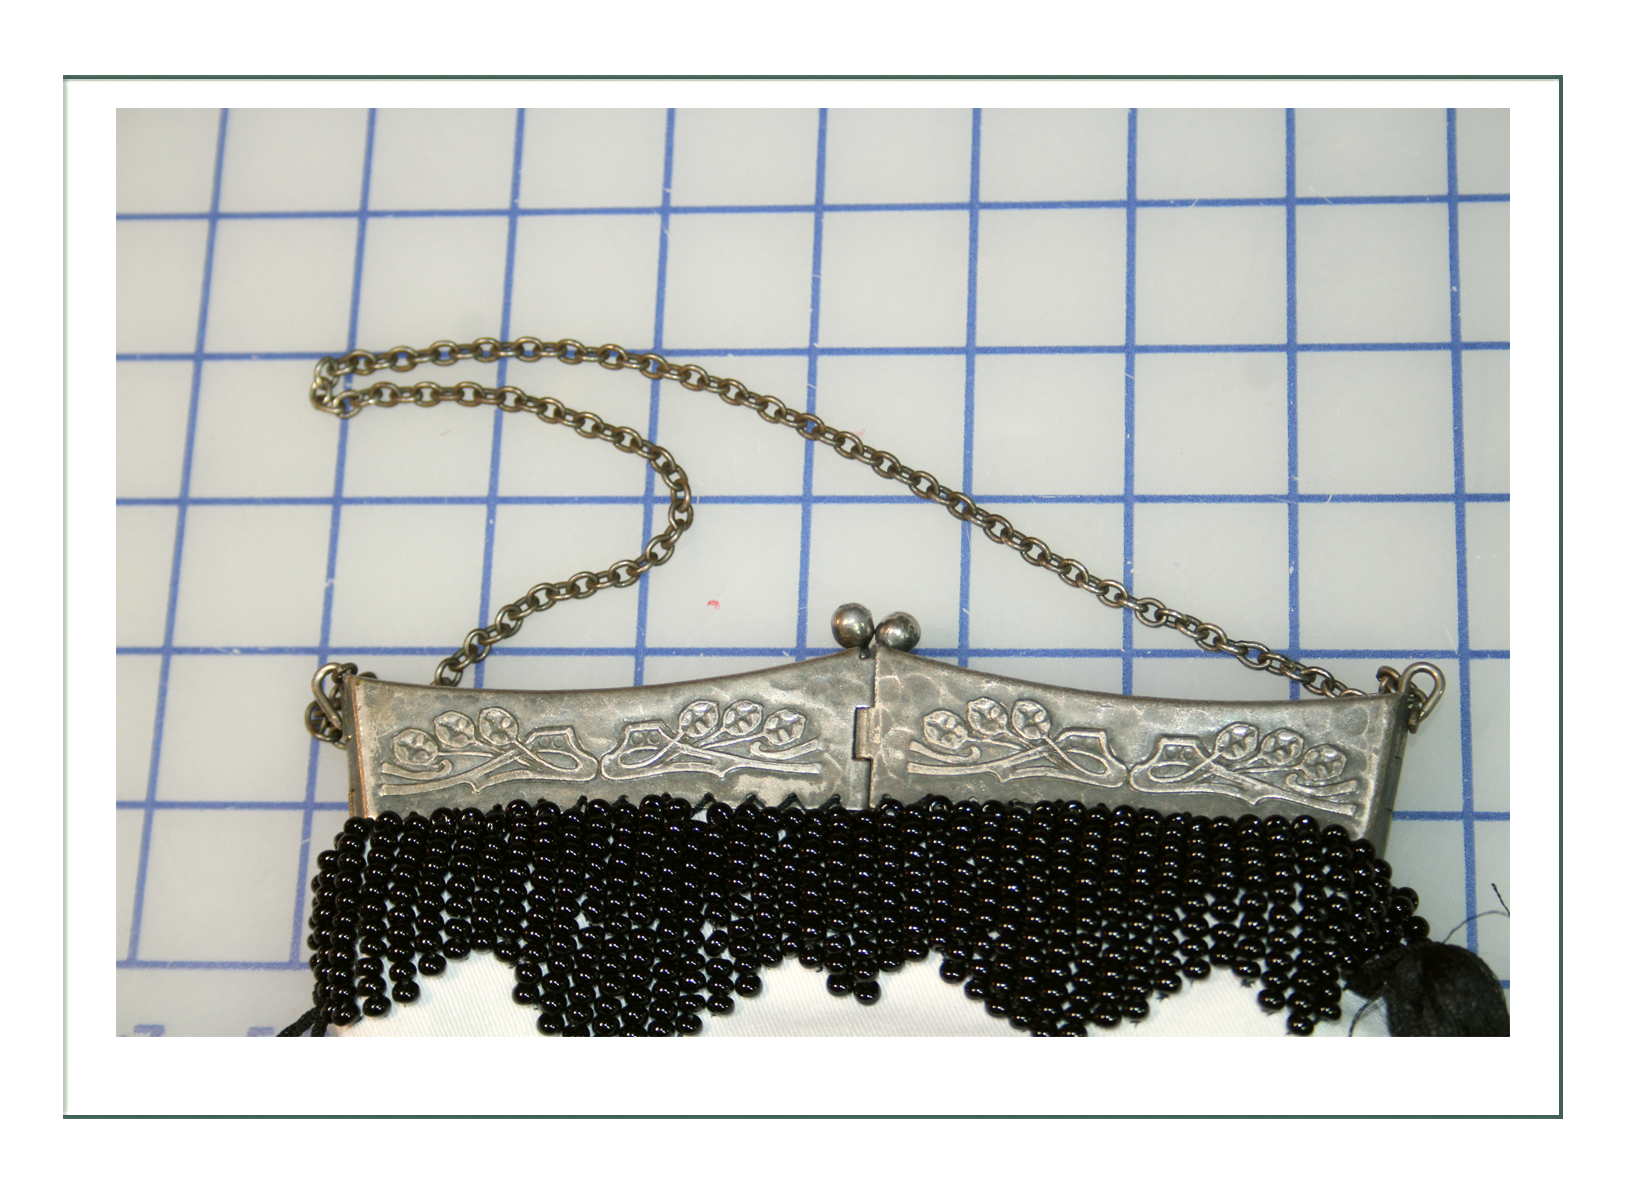
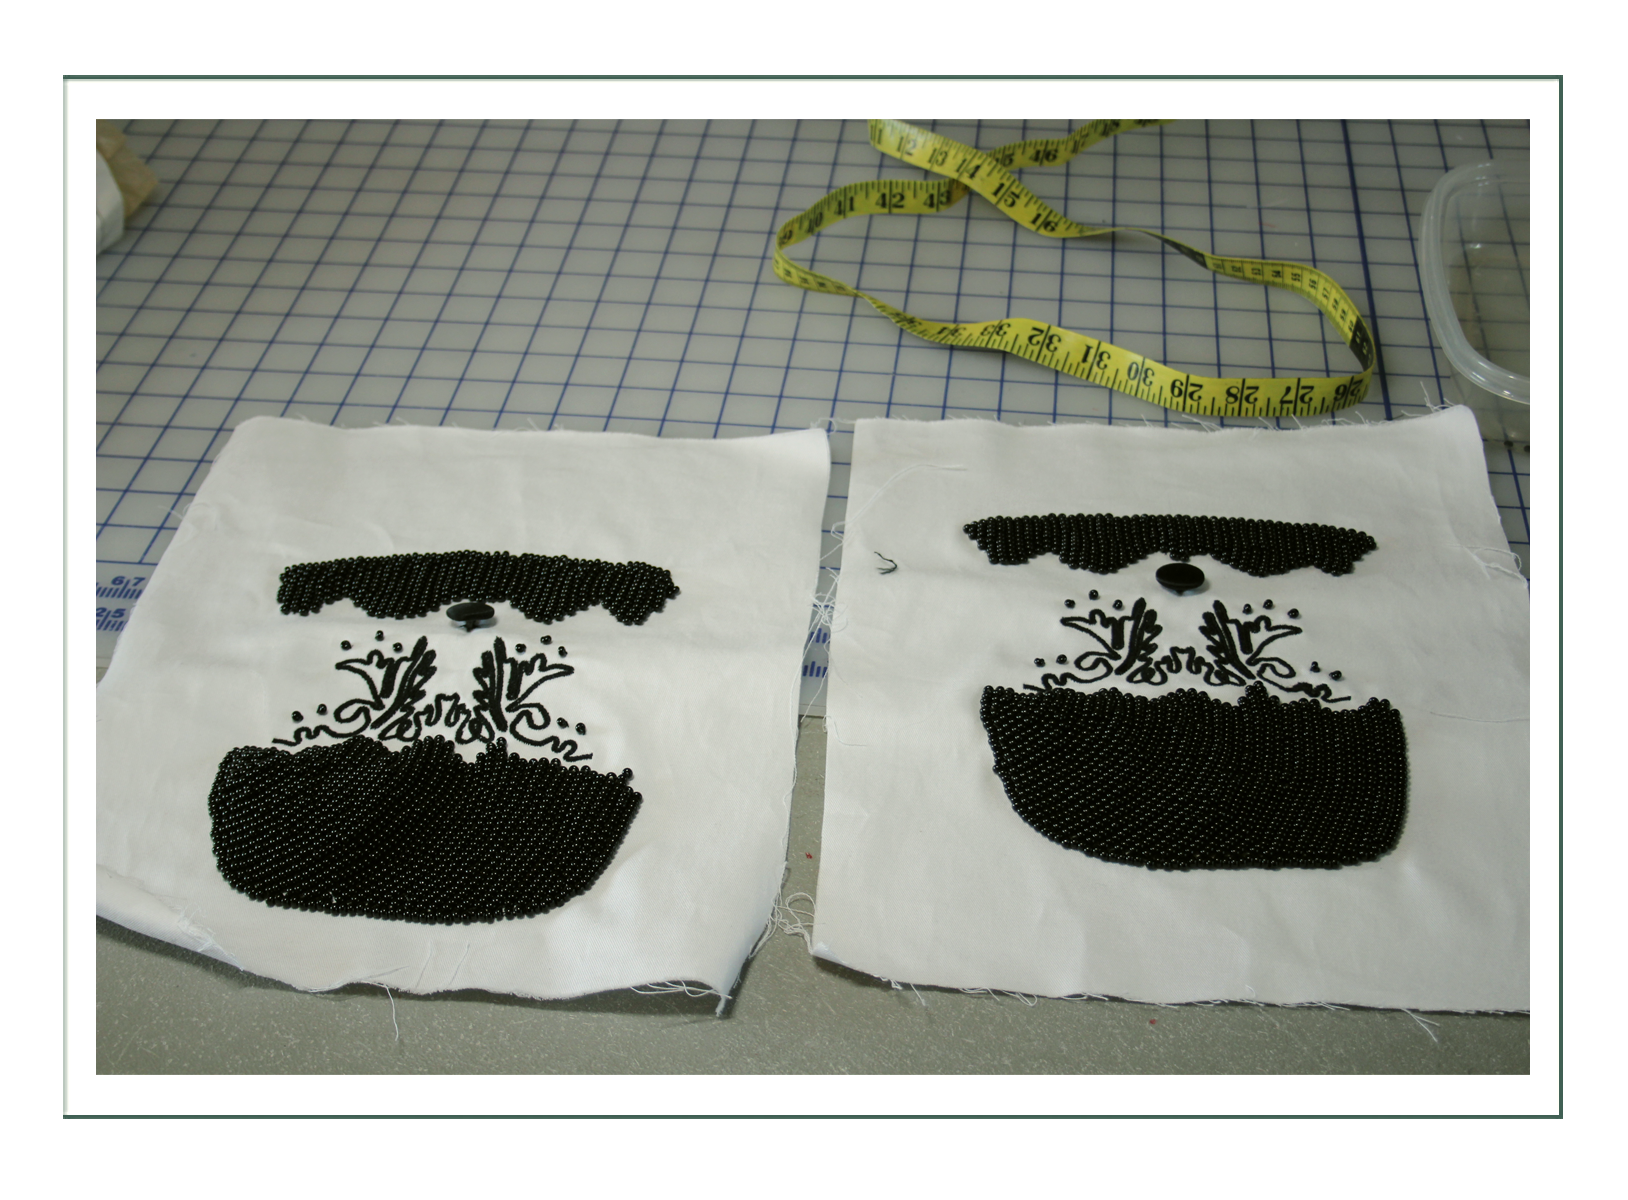
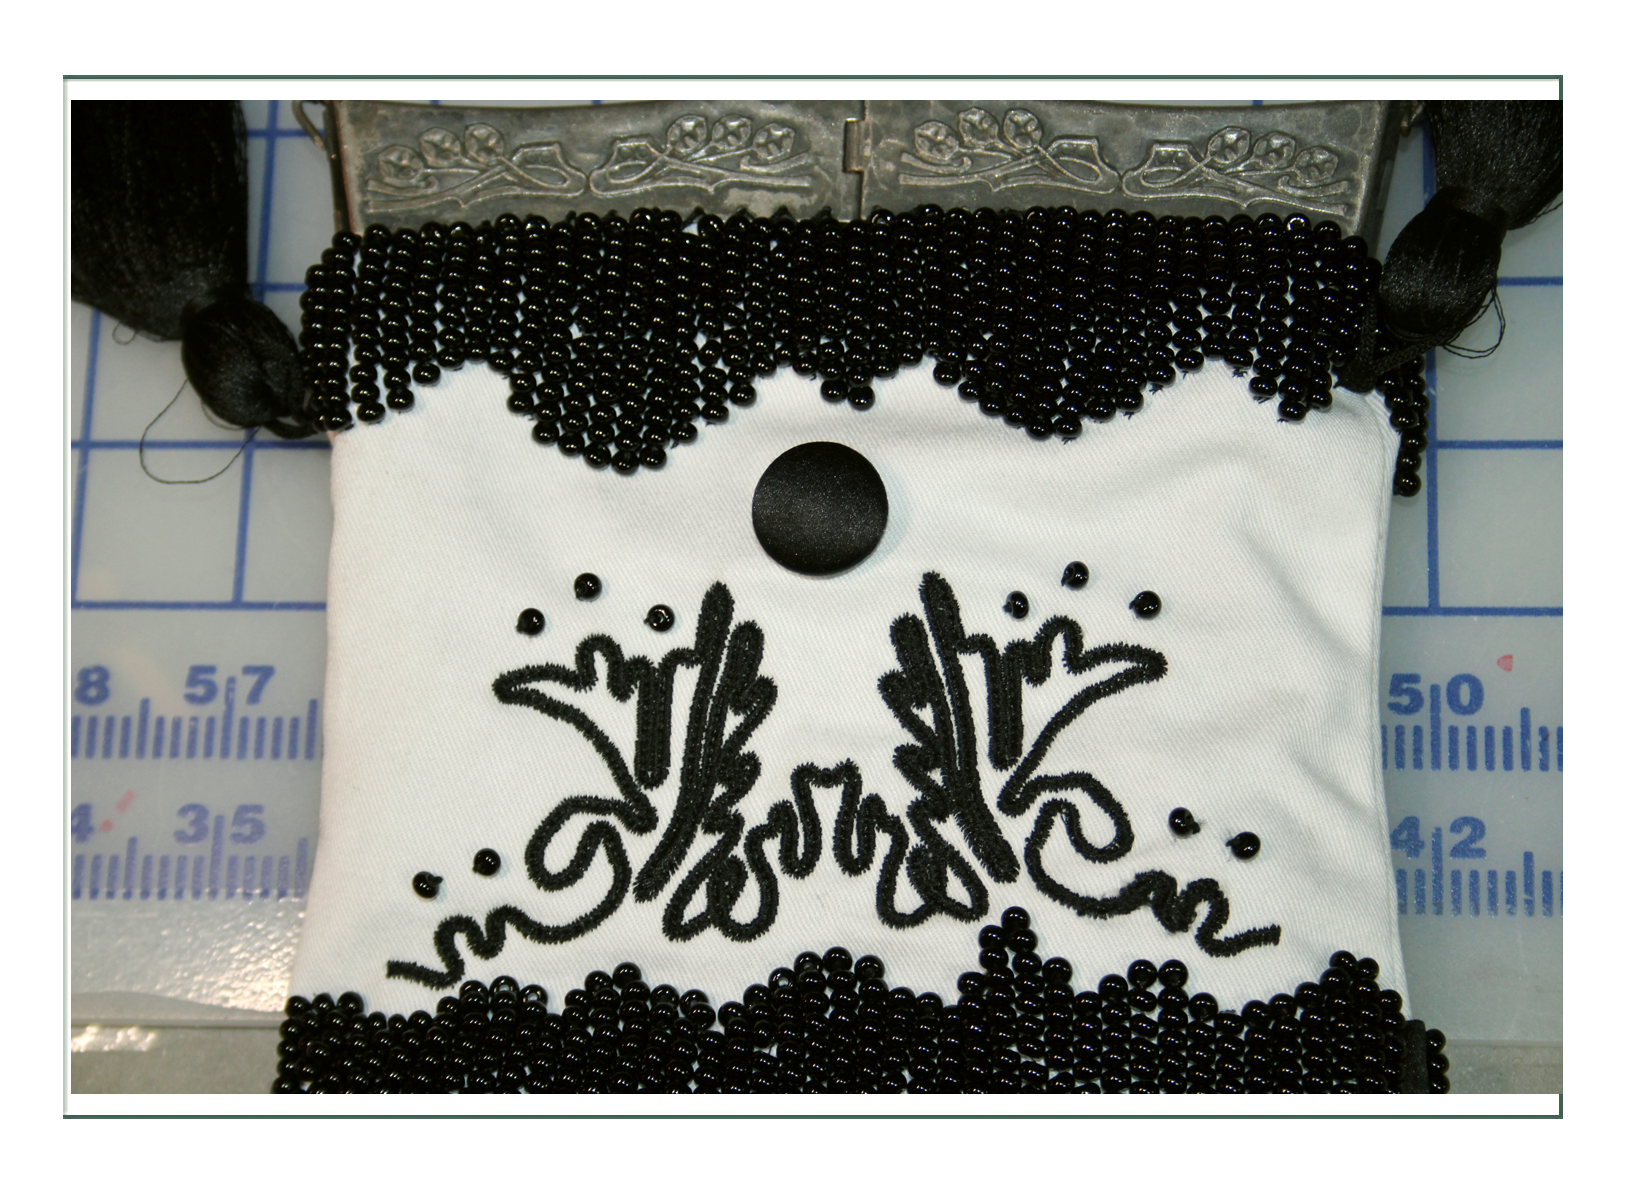
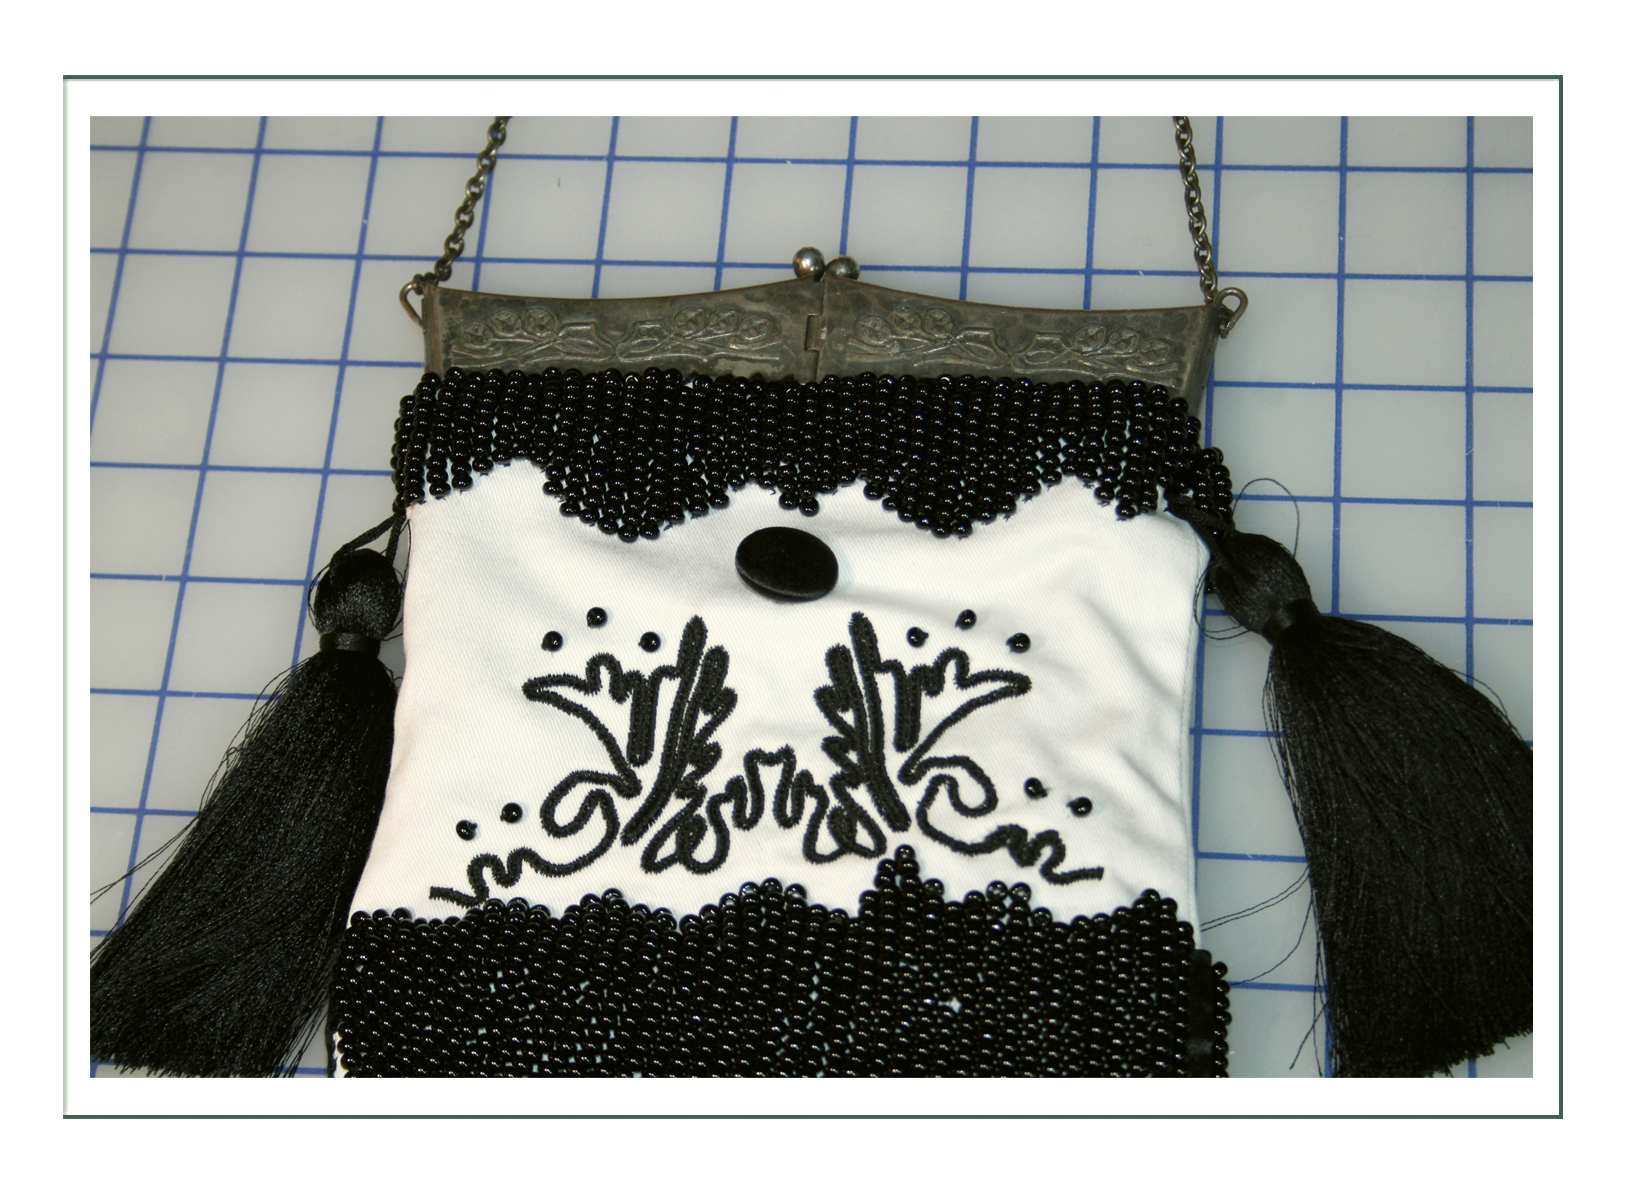
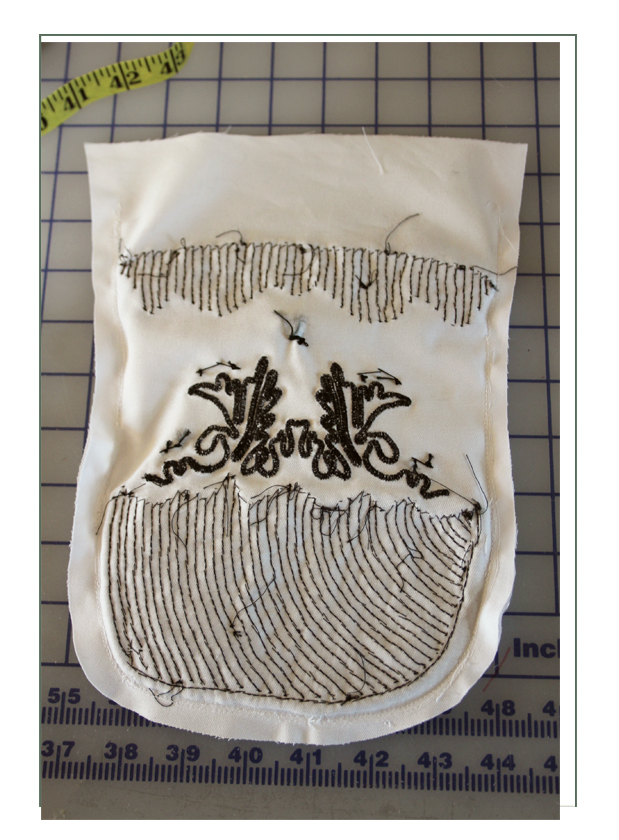
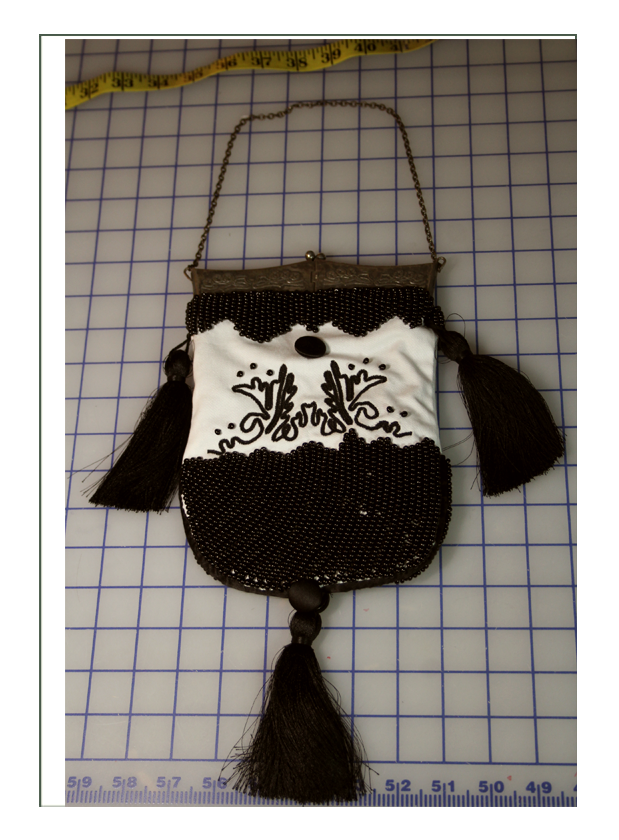
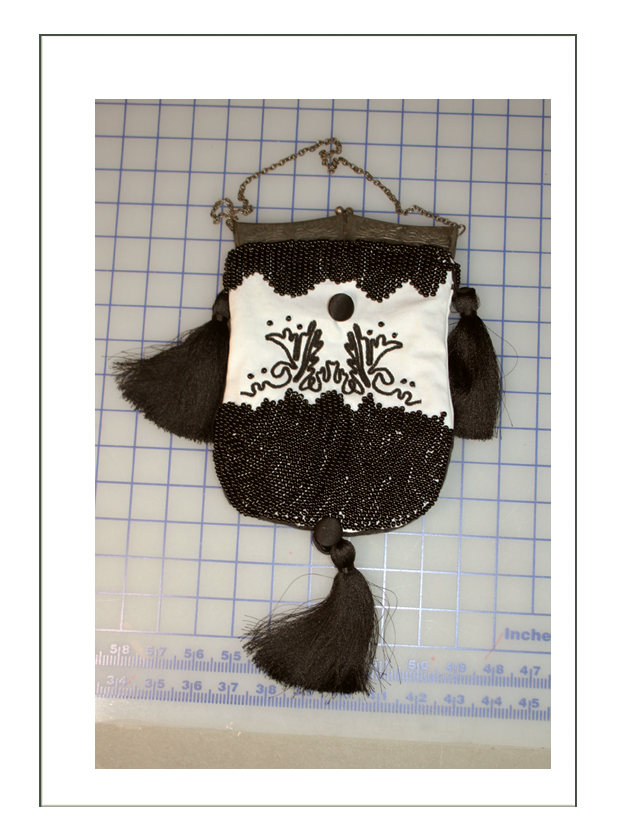
Reticule 2 – Antique Kissing Lock
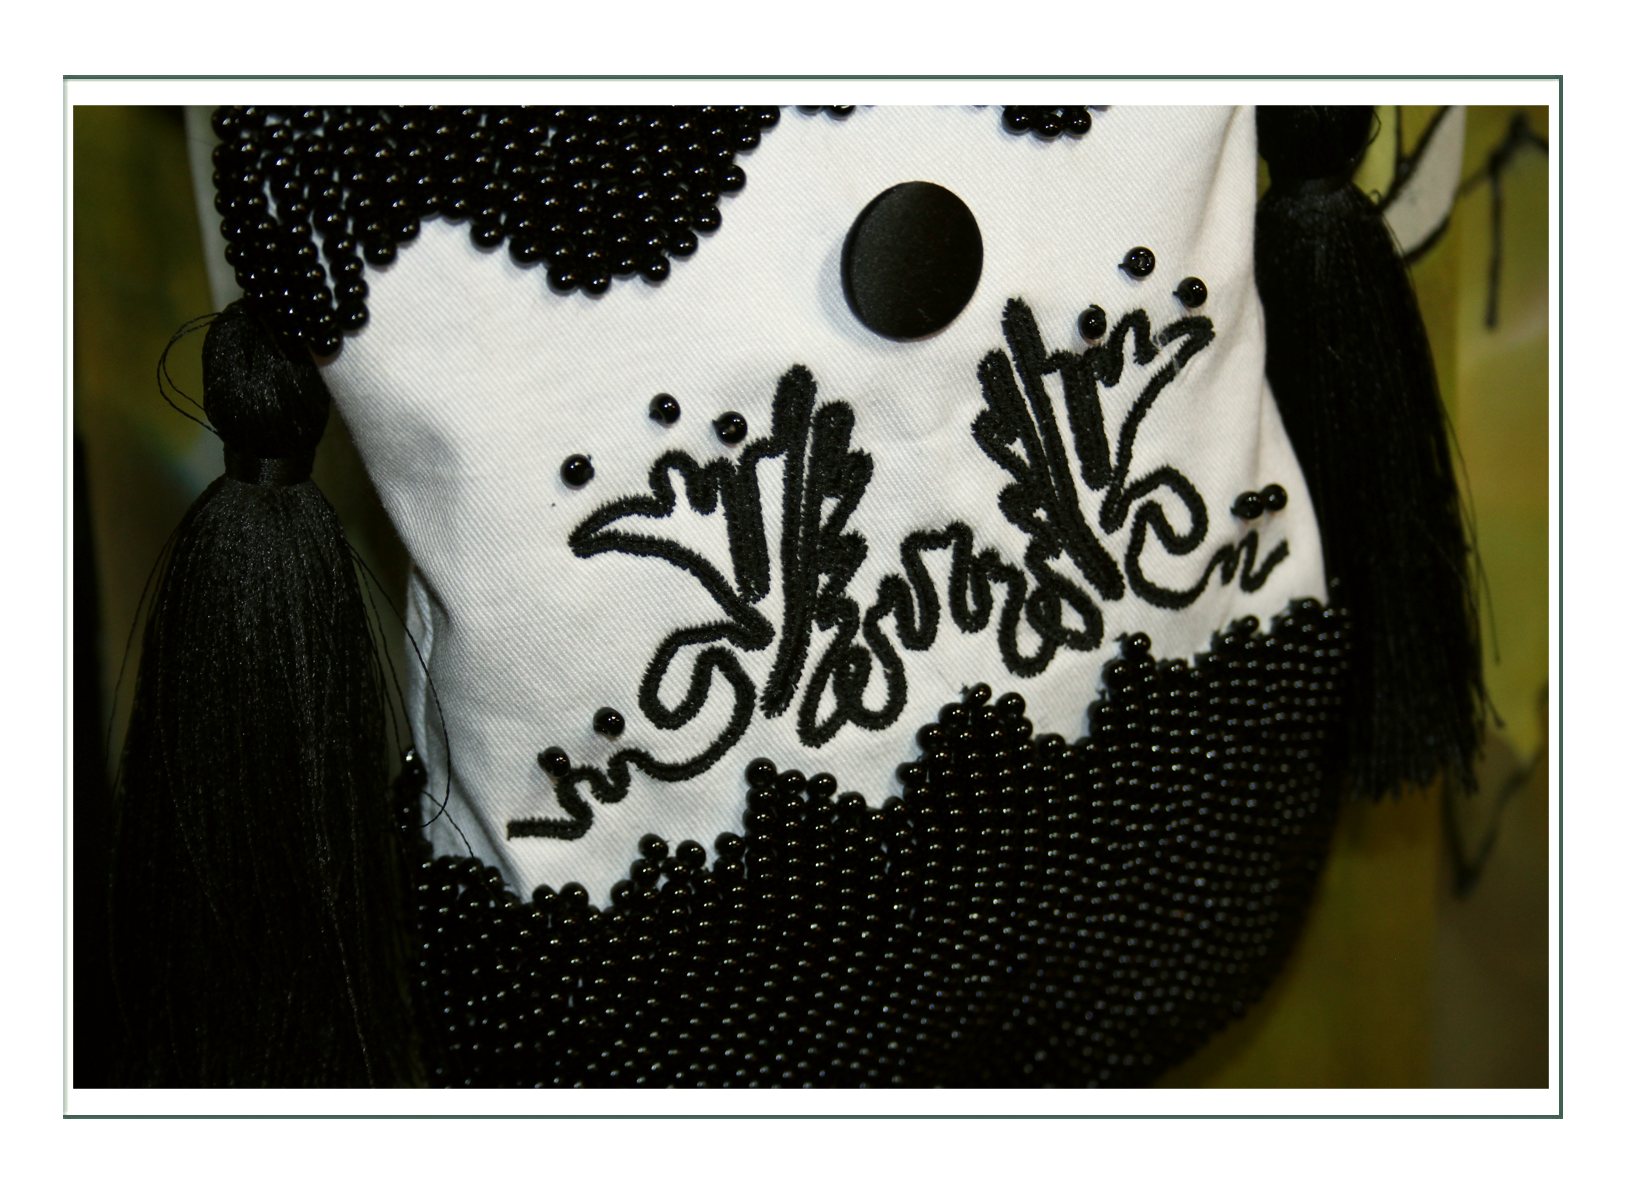
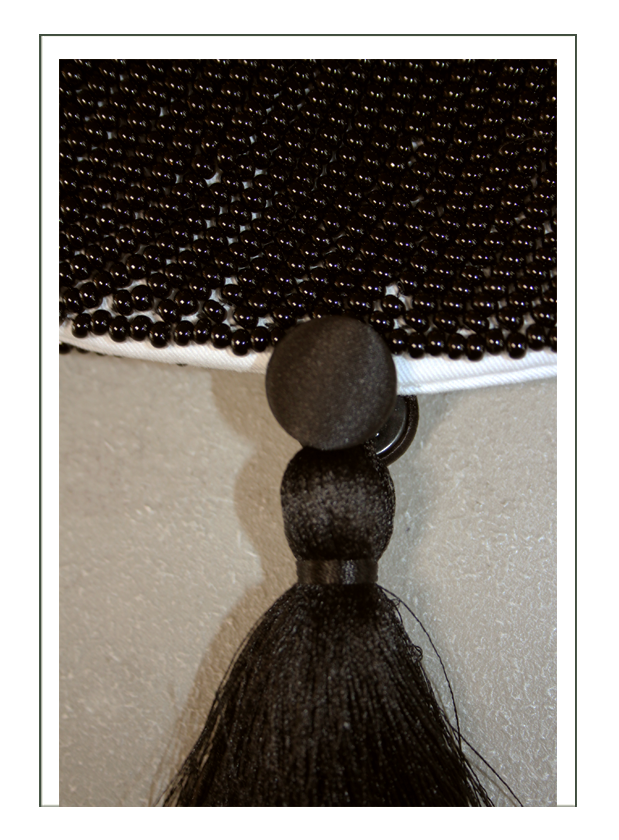
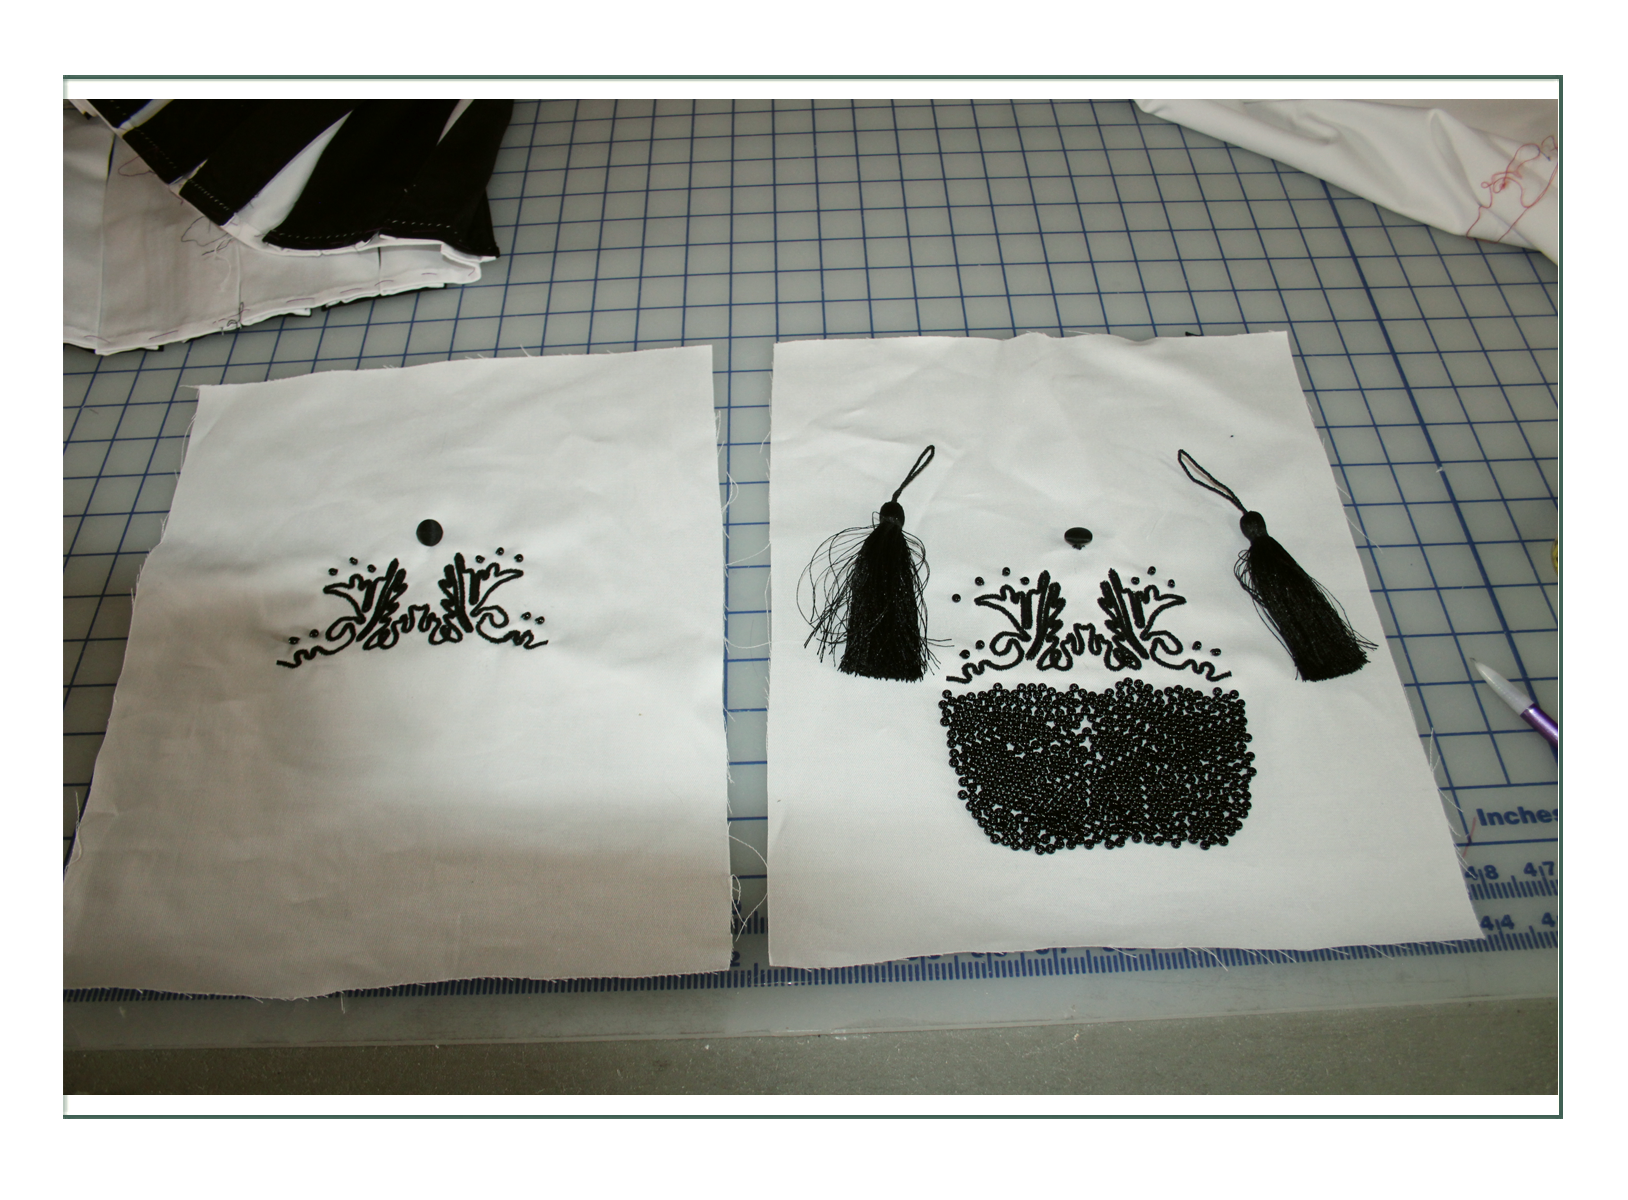
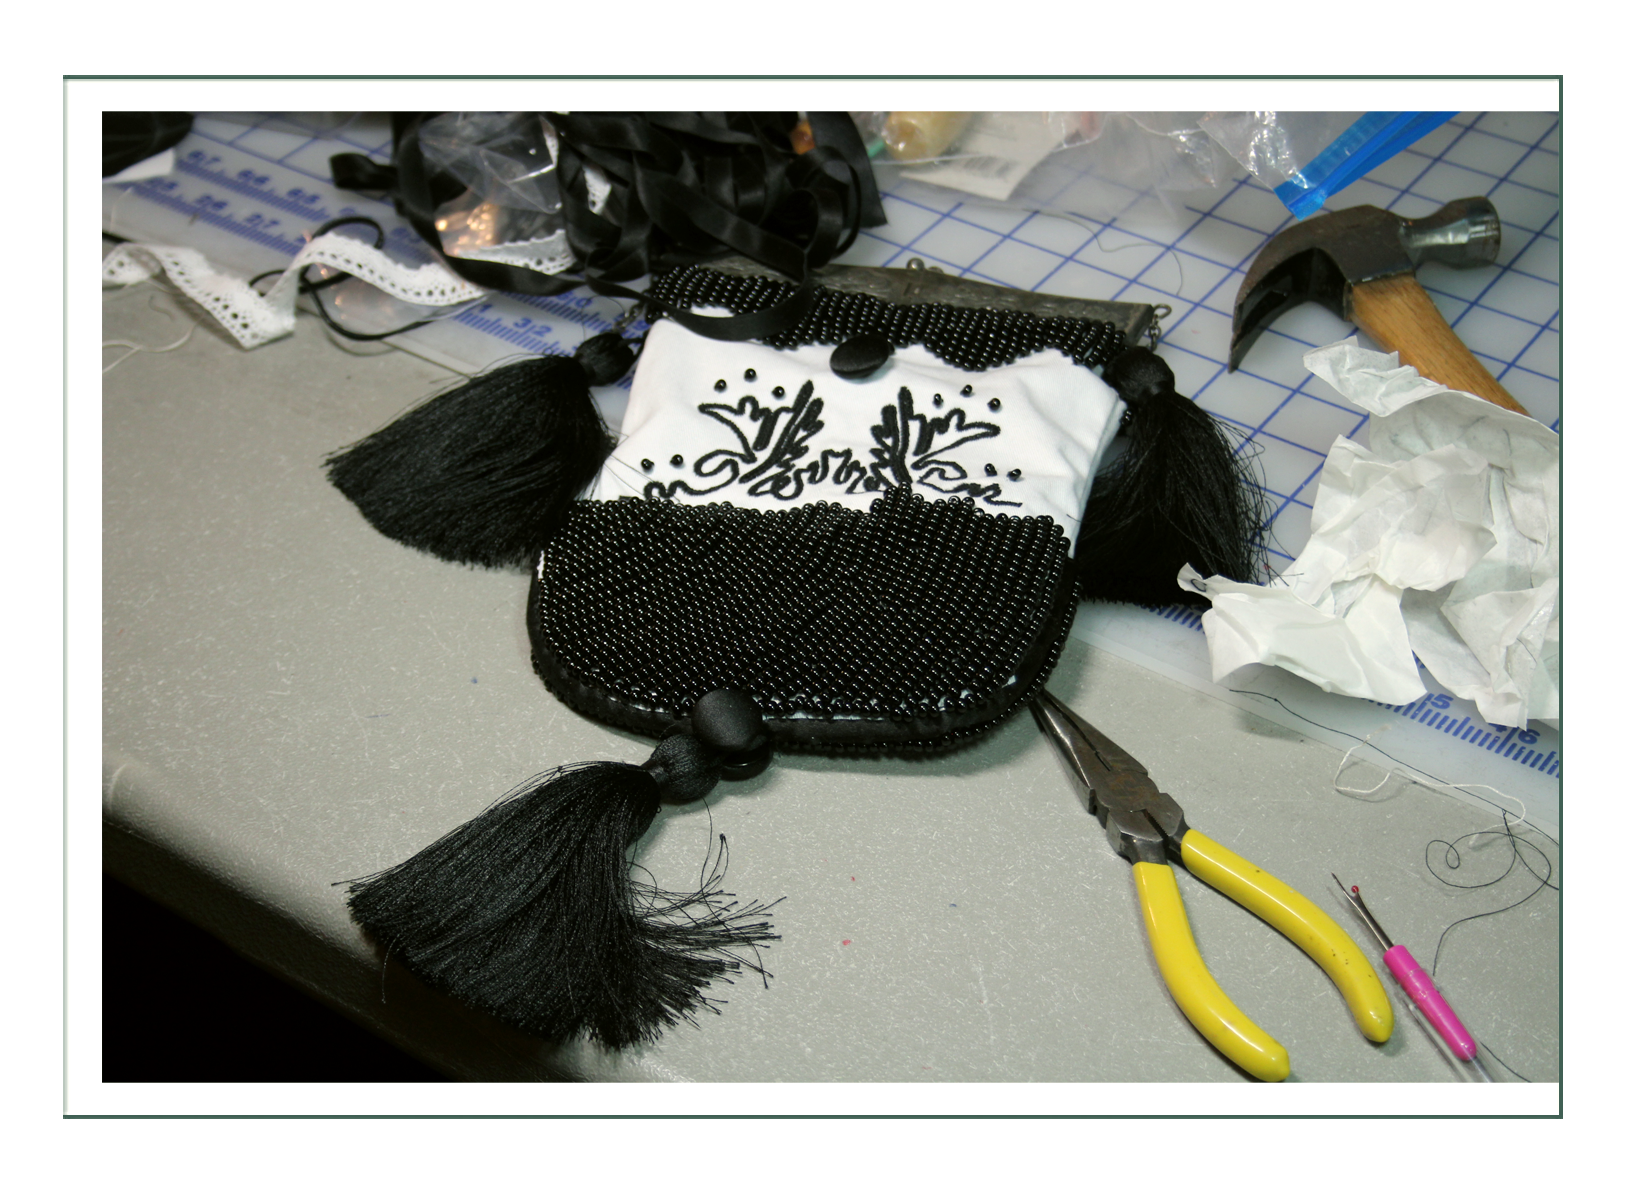
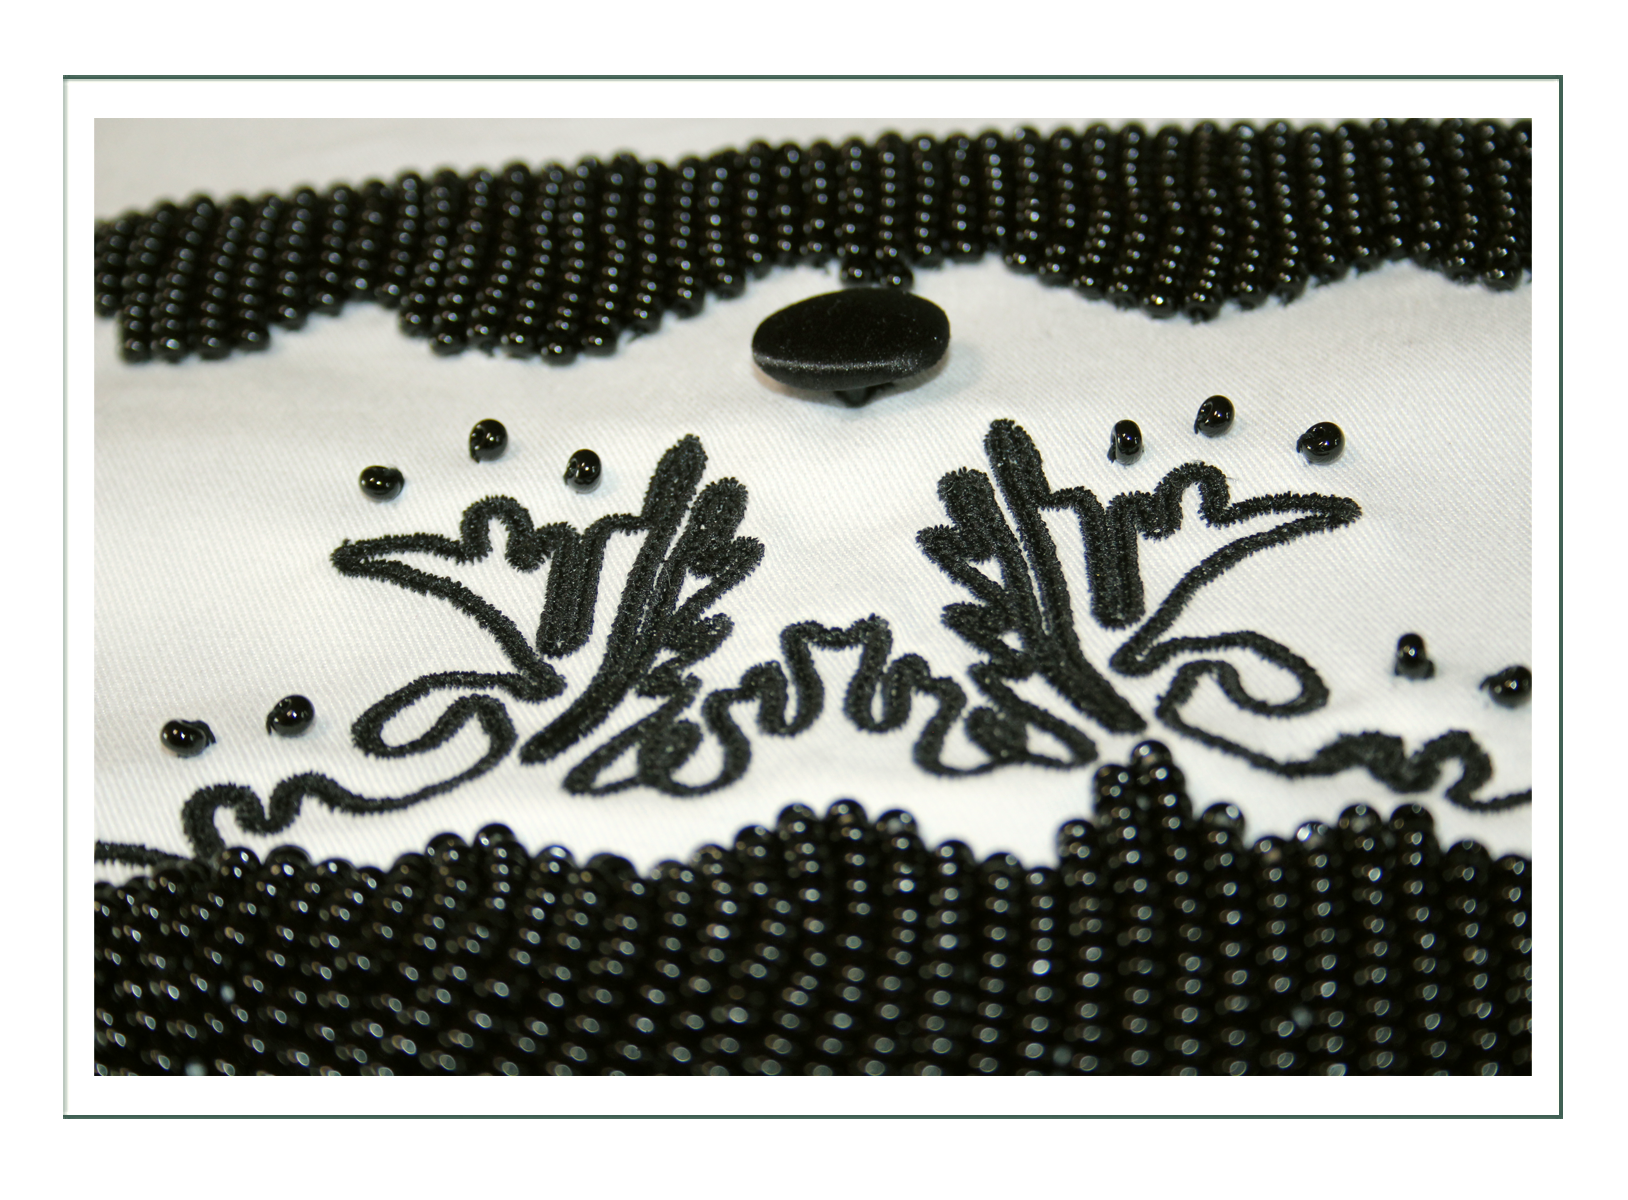
Using a real 1880’s “kissing lock” clasp, we invented this semi-beaded reticule based on extant examples. It appears to be an alloy steel, and was a challenge to install as we had no instructions. The beads are a 6/0 (larger type) glass seed bead. Each was hand sewn on to the twill fabric. The soutache embroidery and tuxedo buttons are the same as on Reticule 1.
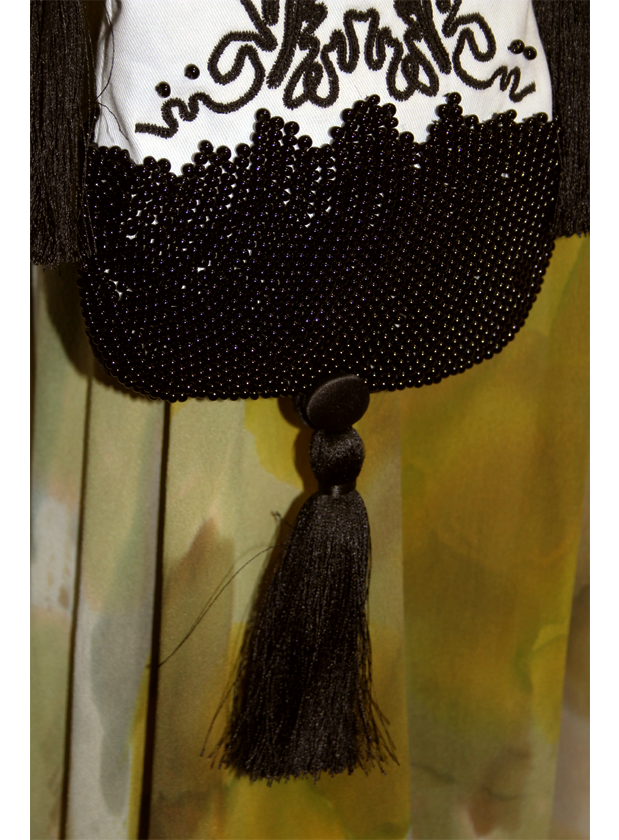
As with the first one, this has real silk tassels in strategic (and historic) positions, and the whimsical “garden” design. We had a challenge getting the clasp to close because of the thickness of the fabric, but it is very strong, and Melissa will just need to be careful not to get the fabric caught in the clasp. We noted with extant examples it was this inside top area historic bag makers seemed to have trouble with the metal cutting the fabric too. Most likely this 4 hinged design was abandoned because of it. In some examples, there would be a lace trim along the inside top, but when we tried to do that, the clasp would not close, so we left it be.
It was quite an interesting experiment, and we think it looks like a fish. It is heavy and has substance, and we accomplished the mission of making something very tactile (fun to touch and handle) as conversation openers. It will be up to Melissa to choose which she likes best, as both are very historically accurate in design and construction, and both just a bit (appropriately) “odd”.

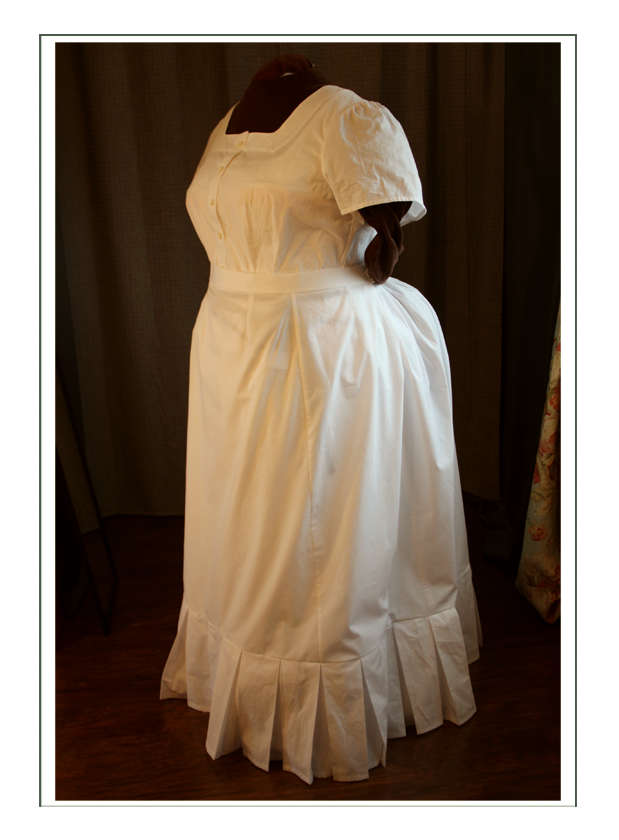
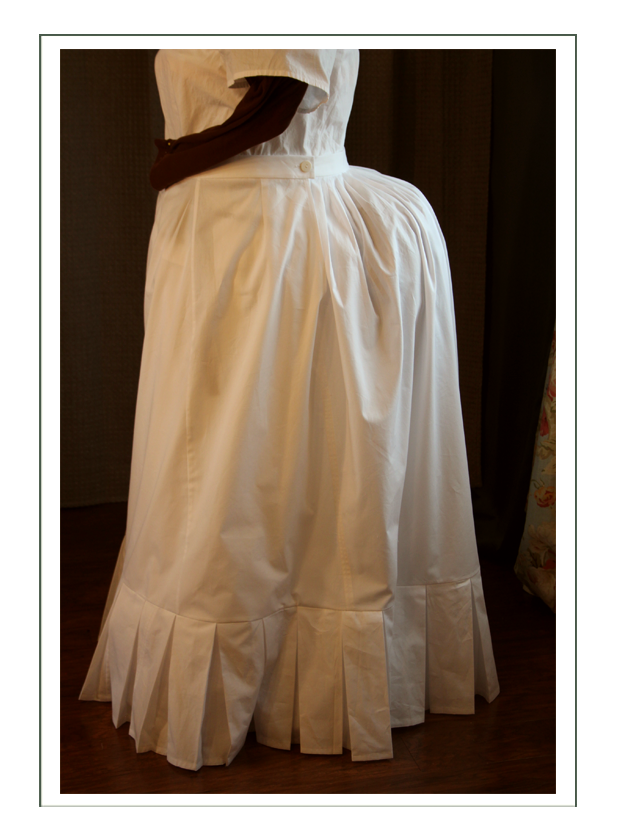
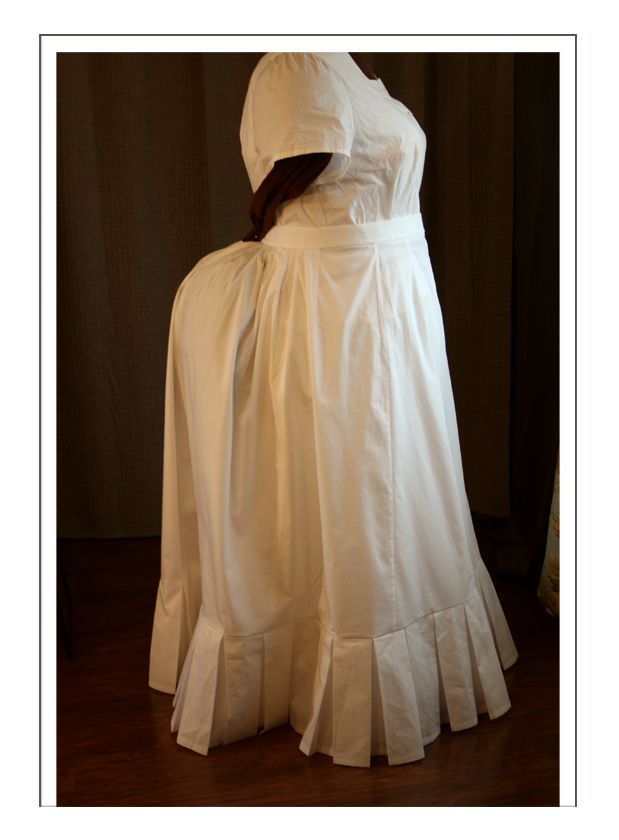
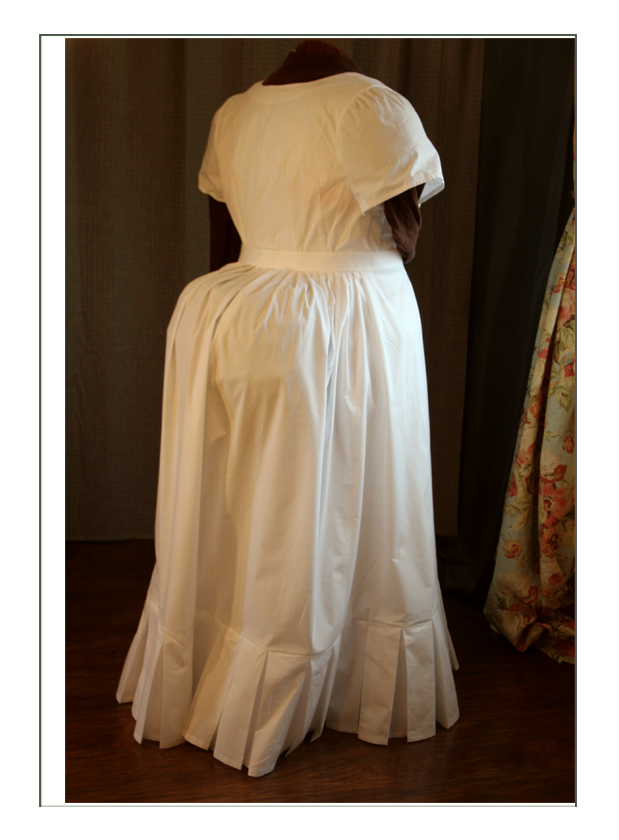
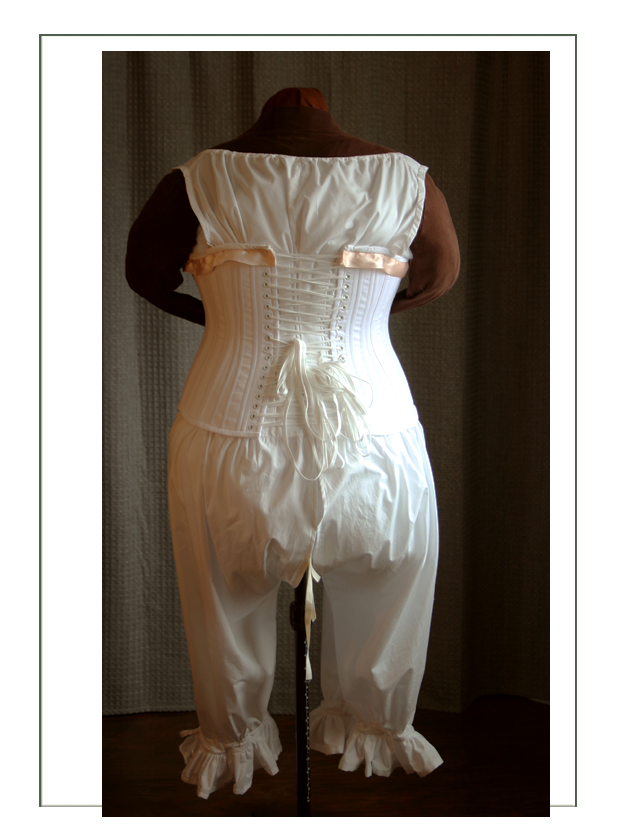
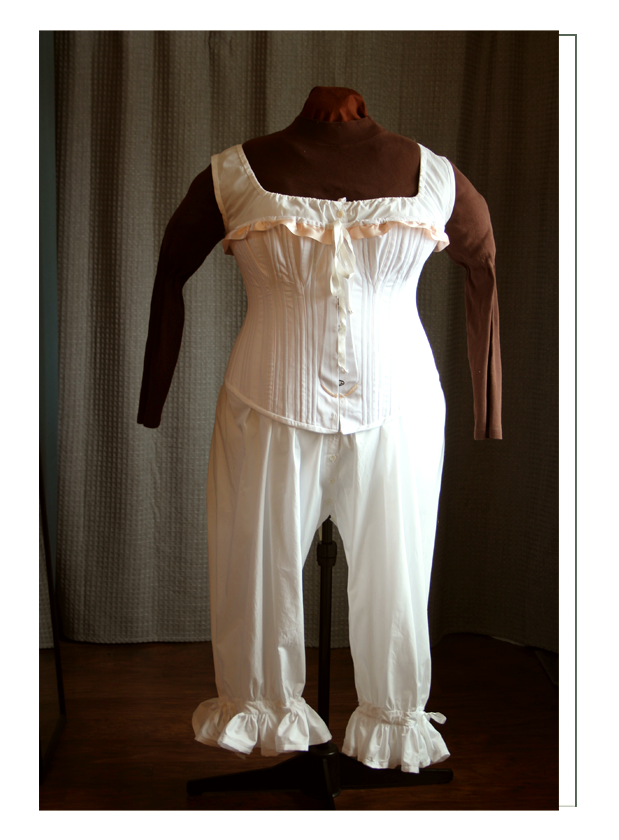
Undergarments
(Some as noted for draping & illustration as Melissa is using her own combination and corset)
All Together
(Bustle shown white is metal reticulating in order to show undergarments, and as an alternative plan. Final bustle will be white silk padded)
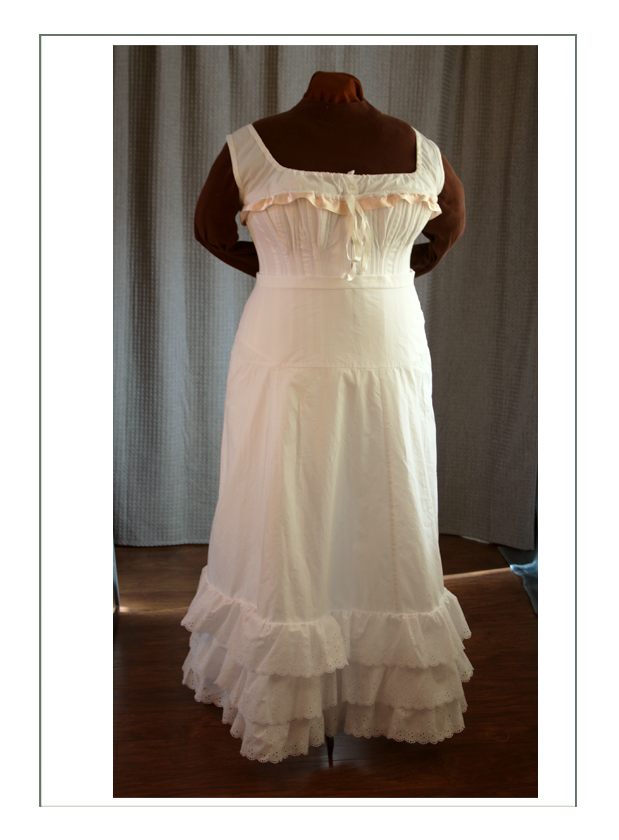


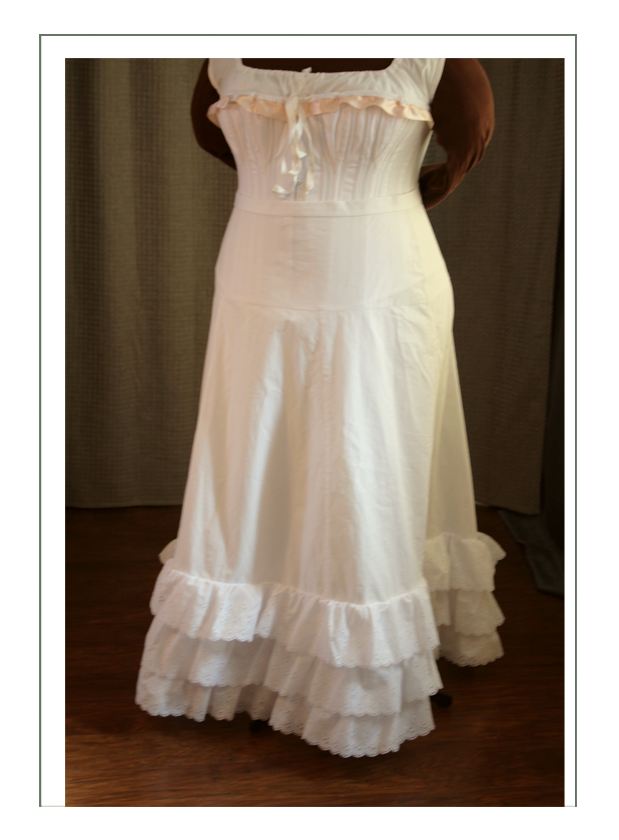
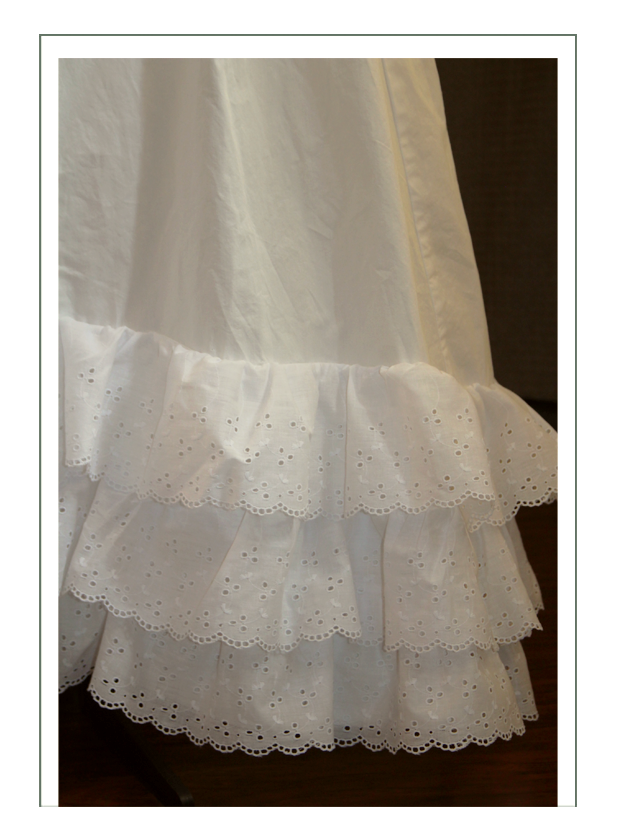
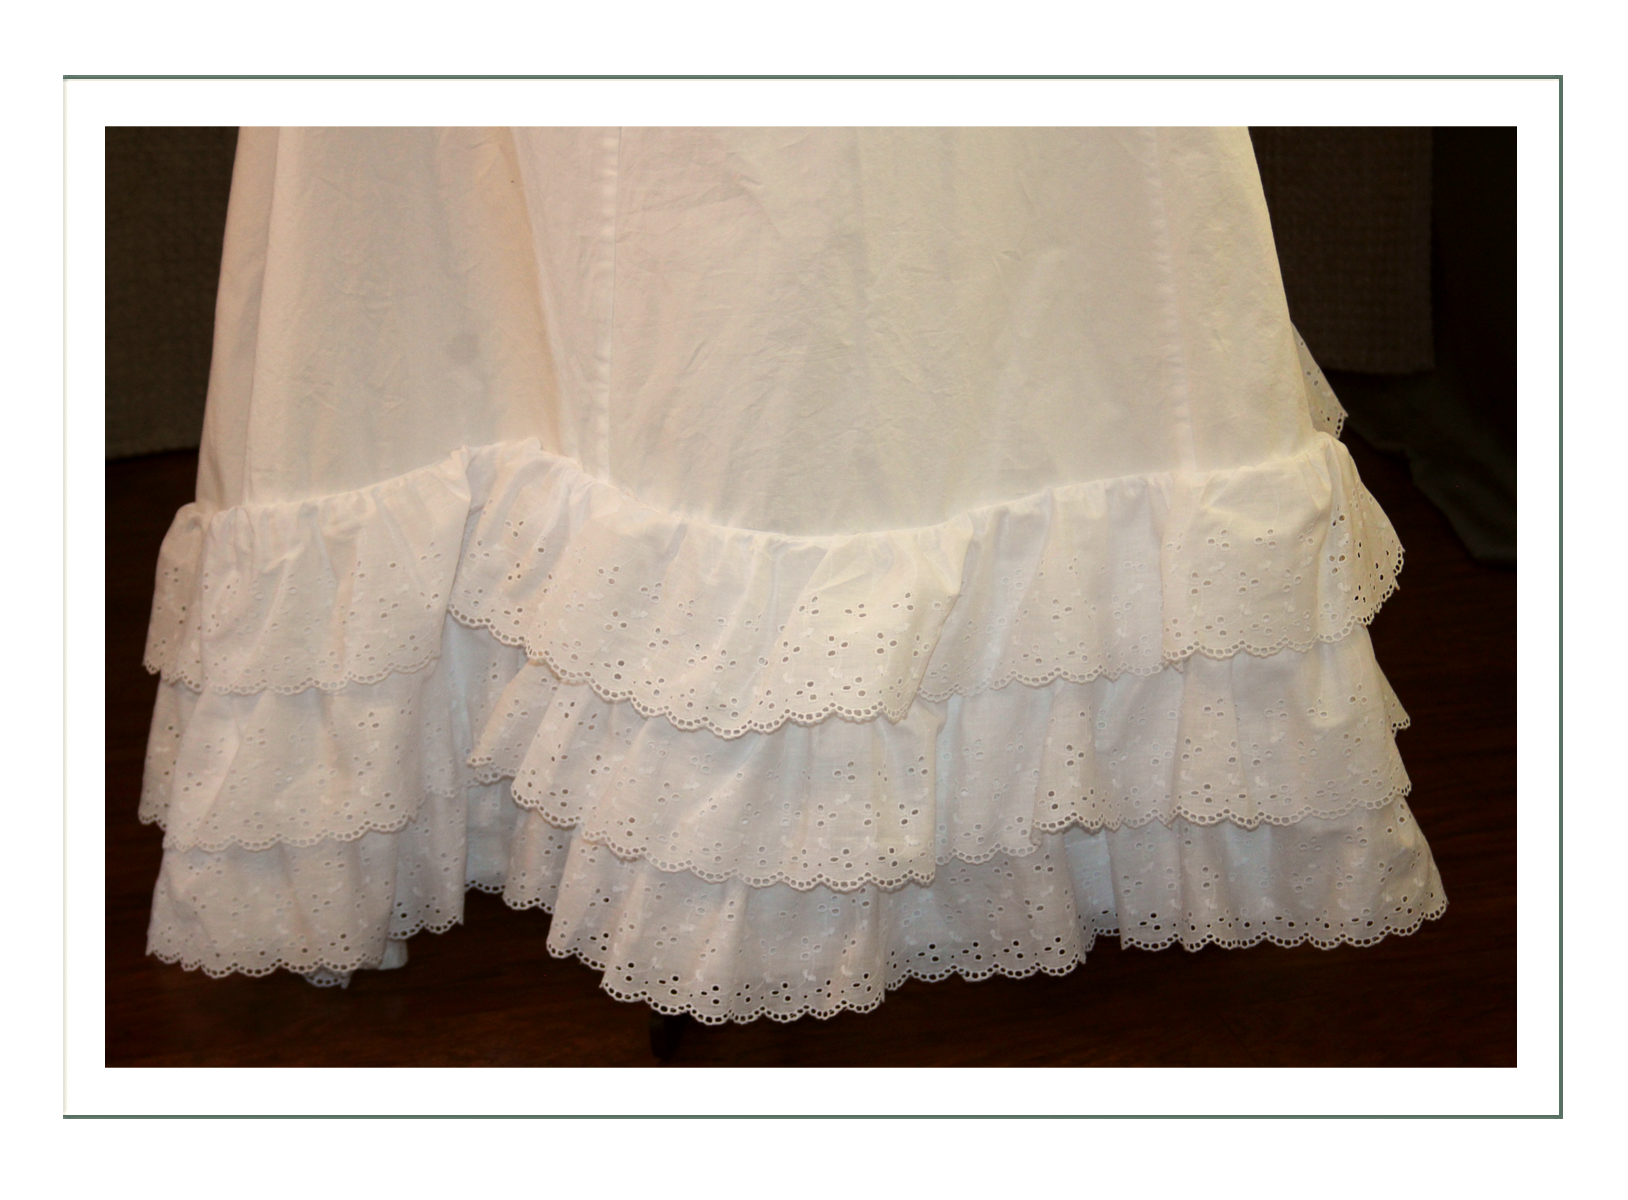
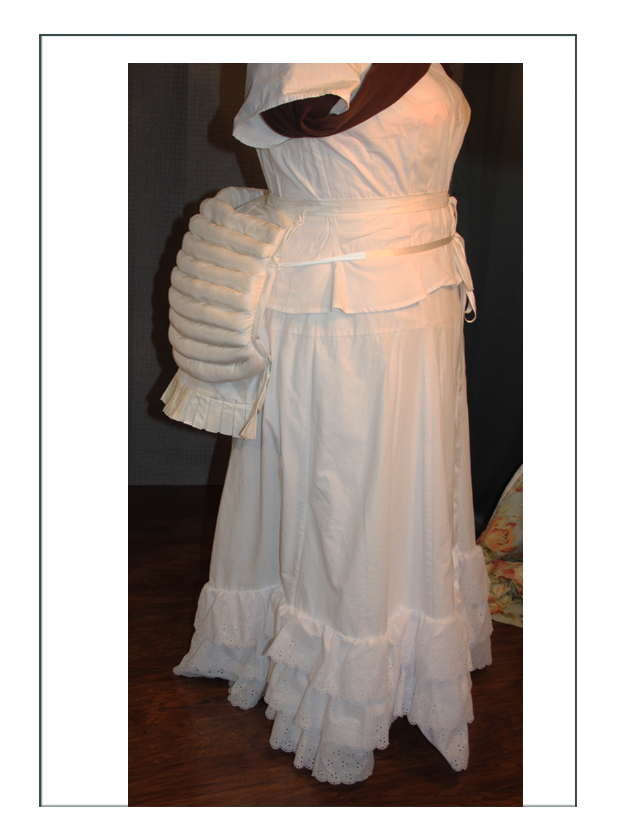
Petticoat
We threw this together out of sheeting and added 3 layers of cotton broiderie lace. Note the fullness is specifially placed to augment the desired silhouette. It also makes the petticoat “swing” in a really pretty way. This one is 100% cotton and has a slight sweeper train because the skirt will have a slight back train too. You can see with just the petticoat the overall silhouette we will achieve when it’s all done.
This has two tapes in the back inside that pull the front back so the front is smoothe and flat. That’s why there’s a little “divot” on the sides.
Corset Cover
100% cotton this is necessary to protect the outer garments and to be a sweat barrier so the rest of the ensemble never needs washing (except the combination). This has real mother of pearl buttons, cotton interfacing, and is very basic and oh so comfy.
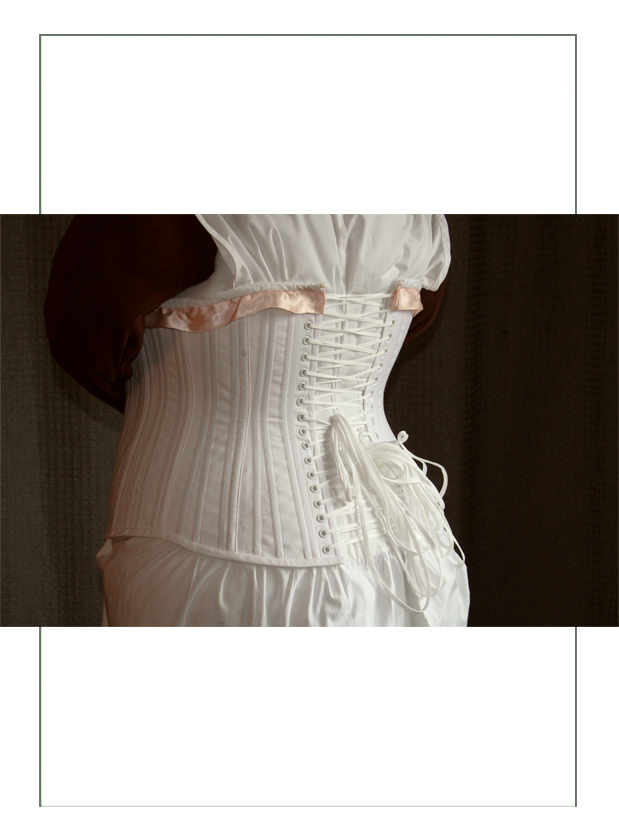
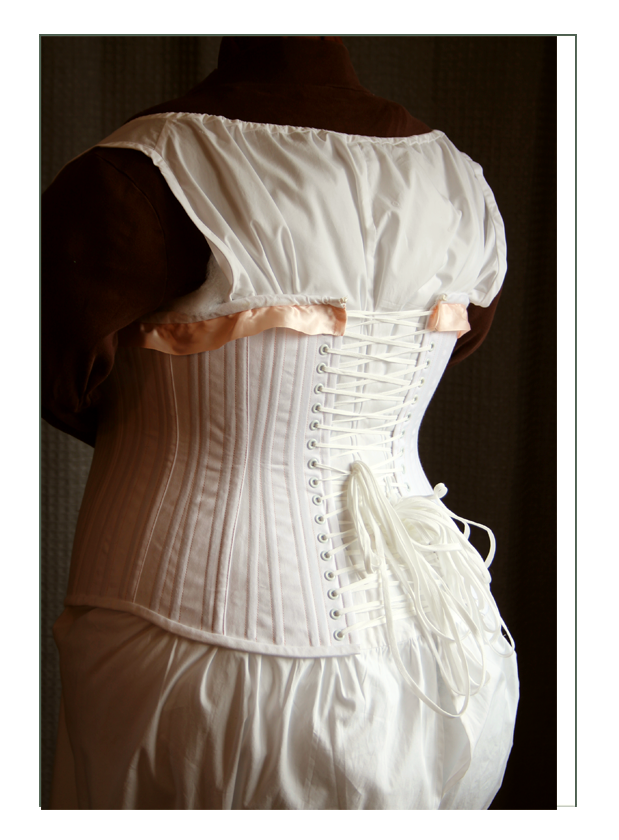
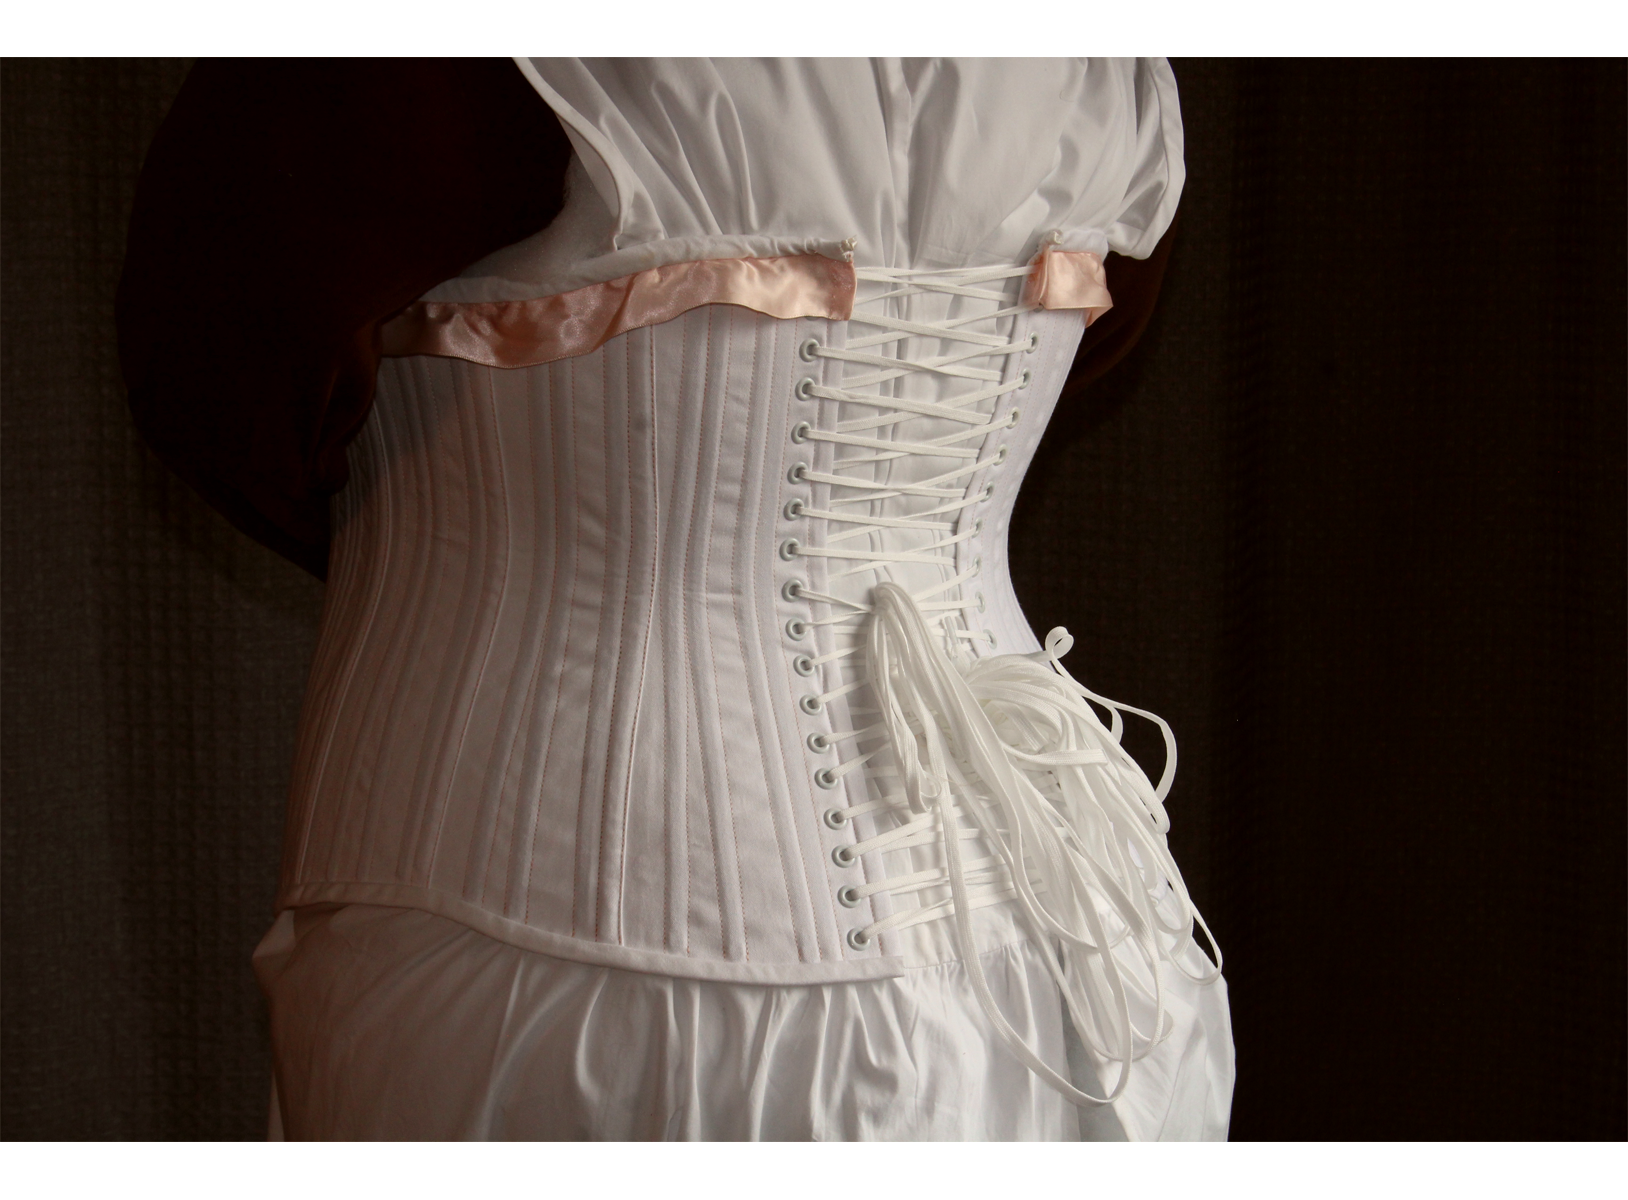
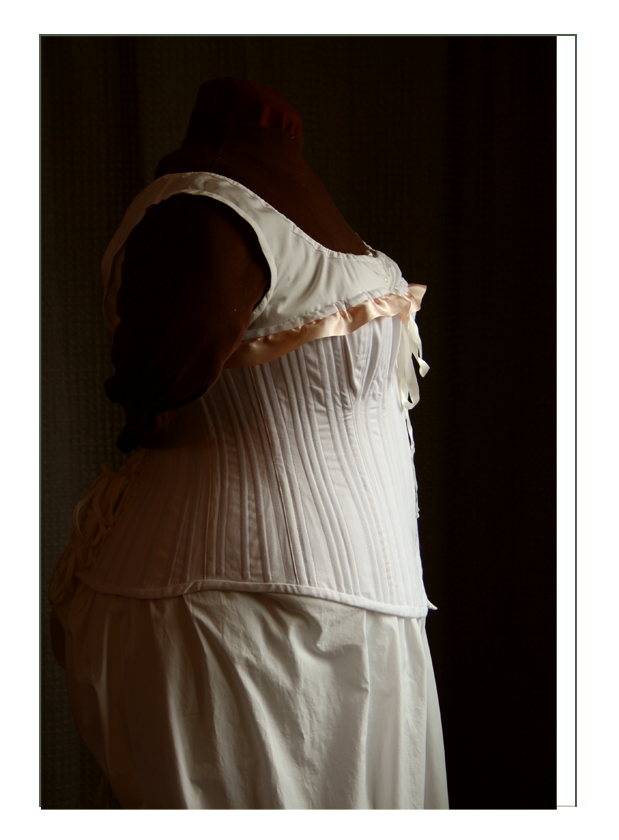
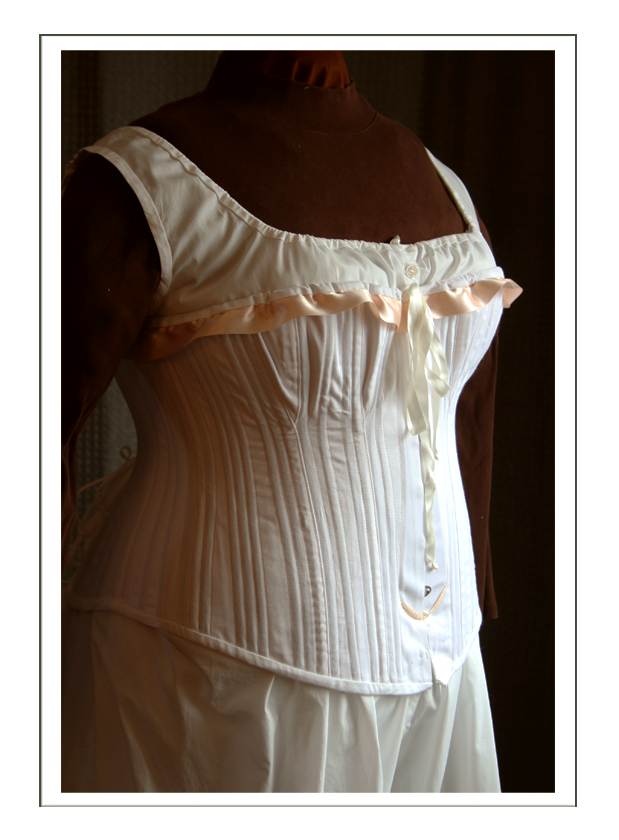
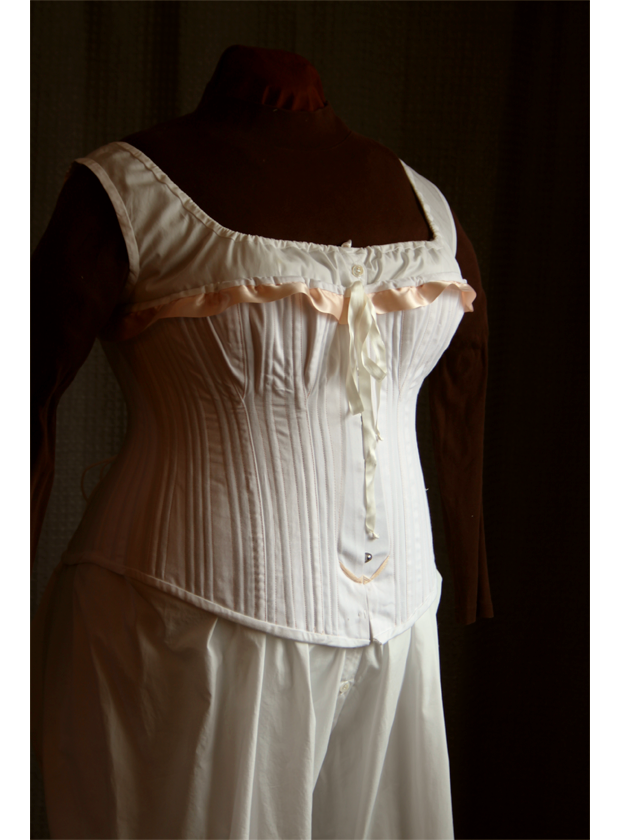
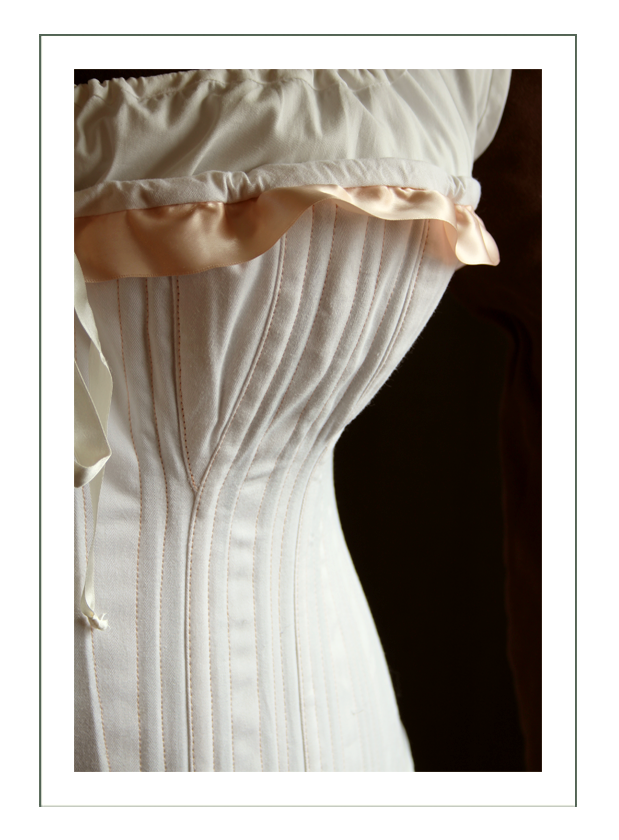
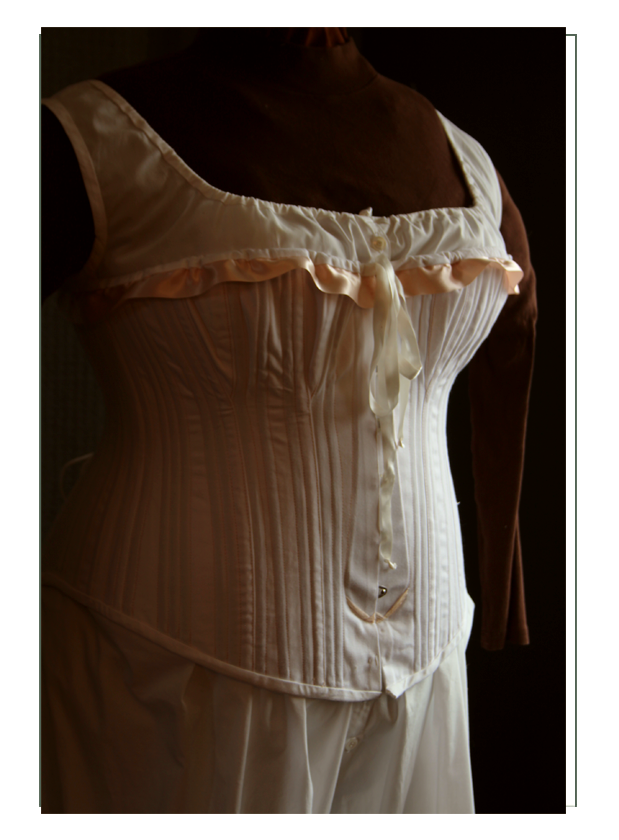
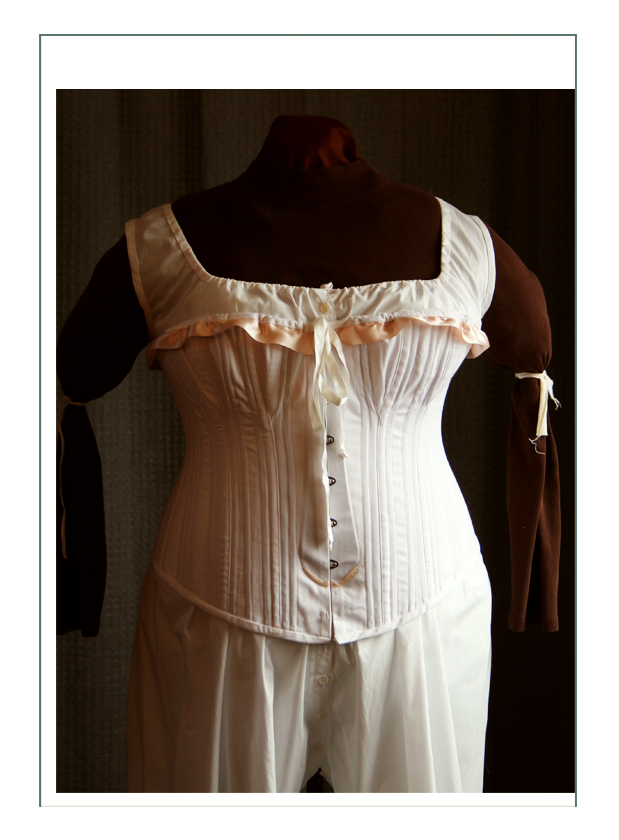
Corset
Built out of two layers of heavy coutil corset fabric (100% cotton), this was built just for draping and to demonstrate to Melissa the difference between a heavily metal boned corset and a lightweight plastic boned one. This is build with “D” cups which can be worn as shown or padded out to fullness (to improve saleability since our intent is to offer this for sale to the public after the project is done). Unlike our competitors, we build bust and hip gores as historically correct; this with two bust gores for optimum support and lift for big gals.
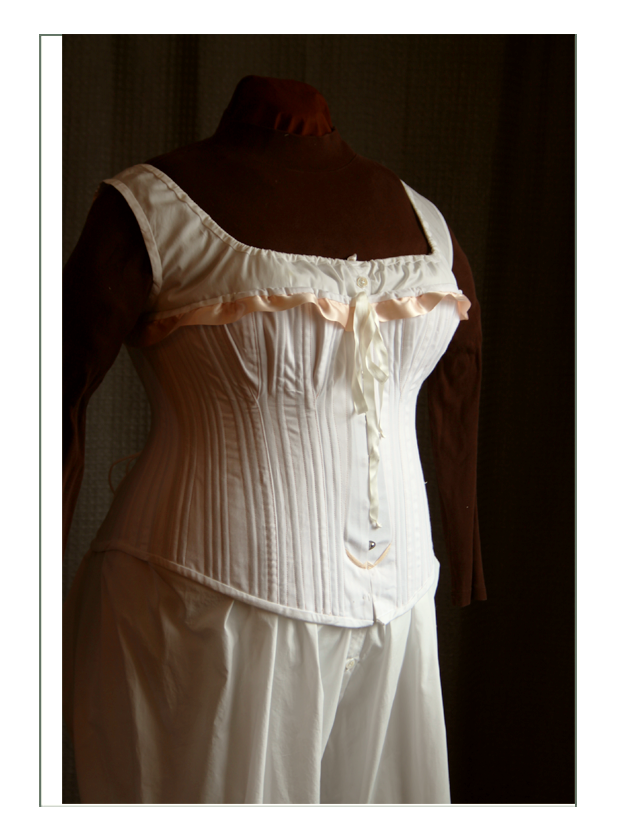
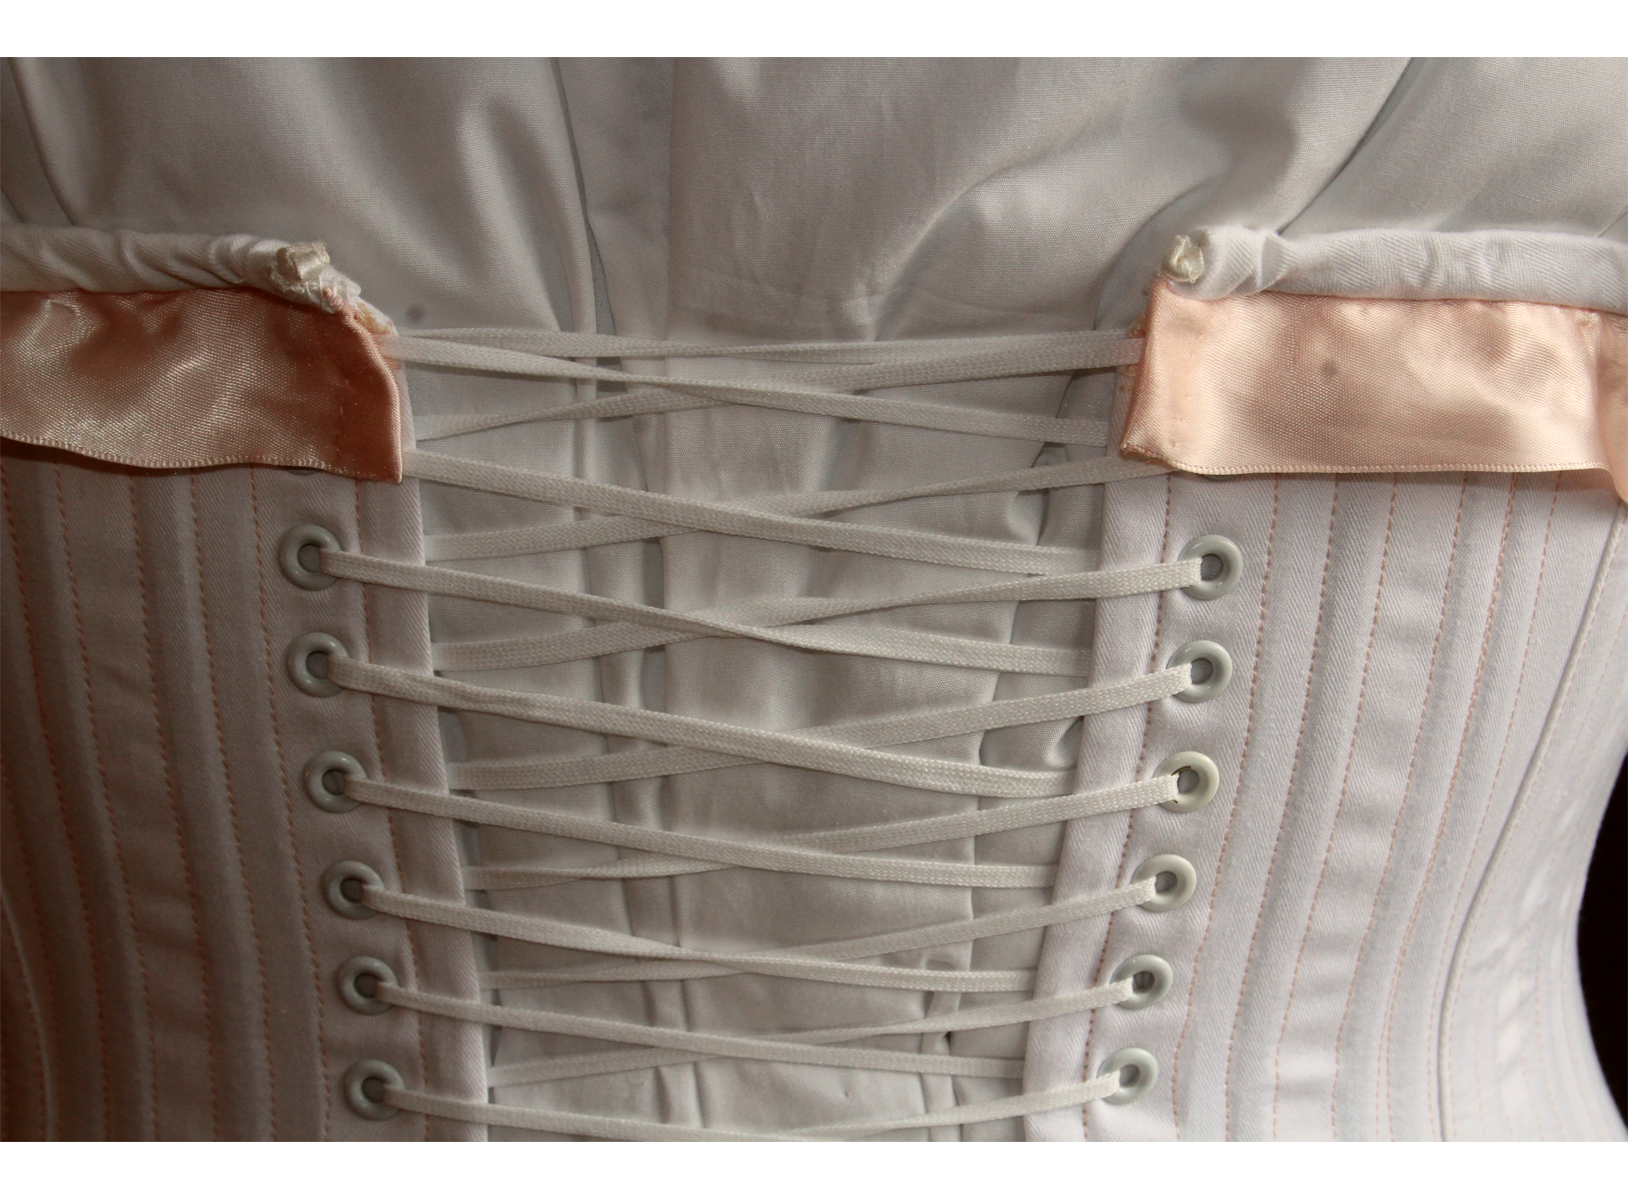
With this particular double lining technique, a waist tape to protect heavy cinching is not necessary. This can take great strain, and for that we use double synthetic long laces. The extra long laces (you see tucked up will assist with the fullness of the back of the skirt) allow a person to lace themselves by pulling the cords to the front where you can see in the mirror.

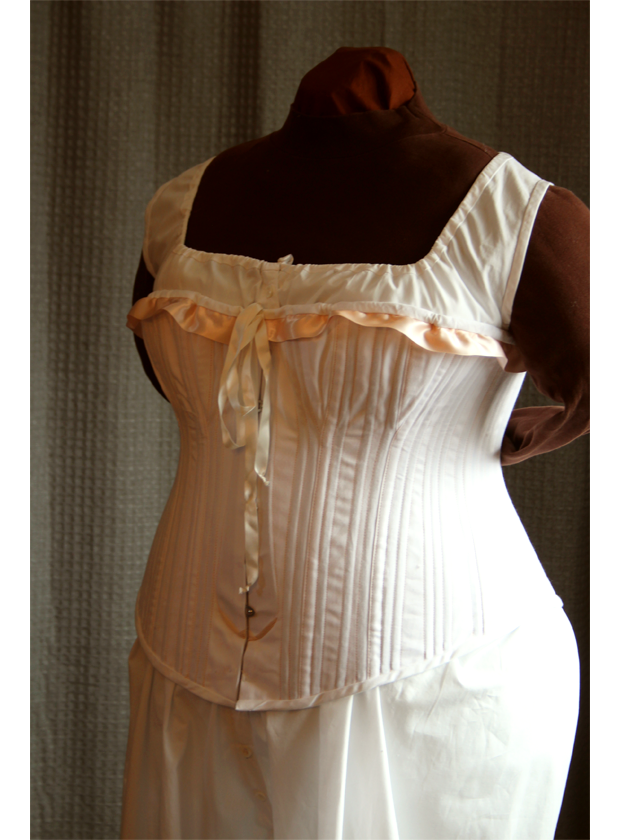
The other feature is a heavy metal spoon busk, which tucks the tummy in so there is no ridge showing under the skirt in front; very important to women of the 1880’s. This one is a bit shorter than typical of the late 1880’s and we’ve added a corset hook in the gap. This is so the wearer can sit down and drive a car; a feature not built in the 1880’s but again necessary for modern people driving to events. That way she can drive fully laced (dress at home) without having to allow the corset to push up to her chin, and can go fully dressed to a performance or event.
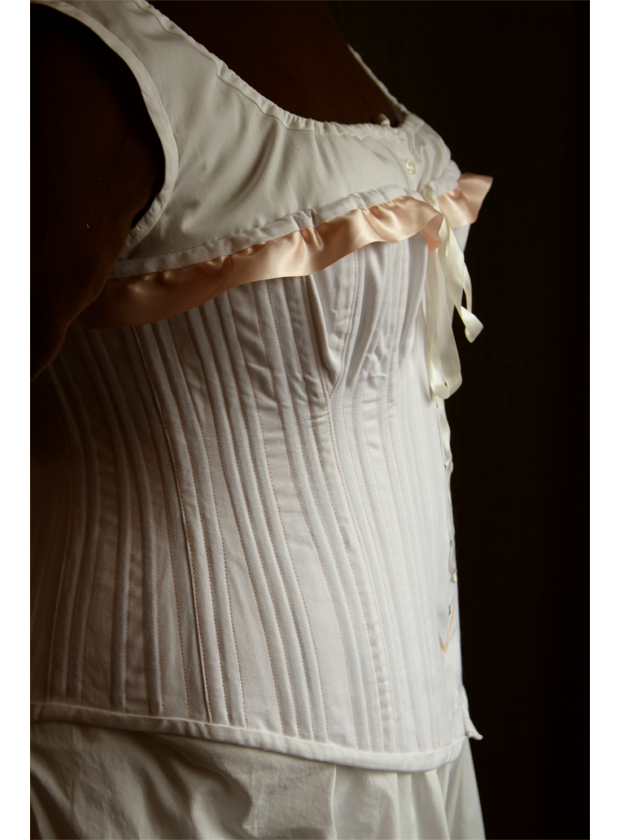
An additional feature most do not build in is the 100% silk satin lacing string around the top of bodice. Different eras liked or disliked the ridge of the corset showing. It’s an easy fix for any era by cinching in the top, and it also allows more flexibility in how much padding is used for the bust gores, how much lift you want, and for more variation in back lacing. With this you can lace loosely but still tie the top down, or you can lace tightly and let the top tie’s hang.
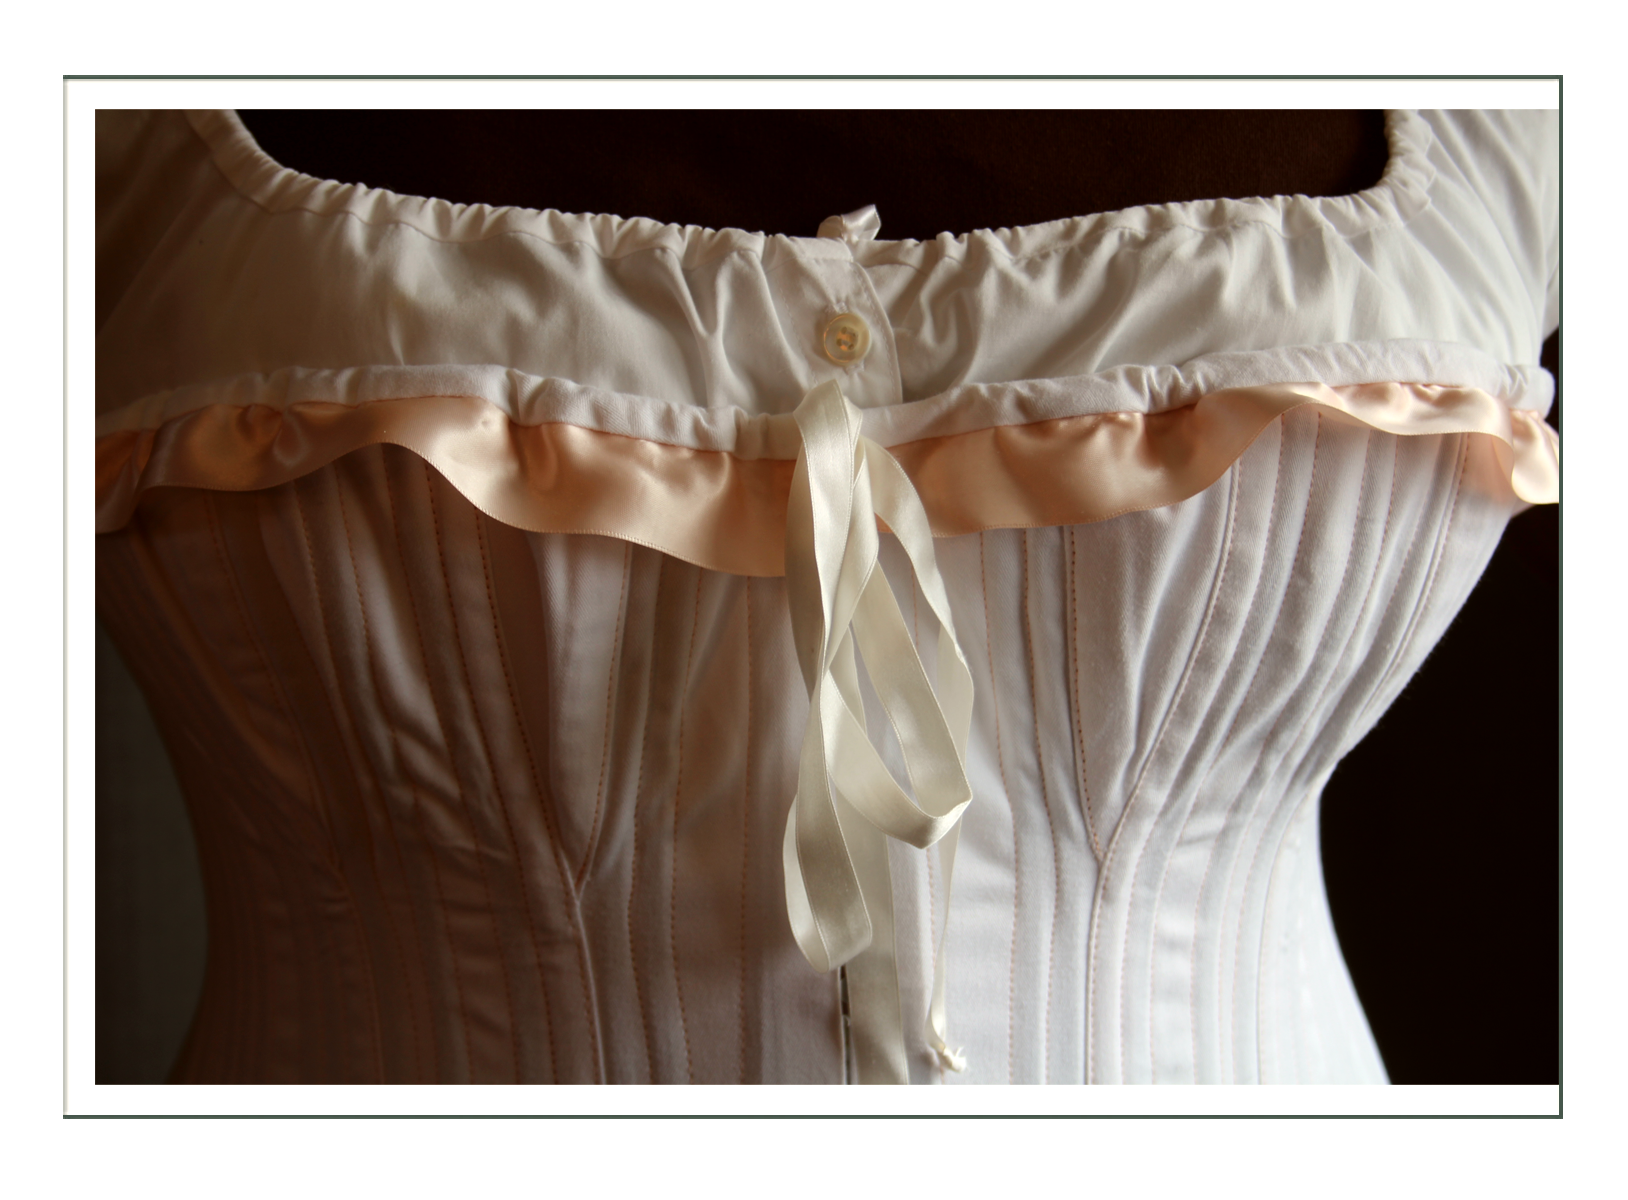
There is also a 100% silk satin ribbon just for fun, and a bit of embroidery at boning tips. We would normally fully embroider ALL the boning tips, but considering this is almost entirely boned corset with lots of boning tips top and bottom, and we just needed it for fitting, so we will do that fancywork if/when we sell it; no need for the many days it would take to do it. Boning channels are sewn in a decorative color to match the ribbon just to make it prettier.
Note the boning is in groups of 3 and no more than 1″ apart. This makes for a very strong corset.

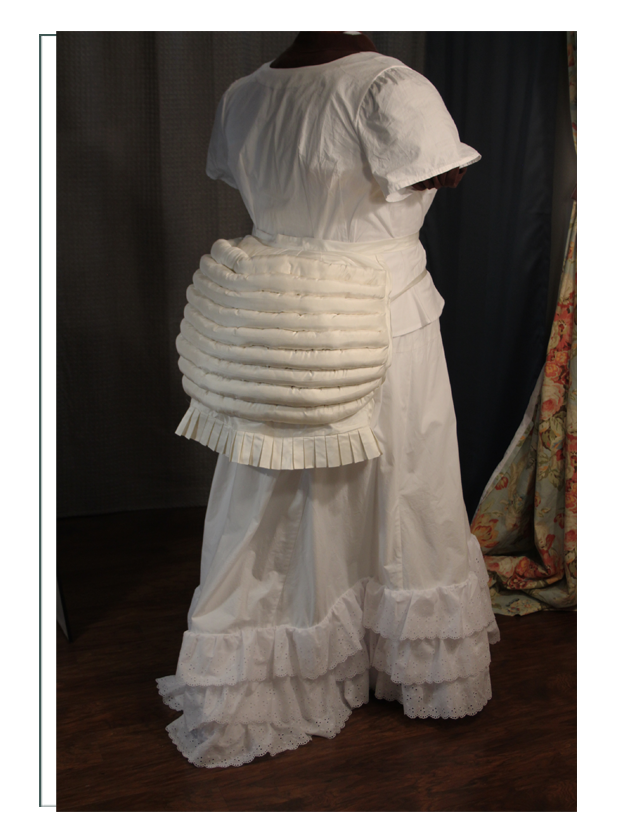
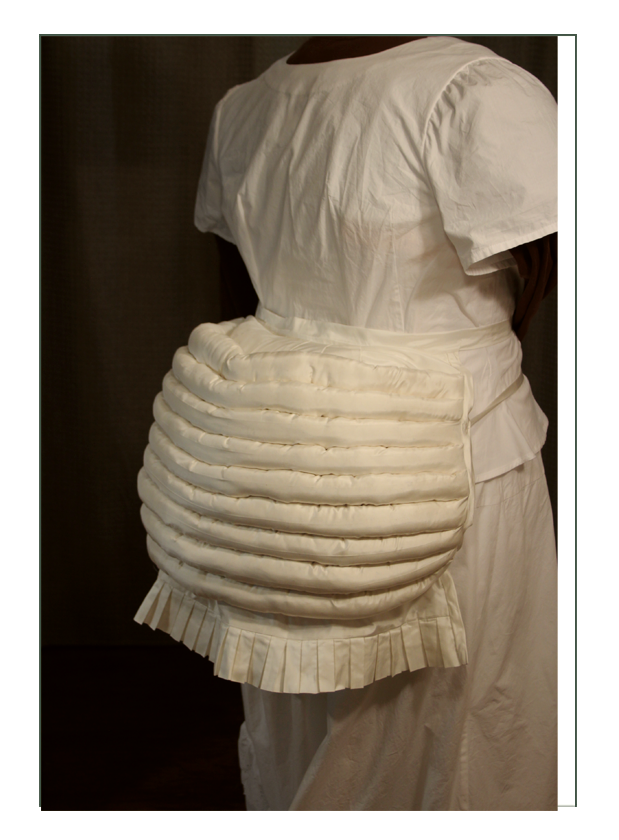
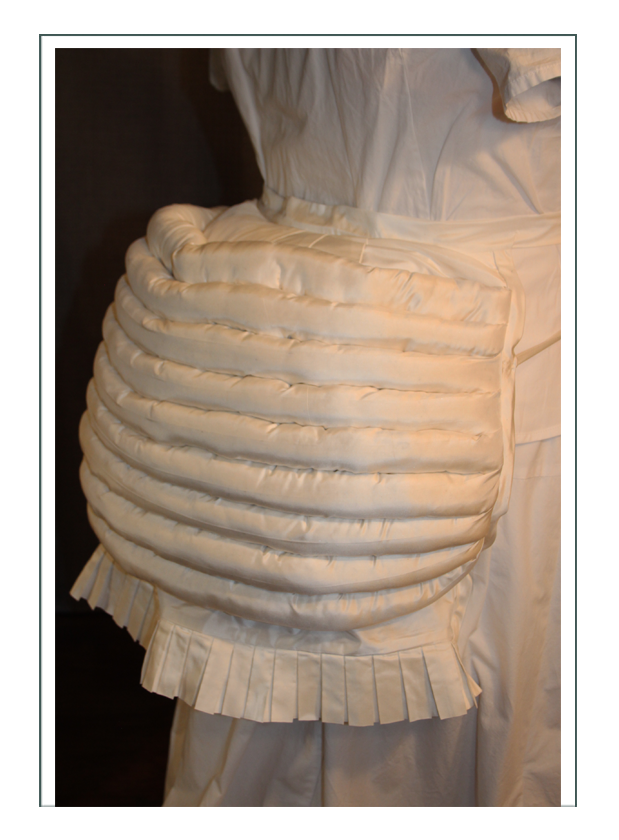
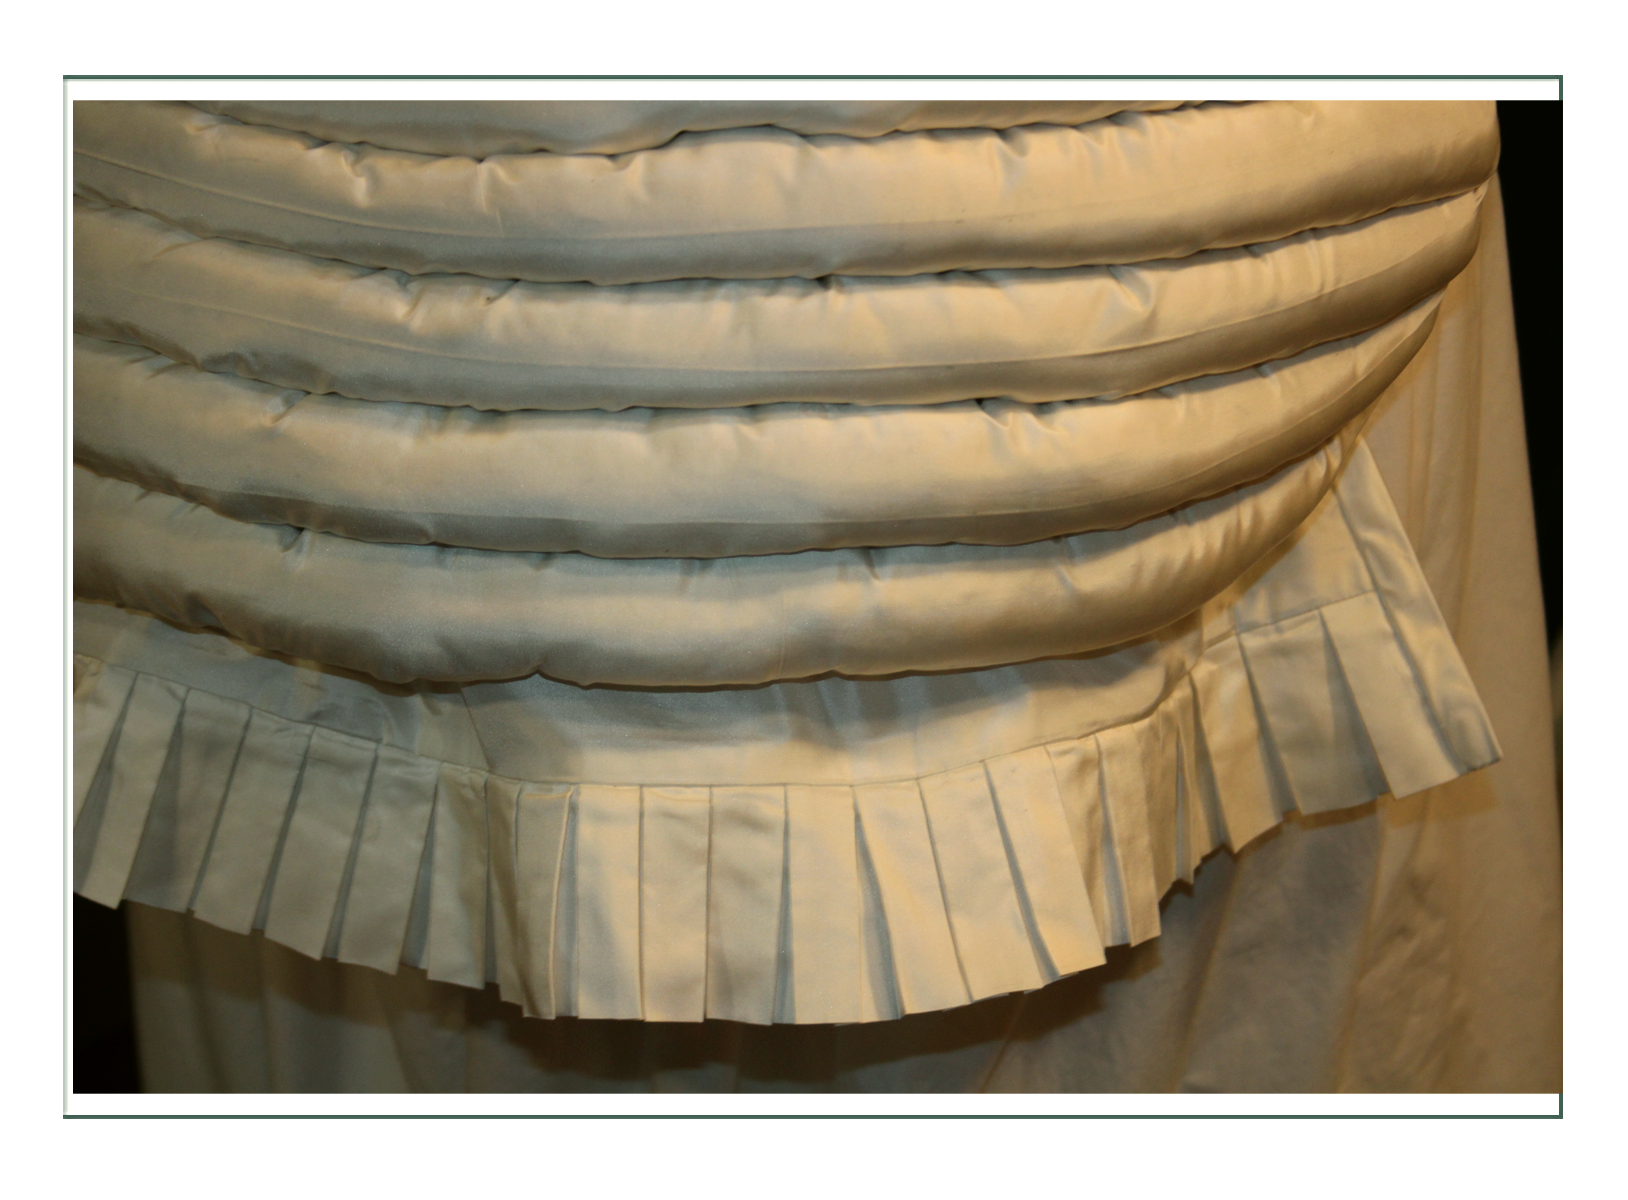
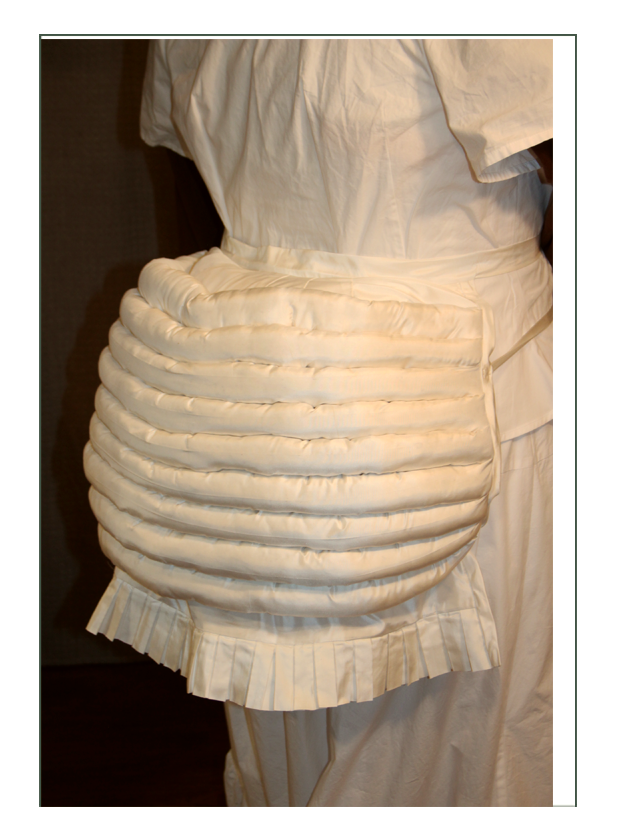
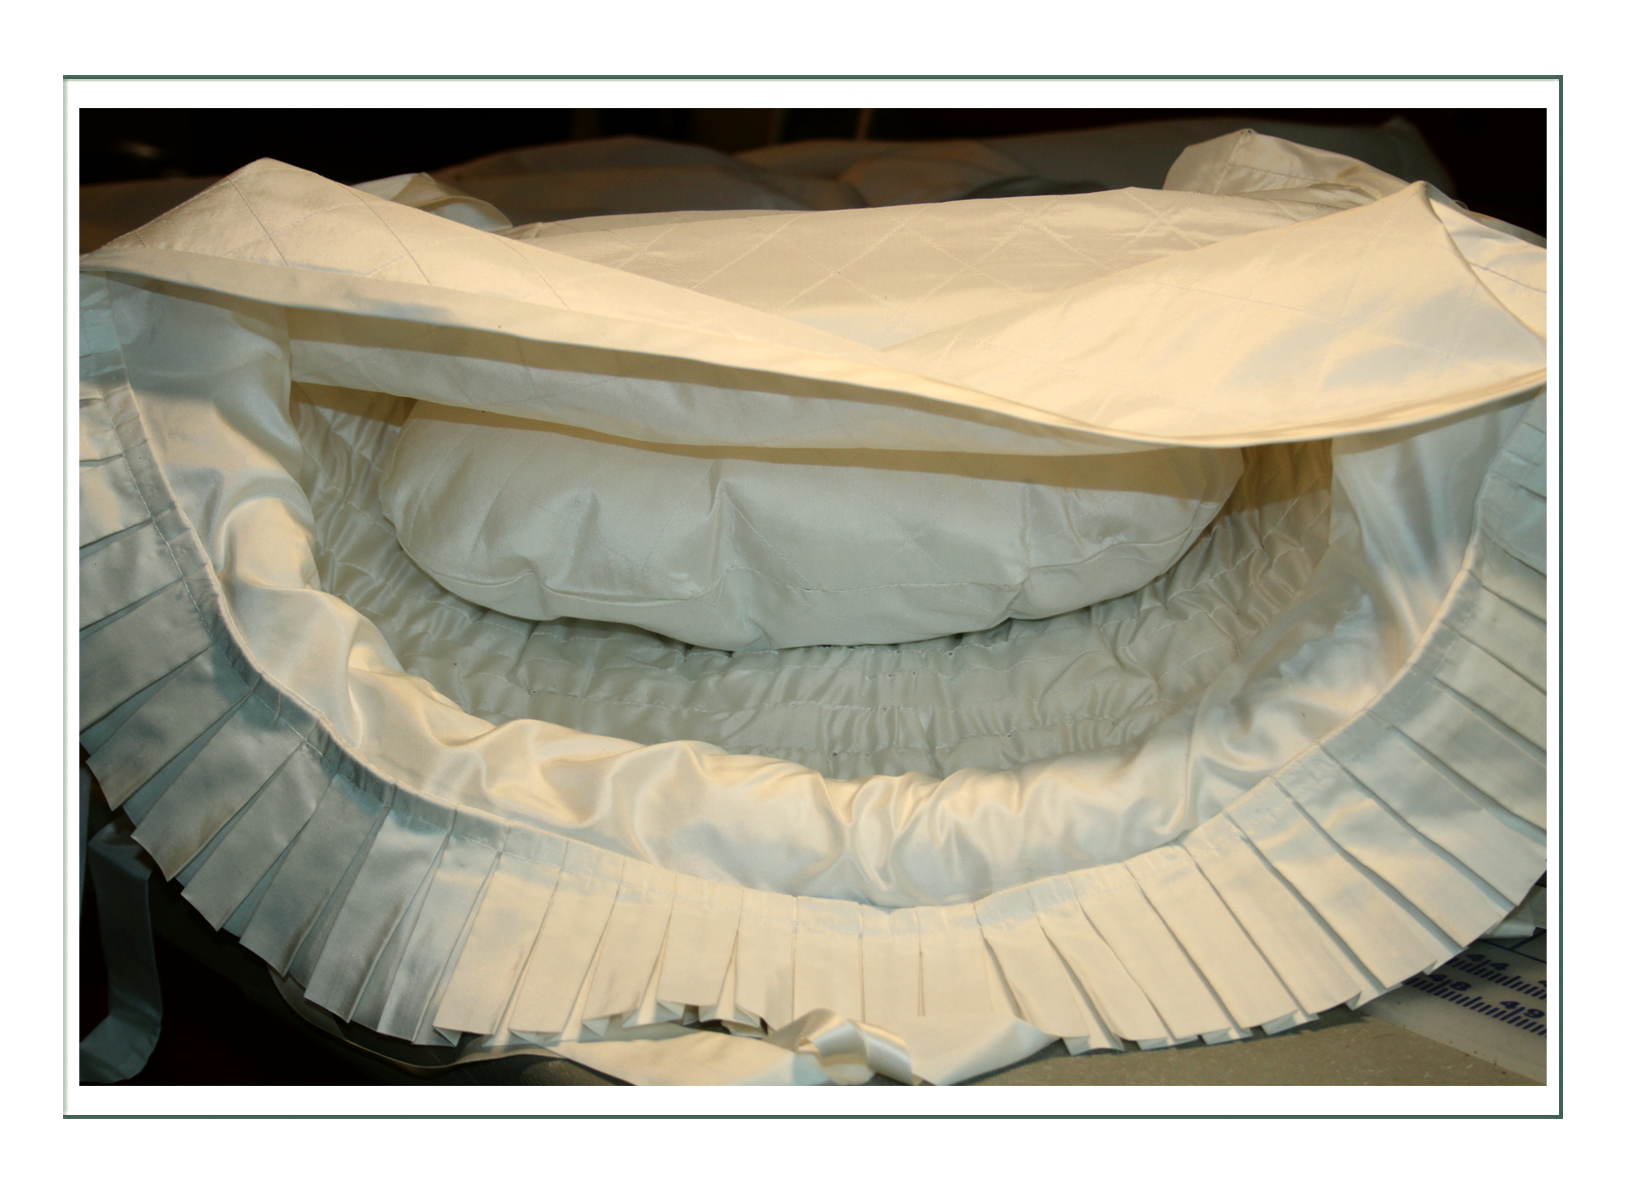
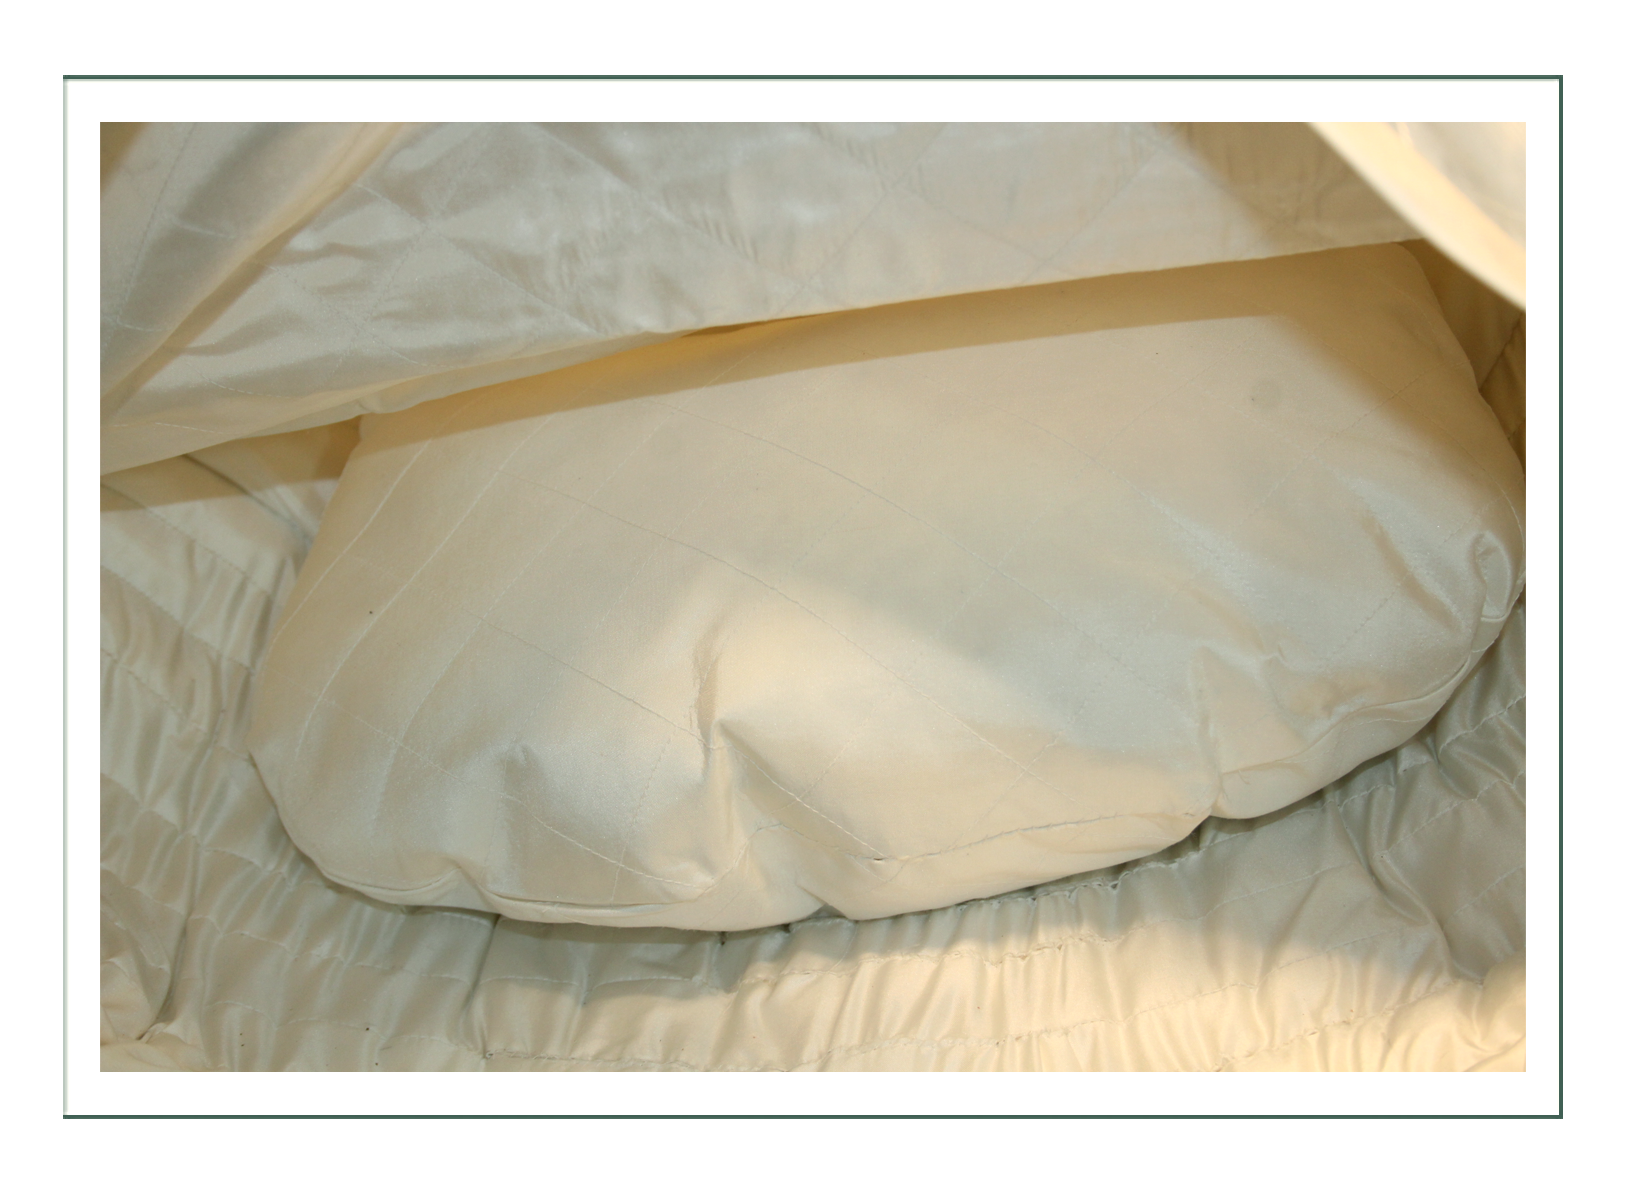
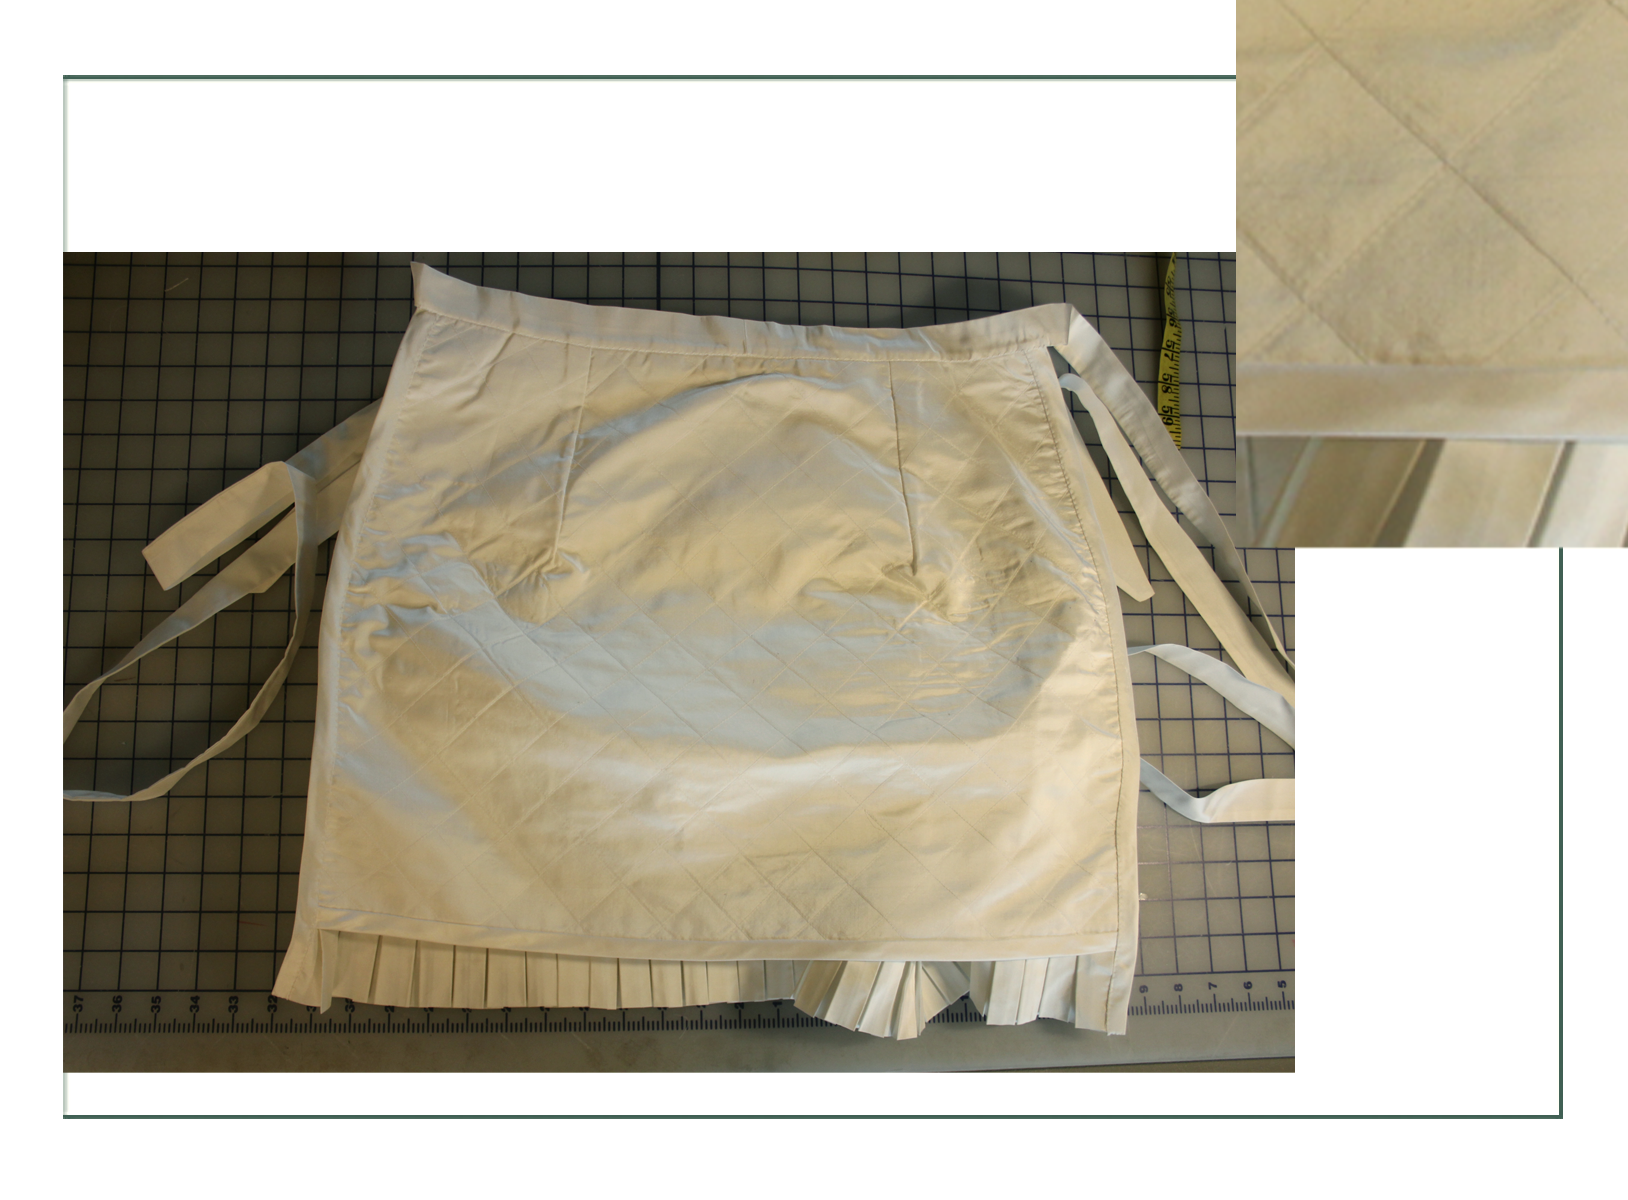
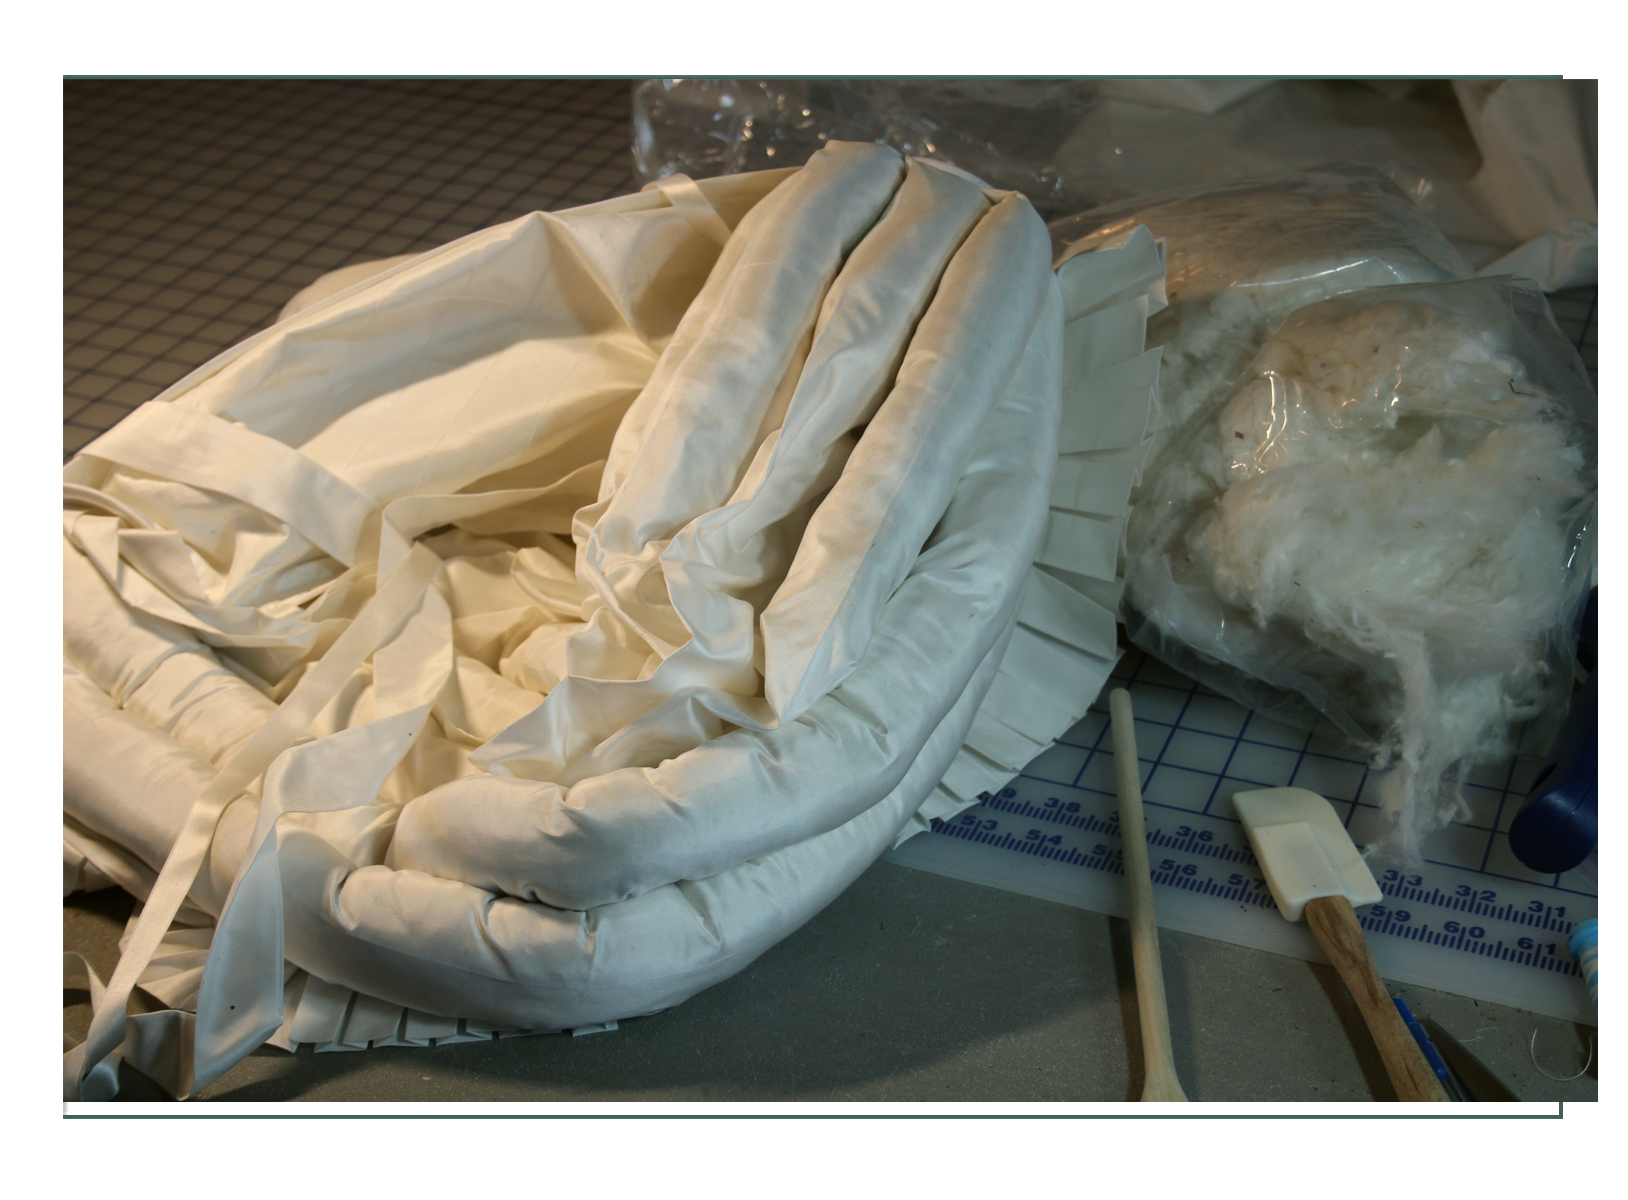
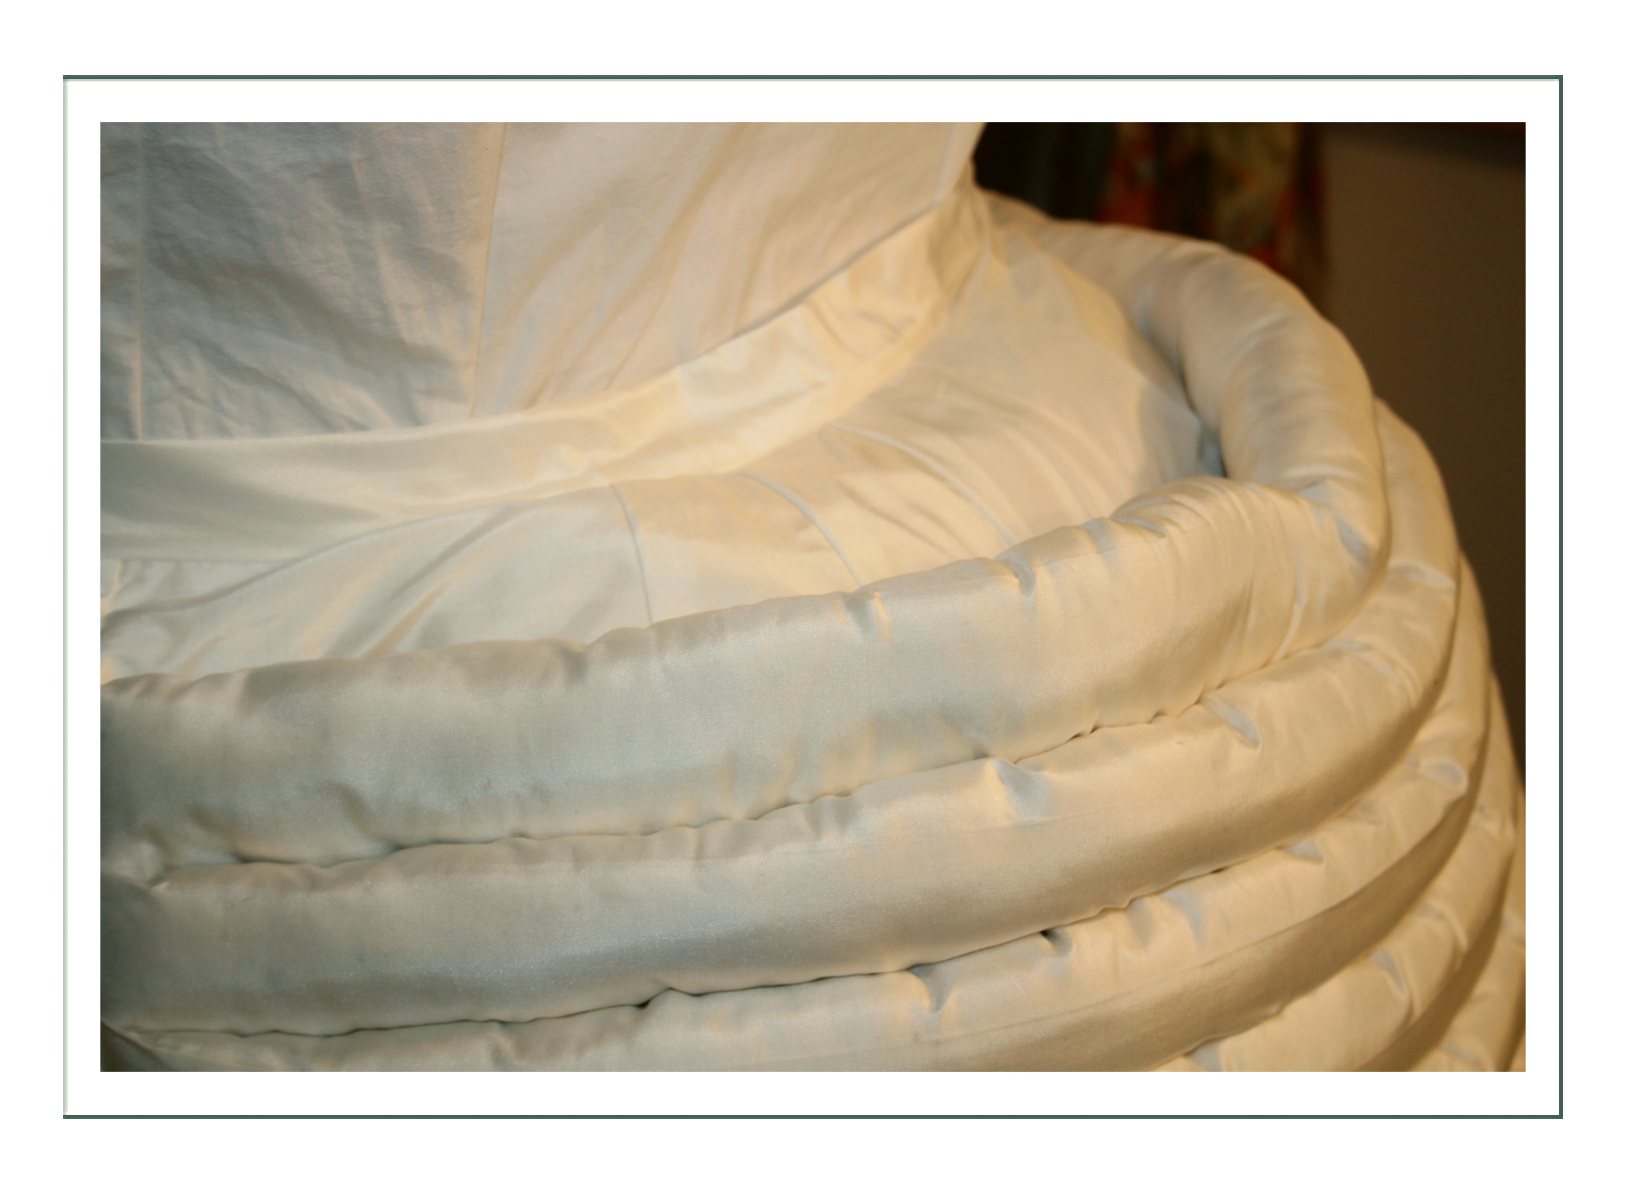
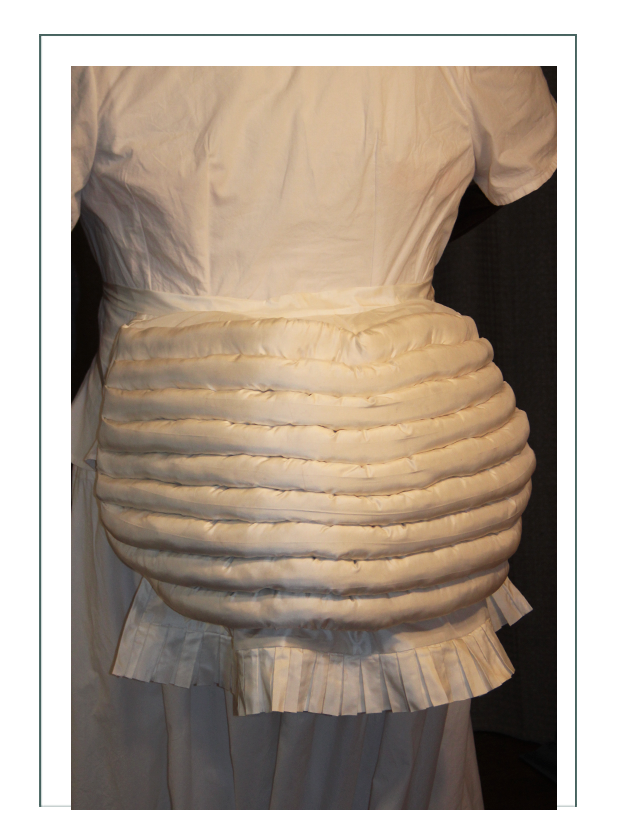
Padded Bustle
This is one of the most comfortable bustles and as Melissa notes a story of a woman who fell down an elevator shaft in Memphis in 1889, “she fell about 30 feet down, but was mostly unscathed, suffering only a sprained wrist. The reason? When she fell she landed on her bustle, and the bustle protected and saved her.”
We like to think with this 100% silk taffeta outer, with double padding (bum roll or rump pad on the inside to keep it from collapsing, and sausage like rolls on the outside) we are not only helping our customer be fashionable, but we might just save her life. She’d still better take care crossing the street with those crazy carriages going as fast as 20 mph though…
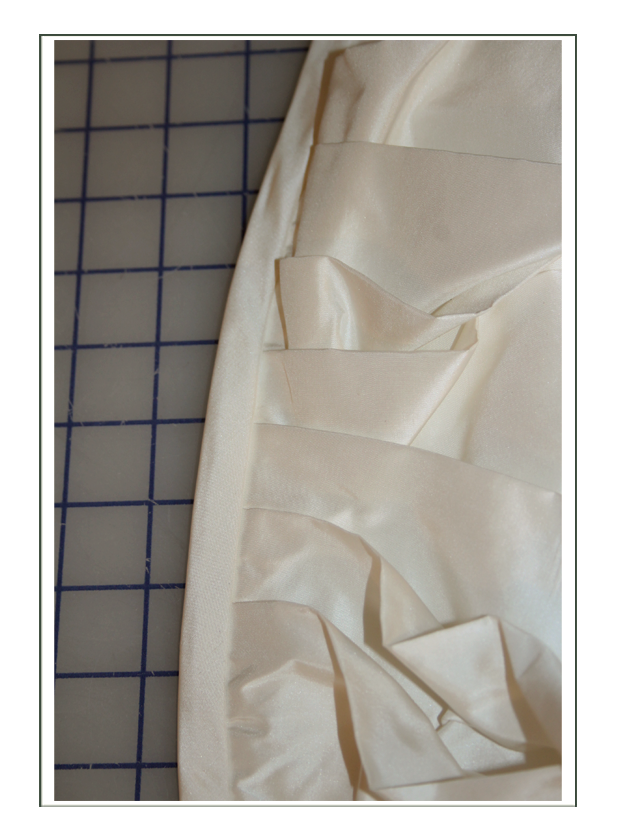
The back which is closest to the body is called the “stay”, which gives it a rigid shape so it doesn’t just flatten out. The stay and padded pillow like “rump” which is integrated inside keeps it from collapsing on itself under the heavy weight of fabrics and copious trims of the late 1880’s. We added a twill tape to carry some of the weight as the 3 pounds of stuffing could pull at the delicate taffeta.
The stays and pad are hand quilted out of the main fabric with an interfacing of 100% cotton for stiffness. This will keep the whole thing from becoming floppy over time.
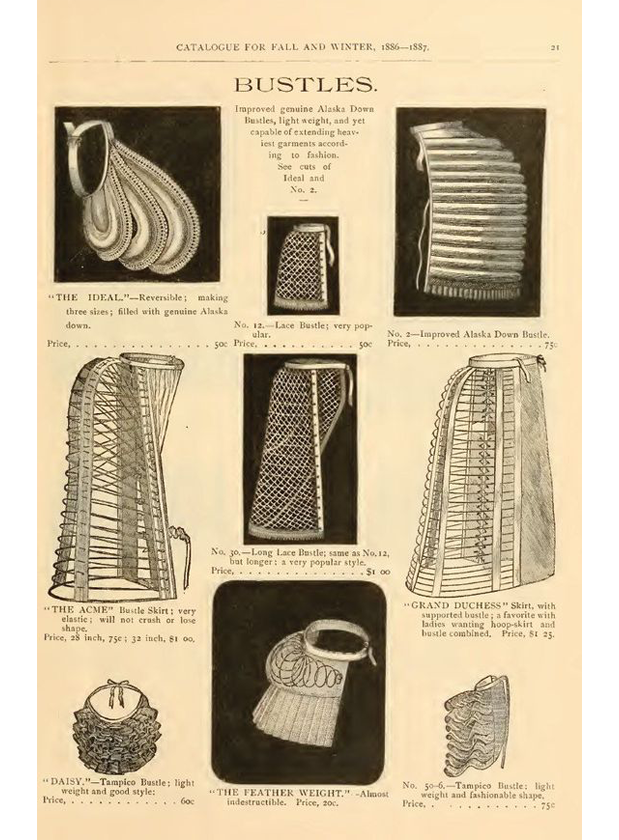
First a quick historic reference with an extant example and catalog pages from the 1880’s”

Finished Product
Note the examples on how to tie to the “side front” so that everything lays flat across the tummy for the sleek look of the day:


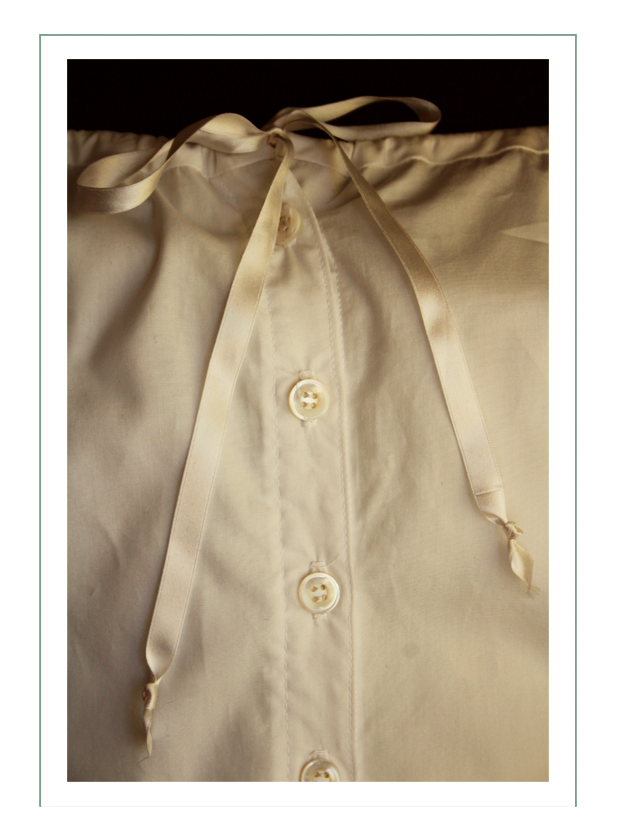
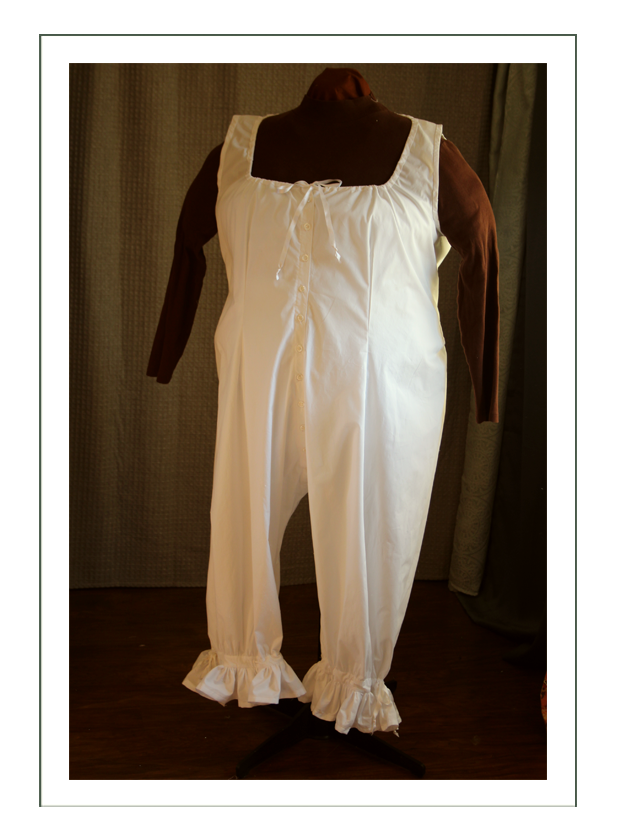
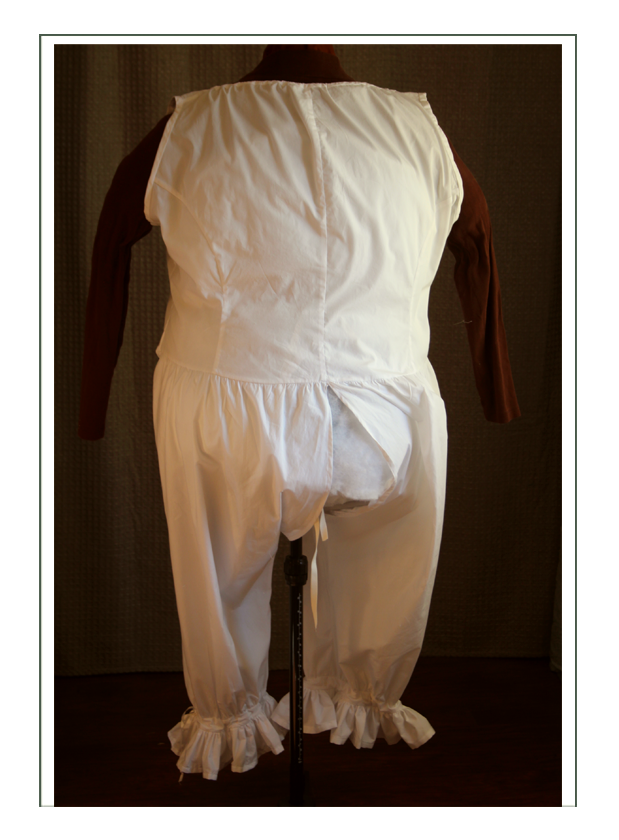
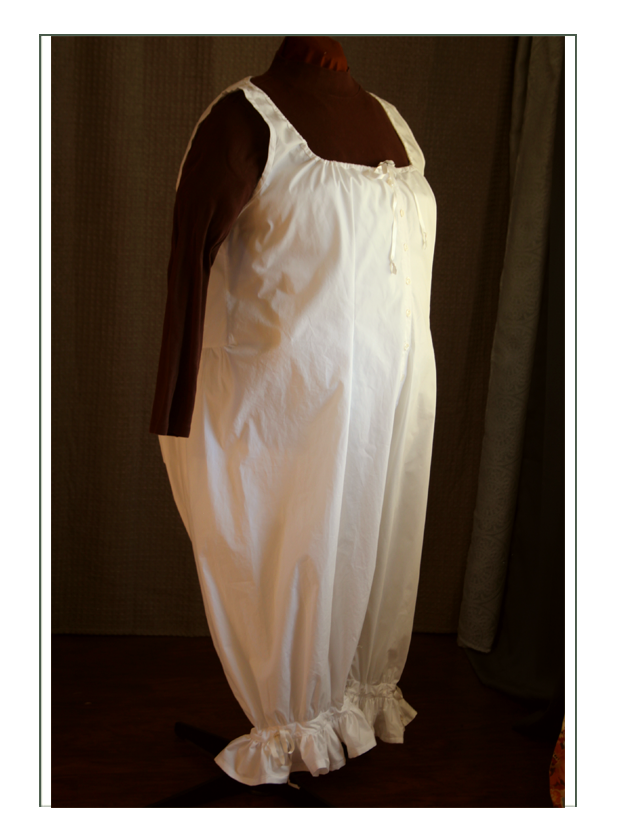
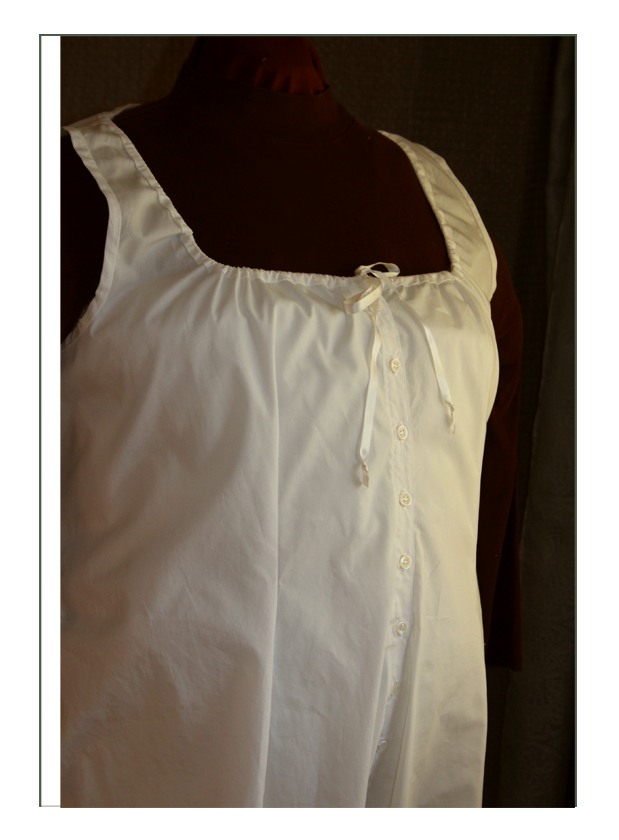
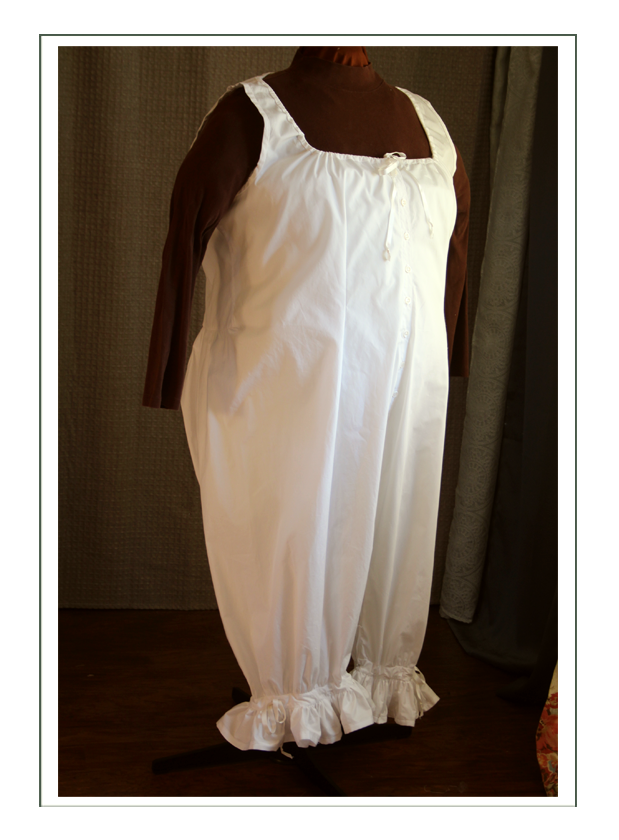
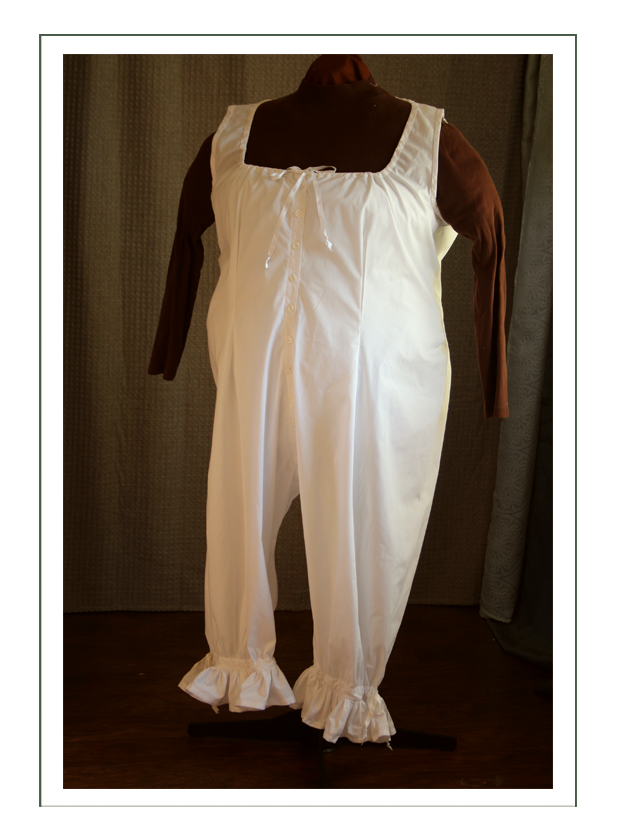
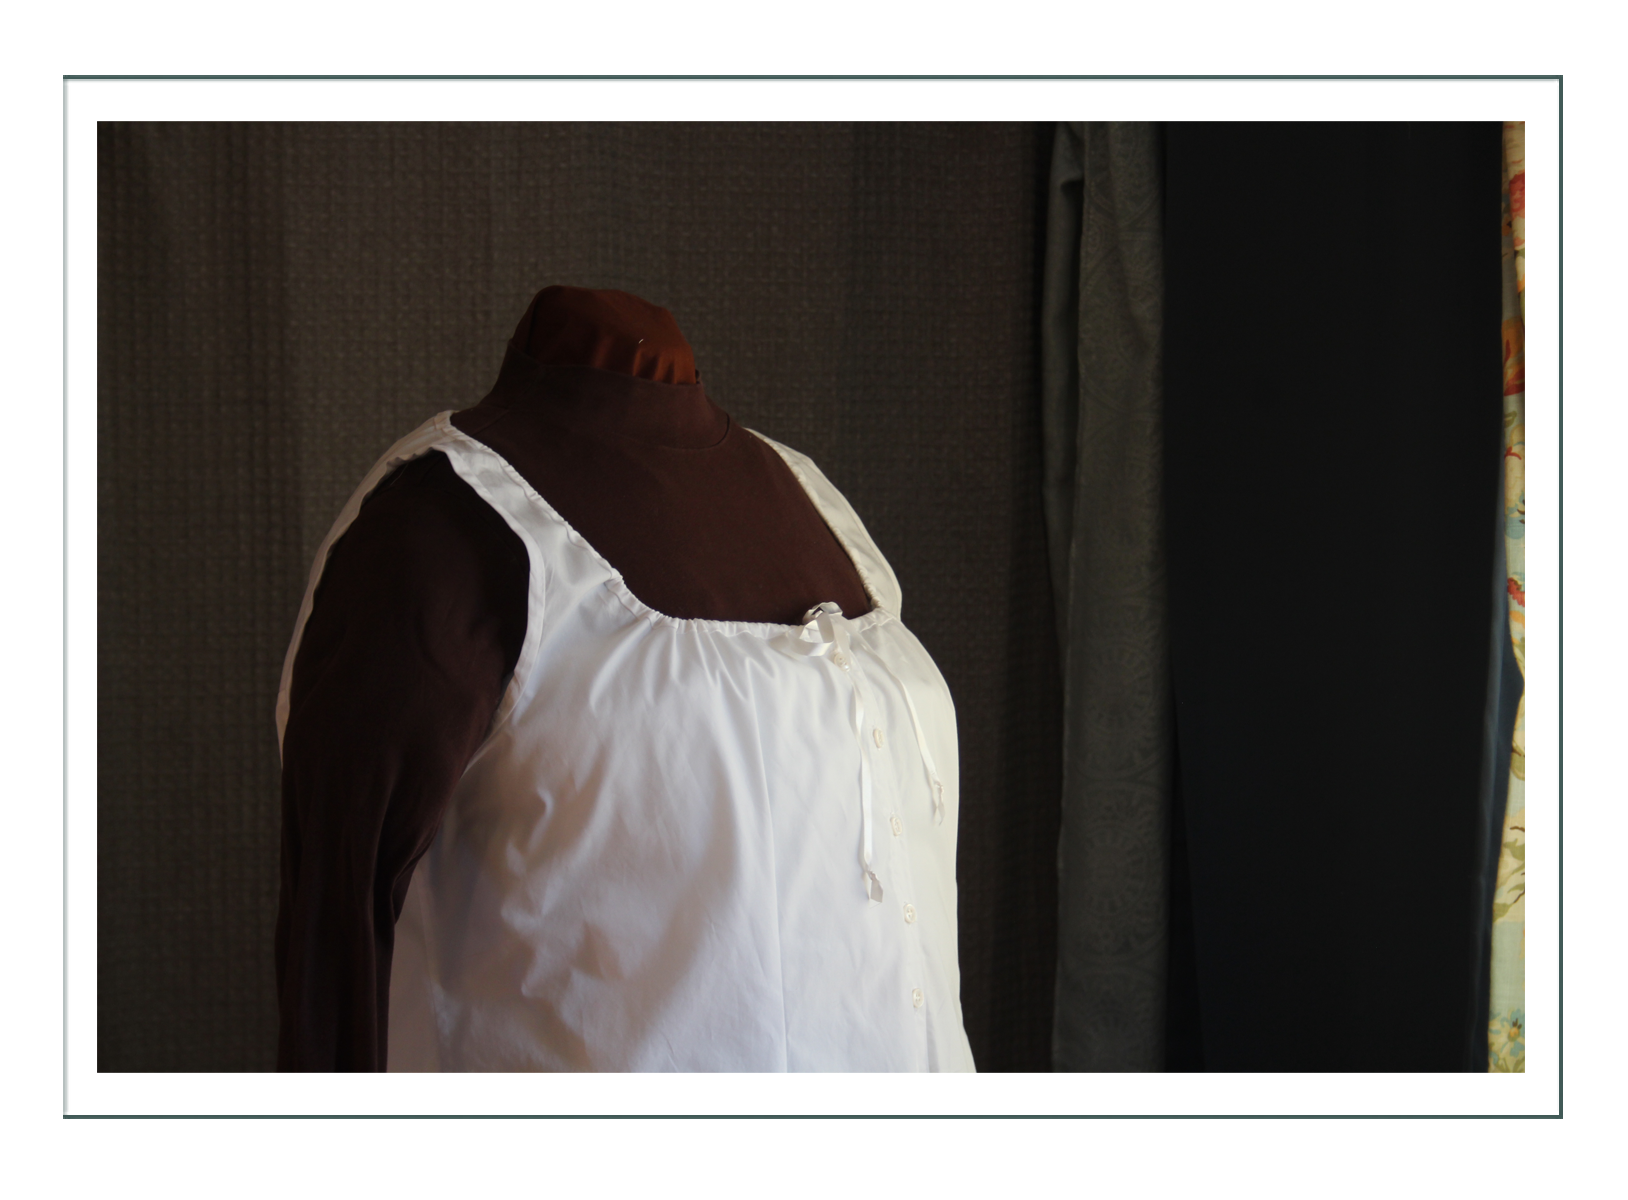
Combination
Hard to photograph since the dummy has no arms or legs, in reality on a person a combination still looks weird like a clown suit, and looks much better under the corset. This is the chemise and split drawers “stuck together” in order to eliminate bulk through the waist and front of the skirt. Women would buy them like a big sack from a catalog and then fit the darts to be closely conforming without being too tight. They didn’t want any bulk under the corset.
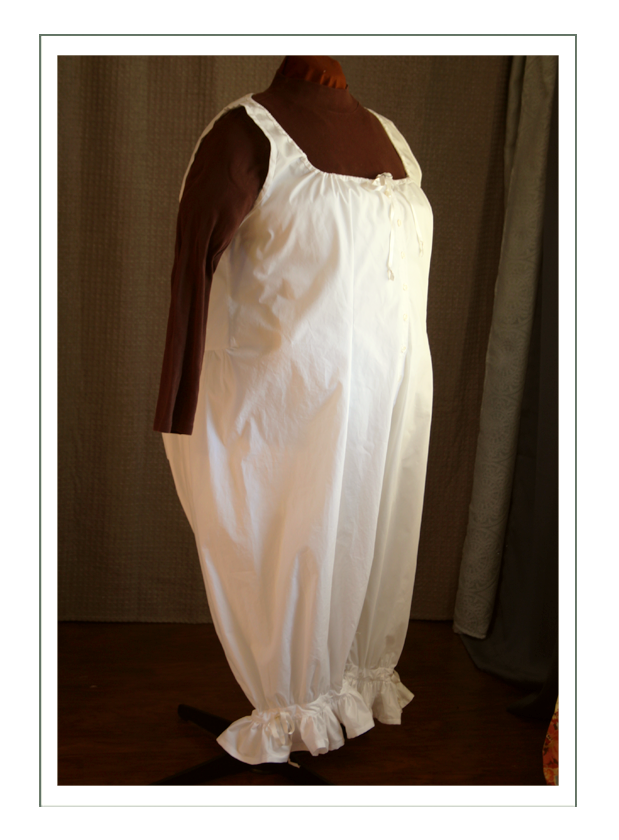
Length and location of ruffles was specific to assist in getting the flounce or gore of the skirt to hold it out (note the 1860’s drawers had very full ruffles at the ankle when they had huge crinoline skirts, whereas the knickers and pantaloons of the 1890’s would have no ruffle would end just below the knee so as not to be seen in the more fitted lower skirts) For this late 1880’s silhouette, the flair of the skirt begins at about mid calf, and so does the flounce on the combination.
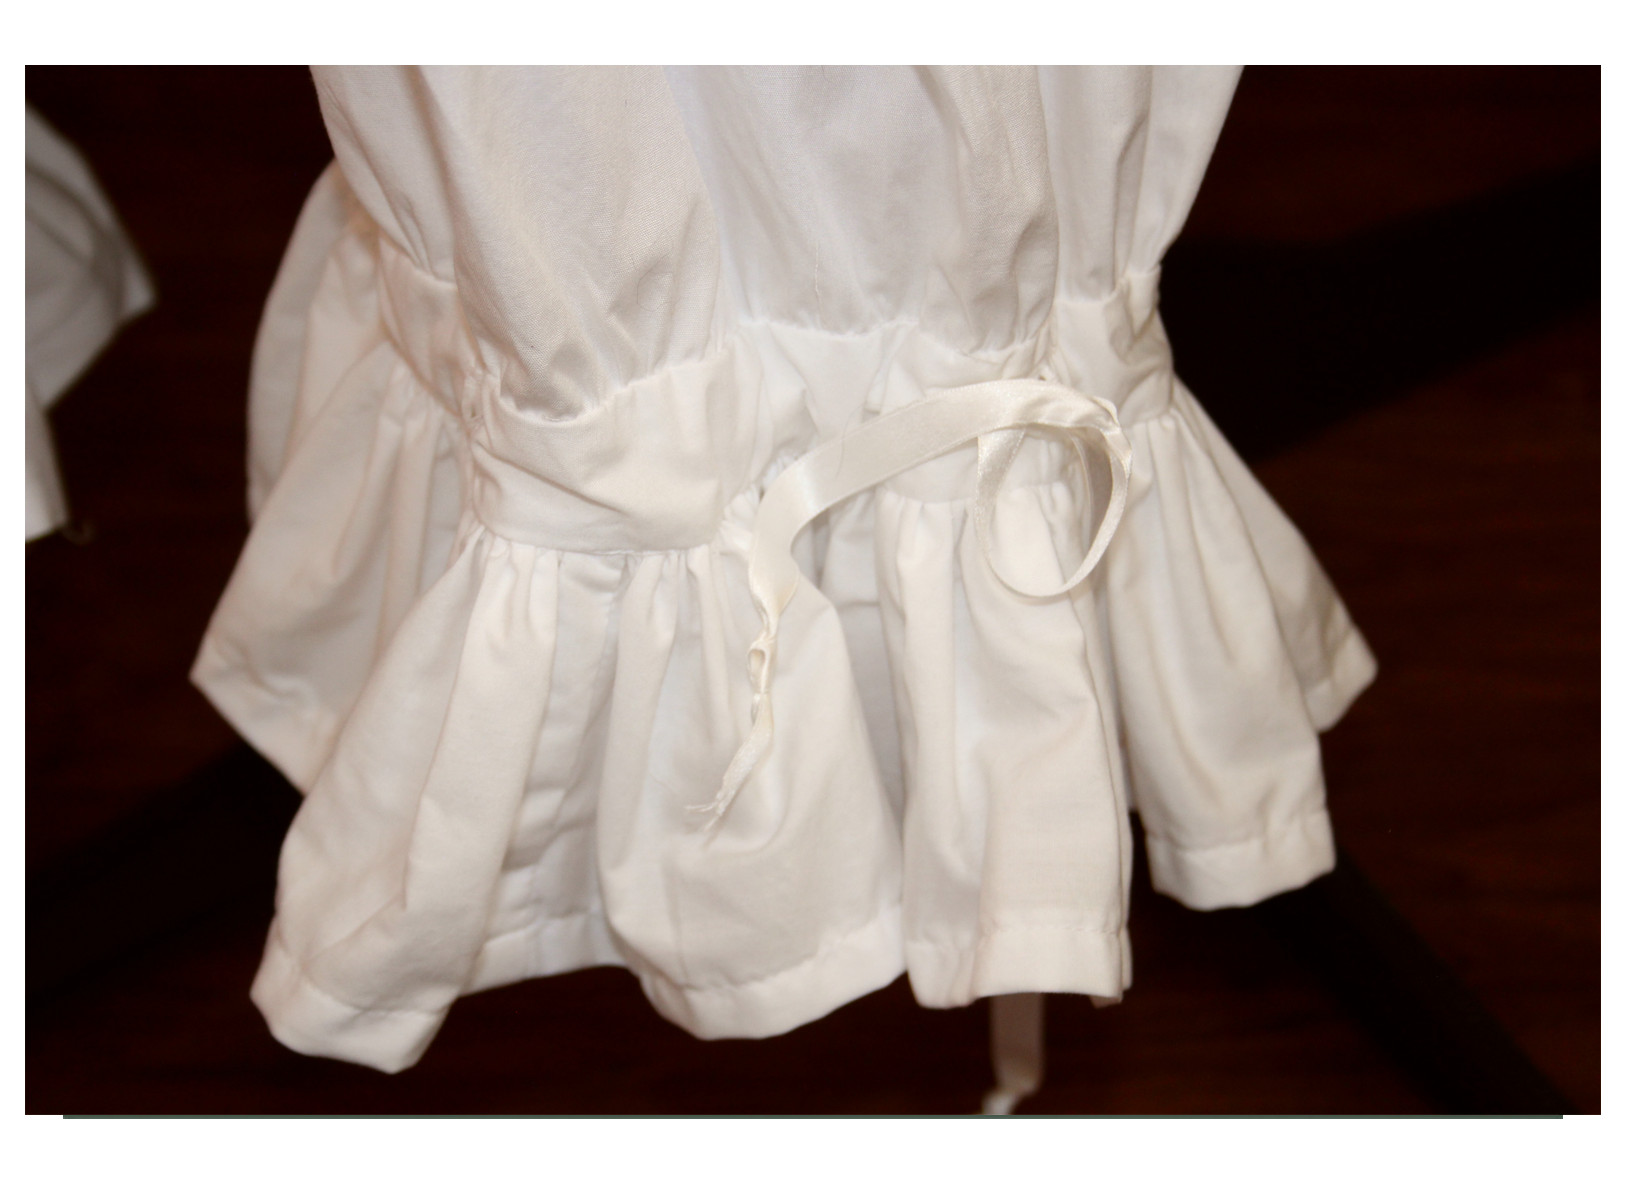
This particular pair is made of a sheeting type of heavy duty cotton and is very basic, although the ribbons are all gorgeous and very strong 100% silk satin, and those are real mother of pearl buttons from the Mississippi River in Iowa and are antiques.
The neckline and ruffles are adjustable, and there is a complete split for ease in use (from waist in front to waist in back). The 100% cotton is very breathable, washable, and bleachable (though the ribbon will discolor with bleach).


Hopefully this February her event will be a go!
Click here to go to Melissa’s Historical Context Page (next!)
Click here to go to Melissa’s Fashion History Page